Thingiverse
Cross Flow Fan Bracket Flashforge Creator Pro PowerSpec Pro by guitartoys
by Thingiverse
Last crawled date: 3 years ago
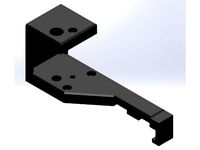
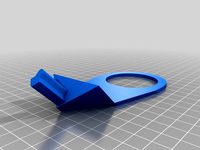
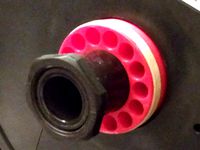
This is a cross flow fan bracket for a Flashforge Creator Pro, PowerSpec Pro of similar printer. I'm sure it could be used for many other printers.
It uses this fan: http://www.amazon.com/gp/product/B0059BCWGU?psc=1&redirect=true&ref_=oh_aui_search_detailpage
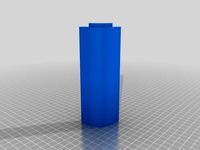
UPDATE: Version 12 added. It includes the 2 notches on each end to make room for glass bed clips, and is also 140 tall, to allow the fan to draw cooler air from the bottom of the printer.
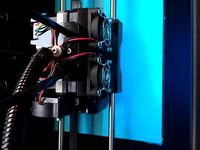
Also, as Mark keenly pointed out, this is a 12V fan. I used the adjustable regulator below, and connected it to the 24V supply. +12 going to the Fan, and taking the switched ground from the mightboard extra fan control to allow the board to turn the fan on and off.
http://www.vellemanusa.com/products/view/?country=us&lang=enu&id=350481
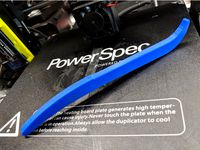
A little disappointed, as it doesn't move as much air as I thought, but seems to help.
UPDATE 3/5/16: Stuck a diode on the fan, as it was backfeeding my other head cooler. Also, the fan controller I have just can't handle the current draw, and wired the fan directly to the +12V supply, without the fan controller. I've been running if full speed anyhow. I've needed to bump up the voltage twice to get this going, but am now very satisfied with it. I use it all the time.
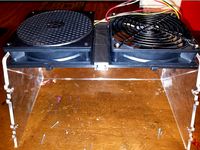
While I love the coolers designed to ride along on the head, I often need a little more cooling, especially when I am printing hollow shells (no infill), to keep the edges of the shells warping up. I printed a couple of muffin fan brackets so I could hang fans on the front of the printer, but it blocked my view to monitor the print.
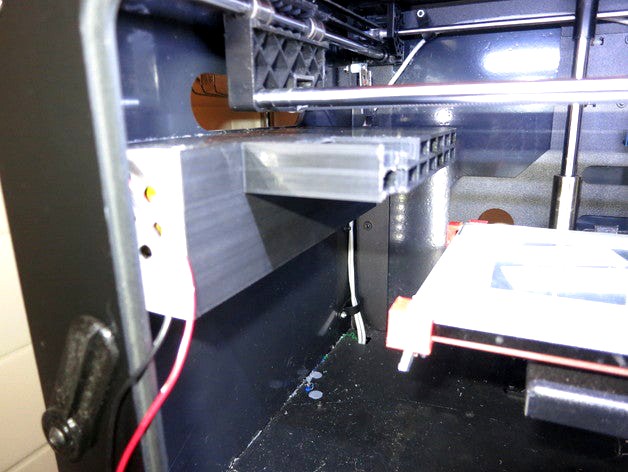
This you can velcro to the side of the printer, and it neatly fits close enought to the bed and high enough to make a gentle breeze across the bed. You can of course drill some holes and screw it directly to the side of your printer. You will also need to drill a couple of holes on the top to hold in the fan. I just used 2 flat heat 3mm screws on opposite corners of the fan.
I thought I had it perfected, but forgot to take into account the thickness of the velcro. So I had to trim the corners a bit to make it fit, due to my using corner clips to hold my glass bed on. I left the top off on the one end, to allow the printer nozzles to fit for my dual head printer. As this is my start position. But I have provided an adjusted version.
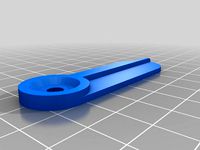
To give a little flexibility, I have provided a couple of flavors.
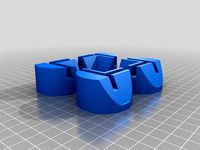
1) The original version, which if like me, you might need to nick 5mm x 20mm off of the 2 corners to allow for corner brackets on you bed.
2) A 5mm trimmed version of the original, so you don't have to do the above.
3) A really tall version, so the air gets sucked in from lower inside the printer body. This is 160mm tall, and you can slice to taste.
4) Same as 3, but with the 5mm slices off the end to make room for corner brackets.
Designed in AutoDesk Fusion 360
Enjoy
It uses this fan: http://www.amazon.com/gp/product/B0059BCWGU?psc=1&redirect=true&ref_=oh_aui_search_detailpage
UPDATE: Version 12 added. It includes the 2 notches on each end to make room for glass bed clips, and is also 140 tall, to allow the fan to draw cooler air from the bottom of the printer.
Also, as Mark keenly pointed out, this is a 12V fan. I used the adjustable regulator below, and connected it to the 24V supply. +12 going to the Fan, and taking the switched ground from the mightboard extra fan control to allow the board to turn the fan on and off.
http://www.vellemanusa.com/products/view/?country=us&lang=enu&id=350481
A little disappointed, as it doesn't move as much air as I thought, but seems to help.
UPDATE 3/5/16: Stuck a diode on the fan, as it was backfeeding my other head cooler. Also, the fan controller I have just can't handle the current draw, and wired the fan directly to the +12V supply, without the fan controller. I've been running if full speed anyhow. I've needed to bump up the voltage twice to get this going, but am now very satisfied with it. I use it all the time.
While I love the coolers designed to ride along on the head, I often need a little more cooling, especially when I am printing hollow shells (no infill), to keep the edges of the shells warping up. I printed a couple of muffin fan brackets so I could hang fans on the front of the printer, but it blocked my view to monitor the print.
This you can velcro to the side of the printer, and it neatly fits close enought to the bed and high enough to make a gentle breeze across the bed. You can of course drill some holes and screw it directly to the side of your printer. You will also need to drill a couple of holes on the top to hold in the fan. I just used 2 flat heat 3mm screws on opposite corners of the fan.
I thought I had it perfected, but forgot to take into account the thickness of the velcro. So I had to trim the corners a bit to make it fit, due to my using corner clips to hold my glass bed on. I left the top off on the one end, to allow the printer nozzles to fit for my dual head printer. As this is my start position. But I have provided an adjusted version.
To give a little flexibility, I have provided a couple of flavors.
1) The original version, which if like me, you might need to nick 5mm x 20mm off of the 2 corners to allow for corner brackets on you bed.
2) A 5mm trimmed version of the original, so you don't have to do the above.
3) A really tall version, so the air gets sucked in from lower inside the printer body. This is 160mm tall, and you can slice to taste.
4) Same as 3, but with the 5mm slices off the end to make room for corner brackets.
Designed in AutoDesk Fusion 360
Enjoy
Similar models
thingiverse
free

Cable Clip
...giverse
i designed this to hold my filament tubes and wires for my powerspec pro printer.
also works for flashforge creator pro.
thingiverse
free

Flashforge Glass Bed Corner Bracket with Factory Nut Relief and Slot for Outer Rubber Band by ABSSS
...e of it moving around during your print. i have also added more factory print bed nut clearance.
used supports and raft in abs.
thingiverse
free

3mm/5mm Z-Axis Shim for Flashforge Creator Pro Glass Bed by unfilterd
...bed from my local supplier, so i remixed it to come up with a 5mm version of my own. while i was at it, i also did a 3mm version.
thingiverse
free

PowerSpec 3D Pro/FlashForge Creator Pro Door Holder by sevenXsix
...shforge printers as well. i believe the 3d pro is just a rebadged creator pro. also, many other ff printers use the same frame.
thingiverse
free
Filament Monitor Brackets for Flashforge Creator Powerspec 3D Pro by ChuckNorr15
...reator pro / powerspec 3d pro filament montior designed by aaron tunell.
these original brackets do not fit the powerspec 3d pro.
thingiverse
free

Concentric Rectangle Bed Level - Replicator Dual / FlashForge Creator Pro / PowerSpec Pro 3D / 225mm x 145mm bed by dfoles
...ps to see if things are laying down properly, if it's more squished on one side or corner, and to make necessary adjustments.
thingiverse
free

Z-Axis Shim in 3mm/4mm/5mm Versions for Flashforge Creator Pro Variant Models Glass Bed Powerspec Pro by Atomist
...along the back edge for flashforge creator pro variants.
added 5mm version
added 4mm versions, with and without solid back.
thingiverse
free

FlashForge Bed Fan Mounting Plate by emikmorgan
...shforge 3d printer. i found a mounting plate on thingiverse but it was way off, so i made one with the right measurements. enjoy!
thingiverse
free

Flashforge Creator Pro Glass Adjustable Bed Bracket (MOD) by omegatron
...dded a blank corner piece with no lip to be screwed directly in place - aimed at back corners where adjustment may not be wanted.
thingiverse
free

Double Fan Bracket for Da Vinci 1.0 3D printer by jdol
...fan controller. i used velcro to attach the controller to the back of the da vinci cover. the fans are used to cool pla prints.
Guitartoys
thingiverse
free

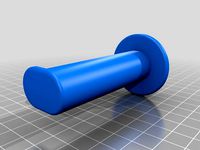
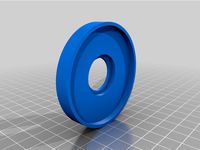
Reel Mod by guitartoys
... mod by guitartoys
thingiverse
this is an adjustment to the base to make the opening at the bottom match the opening at the top.
thingiverse
free

Ribbon Microphone Tuner Tensioner by guitartoys
...e element.
for more info, please check out my instructable at
http://www.instructables.com/id/ribbon-microphone-tuner-tensioner/
thingiverse
free

Austin Ribbon Microphone Alignment Jig by guitartoys
... end at a time.
see my ribbon microphone upgrade for the mxl 990 mic below for full instructions.
cad work done in fusion 360
thingiverse
free

9V Battery Cap by guitartoys
...lso included a version with holes in them so you can test them with a battery tester, without having to take to caps off.
enjoy.
thingiverse
free

Kitchen Sink Wash Cloth dryer by guitartoys
...n diameter and just shy of 180mm long
don't forget to print 2 of the triangle parts.
some super glue and you are done.
enjoy
thingiverse
free

Spektrum Video Monitor Stand by guitartoys
...t fall over. so this is a nice stable stand, it fits well, and is simple to print.
print bottom down, no support needed.
enjoy.
thingiverse
free

MXL R144 Ribbon Upgrade and Alignment Jig by guitartoys
...om/id/ribbon-microphone-upgrade-for-mxl-r144-re-ribbon-n
yes, the ribbon shown in the alignment jig is too loose. i replaced it.
thingiverse
free

Blade Inductrix FPV Plus Case by guitartoys
... should print solid with shells and not need any infill. i also print 4 top and bottom layers.
fits the fpv plus perfectly
enjoy
thingiverse
free

Protein Skimmer Cup with drain for Aquatic Life 115 by guitartoys
...a bucket.
the drain port is to the right, but if you need it on the back or left, just let me know, and i'll mod it for you.
thingiverse
free

H4N Mic Stand Remix with Knobs by guitartoys
...t, and you will find that here as well.
works pretty well.
i haven't printed the thicker piece yet, but the other print ok.
Powerspec
thingiverse
free
Spool holder for Powerspec Ultra by Medfordj
...older for the powerspec ultra printer and should fit the ctc dual. works well , print vertically with extra shell and top layers.
thingiverse
free
Filament Monitor Brackets for Flashforge Creator Powerspec 3D Pro by ChuckNorr15
...reator pro / powerspec 3d pro filament montior designed by aaron tunell.
these original brackets do not fit the powerspec 3d pro.
thingiverse
free
Tramming Tool for PowerSpec, Wanhao, MonoPrice Duplicator i3 by reactron
...tor i3 by reactron
thingiverse
tool to assist in tramming the bed on a duplicator i3. included gcode file is for a powerspec i3.
thingiverse
free
Dropcam PowerSpec 3D Pro Corner Mount by Madss
... i just made it fit to the powerspec 3d pro enclosure. the credit remains with the original author. you can use it on any corner.
thingiverse
free
PowerSpec Ultra top panel for 120mm fans by kboyer36
...m pc fans. this provides improved air circulation and cooling allowing you to safely print pla plastic without removing the hood.
thingiverse
free

Legitamate Corner Brackets 3mm Plate Creator powerspec
...tamate corner brackets 3mm plate creator powerspec
thingiverse
these worked for me after fiddling with a bunch of other designs.
thingiverse
free
Wire saver for PowerSpec Ultra 3D Printer by jkcnet
...ific stress point. this design locks the conduit into an open tube to completely isolate the wires from the movement of the head.
thingiverse
free
Latch for PowerSpec 3D Pro by aich75013
...th a smaller hole. my screw head went through the original design.
copied from: http://www.thingiverse.com/thing:655519/#remixes
thingiverse
free
52mm spool hub for PowerSpec 3D Pro (FlashForge Creator Pro) by aalbinger
...ed for the 30mm spool tubes on my powerspec 3d pro and added a spool end to match. i super glued the spool end into the bushing.
thingiverse
free

PowerSpec Leveler by Rps96
...s, which simplify3d does extremely well, very easy to remove.
very happy with it, and thanks to maker311 for the original design.
Flashforge
thingiverse
free

Flashforge Logo
...flashforge logo
thingiverse
flashforge logo
thingiverse
free

flashforge logo by morive3d
...flashforge logo by morive3d
thingiverse
this is a flashforge stamphttps://www.youtube.com/channel/ucu6ge9qrju9cpgg6wrlxkqw
thingiverse
free

Flashforge Glass Bed by olo2000pm
...flashforge glass bed by olo2000pm
thingiverse
flashforge glass bed
thingiverse
free
Toolbox for FlashForge Finder by Gringo1970
...toolbox for flashforge finder by gringo1970
thingiverse
smal toolbox for flashforge finder
thingiverse
free
Flashforge / Dremel lid by Disco_Rob
...flashforge / dremel lid by disco_rob
thingiverse
lid extension for the flashforge dreamer
thingiverse
free

Flashforge Dreamer Filamentguide by PeterS1
...de for flashforge dreamer / dremel idea. you need also flashforge dreamer lid spacer (http://www.thingiverse.com/thing:1219953)
thingiverse
free
Flashforge creator legs by cybadigitals
...flashforge creator legs by cybadigitals
thingiverse
these legs gives a clearance of 25mm for flashforge creator series
thingiverse
free

Flashforge Inventor/Dreamer by Iprintr7
...orge inventor/dreamer by iprintr7
thingiverse
this is my first thingiverse project and is a model of the flashforge 3d printer
thingiverse
free

Flashforge Filiment Guide by russellscanlan
...flashforge filiment guide by russellscanlan
thingiverse
my design to feed filament through the door on a flashforge adventure 3
thingiverse
free
Flashforge Winder Adapter by newky2k
...winder adapter by newky2k
thingiverse
adapters for the flashforge 0.5 kg spools to the for the filament spool winder by ssinnott
Creator
3ddd
$1

CREATOR
... молдавия
круглая кровать молдавской мастерской creator.диаметр спального места - 1900мм,материалы настроены.
turbosquid
$75

Creators Realm
... available on turbo squid, the world's leading provider of digital 3d models for visualization, films, television, and games.
3ddd
$1

LEGO Creator Part 2
...
lego , конструктор , машина
lego creator №6753
turbosquid
free

Game Creator Pack
... available on turbo squid, the world's leading provider of digital 3d models for visualization, films, television, and games.
3ddd
$1
LEGO Creator №6753 Part 3
...
lego , конструктор , машина
lego creator №6753
3ddd
$1

LEGO Creator №6753 Part 1
...
lego , конструктор , машина
lego creator №6753
turbosquid
$29

Train Track Creator Pro
... available on turbo squid, the world's leading provider of digital 3d models for visualization, films, television, and games.
3d_ocean
$39

Train Track Creator Pro
...n tracks, for video game or rendering in a matter of minutes. all the models in this pack are low poly with high resolution te...
turbosquid
$7

FPS Creator Reloaded Rock Pack 1
... available on turbo squid, the world's leading provider of digital 3d models for visualization, films, television, and games.
3ddd
$1
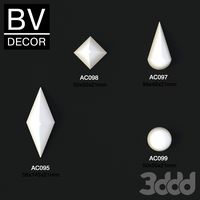
Декоративные элементы BV Decor CREATOR III часть
...ментов и декорирования стен.
множество вариантов для вашей фантазии.https://bvdecor.com/es/category/list/cat/creator-es
Flow
turbosquid
free

Flow(Fluid/Flow)
... available on turbo squid, the world's leading provider of digital 3d models for visualization, films, television, and games.
3ddd
$1

Flow
...dd
flow , mdf italia , tessile
10 тыс.полигонов
turbosquid
$59

Blood Flow - Capilar flow
... available on turbo squid, the world's leading provider of digital 3d models for visualization, films, television, and games.
turbosquid
$59

FLOW CHAIR and FLOW SLIM
... available on turbo squid, the world's leading provider of digital 3d models for visualization, films, television, and games.
turbosquid
$59

FLOW CHAIR and FLOW SLIM
... available on turbo squid, the world's leading provider of digital 3d models for visualization, films, television, and games.
turbosquid
$59

FLOW CHAIR and FLOW SLIM
... available on turbo squid, the world's leading provider of digital 3d models for visualization, films, television, and games.
turbosquid
$59

FLOW CHAIR and FLOW SLIM
... available on turbo squid, the world's leading provider of digital 3d models for visualization, films, television, and games.
turbosquid
$59

FLOW CHAIR and FLOW SLIM
... available on turbo squid, the world's leading provider of digital 3d models for visualization, films, television, and games.
turbosquid
$59

FLOW CHAIR and FLOW SLIM
... available on turbo squid, the world's leading provider of digital 3d models for visualization, films, television, and games.
3d_export
$5

Flow
...flow
3dexport
Cross
3d_export
$5

Cross
...cross
3dexport
cross
archibase_planet
free

Cross
...cross
archibase planet
cross
church sanctuary cross - 3d model for interior 3d visualization.
3d_export
$25
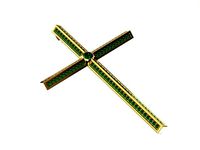
golden cross cross 3d gold cross
...golden cross cross 3d gold cross
3dexport
archibase_planet
free

Cross
...cross
archibase planet
cross crucifix rood
cross n220513 - 3d model (*.3ds) for interior 3d visualization.
3d_export
$5
cross
...cross
3dexport
body cross jewelry 70мм * 50мм
design_connected
$16
Cross
...cross
designconnected
two.six cross computer generated 3d model. designed by ferreira, domingos.
turbosquid
$1

Cross
...cross
turbosquid
free 3d model cross for download as blend on turbosquid: 3d models for games, architecture, videos. (1319421)
turbosquid
$15

Cross
...s
turbosquid
royalty free 3d model cross for download as 3dm on turbosquid: 3d models for games, architecture, videos. (1203663)
turbosquid
$10

Cross
...s
turbosquid
royalty free 3d model cross for download as max on turbosquid: 3d models for games, architecture, videos. (1030743)
turbosquid
$3

Cross
...s
turbosquid
royalty free 3d model cross for download as max on turbosquid: 3d models for games, architecture, videos. (1555121)
Bracket
archibase_planet
free

Bracket
...bracket
archibase planet
bracket corbel holder
bracket 1 - 3d model (*.gsm+*.3ds) for interior 3d visualization.
archibase_planet
free

Bracket
...bracket
archibase planet
bracket corbel console
bracket 5 - 3d model (*.gsm+*.3ds) for interior 3d visualization.
archibase_planet
free

Bracket
...bracket
archibase planet
corbel holder bracket
bracket 6 - 3d model (*.gsm+*.3ds) for interior 3d visualization.
archibase_planet
free

Bracket
...bracket
archibase planet
bracket corbel console
bracket 8 - 3d model (*.gsm+*.3ds) for interior 3d visualization.
archibase_planet
free

Bracket
...bracket
archibase planet
bracket corbel holder
bracket n280911 - 3d model (*.gsm+*.3ds) for interior 3d visualization.
archibase_planet
free

Bracket
...bracket
archibase planet
holder corbel bracket
bracket 9 - 3d model (*.gsm+*.3ds) for interior 3d visualization.
archibase_planet
free

Bracket
...bracket
archibase planet
corbel holder bracket
bracket 10 - 3d model (*.gsm+*.3ds) for interior 3d visualization.
archibase_planet
free

Bracket
...bracket
archibase planet
corbel console bracket
bracket 11 - 3d model (*.gsm+*.3ds) for interior 3d visualization.
archibase_planet
free

Bracket
...bracket
archibase planet
holder console bracket
bracket 12 - 3d model (*.gsm+*.3ds) for interior 3d visualization.
archibase_planet
free

Bracket
...bracket
archibase planet
bracket corbel holder
bracket 13 - 3d model (*.gsm+*.3ds) for interior 3d visualization.
Fan
3d_export
$5

fan
...fan
3dexport
fan 3d model, table fan, fan, electric fan, ventilator
archibase_planet
free

Fan
...fan
archibase planet
fan large fan
fan out n260707 - 3d model for interior 3d visualization.
archibase_planet
free

Fan
...fan
archibase planet
fan ceiling fan ventilator
fan stealth n300615 - 3d model (*.gsm+*.3ds) for interior 3d visualization.
3d_export
$15

fan
...fan
3dexport
is an ancient fan
3ddd
$1

Fan-C-Fan by marco gallegos
...n-c-fan by marco gallegos
3ddd
вентилятор , marco gallegos
fan-c-fan by marco gallegos
3d_export
$10

fan
...fan
3dexport
a detailed fan designed for home or space blowing is now available for only 19.99!
turbosquid
$1

Fan
...fan
turbosquid
free 3d model fan for download as on turbosquid: 3d models for games, architecture, videos. (1427865)
turbosquid
$14

Fan
...fan
turbosquid
royalty free 3d model fan for download as on turbosquid: 3d models for games, architecture, videos. (1415642)
3ddd
$1

Светильник Fan
...светильник fan
3ddd
fan , italamp
светильник fan, производитель italamp
turbosquid
$25

Fan
...fan
turbosquid
royalty free 3d model fan for download as c4d on turbosquid: 3d models for games, architecture, videos. (1483246)
Pro
turbosquid
$29

Pro
...ree 3d model mac pro for download as obj, c4d, fbx, and blend on turbosquid: 3d models for games, architecture, videos. (1505782)
turbosquid
$15

Apple Mac Pro and Pro Display
...ee 3d model apple mac pro and pro display for download as max on turbosquid: 3d models for games, architecture, videos. (1417078)
3d_export
$5

iphone 13 pro max and pro
...3 pro max and 13 pro the model is made in four colors (graphite, gold, silver, and blue), all of which are attached in the files.
3d_export
free

sapphire pro
...sapphire pro
3dexport
sapphire pro 3d printer head mask
3d_export
$4

macbook pro
...macbook pro
3dexport
macbook pro 13" inch 2020 years model
3ddd
free

GentleLase Pro
... syneron , candela
gentlelase pro аппарат для лазерной эпиляции
turbosquid
$25

PRO frame
...rbosquid
royalty free 3d model pro frame for download as max on turbosquid: 3d models for games, architecture, videos. (1148329)
turbosquid
$5

Alien pro
...osquid
royalty free 3d model alien pro for download as blend on turbosquid: 3d models for games, architecture, videos. (1678446)
turbosquid
$5

iphone11 pro
...uid
royalty free 3d model iphone11 pro for download as blend on turbosquid: 3d models for games, architecture, videos. (1562707)
3ddd
$1

Mac Pro (appel)
...mac pro (appel)
3ddd
компьютер , apple
mac pro