Thingiverse
CR-10 Stepper Motor Cooling Enclosures by DotScott1
by Thingiverse
Last crawled date: 4 years, 7 months ago
If you run your CR-10 (or any variation thereof) in an enclosure, you should probably think about keeping your stepper motors cool to extend their life expectancy!
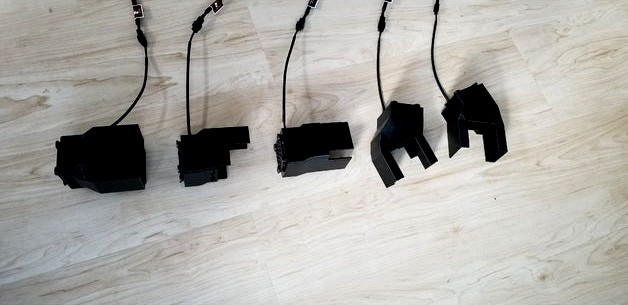
This is exactly what these are intended for! :) I designed each of these to fit somewhat snugly around each stepper motor (with heatsinks inside as well - see photos). In mine, for instance, my stepper motors were running up around 55-65 Degrees C. THAT'S PRETTY HOT! With the addition of these stepper motor coolers though, they went down to around 30-40 degrees C - much better :)
Is this mod a necessity? Probably not. But I like to be safe rather than sorry. Plus, if you use Noctua fans, it really doesn't add much noise at all.
What you'll need:
Any 40x40x10mm fan (I recommend Noctua fans [NOTE: Don't use the noise reduction connector]) http://a.co/d/fx1mp6X
40x40x11mm heatsinks / cooling fins cut to the following sizes / quantities:
8x 40x40mm
4x 34x40mm
2x 24x40mm
1x 28mm
Arctic Silver Cooling Adhesive (or other adhesives designed for heatsinks) http://a.co/d/9MuPAc6
12v 2amp (or thereabouts) power supply (or just tap into the controller's 12v power supply).
Installation:
If you want to keep the Noctua fan connectors attached and not have to cut/splice wires, you'll need to make the cables holes (on the 3D printed cooling enclosures) larger so that the connector fits through it. I used a dremel to do this on mine because I decided on Noctua fans (and keeping the connectors attached) AFTER I had already printed these.
I used the Noctua rubber fasteners since I had them (as you can see in the images) but you can also use nuts and bolts to attach the fans to the 3D printed parts.
Install all fans into the 3D printed enclosures first, then place the heatsinks inside each enclosure and add a little bit of thermal adhesive to each and quickly put it onto the respective stepper motor (you have to do this quickly because the adhesive starts to set within a couple of minutes).
NOTE: If you're not comfortable adding thermal adhesive to your stepper motors, either don't install this mod or find another way to do it. One option might be to jsut leave it dry. The 3d printed enclosures should fit snug enough to keep most of the heatsinks in place. Play around with it!
Link all fan's wires together (black to black, red to red) and connect them to a 12v power source with enough amperage to power all fans (can be calculated based on how many amps each fan requires [just add them up]).
That's it! It sounds like a lot of work but for me, the total install time was under 30 minutes (including getting the fans all connected to a power supply - which I have on a relay controlled by my OctoPrint [Raspberry Pi]).
NOTE 2: I know that the Z-axis stepper cooling enclosures are faceted and the rest are not: This is because I was in a rush and didn't take the time to make them look smooth and pretty. If you'd like to remodel them as a remix, be my guest! :) Also some of them fit more snug than others. I just went with the first prints I tested and didn't bother adjusting the models afterwards since they worked well enough.
NOTE 3: If you have trouble getting the X-axis cooling enclosure to stay in place, add a little tape to the top or bottom inside of the enclosure to "thicken" it up or give it more friction. Duct tape worked well for me.
NOTE 4: This was designed specifically for my CR-10S S4 (400^3mm version) but may fit other variations. Check your clearance on the Y-axis enclosure as well as the two Z-axis enclosures to make sure no part of the bed hits them. If it does, you may need to modify the design OR raise your Z endstop and bed.
NOTE 5: I've included a max file (where I designed these) and FBX and OBJ files of each enclosure WITH 3D models of the heatsinks, motors, etc. in case you want to modify or measure anything before printing it.
PS. Be sure to check out the new facebook group called "3D Printing Useful Things!" - where you can find lots of other useful 3D prints :)
https://www.facebook.com/groups/608845186127310/