Blend Swap

Convenient Speech Bubble Setup
by Blend Swap
Last crawled date: 6 years, 8 months ago
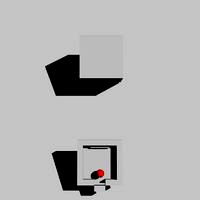
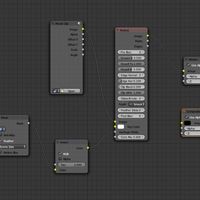
This demonstrates a convenient text overlay/speech bubble that follows the camera.The plane representing the speech bubble copies rotation and location from the camera. The text is a child of the plane. The plane is deformed with the X and Y displacement modifiers and a texture to create an imperfect outer border. An outline is created using the solidify modifier technique. The first solidify turns the plane into a 3d object, and the second is used as describedhere.So in summary, how to use: Edit the solidify outline material to change the outline color. Edit the Speech Bubble BG material to change the speech bubble background color. Edit the displace X and displace Y modifiers to change the imperfect border. Change the thickness on the second solidify modifier (named Add the Outline) to make the border thicker. Use a different plane mesh if you want different base shapes. The text is never converted to a mesh so you can always change it.This was created for a graphic novel project. It seemed easier to be able to arrange text bubbles in Blender in order to be able to adjust elements of the scene to allow for a good layout. Adding text post-render means sometimes realizing too late that there isn't enough room for the desired text.
Similar models
blendswap
free
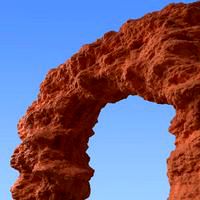
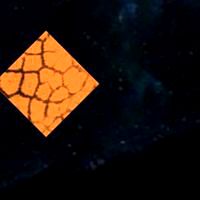
natural rock formation
...made using displacement of an extruded cube and the shape can be modified in edit mode to create different shape rock formations.
blendswap
free
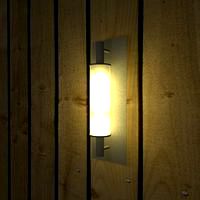
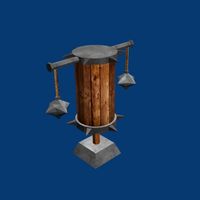
Lamp in Cycles
... a wall. materials created and rendered with cycles. the model have no modifier anymore, e.g. solidify. vertex: 1048, uses ngons.
blendswap
free
Easy - Stylish Text
...lter the text by hitting the tab key and writing down your own text/message. enjoy!latest change on 2013/06/17, 04:21:26title fix
blendswap
free
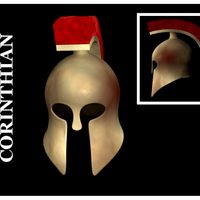
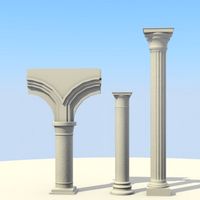
Greek Corinthian Helmet
...tilizado los modificadores mirror, subsurf y solidify. todas las texturas estã¡n generadas con blender.disfrãºtalo!(blender 2.59)
blendswap
free
wrecking ball reveal text
...imation. you may edit the text and enter your own text. blender 2.78 and internal render was used. i hope you guys will enjoy it.
blendswap
free
Collection of eggs part2
...blends in loading. i only used that of a sphere or an icosphere using modifiers
array - wireframe-sub - solidify and addon tissue
blendswap
free
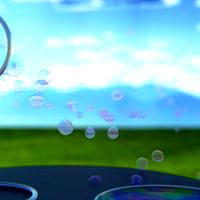
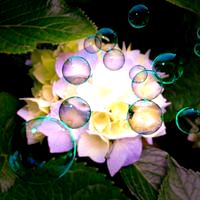
Bubble Scene
...t;bubble" material. after that, i created a simple scene with a particle emitter and a few force fields to blow the bubbles.
blendswap
free
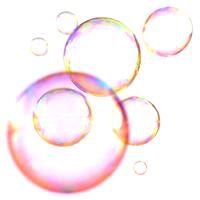
Procedural Soapy Bubble Material
...dural soapy bubble, no hdri included. iridescence is achieved with a musgrave texture and different falloffs using fresnel inputs
blendswap
free

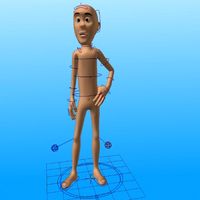
mauro
...bles in the viewport and any is selectable because is a character ready for animation (you can change that in the outliner)enjoy!
blendswap
free

Paper Plane
...eative commons libre open source 3d art
this is a paper plane from paper change to a plane animation in one action controler
Speech
blendswap
free
face mechanical speech
...#39;t let me upload it so here is the forumi posted it in blenderartists.org/forum thread facemech in the team projects category.
blendswap
free

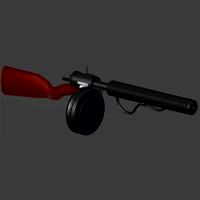
Simple Megaphone
...source 3d art it's a megaphone to make a speech or a alarm...
blendswap
free

Headphones
...for listening to audio signals such as music or speech ...
blendswap
free
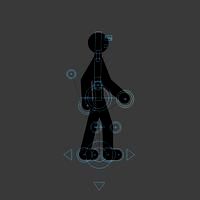
2D StickMan Rig v2
...of my previous rig. now the little guy has speech ...
blendswap
free
Beats
...file i build up for a demonstration in the speech at taiwan taichung on 3/24/2012you can watch the final...
blendswap
free
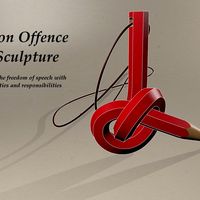
Non Offence Sculpture
...libre open source 3d art for the freedom of speech with duties and responsibilities. (this model is inspired by...
blendswap
free

Mr Potato Head
...rigged for animation and has the basic phonemes for speech animation. hope you have fun with this...
Convenient
blendswap
free
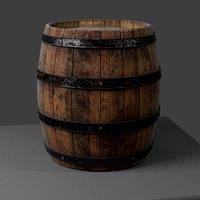
Wooden Barrel
...cc-0 cc0 cco creative commons libre open source 3d art
simple wooden barrel.
feel free to use this at your convenience :)
blendswap
free
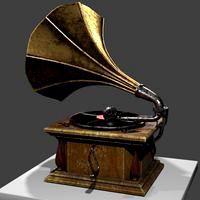
Gramophone Variation
... cc-0 cc0 cco creative commons libre open source 3d art
gramophone-next one :)
feel free to use this at your convenience
blendswap
free
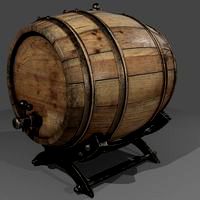
Barrel Variation
...ative commons libre open source 3d art
barrel for rum, or for anything you want :)
feel free to use this at your convenience
blendswap
free

Antique Mirror Frame
...c-0 cc0 cco creative commons libre open source 3d art
sculpted mirror frame.
feel free to use this at your convenience :)
blendswap
free
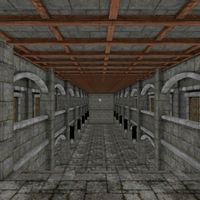
LaGrange - Meeting Hall
...re uv-unwrapped, and are separated into layers for convenience.
similar design to my boathouse as it's from the same project.
blendswap
free

Distances Panel
...e, but for a particular project, i needed enough distances to whip up this panel. can be used as either add-on or startup script.
blendswap
free

customizable 9V Battery
...3d art a model of a 9v battery with convenient uv unwrapping and a template for making your own...
blendswap
free
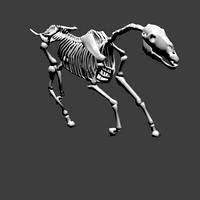
Horse Skeleton, Rigged, UnTextured
...as cc-zero because i know that its not always convenient or easy to credit someone, so enjoy.latest change on...
blendswap
free

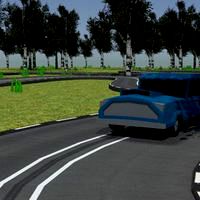
BMW M3 E46
... found here: http://andreimaximov.carbonmade.com/hope you enjoy the model!latest change on 2013/10/16, 02:23:55updated image file
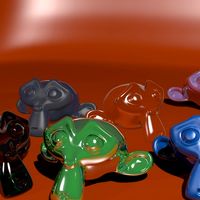
Bubble
blendswap
free
Bubbles
...reat ones at hdr labs all their hdrs are licensed under the creative commons attribution-noncommercial-share alike 3.0 license.
blendswap
free
Bubble Scene
...t;bubble" material. after that, i created a simple scene with a particle emitter and a few force fields to blow the bubbles.
blendswap
free
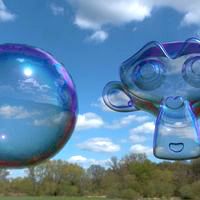
Realistic Bubbles!!!
...e 3d art
that is a little, funny bubbles test from me.have fun with it!latest change on 2013/09/07, 03:27:25updated both files
blendswap
free
Procedural Soapy Bubble Material
...dural soapy bubble, no hdri included. iridescence is achieved with a musgrave texture and different falloffs using fresnel inputs
blendswap
free
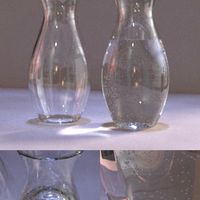
Realistic vase with water and bubbles
...r the bubbles.you may want to replace the bubble mesh with a lighter one (less polys).description and license in the zip-archive.
blendswap
free

Bubbles!
...ce scene by making the background black.i would play around with the settings untill you are happy. have fun and happy blending..
blendswap
free

Bubbly Glass
...ing wine glass. ready for render in cycles. great with hdri maps, and caustics!latest change on 2017/07/06, 03:06:37render engine
blendswap
free

Animated bubble background
...c0 cco creative commons libre open source 3d art
250 frames bacground animation. i use defocus and blur in postprocessing.
blendswap
free
Animated Bubble blowing effect
...er's junkyard. on the way, they fight a villain and partake in a high-speed car chase all to find the land of their dreams...
Commons
blendswap
free
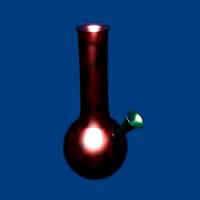
Bong
...compositor cc-by-sa ccbysa cc-by ccby cc-0 cc0 cco creative commons libre open source 3d art the common smoking device,it...
blendswap
free
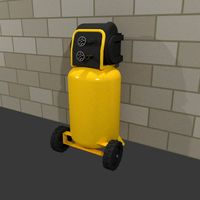
Air Compressor
...compositor cc-by-sa ccbysa cc-by ccby cc-0 cc0 cco creative commons libre open source 3d art modeled after a common...
blendswap
free
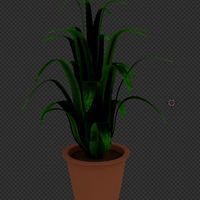
Potted clivia plant
...compositor cc-by-sa ccbysa cc-by ccby cc-0 cc0 cco creative commons libre open source 3d art common household plant in...
blendswap
free

Indonesian Rooster Bowl
...compositor cc-by-sa ccbysa cc-by ccby cc-0 cc0 cco creative commons libre open source 3d art this is the most...
blendswap
free
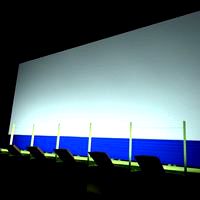
Billboard
...compositor cc-by-sa ccbysa cc-by ccby cc-0 cc0 cco creative commons libre open source 3d art billboard thing. apparently quite...
blendswap
free

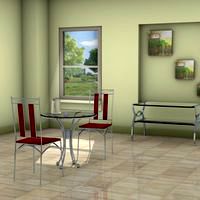
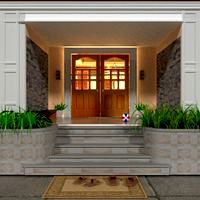
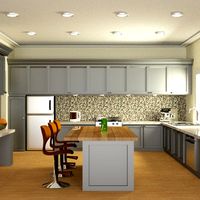
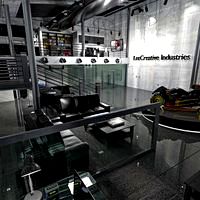
Modern Home Interior
...compositor cc-by-sa ccbysa cc-by ccby cc-0 cc0 cco creative commons libre open source 3d art ~38k vertices.creative commons 0....
blendswap
free
Elfa_unlimited
...compositor cc-by-sa ccbysa cc-by ccby cc-0 cc0 cco creative commons libre open source 3d art es un personaje echo...
blendswap
free

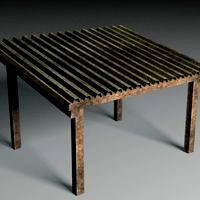
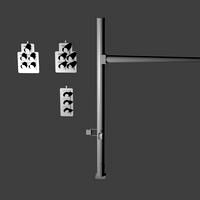
Structural Extrusion 40x40L
...compositor cc-by-sa ccbysa cc-by ccby cc-0 cc0 cco creative commons libre open source 3d art a common aluminium extrusion...
blendswap
free

Tank Obstacle (Czech Hedgehog)
...compositor cc-by-sa ccbysa cc-by ccby cc-0 cc0 cco creative commons libre open source 3d art can't believe nobody made...
blendswap
free
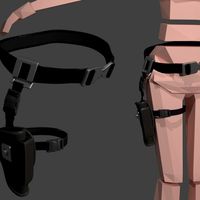
Simple Gun Holster
...compositor cc-by-sa ccbysa cc-by ccby cc-0 cc0 cco creative commons libre open source 3d art an original yet common...
Open
blendswap
free
Open Shack
...y cc-0 cc0 cco creative commons libre open source 3d art
an open shack, uv textured and bump(normal)map.leave a comment.
blendswap
free
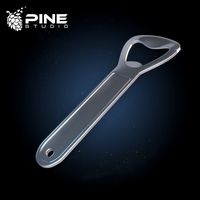
Bottle Opener
...e open source 3d art
small bottle opener model made for our pre-rendered point and click game. more info at www.pinestudio.co
blendswap
free
FoxLogo Opening
...ums/album41/fox_logo_by_matt_hoecker.blendadded modification fit muy will.latest change on 2013/05/22, 01:29:36updated image file
blendswap
free

Star Wars Opening
...open source 3d art
original star wars opening - 1977.introducción original de star wars - 1977.blender 2.6 - cycles
blendswap
free

Opening Curtains
...ated by hudson barkley (aka snu).this .blend is free for all use, credit is not required (but i won't complain if you do so).
blendswap
free
Open GL render
...t together for my latest blender videotutorial.
check blendbend.blogspot.com for more.https://www.youtube.com/watch?v=9xeounurw2y
blendswap
free

Open Books
...s table in the blenlore intro animation. it was very fun to make. i learned a couple new tricks while i was working on the pages.
blendswap
free

Quake 5 Opening with Animation
...0 cco creative commons libre open source 3d art
this is opening of quake 5 with animation. not have any texture or images.
blendswap
free

Open Earth Wallpaper
...ri used blender 2.67 and blender internal render,with 10 sample anda nik software for effect.need your coment,pleasethanks before
blendswap
free

Harry Potter Opening Logo
... a harry potter logo i found on google 3d warehouse. comes pre-animated like the harry potter openings. comment, rate, and enjoy!
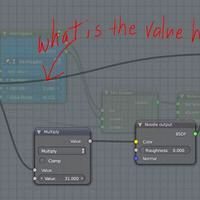
Node
blendswap
free
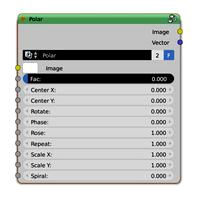
Polar Node
...bysa cc-by ccby cc-0 cc0 cco creative commons libre open source 3d art
polar node for compositorexamples :test 1test 2
blendswap
free
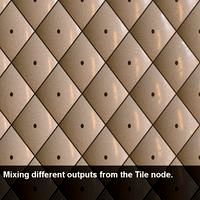
Posterize Node
...ative commons libre open source 3d art
a simnple node grouping for posterizing an image. works in cycles and internal render
blendswap
free
Edge Nodes
...nodes-part-3/and a ba thread here:http://blenderartists.org/forum/showthread.php?275964-edge-nodes-composite-based-edge-detection
blendswap
free
Ocean Node
...e shaders are used. foam must be added manually.latest change on 2014/12/15, 10:23:10corrected description, improved tag spelling
blendswap
free
PBR Utility Node
...adjust the designated slider from 0-1 to change the current preset.latest change on 2016/10/13, 04:31:04reorganized the node tree
blendswap
free
Troubleshoot Nodes with Interrogator
...ere, but i can't even imagine a better tool for troubleshooting a node graph.latest change on 2016/10/02, 15:24:18format text
blendswap
free
Spherical Gradient Node
...nal scale.both of these node are composed by built-in node, so they can be used with gpu rendering.
hope you find them useful : )
blendswap
free

PBR Node Groups
...ibre open source 3d art
a set of pbr node groups, including dielectric, metallic, glass, cloth and one for substance painter.
blendswap
free
Watercolor node
..., 08:19:27since somebody has not bothered to read the ba thread i've added here a copy of the credits for the preview images.
blendswap
free

Mapping Nodes for Cycles (Node groups + OSL)
...amp;gt; mapping) wont map the values like this, instead it clips the values.latest change on 2013/12/12, 10:13:15added usage tips
Libre
blendswap
free
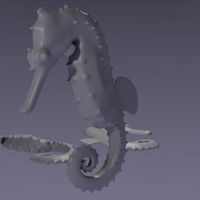
Seahorse
...cc-by-sa ccbysa cc-by ccby cc-0 cc0 cco creative commons libre open source 3d...
blendswap
free

Blouse
...cc-by-sa ccbysa cc-by ccby cc-0 cc0 cco creative commons libre open source 3d...
blendswap
free

Pinguinos
...cc-by-sa ccbysa cc-by ccby cc-0 cc0 cco creative commons libre open source 3d art...
blendswap
free
Computer
...cc-by-sa ccbysa cc-by ccby cc-0 cc0 cco creative commons libre open source 3d art...
blendswap
free
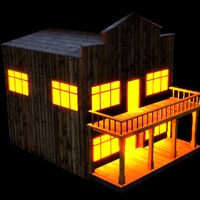
Saloon
...cc-by-sa ccbysa cc-by ccby cc-0 cc0 cco creative commons libre open source 3d art a...
blendswap
free
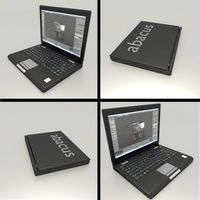
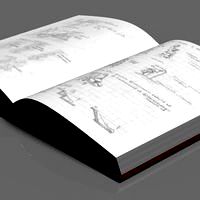
notebook
...cc-by-sa ccbysa cc-by ccby cc-0 cc0 cco creative commons libre open source 3d art...
blendswap
free
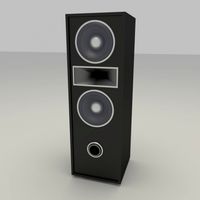
speaker
...cc-by-sa ccbysa cc-by ccby cc-0 cc0 cco creative commons libre open source 3d art...
blendswap
free
speaker
...cc-by-sa ccbysa cc-by ccby cc-0 cc0 cco creative commons libre open source 3d art...
blendswap
free
Train
...cc-by-sa ccbysa cc-by ccby cc-0 cc0 cco creative commons libre open source 3d art...
blendswap
free
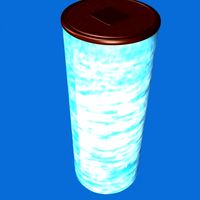
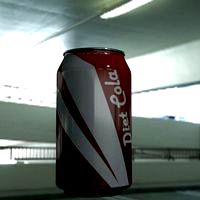
Can
...cc-by-sa ccbysa cc-by ccby cc-0 cc0 cco creative commons libre open source 3d art a...
Art
blendswap
free
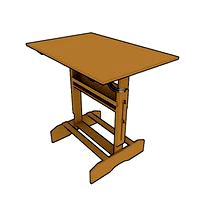
Art Desk
... cc0 cco creative commons libre open source 3d art
art desk, or drafting table. uses blender render. may revise later on.
blendswap
free
Abstract art
...c-0 cc0 cco creative commons libre open source 3d art
abstract art made in blender. try viewing it from different angles.
blendswap
free
Almost Modern Art
...by-sa ccbysa cc-by ccby cc-0 cc0 cco creative commons libre open source 3d art
my very own stab at modern art. enjoy!
blendswap
free
Interior art
...reative commons libre open source 3d art
a simple interior scene made with cycles includes simple shaders and a tiled floor.
blendswap
free
Knight concept art
...rce 3d art
i was trying to modeling from a concept art, i have a lot of problems with my computer and i didn't can end it.
blendswap
free
![Kirito [Sword Art Online]](/t/2911731.jpg)
Kirito [Sword Art Online]
...re open source 3d art
a low poly 3d model fan art of kirito (sword art online)latest change on 2015/03/27, 06:50:473d preview
blendswap
free
3D Street Art Setup
... illusions with uv project modifierlook at these examples:http://www.moillusions.com/2006/04/3d-street-art-optical-illusions.html
blendswap
free
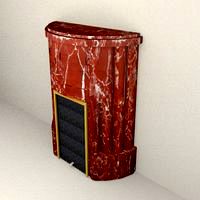
Fireplace art-d
...ccbysa cc-by ccby cc-0 cc0 cco creative commons libre open source 3d art
pink marble fireplace of the south of france.
blendswap
free

The IT Crowd - Block Art
...end a pixel art image that i made, and used with magicavoxel to make the blocks.latest change on 2015/03/13, 08:45:52text updated
blendswap
free
Modern Art Sculpture
...that the porcelain material contains sss nodes, so you will need to be in experimental mode if you want to render it on your gpu.
Free
blendswap
free

Sky Free
...by cc-0 cc0 cco creative commons libre open source 3d art
sky free is a complete blender cycles procedural sky generator
blendswap
free
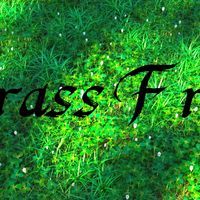
Grass Free
...co creative commons libre open source 3d art
grass free is a set of realistic and low poly grass models for fast renderings
blendswap
free
FREE MATERIALS
... compositor cc-by-sa ccbysa cc-by ccby cc-0 cc0 cco creative commons libre open source 3d art
some materials i made.
blendswap
free
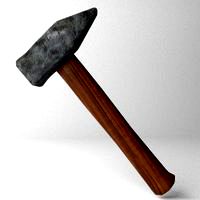
Hammer (FREE)
...oly model in a game just remove the bevel modifier for less polygons.
have a nice day!
notice: model made using blender 2.79 beta
blendswap
free

Car Free Style
...urce 3d art
car free style....................................................................................................
blendswap
free
Free Your Mesh
...ccby cc-0 cc0 cco creative commons libre open source 3d art
a high poly model made with makehuman and edited in blender.
blendswap
free
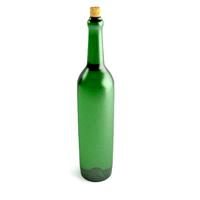
Wine Bottle (FREE)
...on 2.79
verts: 918, faces: 843, tris: 1770
also if you actually use it feel free to credit, but no obligations :)
have a nice day
blendswap
free
Book Free Of CGtextures
...c-by ccby cc-0 cc0 cco creative commons libre open source 3d art
same as my former book but wit modified paper texture.
blendswap
free

Free Standing Awning
...ng awning to go over a walkway.one has a propanel 2 top and the other is canvas. it also has som simple scrolls, hope you enjoy.!
blendswap
free
Free Columns and request
...rave enough to help me finish a castle i started(hence the columns), send me an email at allaboutblender@gmail.com or reply here.
Cc
blendswap
free

CC 205
...hon node-setups compositor cc-by-sa ccbysa cc-by ccby cc-0 cc0 cco creative commons libre open source 3d art
cc205
blendswap
free
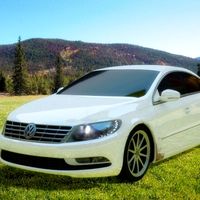
Volkswagen CC 2012
...707/vw_cc_2012_3_www.kepfeltoltes.hu_.jpgwire render: http://kepfeltoltes.hu/view/120707/vw_cc_2012_wire_www.kepfeltoltes.hu_.jpg
blendswap
free
Adobe CC Dark
...es > appearance).this is the resulting blender theme, created from colour-sampling screenshots from the apps themselves.enjoy!
blendswap
free
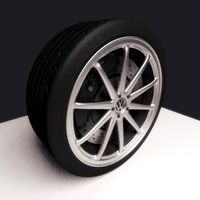
VW Wheel
...open source 3d art my next model's wheel (vw cc ...
blendswap
free
room
...models free python node-setups compositor cc-by-sa ccbysa cc-by ccby cc0 cc0 cco creative commons libre open source 3d art...
blendswap
free
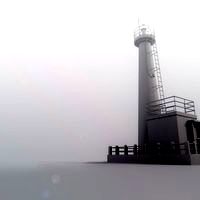
Environment Building Light House Small
...assets blender users community models free python node-setups compositor ccby-sa ccbysa cc-by ccby cc-0 cc0 cco creative commons libre...
blendswap
free

HDMI Set
...is published by sergey ozerov on blendermada.com, released under cc0. ...
blendswap
free
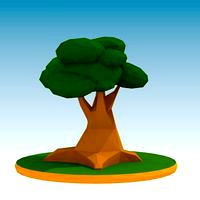
LOW POLY TREE
...open source 3d art low poly tree licence : cc public domain author: jcrz3 made with blender...
blendswap
free
Seahorse
...python node-setups compositor cc-by-sa ccbysa cc-by ccby cc-0 cc0 cc creative commons libre open source 3d...
blendswap
free
Blouse
...python node-setups compositor cc-by-sa ccbysa cc-by ccby cc-0 cc0 cc creative commons libre open source 3d...
Source
blendswap
free
Power Source
... libre open source 3d art
this is a model of a power source.features:lightsglowing piecesscene setup completeunder 15k faces
blendswap
free

Open source game icons
... now i finally decided to share my work with you and i hope you like them or have some cool ideas what to do with theses icons :d
blendswap
free
Distortion node group for heat source
... group to imitate the air distortion around a heat source, like fire.
here is a demo :https://www.youtube.com/watch?v=bgxeo5vtase
blendswap
free
CGC Classic: Unwrapping a Human Head Blender 2.4 - Source Files
... for what became the standard 3d software taught at cg cookie.you can find the associated video on the cg cookie youtube channel.
blendswap
free
CGC Classic: Creating Stencil Maps in Blender 2.4 Source Files
... for what became the standard 3d software taught at cg cookie.you can find the associated video on the cg cookie youtube channel.
blendswap
free
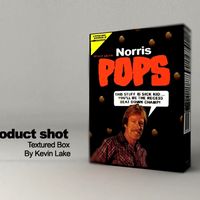
Norris Pops
...cc-by ccby cc-0 cc0 cco creative commons libre open source 3d art awesome source of aggression ... product shot...
blendswap
free
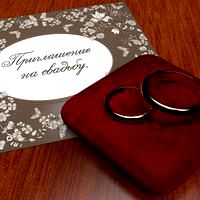
Wedding rings and card
...cc-by ccby cc-0 cc0 cco creative commons libre open source 3d art golden wedding rings and invitation card.cycles. 3000...
blendswap
free
Limestone material
...cc-by ccby cc-0 cc0 cco creative commons libre open source 3d art also using the open source lighting getup...
blendswap
free
GreenscreenKeyingNode
...using the new keying node. just replace the image source and start...
blendswap
free
Soda Can
...open source 3d art soda can for use. open source feel free to use in any project without...
Blend
blendswap
free
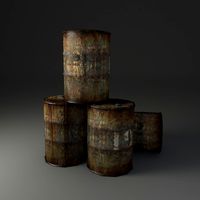
Barril2.blend
...sa cc-by ccby cc-0 cc0 cco creative commons libre open source 3d art
low-poly barrels with textures. ready for a game.
blendswap
free

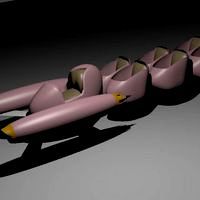
Car34.Blend
... ccbysa cc-by ccby cc-0 cc0 cco creative commons libre open source 3d art
another pod , this one designed for my son.
blendswap
free
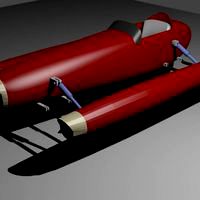
car5.blend
... ccbysa cc-by ccby cc-0 cc0 cco creative commons libre open source 3d art
another pod, only designed for my daughter.
blendswap
free
Auto1.blend
... cc-by-sa ccbysa cc-by ccby cc-0 cc0 cco creative commons libre open source 3d art
my simple version of a pod racer.
blendswap
free
dungeon blend
...y ccby cc-0 cc0 cco creative commons libre open source 3d art
dungeon structure animated doors ,textured made with 2.49
blendswap
free

Blend Swap
...e 3d art
hiblend swap by ahmad maadin this file you will seesimple logo movie withrainbow coloursenjoy-ahmad.blender@gmail.com
blendswap
free

RockosTRETCHcANs3.blend
...awning designed to cover a cement pad at an eating establishment.i am still learning to use this program but thought it looks ok.
blendswap
free
Home sweet blend
...cco creative commons libre open source 3d art
this is a blend file of the front part of the house it is rendered in cycles.
blendswap
free
Blacksmith Blend
...ects have atleast 4 textures(nm,cl,sp,sh) by 1024*1024.no object is larger than 564 faces/1128 tri.with 6 main objects and props.
blendswap
free

blender phones1.blend
...9 renderd with blender internal.. i made thease as they is not many on blend swap ?? so come on people lets see what you can do??
Ccby
blendswap
free

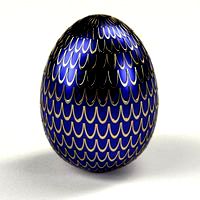
Robin's Egg
...leafy knoll hdri environment image by greg zaal license ccby ...
blendswap
free
Seahorse
...community models free python node-setups compositor cc-by-sa ccbysa cc-by ccby cc-0 cc0 cco creative commons libre open source 3d...
blendswap
free
Blouse
...community models free python node-setups compositor cc-by-sa ccbysa cc-by ccby cc-0 cc0 cco creative commons libre open source 3d...
blendswap
free
Pinguinos
...community models free python node-setups compositor cc-by-sa ccbysa cc-by ccby cc-0 cc0 cco creative commons libre open source 3d...
blendswap
free
Computer
...community models free python node-setups compositor cc-by-sa ccbysa cc-by ccby cc-0 cc0 cco creative commons libre open source 3d...
blendswap
free
Saloon
...community models free python node-setups compositor cc-by-sa ccbysa cc-by ccby cc-0 cc0 cco creative commons libre open source 3d...
blendswap
free
notebook
...community models free python node-setups compositor cc-by-sa ccbysa cc-by ccby cc-0 cc0 cco creative commons libre open source 3d...
blendswap
free
speaker
...community models free python node-setups compositor cc-by-sa ccbysa cc-by ccby cc-0 cc0 cco creative commons libre open source 3d...
blendswap
free
speaker
...community models free python node-setups compositor cc-by-sa ccbysa cc-by ccby cc-0 cc0 cco creative commons libre open source 3d...
blendswap
free
Train
...community models free python node-setups compositor cc-by-sa ccbysa cc-by ccby cc-0 cc0 cco creative commons libre open source 3d...
Python
blendswap
free

Python Girl
...t the eye ball texture is replaced by a gimp edited blender rendered image.latest change on 2013/03/11, 09:21:39category and tags
blendswap
free
Cubemap Render Python Script
... a cycles scene into a cubemap as 6 png files. these files are useful if you want to use your cubemap in an external game engine.
blendswap
free
Cube Roll â Python script
... forwards, backwards, upwards or downwards.documented as part of a small short: umdaniso weblocks - 'dance of the blocks'
blendswap
free
Python Script Demo
...re license information please visit: http://creativecommons.org/licenses/by/3.0/copyright 2011 ethan luo(congcong009(a)gmail.com)
blendswap
free
Colt Python .357 magnum 4inch
...e-setups compositor cc-by-sa ccbysa cc-by ccby cc-0 cc0 cco creative commons libre open source 3d art
gun and ammo.
blendswap
free
Coche 3D codigo python.
...y vista de camara en primera persona, para conducir el coche....el coche se controla con las teclas w,a,s,d. y barra espaciadora.
blendswap
free
BGE Pokeball Toss No Python Script
...i decided to do an all logic block fps pokeball toss system based on new fps technology. use the space bar to toss the pokeball.
blendswap
free
No Python FPS Template
...asd-movementq-swap weaponsr-reloadleft click-fireright click-zoomi hope someone finds this helpful in some way.
happy blending :)
blendswap
free

Pythonic Navigation and Alignment and unit selection
...n listctrl + click on unit not in selected list = add to selected listleft click on map = set navigation target in selected units
blendswap
free
![Dulana57's Blender Minecraft Rig V6.0 [With Python Sidebar]](/t/1051154.jpg)
Dulana57's Blender Minecraft Rig V6.0 [With Python Sidebar]
...x eyes, sparkle eyes, performance settings, and more!this works in both cycles and internalif you use this, you have to credit me
Community
blendswap
free
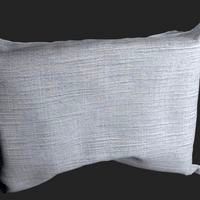
Pillow
...swap blend swap blendswap blender 3d assets blender users community models free python node-setups compositor cc-by-sa ccbysa cc-by ccby...
blendswap
free
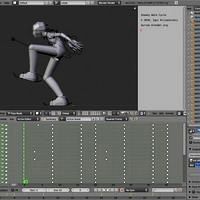
Sneaky Walk Cycle
...swap blend swap blendswap blender 3d assets blender users community models free python node-setups compositor cc-by-sa ccbysa cc-by ccby...
blendswap
free
Green abstract
...ago, and i want to share it with the community ...
blendswap
free
Tank KV.
...i am glad to share my work with the community this is ww2 ussr heavy tank...
blendswap
free
Collection of personal materials
...reuse, uploaded here for the use of the blender community ...
blendswap
free
![Blendera [blowing flag ]](/t/1051338.jpg)
Blendera [blowing flag ]
...swap blend swap blendswap blender 3d assets blender users community models free python node-setups compositor cc-by-sa ccbysa cc-by ccby...
blendswap
free
Sv98
...crappy sv98 that i felt like releasing to the community made in blender 2.61 (pre release) on a...
blendswap
free
Race track Cycles
...3d art this is my first contribution to the community so fingers crossed.trees: created by christian femmer aka...
blendswap
free

Kitana's War Fans
...open source 3d art https://youtu.be/ssbdawt7_uqmy first contribution to the community i hope you will enjoy it....
blendswap
free
Parallax Shader
...open source 3d art parallax shader made by blenderartists.org community easy to edit and work fine for internal render,...
Setups
blendswap
free
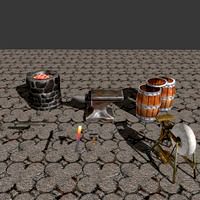
Campfire setup
...blender 3d assets blender users community models free python node-setups compositor cc-by-sa ccbysa cc-by ccby cc-0 cc0 cco creative...
blendswap
free
Cooking setup
...blender 3d assets blender users community models free python node-setups compositor cc-by-sa ccbysa cc-by ccby cc-0 cc0 cco creative...
blendswap
free
MatCap Setup
...blender 3d assets blender users community models free python node-setups compositor cc-by-sa ccbysa cc-by ccby cc-0 cc0 cco creative...
blendswap
free
Lighting setups
... cc-0 cc0 cco creative commons libre open source 3d art
watch the making of: https://www.youtube.com/watch?v=ffbxnxsvqpu
blendswap
free
Lighting Setup
...blender 3d assets blender users community models free python node-setups compositor cc-by-sa ccbysa cc-by ccby cc-0 cc0 cco creative...
blendswap
free

Simple Ragdoll Setup
...blender 3d assets blender users community models free python node-setups compositor cc-by-sa ccbysa cc-by ccby cc-0 cc0 cco creative...
blendswap
free

Campfire / cooking setup
...blender 3d assets blender users community models free python node-setups compositor cc-by-sa ccbysa cc-by ccby cc-0 cc0 cco creative...
blendswap
free
Gamer SetUp
...blender 3d assets blender users community models free python node-setups compositor cc-by-sa ccbysa cc-by ccby cc-0 cc0 cco creative...
blendswap
free
wirerope setup
...blender 3d assets blender users community models free python node-setups compositor cc-by-sa ccbysa cc-by ccby cc-0 cc0 cco creative...
blendswap
free
hair setup
...blender 3d assets blender users community models free python node-setups compositor cc-by-sa ccbysa cc-by ccby cc-0 cc0 cco creative...
Blendswap
blendswap
free

BlendSwap Logo
...realized nobody had. it now has 2576 faces without the subsurf (it used to have 76992!) and was rendered in cycles at 450 passes.
blendswap
free
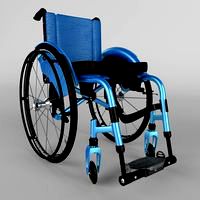
Wheel Chair In Response to a Request on Blendswap
...aints have been put of parts to limit the rotation to a single axis.happy blending!latest change on 2016/07/25, 10:47:39licencing
blendswap
free
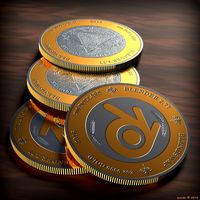
Gold Silver Coin (Blendswap/Illuminati theme)
...ubsurface modifier from the coin, it is not needed. ensure enough samples for a good render quality (at least some 300). regards!
blendswap
free
Baul
...baul blend swap blend swap blendswap blender 3d assets blender users community models free python...
blendswap
free

Iphone stand/smartphone stand for the desktop
...stand/smartphone stand for the desktop blend swap blend swap blendswap blender 3d assets blender users community models free python...
blendswap
free

Toaster 2.68
...toaster 2.68 blend swap blend swap blendswap blender 3d assets blender users community models free python...
blendswap
free

Video background for Karaoke
...video background for karaoke blend swap blend swap blendswap blender 3d assets blender users community models free python...
blendswap
free

DeathPhone
...3d art my first model to be uploaded to blendswap the deathphone, from the series...
blendswap
free
FIRES Album
...fires album blend swap blend swap blendswap blender 3d assets blender users community models free python...
blendswap
free
Handy Combo
...3d art stuff that might be handy for some blendswaprs. rendered with cycles. regards,...
Swap
blendswap
free
Blend Swap
...e 3d art
hiblend swap by ahmad maadin this file you will seesimple logo movie withrainbow coloursenjoy-ahmad.blender@gmail.com
blendswap
free
Blend Swap 5 Theme.
... light theme made with the colors of blend swap 5, install it if you like it, and leave me your requests in the comments below ;)
blendswap
free
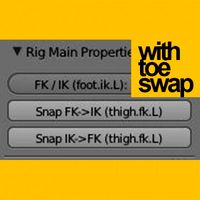
cg cookie flexrig v1.0 IK FK swapping added + Toe swapping
...hl - rigging, scriptingjonathan williamson - modelling, shadersdavid revoy - concept artlatest change on 2013/06/19, 01:18:07tags
blendswap
free
Broadway
...broadway blend swap blend swap blendswap blender 3d assets blender users community...
blendswap
free
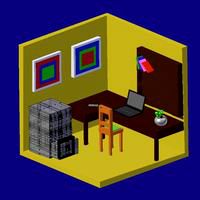
Office Isometric model
...office isometric model blend swap blend swap blendswap blender 3d assets blender users community...
blendswap
free
simple stone
...creative commons libre open source 3d art my first swap exploring materials in blender: i first started with a...
blendswap
free

Herodian Lamp
...this herodian lamp for a request here at blend swap public domain. do whatever you like with...
blendswap
free
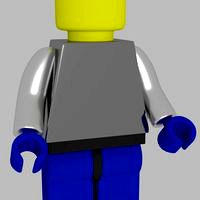
Lego figures
...source 3d art my first blender file on blend swap simply lego figure without uv images....
blendswap
free
Modern Kitchen
...modern kitchen blend swap blend swap blendswap blender 3d assets blender users community...
blendswap
free

Chest
...because the original was deemed too simple by blend swap so here is an improved...
Creative
blendswap
free

Creative EP630 Headset
... 3d art
this is a model of a creative ep630 headset.textures are made with gimp 2.8.the blend file for this image also follows.
blendswap
free
Creative Design theme
..."\appdata\roaming\blender foundation\blender - make a backup file about your startup.blend file before you try my settings !
blendswap
free
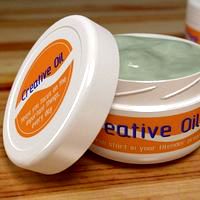
Creativity Cream
...node-setups compositor cc-by-sa ccbysa cc-by ccby cc-0 cc0 cco creative commons libre open source 3d art i started this...
blendswap
free
Office Building/Warehouse - Creative Headquarters
...al 360 look around of a fictitious creative marketing firm warehouse. furniture and vehicle not included (file would be too big).
blendswap
free
Chroma Key Green Screen Mask Node Setup - Emrich Creative
...sk node setup for blender.we hope you like it, it has been very helpful for us.latest change on 2014/05/19, 12:19:11updated files
blendswap
free

blender
...node-setups compositor cc-by-sa ccbysa cc-by ccby cc-0 cc0 cco creative commons libre open source 3d art blender made in...
blendswap
free

Lamp "Idea"
...node-setups compositor cc-by-sa ccbysa cc-by ccby cc-0 cc0 cco creative commons libre open source 3d art the creative idea...
blendswap
free
RopeChild
...node-setups compositor cc-by-sa ccbysa cc-by ccby cc-0 cc0 cco creative commons libre open source 3d art i hope this...
blendswap
free
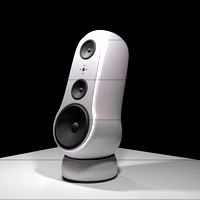
Furturistic, High Quality Audio Speakers
...node-setups compositor cc-by-sa ccbysa cc-by ccby cc-0 cc0 cco creative commons libre open source 3d art creative audio research...
blendswap
free
Elfa_unlimited
...node-setups compositor cc-by-sa ccbysa cc-by ccby cc-0 cc0 cco creative commons libre open source 3d art es un personaje...
Assets
blendswap
free
Traffic Assets
... guys!!!
these are traffic assets using in a game made by us.
sorry these are not textured yet...
u can download and use them....
blendswap
free
Rooftop Assets
...an answer to start.
the fully texturized models with more details and color will be finish the next week (if i have enough time)
blendswap
free

Dalek game asset
...game asset blend swap blend swap blendswap blender 3d assets blender users community models free python node-setups compositor cc-by-sa...
blendswap
free

Suburb Assets pt1
... my other assets :)have funlatest change on 2014/08/26, 06:05:50my keyboard messed up the spelling of some words... bad keyboard!
blendswap
free
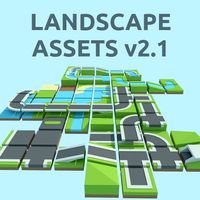
Landscape Assets v2.1
...eck my other assets :)have funlatest change on 2014/10/29, 18:09:00added link to blender market and gave my post good luck kisses
blendswap
free
PaintWars Game Assets
... includes (low-poly) rigged character, paint gun, and game environment (with associated textures hence why the tile is so large).
blendswap
free
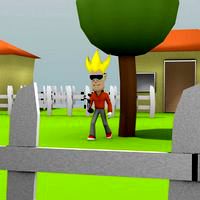
low poly animal assets
...deer, and buck, and a tree, a sun with proper shading and lighting, and subdivided and triangulated plane for your ground. enjoy!
blendswap
free
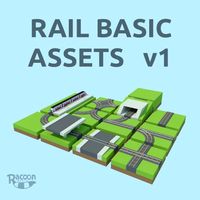
Rail Basic assets v1
...izations, more landscape possibilities..separated materials and maybe.... vertex colors.latest change on 2014/11/16, 18:12:05typo
blendswap
free

Vehicles Asset pt1
...asset pt1 blend swap blend swap blendswap blender 3d assets blender users community models free python node-setups compositor cc-by-sa...
blendswap
free

Simple Game Asset
...game asset blend swap blend swap blendswap blender 3d assets blender users community models free python node-setups compositor cc-by-sa...
Ccbysa
blendswap
free
Seahorse
...blender users community models free python node-setups compositor cc-by-sa ccbysa cc-by ccby cc-0 cc0 cco creative commons libre open...
blendswap
free
Blouse
...blender users community models free python node-setups compositor cc-by-sa ccbysa cc-by ccby cc-0 cc0 cco creative commons libre open...
blendswap
free
Pinguinos
...blender users community models free python node-setups compositor cc-by-sa ccbysa cc-by ccby cc-0 cc0 cco creative commons libre open...
blendswap
free
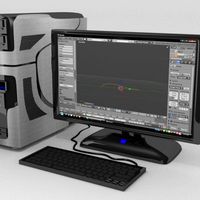
Computer
...blender users community models free python node-setups compositor cc-by-sa ccbysa cc-by ccby cc-0 cc0 cco creative commons libre open...
blendswap
free
Saloon
...blender users community models free python node-setups compositor cc-by-sa ccbysa cc-by ccby cc-0 cc0 cco creative commons libre open...
blendswap
free
notebook
...blender users community models free python node-setups compositor cc-by-sa ccbysa cc-by ccby cc-0 cc0 cco creative commons libre open...
blendswap
free
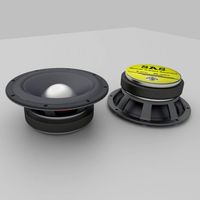
speaker
...blender users community models free python node-setups compositor cc-by-sa ccbysa cc-by ccby cc-0 cc0 cco creative commons libre open...
blendswap
free
speaker
...blender users community models free python node-setups compositor cc-by-sa ccbysa cc-by ccby cc-0 cc0 cco creative commons libre open...
blendswap
free
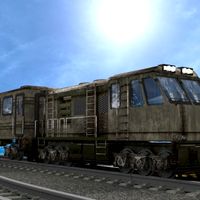
Train
...blender users community models free python node-setups compositor cc-by-sa ccbysa cc-by ccby cc-0 cc0 cco creative commons libre open...
blendswap
free
Can
...blender users community models free python node-setups compositor cc-by-sa ccbysa cc-by ccby cc-0 cc0 cco creative commons libre open...
Setup
blendswap
free
Campfire setup
... node-setups compositor cc-by-sa ccbysa cc-by ccby cc-0 cc0 cco creative commons libre open source 3d art
campfire
blendswap
free
Cooking setup
... node-setups compositor cc-by-sa ccbysa cc-by ccby cc-0 cc0 cco creative commons libre open source 3d art
campfire
blendswap
free
MatCap Setup
...or cc-by-sa ccbysa cc-by ccby cc-0 cc0 cco creative commons libre open source 3d art
sculpt, material, texture, glsl
blendswap
free
Lighting setups
... cc-0 cc0 cco creative commons libre open source 3d art
watch the making of: https://www.youtube.com/watch?v=ffbxnxsvqpu
blendswap
free
Lighting Setup
...um samples is around 2000, at least for the flask in this particular scenelatest change on 2015/05/17, 14:41:07changed to cc-zero
blendswap
free
Simple Ragdoll Setup
...ysa cc-by ccby cc-0 cc0 cco creative commons libre open source 3d art
a ragdoll setup all ready to go in blender 2.57b
blendswap
free
Campfire / cooking setup
...-0 cc0 cco creative commons libre open source 3d art
requested cooking setup on tripod. can add more detail if needed....
blendswap
free
Gamer SetUp
... original model.
you can use it for anything.
no textures are needed, the model uses solid material (which are included).
enjoy!
blendswap
free
wirerope setup
...3d art
hi everyone,
i came up this 3d objects by trial and error and with the help of some online tutorials from youtube.
enjoy
blendswap
free
hair setup
...it redered in blender internalhopefully this blendfile useful for you guyslatest change on 2013/02/23, 10:54:45change discription
Compositor
blendswap
free
Fire+compositor
...node-setups compositor cc-by-sa ccbysa cc-by ccby cc-0 cc0 cco creative commons libre open source 3d art
similation
blendswap
free
Compositor based fire
...eative commons libre open source 3d art
a compositing node that allows you to create fire in the compositor based on a mask.
blendswap
free
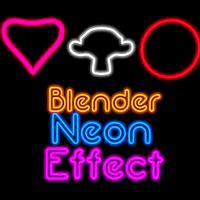
Neon Effect - Compositor
...ply to any thing : objects , meshes and even text !just make the emit value up to 0.7 and make the specularity 0 and it is done !
blendswap
free
Inderct Lighting+compositor
...on node-setups compositor cc-by-sa ccbysa cc-by ccby cc-0 cc0 cco creative commons libre open source 3d art
effect
blendswap
free
Transparent object in the Compositor
... won't see the backside of the transparent object on the front of the solid. don't try to fix it in the compositor.cheers
blendswap
free
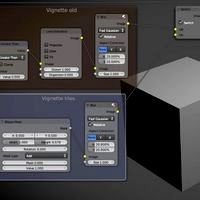
Compositor setup - Vignette
...blend file shows you how this can be done.this file only works with latest graphicall build or from future blender releases 2.64.
blendswap
free

Blender's Compositor as a Photo Editor
...pe you all like it! just a row of nodes!watch the tutorial on my site:http://blenderskool.cf/blenders-compositor-as-photo-editor/
blendswap
free
Photo Editing Nodes for Compositor
...derskool.cf/photo-editing-nodes/video:https://www.youtube.com/watch?v=3ppfmdr5f40latest change on 2015/08/08, 11:39:07description
blendswap
free

Real Anaglyphs Compositor Setup
...te though, that the first lens distortion node is the one that drastically controls the anaglyphs ( the dispersion tab ). enjoy !
blendswap
free

VHS Look in Node Compositor
...ree to use for anything, just don't claim the effect as your own. also included is an example animation using the blend file.
0
blendswap
free
flashdisk 0
...node-setups compositor cc-by-sa ccbysa cc-by ccby cc-0 cc0 cco creative commons libre open source 3d art
only model
blendswap
free
RZ-0
...2. knight form 3. armed form 4. warrior form 5. omni form 6. ruin form 7. bird form (image attached, but uploaded in normal form)
blendswap
free
SentaB.0.T
...by ccby cc-0 cc0 cco creative commons libre open source 3d art
still in progress, and there are still many shortcomings
blendswap
free
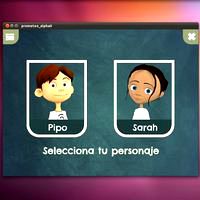
Prometeo alpha 0
...id rodriguez , gustavo gonzalezhttp://www.youtube.com/watch?v=rbmhkh7bccy&feature=youtu.bethanks for your help and enjoy!
blendswap
free
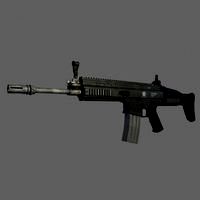
SCAR-L (MK16 MOD 0)
...sal, all logos and trademarks belong to their respective owners.latest change on 2013/08/01, 18:15:40added textures to categories
blendswap
free

Wineglass
...i made, it might take while to fully render though.0 ...
blendswap
free
room
...models free python node-setups compositor cc-by-sa ccbysa cc-by ccby cc-0 cc0 cco creative commons libre open source 3d art...
blendswap
free
Modern Home Interior
...commons libre open source 3d art ~38k vertices.creative commons 0 do what you want, attribution not...
blendswap
free
HDMI Set
...is published by sergey ozerov on blendermada.com, released under cc-0 ...
blendswap
free
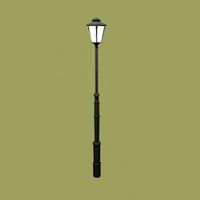
Street Lamp
...models free python node-setups compositor cc-by-sa ccbysa cc-by ccby cc-0 cc0 cco creative commons libre open source 3d art...
Sa
blendswap
free
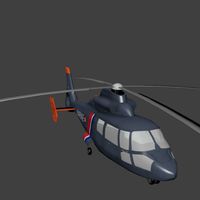
Eurocopter SA 365 Dauphin
...urocopter panther, the hh/mh-65 dolphin, the chinese-produced harbin z-9 and the improved eurocopter ec155. (sources : wikipedia)
blendswap
free

Aerospatiale SA 321 Super Frelon
...le) of france. the helicopter is still in use in china where the locally produced version is known as the z-8. (source wikipedia)
blendswap
free
Environment Building Light House Small
...assets blender users community models free python node-setups compositor cc-by-sa ccbysa cc-by ccby cc-0 cc0 cco creative commons libre...
blendswap
free
Low-poly people
...assets blender users community models free python node-setups compositor cc-by-sa ccbysa cc-by ccby cc-0 cc0 cco creative commons libre...
blendswap
free
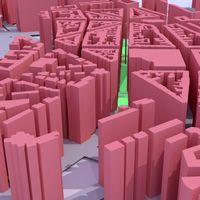
OpenThreeDeeMap - Koeln-Agnesviertel
...assets blender users community models free python node-setups compositor cc-by-sa ccbysa cc-by ccby cc-0 cc0 cco creative commons libre...
blendswap
free

robot goes to jersey city
...assets blender users community models free python node-setups compositor cc-by-sa ccbysa cc-by ccby cc-0 cc0 cco creative commons libre...
blendswap
free
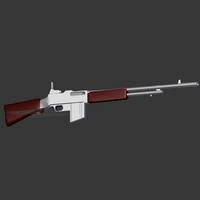
BAR-1918 Rifle
...standalone-mod/fork of xonotic: chaos-esque anthology dual licensed: cc-by-sa, gplv2 --mikeeusa- ...
blendswap
free

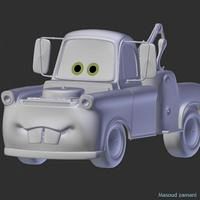
gaido
...renderhis is released under a attribution-noncommercial-sharealike 3.0 unported license http://creativecommons.org/licenses/by-nc-sa3.0/for feedback please contact me at blenderartists (masoud zamani).i hope...
blendswap
free
matter
...renderhis is released under a attribution-noncommercial-sharealike 3.0 unported license http://creativecommons.org/licenses/by-nc-sa3.0/for feedback please contact me at blenderartists (masoud zamani).i hope...
blendswap
free
Hellriegel Sub-Machinegun
...this being one of them) dual licensed: cc-by-sa, gplv2 --mikeeusa- ...
Blender
blendswap
free
blender
...a ccbysa cc-by ccby cc-0 cc0 cco creative commons libre open source 3d art
blender made in blender. creative by me :)
blendswap
free

blender logo
... compositor cc-by-sa ccbysa cc-by ccby cc-0 cc0 cco creative commons libre open source 3d art
remodeled blender logo
blendswap
free
Blender Italia_Monociclo
...ysa cc-by ccby cc-0 cc0 cco creative commons libre open source 3d art
a model made for mico7, a blender italia contest
blendswap
free
Blender phisics
... cc-0 cc0 cco creative commons libre open source 3d art
this is a free demonstation of blender phisics with hd textures.
blendswap
free
Blender Logo
...-by ccby cc-0 cc0 cco creative commons libre open source 3d art
blender logo modeled with curves, rendered with cycles.
blendswap
free
Blender Garden
...c0 cco creative commons libre open source 3d art
this scene i maked with blender is with some sounds and a lot of textures
blendswap
free

Blender badges
... of 2 blender logo bagdes. 1st photo with blender, second for real ;-)latest change on 2013/11/30, 02:56:28added real badge photo
blendswap
free

BLENDER PARTICULE
...o creative commons libre open source 3d art
blender particle animation.you can see here a preview:http://vimeo.com/35764726
blendswap
free
Blender Cube
...rktop) are included, also the source svg files i used to make them.latest change on 2014/06/17, 03:15:53no more missing textures.
blendswap
free
Blender logo
...ve commons libre open source 3d art
modeling blender logo using nurbslatest change on 2013/04/23, 00:54:58updated both files
Users
blendswap
free
Red Bull
...blend swap blend swap blendswap blender 3d assets blender users community models free python node-setups compositor cc-by-sa ccbysa cc-by...
blendswap
free
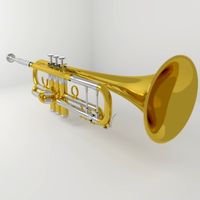
Trumpet
...blend swap blend swap blendswap blender 3d assets blender users community models free python node-setups compositor cc-by-sa ccbysa cc-by...
blendswap
free
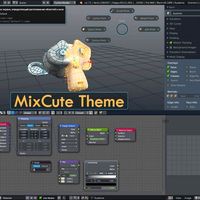
MixCute Theme
...3d, tooltrips, node editor & other.install:paste mixcute.xml in to c:\usersamp;#46;...user name....\appdata\roaming\blender foundation\blender\2.72(or other version)\scripts\presets\interface_themein blender go to: file ->...
blendswap
free
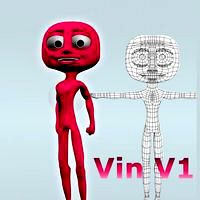
Vin V1
...blend swap blend swap blendswap blender 3d assets blender users community models free python node-setups compositor cc-by-sa ccbysa cc-by...
blendswap
free

Little Robot by Jack73 RIGGED
...blend swap blend swap blendswap blender 3d assets blender users community models free python node-setups compositor cc-by-sa ccbysa cc-by...
blendswap
free
Iphone stand/smartphone stand for the desktop
...blend swap blend swap blendswap blender 3d assets blender users community models free python node-setups compositor cc-by-sa ccbysa cc-by...
blendswap
free
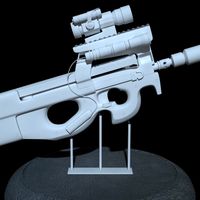
FN P90
...blend swap blend swap blendswap blender 3d assets blender users community models free python node-setups compositor cc-by-sa ccbysa cc-by...
blendswap
free
Porl
...blend swap blend swap blendswap blender 3d assets blender users community models free python node-setups compositor cc-by-sa ccbysa cc-by...
blendswap
free
FIRES Album
...blend swap blend swap blendswap blender 3d assets blender users community models free python node-setups compositor cc-by-sa ccbysa cc-by...
blendswap
free
Training Device
...keeper open source remake: [http://opendungeons.sourceforge.net/](http://opendungeons.sourceforge.net/) metal texture cc0 from: [http://opengameart.org/usersyughues](http://opengameart.org/users/yughues) ...
Cc0
blendswap
free
customizable 9V Battery
...your own battery design fingerprint-255897 - texture from pixabay.com (cc0 painted-498591 - texture from pixabay.com (cc0) wall_03_by_linolafett-d76wg5s - wall...
blendswap
free
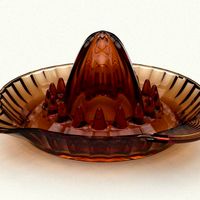
lemon press
...free python node-setups compositor cc-by-sa ccbysa cc-by ccby cc-0 cc0 cco creative commons libre open source 3d art a...
blendswap
free
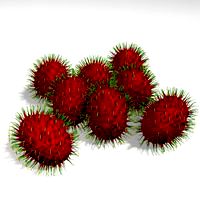
Rambutan
...free python node-setups compositor cc-by-sa ccbysa cc-by ccby cc-0 cc0 cco creative commons libre open source 3d art more...
blendswap
free
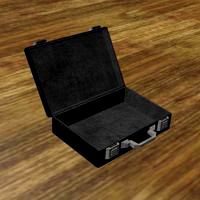
Suitcase
...and textures included.latest change on 2017/06/12, 13:54:44changed license to cc0 ...
blendswap
free

"parseh" Building
...free python node-setups compositor cc-by-sa ccbysa cc-by ccby cc-0 cc0 cco creative commons libre open source 3d art a...
blendswap
free

More kiwis
...tried to enhanced it, here is my final result!is cc0 please used it, enhanced it and share...
blendswap
free

Fantasy sword
...accidently uploaded as creative common, but it should be cc0latest change on 2016/01/20, 15:01:54the...
blendswap
free
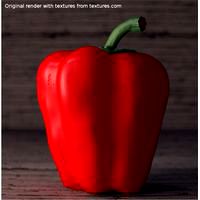
bell pepper
...free python node-setups compositor cc-by-sa ccbysa cc-by ccby cc-0 cc0 cco creative commons libre open source 3d art a...
blendswap
free
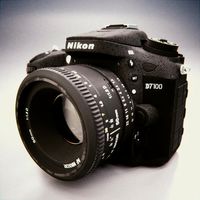
Nikon D7100 SLR Camera + Nikkor 50mm 1.8D Lens
...by me or are cc0 textures. everything released as cc0camera: 24,100 vertslens: 26,101 vertsyou'll probably want to have at...
blendswap
free
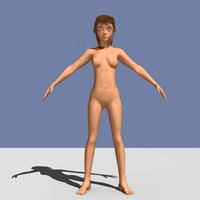
Girl Character
...free python node-setups compositor cc-by-sa ccbysa cc-by ccby cc-0 cc0 cco creative commons libre open source 3d art hi...
Cco
blendswap
free
Seahorse
...python node-setups compositor cc-by-sa ccbysa cc-by ccby cc-0 cc0 cco creative commons libre open source 3d...
blendswap
free
Blouse
...python node-setups compositor cc-by-sa ccbysa cc-by ccby cc-0 cc0 cco creative commons libre open source 3d...
blendswap
free
Pinguinos
...python node-setups compositor cc-by-sa ccbysa cc-by ccby cc-0 cc0 cco creative commons libre open source 3d art...
blendswap
free
Computer
...python node-setups compositor cc-by-sa ccbysa cc-by ccby cc-0 cc0 cco creative commons libre open source 3d art...
blendswap
free
Saloon
...python node-setups compositor cc-by-sa ccbysa cc-by ccby cc-0 cc0 cco creative commons libre open source 3d art a...
blendswap
free
notebook
...python node-setups compositor cc-by-sa ccbysa cc-by ccby cc-0 cc0 cco creative commons libre open source 3d art...
blendswap
free
speaker
...python node-setups compositor cc-by-sa ccbysa cc-by ccby cc-0 cc0 cco creative commons libre open source 3d art...
blendswap
free
speaker
...python node-setups compositor cc-by-sa ccbysa cc-by ccby cc-0 cc0 cco creative commons libre open source 3d art...
blendswap
free
Train
...python node-setups compositor cc-by-sa ccbysa cc-by ccby cc-0 cc0 cco creative commons libre open source 3d art...
blendswap
free
Can
...python node-setups compositor cc-by-sa ccbysa cc-by ccby cc-0 cc0 cco creative commons libre open source 3d art a...