Thingiverse
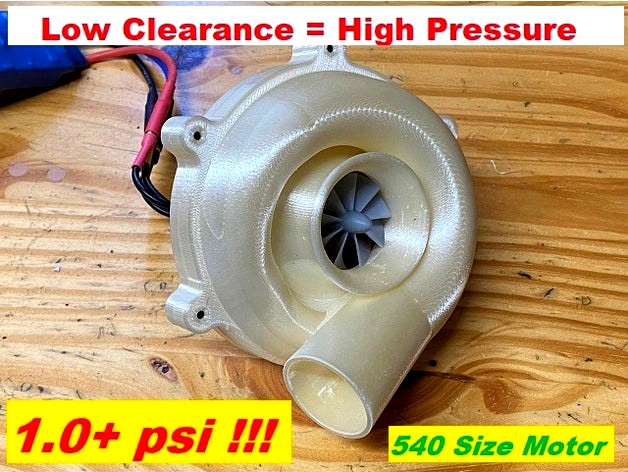
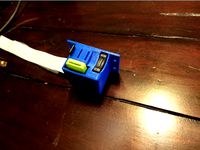
Compressor for 540 Motors (>1.0 psi !!!) by truglodite
by Thingiverse
Last crawled date: 2 years, 10 months ago
Yet another electric powered "turbo"... but this one sucks really hard! [>1.0 psi easily]
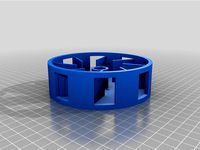
I set about designing a centrifugal compressor with a smaller rotor/shroud clearance that commonly found, in order to achieve high pressures more efficiently. With just 0.5mm clearance, this thing has enough clearance to work with common sloppy hobby grade hardware and printers, yet it is still tight enough to put out 1psi without much power. I achieved over 1psi on 2s5000 with the below listed 4000kV motor. I have tested with 3s without measuring pressure; it was pretty scary but it may be able to do 4s if have a better motor and balance the rotor well.
BOM:
1@ 540 sized motor (w/ 2-6@ M3-10 mounting bolts)
1@ printed rotor (ABS, 0.1mm layers, 4 walls, 70% infill, build plate supports)
1@ printed matching upper (PLA, 0.2mm layers, 2 walls, 40% infill, supports everywhere)
1@ printed matching lower (PLA, 0.2mm layers, 2 walls, 40% infill, no supports required)
6@ M3-16 bolts
*The type of upper and rotor must be matching. For example the V2 36mm rotor only fits the V2 36mm upper. The original lower housing fits both the original upper and V2 uppers. The V3 upper only fits the V3 lower housing.
Motors:
I tested with this motor-https://www.amazon.com/gp/product/B01DBS3MQQ/ref=ppx_yo_dt_b_asin_title_o02_s01?ie=UTF8&psc=1)
I would recommend finding a better 4000kVish 540 motor as this one is perhaps the worst quality motor I have ever owned (got warm and sounded like a pylon racer on my bench with 2s and no load... extremely poor efficiency and balance). To be honest you may be better off with a brushed 540 vs the one linked above. OTOH, if your budget is a little higher you can get something like this to make it absolutely scream:https://www.michaelsrchobbies.com/mrc4300-1-10-4300kv-sensorless-540-4-pole-motor.html
Printing:
Note that the rotor clearance is very small, and this will be turning high RPM. So print higher resolution (0.1mm layers) to increase overhang performance and layer adhesion. Even a PLA print will work OK. ABS is even better, and one up if you treat it with acetone vapor. I prefer ABS rotors as they are lighter weight, and can handle a bit of temperature if needed. SLA also works well if you have it. I made a rotor with 50/50 Siraya Blu and Fast Grey, no supports, and it came out nice.
I found that common infill settings will work OK (2x 0.4mm walls, 0.8mm thick top/bottom, etc), but for in use prints I prefer 40-50% cubic infill, with infill connected lines enabled. These settings usually produce a stronger and more durable part, versus the usual triangle infill ppl like to use on everything. With these settings you get better infill to wall adhesion, less infill telegraphing (less visible on the outside), and a lot less travel/retracts while printing infill as well. The parts feel stronger in all directions, but it does require a small amount of extra filament and print time.
Post processing:
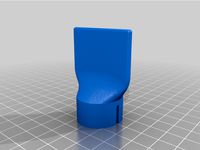
The rotor shroud area of the upper housing must be cleaned up well after printing. If you leave behind loose strings or chunks of supports there, these may be dislodged during operation and cause damage to the rotor. Cleaning the inside of the volute (snailshell part) is not so critical.
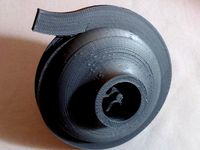
Due to my decision to stick with common automotive turbocharger volute design, a lot of supports are required to maintain a smooth section in the volute. The original and V2 versions both require a bit more support material. Since this thing got more popular than I imagined, I made V3 to save everyone some filament. V3 has the lower and upper housing split higher so it requires a lot less support material.
Assembly:
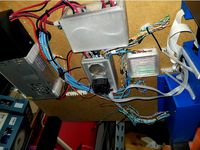
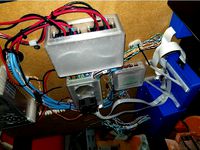
To assemble, first bolt your 540 motor to the bottom of the lower housing (use thread lock compound here). Then press the rotor on to the shaft until the lower flange of the rotor is flush with the recess in the housing. Use the holes in the back of the lower housing to push up or remove the rotor if needed. Next use M3 bolts to fix the upper housing to the lower housing.
If you have a motor with suitable startup torque, you can get the fit between the upper housing and rotor much tighter to where they actually make intermittent contact while rotating. If the fit is just right, when you start the motor the first time, the rotor will machine itself to the shape of the upper housing, providing a very small clearance for even more pressure. Note that if you use this "wear in" method of fitting, you have to use a more workable filament for the rotor, like ABS. More brittle filaments may snap off a rotor vane in the process.
Notes:
I made the design so I can easily change aero parameters and quickly generate new STL files. So if someone needs say, less clearance, more intake or exit area, a different mating tube, etc... just let me know. In the process of drawing this thing, I imagined experimenting with printed electric motor powered compressors could turn into another side hobby, with lots of rabbit holes to explore. I hope that sharing this leads to development in printed compressors, and some neat improvements to this and other designs. Maybe eventually we will be able to print a screw compressor, or even a conical screw! ;)
Lastly, 1+psi does not sound like much, but it is a lot more than the typical commercially available inflatable blower (these typically get to ~0.5psi). So please be careful using this... for example don't leave it alone to fill up a pool toy, as it could burst!
Updates/Revisions
1- I uploaded "V2" stl files that I am currently experimenting with. V2 adds some changes to the volute geometry that should slightly improve performance. V2 also comes in 2 sizes, one with a 36mm diameter inlet (like the original), and one with a 42mm inlet. The lower housing works with all rotors and uppers.
2- I uploaded some "V3" stl's for the 42mm version, which work with the 42mm rotor. V3 brings some ease of printing changes as promised earlier. The aerodynamics are otherwise identical between V2 and V3.
I set about designing a centrifugal compressor with a smaller rotor/shroud clearance that commonly found, in order to achieve high pressures more efficiently. With just 0.5mm clearance, this thing has enough clearance to work with common sloppy hobby grade hardware and printers, yet it is still tight enough to put out 1psi without much power. I achieved over 1psi on 2s5000 with the below listed 4000kV motor. I have tested with 3s without measuring pressure; it was pretty scary but it may be able to do 4s if have a better motor and balance the rotor well.
BOM:
1@ 540 sized motor (w/ 2-6@ M3-10 mounting bolts)
1@ printed rotor (ABS, 0.1mm layers, 4 walls, 70% infill, build plate supports)
1@ printed matching upper (PLA, 0.2mm layers, 2 walls, 40% infill, supports everywhere)
1@ printed matching lower (PLA, 0.2mm layers, 2 walls, 40% infill, no supports required)
6@ M3-16 bolts
*The type of upper and rotor must be matching. For example the V2 36mm rotor only fits the V2 36mm upper. The original lower housing fits both the original upper and V2 uppers. The V3 upper only fits the V3 lower housing.
Motors:
I tested with this motor-https://www.amazon.com/gp/product/B01DBS3MQQ/ref=ppx_yo_dt_b_asin_title_o02_s01?ie=UTF8&psc=1)
I would recommend finding a better 4000kVish 540 motor as this one is perhaps the worst quality motor I have ever owned (got warm and sounded like a pylon racer on my bench with 2s and no load... extremely poor efficiency and balance). To be honest you may be better off with a brushed 540 vs the one linked above. OTOH, if your budget is a little higher you can get something like this to make it absolutely scream:https://www.michaelsrchobbies.com/mrc4300-1-10-4300kv-sensorless-540-4-pole-motor.html
Printing:
Note that the rotor clearance is very small, and this will be turning high RPM. So print higher resolution (0.1mm layers) to increase overhang performance and layer adhesion. Even a PLA print will work OK. ABS is even better, and one up if you treat it with acetone vapor. I prefer ABS rotors as they are lighter weight, and can handle a bit of temperature if needed. SLA also works well if you have it. I made a rotor with 50/50 Siraya Blu and Fast Grey, no supports, and it came out nice.
I found that common infill settings will work OK (2x 0.4mm walls, 0.8mm thick top/bottom, etc), but for in use prints I prefer 40-50% cubic infill, with infill connected lines enabled. These settings usually produce a stronger and more durable part, versus the usual triangle infill ppl like to use on everything. With these settings you get better infill to wall adhesion, less infill telegraphing (less visible on the outside), and a lot less travel/retracts while printing infill as well. The parts feel stronger in all directions, but it does require a small amount of extra filament and print time.
Post processing:
The rotor shroud area of the upper housing must be cleaned up well after printing. If you leave behind loose strings or chunks of supports there, these may be dislodged during operation and cause damage to the rotor. Cleaning the inside of the volute (snailshell part) is not so critical.
Due to my decision to stick with common automotive turbocharger volute design, a lot of supports are required to maintain a smooth section in the volute. The original and V2 versions both require a bit more support material. Since this thing got more popular than I imagined, I made V3 to save everyone some filament. V3 has the lower and upper housing split higher so it requires a lot less support material.
Assembly:
To assemble, first bolt your 540 motor to the bottom of the lower housing (use thread lock compound here). Then press the rotor on to the shaft until the lower flange of the rotor is flush with the recess in the housing. Use the holes in the back of the lower housing to push up or remove the rotor if needed. Next use M3 bolts to fix the upper housing to the lower housing.
If you have a motor with suitable startup torque, you can get the fit between the upper housing and rotor much tighter to where they actually make intermittent contact while rotating. If the fit is just right, when you start the motor the first time, the rotor will machine itself to the shape of the upper housing, providing a very small clearance for even more pressure. Note that if you use this "wear in" method of fitting, you have to use a more workable filament for the rotor, like ABS. More brittle filaments may snap off a rotor vane in the process.
Notes:
I made the design so I can easily change aero parameters and quickly generate new STL files. So if someone needs say, less clearance, more intake or exit area, a different mating tube, etc... just let me know. In the process of drawing this thing, I imagined experimenting with printed electric motor powered compressors could turn into another side hobby, with lots of rabbit holes to explore. I hope that sharing this leads to development in printed compressors, and some neat improvements to this and other designs. Maybe eventually we will be able to print a screw compressor, or even a conical screw! ;)
Lastly, 1+psi does not sound like much, but it is a lot more than the typical commercially available inflatable blower (these typically get to ~0.5psi). So please be careful using this... for example don't leave it alone to fill up a pool toy, as it could burst!
Updates/Revisions
1- I uploaded "V2" stl files that I am currently experimenting with. V2 adds some changes to the volute geometry that should slightly improve performance. V2 also comes in 2 sizes, one with a 36mm diameter inlet (like the original), and one with a 42mm inlet. The lower housing works with all rotors and uppers.
2- I uploaded some "V3" stl's for the 42mm version, which work with the 42mm rotor. V3 brings some ease of printing changes as promised earlier. The aerodynamics are otherwise identical between V2 and V3.
Similar models
thingiverse
free
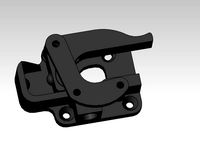
Centrifugal Compressor impeller by M_Sami
...sing and shaft.
shim installed to increase clearance between impeller and volute .
bearing 5 mm *16 mm used for shaft supporting.
thingiverse
free
Training Bike Phone Holder by SamiSamu
...r flange)
no raft, no support, normal quality, ready to print :)
(printed model on picture is crap, i will make a better one :) )
thingiverse
free
Training Bike Phone Holder by SamiSamu
...r flange)
no raft, no support, normal quality, ready to print :)
(printed model on picture is crap, i will make a better one :) )
thingiverse
free
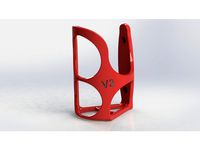
Multi spring loaded V2 by mming1106
...rse
multi spring loaded v2
for 42mm stepper motor or 42mm stepper motor with gearbox
(push fit connector id=4mm with 1/8 thread)
thingiverse
free
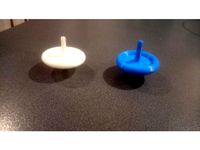
Spinning Top by AKRAM3D
...equired if printing the "split" model. you can glow the upper and lower part together.
spins for more than two minutes!
thingiverse
free
Atom122 Arm Protector by Curtisbeef
...lip without support. i printed it at 100% infill and 0.1mm layers
v2 adds a cross support that allows it to clip on more tight.
thingiverse
free
Bike Bottle Holder by Russianfruitiman
...wer there is a v3 langloch version.
didnt print v3 jet but i will. i also correctet v2 distance between holes. its also 65mm now.
thingiverse
free

Print In Place 608 Bearing by Darthvaper
...t print problems
(untested) print in place 608 bearing for fidget spinners.
print with support and whatever infill works for you.
thingiverse
free
8 Port Mechanical Siren by Vonel
...i plan to include a housing and a motor mount. rotor and stator should be finished. i will upload different port ratios later on.
thingiverse
free
Olight S2R biter
...d filament for best results.
2-7-19 uploaded v3. much better fit than v2. use v2 if you like an extremely tight fit to the light.
Truglodite
thingiverse
free
RCWL-0516 Cover by truglodite
... made it thin but with some clearance, to save filament and minimize interference. it fits nicely for me printed in abs on my a8.
thingiverse
free
SSR Cover (Remix) by truglodite
.... a pair of zipties may be used to secure the wires in their tubes. sized to work with larger wires and crimp on spade terminals.
thingiverse
free
8mm LED Strip Clip by truglodite
... have to remove the adhesive backing, but loose enough to where you can still slide the strip in even if the adhesive is exposed.
thingiverse
free
Ramps Enclosure Remix (lid pin added) by truglodite
.... so i did this remix to add a flange and holes to accept a pin/bolt that locks the lid shut (so it won't fall from gravity).
thingiverse
free
Keystone Surface Mount (single) by truglodite
...small gap on 2 sides of the keystone's face once installed, but it's barely noticeable and they still hold very securely.
thingiverse
free
Anet A8 20mm Printed Rubber Foot by truglodite
... flat headed screws. i just used some small self tapping flat heads, but a set of machine screws and nuts could also get it done.
thingiverse
free
Micro SD Card Extension, Cards, & Stick Mount by truglodite
... room is for my larger usb3 readers to fit, but the standard usb hole inside secures smaller sticks too. prints without supports.
thingiverse
free
4ch Mosfet Enclosure by truglodite
...assive cooling. the slots alone are adequate for my application, but comment if you need me to add a lid with a fan port instead.
thingiverse
free
Double Mosfet Box by truglodite
...n to save filament. the dimensions are designed for a 0.45mm printer line width (0.4mm nozzle), but other settings may work fine.
thingiverse
free
IEE VFD Enclosure Control Box by truglodite
...cts where you want a honkin' big vfd with "3 button menus". i made the rear compartment over sized for this reason.
540
turbosquid
$30

BelAZ 540
...lty free 3d model belaz 540 for download as max, obj, and fbx on turbosquid: 3d models for games, architecture, videos. (1482389)
3d_export
$20
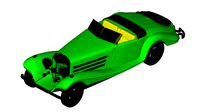
mercedes benz 540 roadster 1936
...mercedes benz 540 roadster 1936
3dexport
mercedes benz 540 roadster 1936
3d_export
$30

Lg optimus gt 540 3D Model
...lg optimus gt 540 3d model
3dexport
lg optimus gt 540 cell phone gsm
lg optimus gt 540 3d model sashocoppy 51509 3dexport
turbosquid
$60

Roadster 540 k Mercedes
...dster 540 k mercedes for download as blend, dae, fbx, and obj on turbosquid: 3d models for games, architecture, videos. (1710574)
turbosquid
$35

lg optimus gt 540
... available on turbo squid, the world's leading provider of digital 3d models for visualization, films, television, and games.
turbosquid
$10

Microsoft Lumia 540 Orange
... available on turbo squid, the world's leading provider of digital 3d models for visualization, films, television, and games.
3d_export
$60

Architecture 540 3D Model
...lege campus max street landscape commercial building medical hospital offices
architecture 540 3d model lotusmodel 48675 3dexport
turbosquid
$14

Microsoft Lumia 540 All Colours
... available on turbo squid, the world's leading provider of digital 3d models for visualization, films, television, and games.
3d_export
$180

3d building 540 3D Model
...metropolis street block detailed definition realistic skyscraper huge collection
3d building 540 3d model kanhtart 44574 3dexport
humster3d
$40

3D model of Microsoft Lumia 540 Orange
...d 3d model of microsoft lumia 540 orange in various file formats. all our 3d models were created maximally close to the original.
Psi
3d_export
$5
Stepper motor biturbo boost PSI gauge 3D Model
...3d model
3dexport
external gauge bi-turbo boost psi motor
stepper motor biturbo boost psi gauge 3d model mackandco 33612 3dexport
3d_export
$25

Scuba Dive Cylinder Tank 3D Model
...high pressure gas hipress oxygen nitrogen dive diver 3000 psi underwater breathing scuba dive cylinder tank 3d model raphaelwolfeye...
3d_ocean
$10
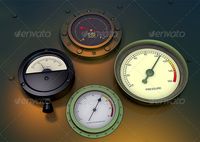
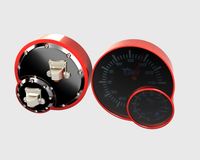
Gauges
...gallon gauge gauge gauges highres metal metal needle pressure psi steampunk steampunk xpresso 4 highres steampunk style gauges ready...
thingiverse
free
Psi by trbone76
...psi by trbone76
thingiverse
not very exciting, just the greek letter psi
thingiverse
free

Psi Corp by WinklePinkle
...psi corp by winklepinkle
thingiverse
psi corp
thingiverse
free

PSI mounts with honeycombs
...i mounts with honeycombs
thingiverse
front and rear psi mounts with honeycomb inserts. this is a remix of mr baddleys psi mounts
thingiverse
free
Psi Symbol by InPrinting
...psi symbol by inprinting
thingiverse
psi symbol 100th centennial...
thingiverse
free

Psi Keychain by gomezinh
...psi keychain by gomezinh
thingiverse
keychain for psychologist
thingiverse
free
Psi Corps Badge by Torvaun
...psi corps badge by torvaun
thingiverse
a psi corps badge from babylon 5. designed for cosplay.
thingiverse
free
Psi die for Android Netrunner by maboulton
...psi die for android netrunner by maboulton
thingiverse
this is a psi die for android netrunner
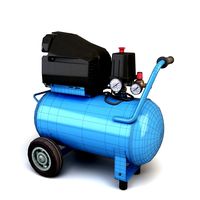
Compressor
3d_ocean
$16
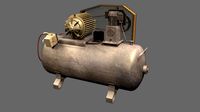
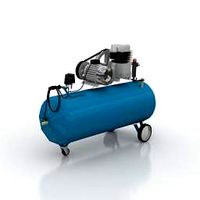
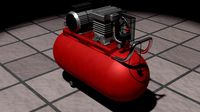
Compressor
...ean
car compressor urss
this is a compressor to inflate car tires, made in 3ds max 9 this is is an old model, 1980, made in urss
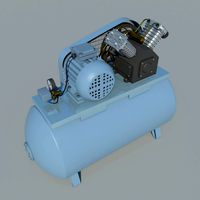
turbosquid
$39

Compressor
...
royalty free 3d model compressor for download as ige and obj on turbosquid: 3d models for games, architecture, videos. (1331119)
turbosquid
$15
Compressor
... available on turbo squid, the world's leading provider of digital 3d models for visualization, films, television, and games.
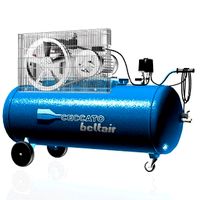
3d_export
$10
Compressor 3D Model
...compressor 3d model
3dexport
compressor 3dmodel c4d
compressor 3d model mur 4467 3dexport
archive3d
free
Compressor 3D Model
...r technics equipment
compressor n230709 - 3d model (*.gsm+*.3ds) for interior 3d visualization.
3d_export
$15
Compressor
...olors and materials. render using cycles created in a blender.<br>formats file: blend, fbx, mtl, obj. textures formats: png
turbosquid
$29
air compressor
...ree 3d model air compressor for download as max, obj, and fbx on turbosquid: 3d models for games, architecture, videos. (1709962)
turbosquid
$14

garage compressor
...d model garage compressor for download as , obj, fbx, and 3ds on turbosquid: 3d models for games, architecture, videos. (1628478)
turbosquid
$12
Compressor K22
...ree 3d model compressor k22 for download as max, fbx, and obj on turbosquid: 3d models for games, architecture, videos. (1584925)
archive3d
free
Compressor 3D Model
...compressor 3d model
archive3d
compressor air- 3d model for interior 3d visualization.
0
turbosquid
$12

Calligraphic Digit 0 Number 0
...hic digit 0 number 0 for download as max, obj, fbx, and blend on turbosquid: 3d models for games, architecture, videos. (1389318)
3d_export
$6

set-0
...set-0
3dexport
turbosquid
$6

hedge 0
...yalty free 3d model hedge 0 for download as max, obj, and fbx on turbosquid: 3d models for games, architecture, videos. (1450353)
turbosquid
$5

Nuber 0
...oyalty free 3d model nuber 0 for download as ma, obj, and fbx on turbosquid: 3d models for games, architecture, videos. (1564674)
turbosquid
$22

0.jpg
... available on turbo squid, the world's leading provider of digital 3d models for visualization, films, television, and games.
turbosquid
free

Steam Locomotive Fowler 4F 0-6-0
... available on turbo squid, the world's leading provider of digital 3d models for visualization, films, television, and games.
turbosquid
$10

Liquid Number 0
... model liquid number 0 for download as c4d, 3ds, fbx, and obj on turbosquid: 3d models for games, architecture, videos. (1689919)
turbosquid
$45

Dragon360_perspShape_tmp.0.jpg
... available on turbo squid, the world's leading provider of digital 3d models for visualization, films, television, and games.
turbosquid
$8

Rocks Debris 0
... available on turbo squid, the world's leading provider of digital 3d models for visualization, films, television, and games.
3d_export
$18

wood-guardrail-fence 0
...wood-guardrail-fence 0
3dexport
wood-guardrail-fence 0<br>3ds max 2015
Motors
archibase_planet
free

Motor
...base planet
motor motor engine engine electric motor
motor wagner n250213 - 3d model (*.gsm+*.3ds) for interior 3d visualization.
archibase_planet
free

Motor
...motor
archibase planet
motor motor engine engine
motor n151112 - 3d model (*.gsm+*.3ds) for interior 3d visualization.
archibase_planet
free

Motor
...motor
archibase planet
motor motor engine engine
motor n150615 - 3d model (*.gsm+*.3ds+*.max) for interior 3d visualization.
turbosquid
$15

Motor
...otor
turbosquid
royalty free 3d model motor for download as on turbosquid: 3d models for games, architecture, videos. (1639404)
3d_ocean
$5

Electric motor
...electric motor
3docean
car electric engine industry motor phase train vehicle
an electric motor enjoy!
3d_ocean
$18

Electric Motor
...electric motor
3docean
electric motor engine machine mover parts
3d model electric motor for hoist crane
turbosquid
$5

Motor
... available on turbo squid, the world's leading provider of digital 3d models for visualization, films, television, and games.
3d_export
$5

electric motor
...electric motor
3dexport
electric motor use for industrial purposes
3d_export
$5

servo motor
...tor
3dexport
it's a simple part of servo motor 0.75kw for used in machines assembly to show specified motor in own project.
archive3d
free

Motor 3D Model
...ine electric motor
motor wagner n250213 - 3d model (*.gsm+*.3ds) for interior 3d visualization.
>1
turbosquid
$15

ring 1+1
... available on turbo squid, the world's leading provider of digital 3d models for visualization, films, television, and games.
turbosquid
$10

chair(1)(1)
... available on turbo squid, the world's leading provider of digital 3d models for visualization, films, television, and games.
turbosquid
$8

Chair(1)(1)
... available on turbo squid, the world's leading provider of digital 3d models for visualization, films, television, and games.
turbosquid
$2

RING 1(1)
... available on turbo squid, the world's leading provider of digital 3d models for visualization, films, television, and games.
turbosquid
$1

Table 1(1)
... available on turbo squid, the world's leading provider of digital 3d models for visualization, films, television, and games.
turbosquid
$1

house 1(1)
... available on turbo squid, the world's leading provider of digital 3d models for visualization, films, television, and games.
turbosquid
$59

Formula 1(1)
...lty free 3d model formula 1 for download as max, fbx, and obj on turbosquid: 3d models for games, architecture, videos. (1567088)
design_connected
$11

No 1
...no 1
designconnected
sibast no 1 computer generated 3d model. designed by sibast, helge.
turbosquid
$2

desert house(1)(1)
...3d model desert house(1)(1) for download as 3ds, max, and obj on turbosquid: 3d models for games, architecture, videos. (1055095)
turbosquid
$50
door 1 darkwood 1
... available on turbo squid, the world's leading provider of digital 3d models for visualization, films, television, and games.