Thingiverse
Complete front end for a Tonka Bronco by BrianHooker
by Thingiverse
Last crawled date: 3 years ago
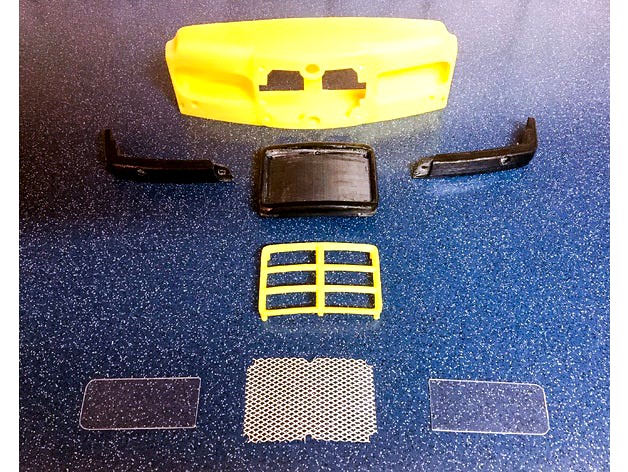
Now that I have a 3D Printer, I thought that I would redesign my rc truck’s front end.......something that I have been wanting to do for several years....... integrating the led lights and a deeper grille all into one structure......the difficult part was styling it so that it wouldn’t look like a modern front end bolted to the square 70’s style of Tonka Bronco......I also wanted the yellow truck bodywork to continue onto the new front end......but at the same time I wanted to add the black bumpers and grille bezel, which is not only in line with the current colour scheme, but keeps some of the original Tonka front end style......so with this in mind, plus the fact that the whole assembly is bigger than my printer bed......I decided to split the whole front end into 7 parts......the main body (1), the grille bezel (1), the grille bars (1), the bumpers (2) and the clear lamp lenses (2).
During the design process I designed 4 sets of grille bars......so I have added all 4 designs as STL Files.......giving people the opportunity to choose which grille look they want, as each one has identical fixings it will fit perfectly into the Grille Bezel.
The lenses are cut (using the lens template included in the stl files) from a sheet of 1mm thick polycarbonate Lexan, which is unbreakable and almost impossible to scratch....... the grille mesh was purchased from a company that make scale metal mesh for model making......the led lights were from Hobbyking...... https://hobbyking.com/en_us/hobbyking-1-5-and-1-8-off-road-led-light-set-with-functional-brake-lights.html .......everything else was printed on the 3D printer......the whole assembly was locked together using 6 screws.
The assembly sequence is :-
1) Slot the bumpers into the grille bezel.
2) Add the grille mesh to the bezel and push the grille bars into the bezel, locking the mesh and bumpers into place, then add the 2 centre screws to lock the grille bar to the bezel.
3) Add the led lights to the lamp can using double sided tape, and feed the wire leads through the hole in the rear of the lamp can.
4) Slide the lenses into the slots provided from inside the grille opening in the main body.......the lenses are locked into place by the the two legs on the rear of the Bezel when it is attached to the front end in step 5.
5) Slot the outer ends of the bumpers into the slots in the main body and lock the whole assembly together with the 4 screws into the rear corners of the bezel from the inside of the main body.
6) The whole assembly can now be bolted onto the front of the Tonka body, once the stock Tonka grille has been removed.......but it requires longer bolts, as the new front end is deeper than the stock Tonka grille.
This truck is driven FPV (First Person View) where the truck is controlled while looking through the onboard camera via Fatshark goggles.......for an example of what it is like, you can view it on YouTube........ https://youtu.be/UVX8bOjsIS8
Similar models
thingiverse
free

Element Enduro 1:24 Scale Roll Bars and Front Grill by 3DtoRC
...two 9mm holes have to be bored out.
the light bars are designed to mount with 2mm screws. one light bar has bezels for 3mm leds.
3dwarehouse
free

1994 Ford Bronco DETAILED
...1995 #1996 #badge #bronco #bumper #carrier #colormatch #custom #emblem #f150 #f250 #f350 #ford #front #grille #mirror #rear #tire
3dwarehouse
free

Cars Front Bumper
...ota levin but i couldnt be botherd so i just made the bumper #bumper #car #cars #corolla #front #grill #levin #mesh #rear #toyota
3dwarehouse
free

Caddy Truck Part 3 (Front)
...ck part 3 (front)
3dwarehouse
caddy truck front end #bumper #caddy_truck #cadillac #fenders #front_end #grille #headlight #truck
thingiverse
free

RC Redcat Rear Bumper Light Mount by bertanator
... mount light to my rc truck so i designed a mount to slide over the front bumper. i used rgb led strips that are about 10mm wide.
3dwarehouse
free

Toyota Tundra Bull Bar
...t bumper with this to add a more aggresive look to your truck. leave grill in place though. #bar #bull #off #road #toyota #tundra
3dwarehouse
free

1970 HMC F-300 (Beginning of Third Generation)
...ont end, grille, and headlights, and kept the same wheels, side mirrors, and bumpers as the previous trucks. #car #truck #vehicle
thingiverse
free

Traxxas Trx-4 Bronco Front bumper And a bumper with a winch mount by Buckshot_411
...axxas trx-4 bronco
this is a front bumper for a traxxas trx-4 bronco with a winch mount for the rc4wd 1/10 mini warn 9.5cti winch
3dwarehouse
free

rear bumper for ford f150 or ford bronco
...a bumper i made like the one i have on my bronco. please rate and commetn #body_kit #bumper #f150 #ford #ford_f150 #offroad #rear
grabcad
free

Unimog 404 Electric Winch Assembly 2 with LED BAR Lights
...embly-with-led-bar-lights-1 , i had to put it to a new place.
led bars connected directly to front grill with m6 bolt and nuts.
Brianhooker
thingiverse
free

GoPro hero 2 gimbal by BrianHooker
... ground fvp in a radio controlled truck.
you can see the effect achieved in the attached video or at https://youtu.be/qwr8lmmd6pk
thingiverse
free

Karcher K7 power cable & plug storage by BrianHooker
...p the power cable secure while not in use.
it should work on any karcher power washers that have the same cable retention method.
thingiverse
free

FlashForge Dreamer top filament guide by Nokaymaybe
...front and fix with either pin or something like brianhooker#39;s cable harness guide--the white part seen in the photos....
thingiverse
free

FlashForge Dreamer top filament guide Mk2 by Nokaymaybe
...front and fix with either pin or something like brianhooker#39;s cable harness guide. the top cover still fits on....
Tonka
design_connected
$16

Tonka
...tonka
designconnected
ligne roset tonka computer generated 3d model. designed by rosignoli, alice.
3ddd
$1

stickers Tonka Design
...stickers tonka design
3ddd
stickers by tonka design
thingiverse
free

Tonka Logo by AwesomeA
...tonka logo by awesomea
thingiverse
tonka logo
thingiverse
free

Tonka Summit by rockett6
...tonka summit by rockett6
thingiverse
this is a copy of the tonka 1978 buggy off road
thingiverse
free

Classic Tonka Logo. by AwesomeA
...classic tonka logo. by awesomea
thingiverse
classic tonka logo.
close enough.
thingiverse
free

Cab for Tonka excavator by Bustenchops
...cab for tonka excavator by bustenchops
thingiverse
this is the cab window for a tonka excavator 1980(?) vintage.
thingiverse
free

Tonka little man by Yamil128
...tonka little man by yamil128
thingiverse
simple design of a little man for some tonka toys
free3d
free

Tonka Fire Truck V2
...tonka fire truck v2
free3d
tonka fire truck v2 printable, low poly model.
thingiverse
free

Wheel for tonka excavator by Bustenchops
...wheel for tonka excavator by bustenchops
thingiverse
wheels for the tonka tracked excavator. based off toy from 1980(?)
thingiverse
free

Iroby Tonka by jaimecuevas290
...iroby tonka by jaimecuevas290
thingiverse
this is a design for my iroby
Bronco
3ddd
$1

Bronco
... капитоне
фабрика beni, модель bronco.габариты и обивка на заказ.остальная информация на сайте www.beni.ru
3d_export
$69

ford-bronco 2021
...vertisements or games corona render and materials all textures include in *.rar files lighting setup is not included in the file!
3d_ocean
$89

Ford Bronco 1992
...y, in real units of measurement, qualitatively and maximally close to the original. model formats: - *.max (3ds max 2008 scanl...
3d_export
$69

Ford-Bronco Raptor 2022
...vertisements or games corona render and materials all textures include in *.rar files lighting setup is not included in the file!
3d_export
$69

Ford-Bronco sport
...>corona render and materials<br>all textures include in *.rar files<br>lighting setup is not included in the file!
3d_export
$69

ford-bronco 2-door 2021
...vertisements or games corona render and materials all textures include in *.rar files lighting setup is not included in the file!
cg_studio
$99

Ford Bronco 19923d model
...
.3ds .c4d .fbx .lwo .max .mb .obj - ford bronco 1992 3d model, royalty free license available, instant download after purchase.
3ddd
$1

лампа-собака Odesi Bronco
...o
3ddd
лампа , собака , светильник
www.odesi.eu
3d_export
$69

Ford-Bronco Raptor 2-door 2022
...vertisements or games corona render and materials all textures include in *.rar files lighting setup is not included in the file!
humster3d
$75

3D model of Ford Bronco 1992
... a detailed 3d model of ford bronco 1992 in various file formats. all our 3d models were created maximally close to the original.
Front
archibase_planet
free

Front
...front
archibase planet
facade front bluff
front 3d01a - 3d model (*.gsm+*.3ds) for interior 3d visualization.
3d_export
$5
front fork
...front fork
3dexport
front fork
3d_export
$5

Front Desk
...front desk
3dexport
modern and minimal reception front desk
3d_ocean
$4
Medical Front
...medical front
3docean
horror low medical
medical front
3d_ocean
$5
Front Desk
...front desk
3docean
desk front office reception
office reception counter or front desk. cad file and obj file included.
3ddd
free
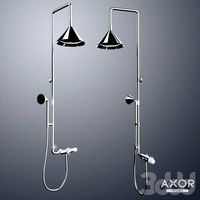
Axor WaterDream by Front
...r , waterdream , front
axor waterdream by front
3d_export
$5

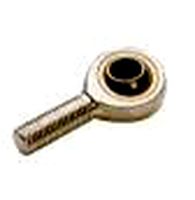
front nut eye
...front nut eye
3dexport
front nut eye
3d_export
$5
front screw eye
...front screw eye
3dexport
front screw eye
3d_export
$5
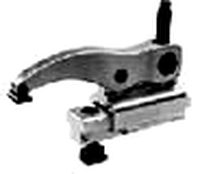
front clamping device
...front clamping device
3dexport
front clamping device
archive3d
free
Front 3D Model
...rchive3d
facade front bluff
front 3d01a - 3d model (*.gsm+*.3ds) for interior 3d visualization.
End
archibase_planet
free

Cigarettes end
...d
archibase planet
cigarettes end cigarette stub cigar-butt
cigarette-end - 3d model (*.gsm+*.3ds) for interior 3d visualization.
3d_export
$5
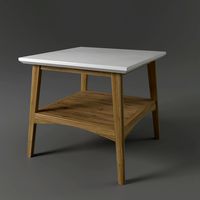
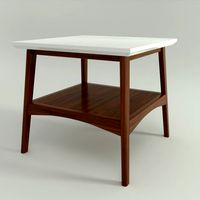
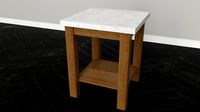
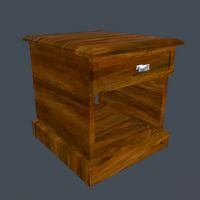
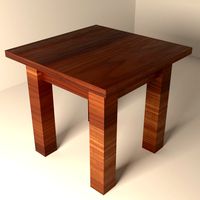
end table
...end table
3dexport
end table 3d model dimensions:(w)60cm×(d)60cm×(h)56cm
3d_export
$5
end table
...end table
3dexport
end table 3d model dimensions:(w)60cm×(d)60cm×(h)56cm
turbosquid
$10
End Table
...rbosquid
royalty free 3d model end table for download as max on turbosquid: 3d models for games, architecture, videos. (1570610)
turbosquid
$5
End Table
...urbosquid
royalty free 3d model end table for download as ma on turbosquid: 3d models for games, architecture, videos. (1622809)
turbosquid
$3
End Table
...rbosquid
royalty free 3d model end table for download as fbx on turbosquid: 3d models for games, architecture, videos. (1315115)
3d_export
$5

rope end ring
...rope end ring
3dexport
rope end ring
turbosquid
$2

End Tables
...
royalty free 3d model end tables for download as max and obj on turbosquid: 3d models for games, architecture, videos. (1706896)
turbosquid
$14
End Table
...lty free 3d model end table for download as max, obj, and fbx on turbosquid: 3d models for games, architecture, videos. (1403051)
turbosquid
$12

End Table
...lty free 3d model end table for download as max, obj, and fbx on turbosquid: 3d models for games, architecture, videos. (1574707)
Complete
turbosquid
$35
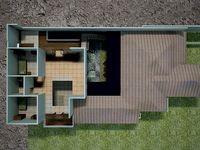
complete plan
...quid
royalty free 3d model complete plan for download as max on turbosquid: 3d models for games, architecture, videos. (1221693)
turbosquid
$10
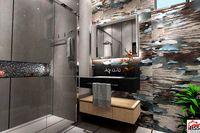
COMPLETE WASHROOM
...
royalty free 3d model complete washroom for download as max on turbosquid: 3d models for games, architecture, videos. (1413853)
turbosquid
$1

Complete Office
...id
royalty free 3d model complete office for download as max on turbosquid: 3d models for games, architecture, videos. (1323641)
vizpark
$509
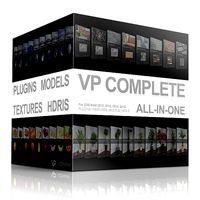
VP COMPLETE
...e is the ultimate collection of 3d archviz assets, including 900 3d models, 50 hdris, 100 tileable textures and pattern software.
turbosquid
$15
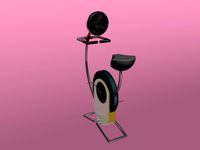
excercise complete
... available on turbo squid, the world's leading provider of digital 3d models for visualization, films, television, and games.
turbosquid
$1
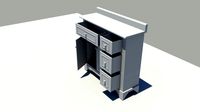
complete cabinet
... available on turbo squid, the world's leading provider of digital 3d models for visualization, films, television, and games.
turbosquid
free

complete Desk.lwo
... available on turbo squid, the world's leading provider of digital 3d models for visualization, films, television, and games.
3d_export
$5
Complete Wall Pack
...complete wall pack
3dexport
a complete set of 14 walls
3d_ocean
$12
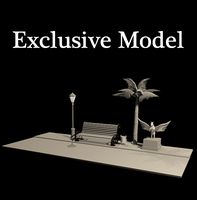
Complete Model
... any other purpose. model includes, tree, street light, bench with urn, horse model. total poly and verts are 282,036 and 334,...
turbosquid
$80
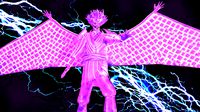
sasuke complete susanoo
...oyalty free 3d model sasuke complete susanoo for download as on turbosquid: 3d models for games, architecture, videos. (1693376)