Thingiverse
Combo Lock Code Finder by frostryche
by Thingiverse
Last crawled date: 3 years, 4 months ago
Many of us have combination locks sitting around unused for long periods of time. When we finally need them we realize we can’t remember or find the combination. It’s annoying and frustrating. You can find many ways online to pick these locks but that doesn’t get you the combination if you want to keep using it. This device is for that exact situation. You can put your lock in the device and it will try combinations for you until it gets the correct one and then save/ display the unlock code.
DISCLAIMER: This is for use only on locks that are not attached to anything and that you have have the rights to open. Only the operator of this device is liable for any repercussions of it’s use.
This was inspired by a previous project by Samy Kamkar who made a much more elaborate version. You can find those details on his website here: http://samy.pl/combobreaker/
I tried following his concept with parts that I had around the house and wasn’t able to replicate his success. Instead I made this design that worked much better for me and used components I had already. The major downside is that it is pure brute force. The tricks you find online for measuring pressure of the shackle and doing some math may work on a new lock. Every lock I’ve worked with was stickier, had high friction areas, and was not conducive to these “quick” methods. I recommend watching Samy’s videos to understand how locks work. I was able to narrow down my combinations by picking the locks and looking at the disks inside. I then tested a fraction of the combinations to find the code. Note that there are 64000 possible combinations on a Masterlock combo lock. It will take a few days to test all of those combinations and will likely wear out the lock. In my experience with building this, the locks started to degrade after a few thousand cycles. Narrowing down the possibilities is key to having a functioning lock once you have the combination.
I may continue to revise the design, code, and this post with more detail if I work on this more in the future. For now I have found the codes for all of the locks my friends have sitting around and don’t have any planned work. I’m sure I’m leaving out lots of detail here. Feel free to ask any questions you may have and I can try to fill in any gaps.
Lock Cracker: Automatically try lock combinations until the lock opens. Displays/saves the combination when found.
Written & Designed by Sam Roehler
Revision 3 – 2020/11/28
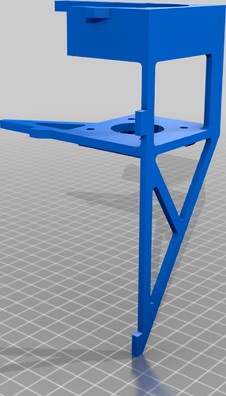
Refer to images for assembly.
Remember to set the dial to zero before or during the setup loop of the program.
Printed Parts
Assembly Mount pt 1
Assembly Mount pt 2
Backer Plate
Bearing Filler 3to5mm X 2
Spur Gear11
Spur Gear21
Switch Plate
Hardware
Bearing: 5mm ID, 10mm OD, 4mm thick X 2
2.5mm x 14mm Cap Screw X 10
2.5mm x 35mm Cap Screw X 7
2.5mm Nuts X 8 (I used a mix of nylock and regular, use your preference)
2.5mm washers X 13
0.125” ID, 0.75” OD washers X 2 (added frame support for lever arm)
Ziptie, 200mm X 1 (keep the shackle motor on the support)
Super Glue (glue frame together)
Loctite (Optional to hold motor screws in place.
Electronics: You can use whatever you have but the code is setup to work with these parts.
Arduino Mega 2560
SainSmart 1/8" TFT LCD Display (i don't recommend this display but I had one and it worked)
Follow this wiring guide for high speedhttps://www.tweaking4all.com/hardware/arduino/sainsmart-arduino-color-display/
Update pins to use mega SPI instead of uno. Guide herehttps://www.arduino.cc/en/reference/SPI
A4988 Stepper Motor Driver (these are cheap on ebay)
Wiring Guidehttps://www.makerguides.com/a4988-stepper-motor-driver-arduino-tutorial/
Nema 17 Stepper Motor X 2
Bigger the better. A new lock will work with little resistance but will get sticky after hundreds of rotations.
Since I built this without position sensing I needed to guarantee that the dial motor was hitting its position.
I had a geared (1:40) motor on hand which was used for the shackle lifter motor.
I highly recommend having shafts with a face for the screw to set on to prevent it from slipping. Grind in a flat if needed.
capacitor X 2
One for each stepper motor. Most any size will do.
Power Supply, 5V
Used to power the Arduino. Could be a wall supply or a computer if you are watching the serial port
Power Supply, 8-35V X 2
One for each stepper motor. It's technically possible to do this with one supply but life is easier if they are split.
Miscellaneous wires
Bread board
DISCLAIMER: This is for use only on locks that are not attached to anything and that you have have the rights to open. Only the operator of this device is liable for any repercussions of it’s use.
This was inspired by a previous project by Samy Kamkar who made a much more elaborate version. You can find those details on his website here: http://samy.pl/combobreaker/
I tried following his concept with parts that I had around the house and wasn’t able to replicate his success. Instead I made this design that worked much better for me and used components I had already. The major downside is that it is pure brute force. The tricks you find online for measuring pressure of the shackle and doing some math may work on a new lock. Every lock I’ve worked with was stickier, had high friction areas, and was not conducive to these “quick” methods. I recommend watching Samy’s videos to understand how locks work. I was able to narrow down my combinations by picking the locks and looking at the disks inside. I then tested a fraction of the combinations to find the code. Note that there are 64000 possible combinations on a Masterlock combo lock. It will take a few days to test all of those combinations and will likely wear out the lock. In my experience with building this, the locks started to degrade after a few thousand cycles. Narrowing down the possibilities is key to having a functioning lock once you have the combination.
I may continue to revise the design, code, and this post with more detail if I work on this more in the future. For now I have found the codes for all of the locks my friends have sitting around and don’t have any planned work. I’m sure I’m leaving out lots of detail here. Feel free to ask any questions you may have and I can try to fill in any gaps.
Lock Cracker: Automatically try lock combinations until the lock opens. Displays/saves the combination when found.
Written & Designed by Sam Roehler
Revision 3 – 2020/11/28
Refer to images for assembly.
Remember to set the dial to zero before or during the setup loop of the program.
Printed Parts
Assembly Mount pt 1
Assembly Mount pt 2
Backer Plate
Bearing Filler 3to5mm X 2
Spur Gear11
Spur Gear21
Switch Plate
Hardware
Bearing: 5mm ID, 10mm OD, 4mm thick X 2
2.5mm x 14mm Cap Screw X 10
2.5mm x 35mm Cap Screw X 7
2.5mm Nuts X 8 (I used a mix of nylock and regular, use your preference)
2.5mm washers X 13
0.125” ID, 0.75” OD washers X 2 (added frame support for lever arm)
Ziptie, 200mm X 1 (keep the shackle motor on the support)
Super Glue (glue frame together)
Loctite (Optional to hold motor screws in place.
Electronics: You can use whatever you have but the code is setup to work with these parts.
Arduino Mega 2560
SainSmart 1/8" TFT LCD Display (i don't recommend this display but I had one and it worked)
Follow this wiring guide for high speedhttps://www.tweaking4all.com/hardware/arduino/sainsmart-arduino-color-display/
Update pins to use mega SPI instead of uno. Guide herehttps://www.arduino.cc/en/reference/SPI
A4988 Stepper Motor Driver (these are cheap on ebay)
Wiring Guidehttps://www.makerguides.com/a4988-stepper-motor-driver-arduino-tutorial/
Nema 17 Stepper Motor X 2
Bigger the better. A new lock will work with little resistance but will get sticky after hundreds of rotations.
Since I built this without position sensing I needed to guarantee that the dial motor was hitting its position.
I had a geared (1:40) motor on hand which was used for the shackle lifter motor.
I highly recommend having shafts with a face for the screw to set on to prevent it from slipping. Grind in a flat if needed.
capacitor X 2
One for each stepper motor. Most any size will do.
Power Supply, 5V
Used to power the Arduino. Could be a wall supply or a computer if you are watching the serial port
Power Supply, 8-35V X 2
One for each stepper motor. It's technically possible to do this with one supply but life is easier if they are split.
Miscellaneous wires
Bread board
Similar models
thingiverse
free

3D-printed rotating display platform - turntable by kvriet
... been unable to find the original author. should you know who it is, please contact me and i will include attribution in my file.
grabcad
free

CNC laser engraving machine
... microcontroller is arduino uno combined with cnc shield v3 with a4988 stepper motor drivers that control nema 17 stepper motors.
thingiverse
free

ANY Room electric door locking device using NEMA17 and matrix keypad by dominik-polic
... just ask for it.
there is also an .stl for a wall/door-mounted matrix keypad, the wire is supposed to go through the wall/door.
3dwarehouse
free

Stepper Motor X25 Switec
...reat with arduino. code at. http://guy.carpenter.id.au/gaugette/about/ #arduino #car #gauge #instrument #stegmotor #stepper_motor
thingiverse
free

DIY Antenna spring coil making machine | Arduino Project by electricdiylab
...8 -- 2
sc8uu -- 1
8mm lead screw -- 1
8mm screw nut -- 1
8mm smooth ss rod
custom pcb
a4988 stepper driver -- 2
arduino nano -- 1
thingiverse
free

Arduino MIDI Stepper Synth by jzkmath
...tu.be/inyrupq-1sohttps://youtu.be/2an8hk7j_mkhttps://youtu.be/tkpswnm2hamhttps://youtu.be/q6_co7ildukhttps://youtu.be/pv-dyiut9yi
thingiverse
free

Reloading Die Locking Rings by pastera
...5mm screw to test with but it might fit)
if any of my designs help you out, a comment is appreciated and tips are always welcome.
thingiverse
free

DIY automated 3D Scanner by VenomPrinter
...ytic capacitor)
-> 12v 2a power supply
-> 4 x bearings 5 x 16 x 5 mm (625-2rs)
optional:
-> i2c lcd panel (hd44780 16x2)
grabcad
free

A4988 Stepper motor Driver
...a4988 stepper motor driver
grabcad
this is a a4988 stepper motor driver with heatsink
thingiverse
free

Stepper Motor Speed Controller by dvanommen
...o push switches and a potentiometer for input! doesn't have to be for a stepper motor. whatever you use it for, please share!
Frostryche
thingiverse
free

Garden Hose Holder by frostryche
.... for this application pla worked well. if it gets used outside, make sure to pick a material that will not weather as quickly.
thingiverse
free

Violin Wall Mount by frostryche
...this mount does not hold the bow. feel free to check out my other designs for the violin bow mount as well as other instruments.
thingiverse
free

Belt Holder by frostryche
...d passes between the wires of a shelf and is secured with the 'top bar'.
print:
1x belt main
2x side support
2x top bar
thingiverse
free

Door Hinge Shim by frostryche
...dle side of the door, put a shim under each hinge. if it's sagging, put one under the middle hinge and two under the bottom.
thingiverse
free

Guitar Wall Mount by frostryche
...e on the wall yet is very easy to take down and play.
feel free to check out my other mount designs for the violin and saxophone.
thingiverse
free

Violin Bow Wall Clips by frostryche
... hiding the clips behind the violin.
feel free to check out my other designs for the violin mount as well as other instruments.
thingiverse
free

Saxophone Wall Mount by frostryche
...re on the wall yet is very easy to take down and play.
feel free to check out my other mount designs for the violin and guitar.
thingiverse
free

Flexible Duct Fan Connections by frostryche
... cover to that instead to prevent excess heat loss in the winter.
both parts can be printed in any resolution without supports.
thingiverse
free

Spool Adapter w/ Flexible Arms by frostryche
...accommodates variation in spool i.d. sizes. i've included the cad file so you can adapt it to your preferred size if needed.
thingiverse
free

Jack Skellington Bat Bow Tie (Nightmare Before Christmas) by frostryche
...erneath the collar to be worn like a normal bow tie.
i printed mine with black pla and used a silver sharpie to color the eyes.
Finder
turbosquid
$80

path finder
... available on turbo squid, the world's leading provider of digital 3d models for visualization, films, television, and games.
turbosquid
$26

Radio direction finder A
...ty free 3d model radio direction finder a for download as fbx on turbosquid: 3d models for games, architecture, videos. (1212490)
turbosquid
$13

Oppo Finder X907
... available on turbo squid, the world's leading provider of digital 3d models for visualization, films, television, and games.
turbosquid
$5

Pocket Leser Renge Finder
...nge finder for download as 3ds, lwo, obj, fbx, blend, and dae on turbosquid: 3d models for games, architecture, videos. (1384961)
3ddd
$1

Писсуар Laufen
...писсуар laufen 3ddd laufen , ilbagnoalessi one , писсуар http://www.laufen.ru/ru/products/product-finderписсуары/840971 писсуар...
archive3d
free

Detector 3D Model
...detector 3d model archive3d detector metal detector metal finder radio-metal locator detector metal n250314 - 3d model (*.gsm+*.3ds)...
3ddd
$1

Унитаз подвесной 820681
...унитаз подвесной 820681 3ddd 820681 , подвесной , унитаз http://www.ru.laufen.com/wps/wcm/connect/laufen_ru/ru_ru/products/product+findermodel/?&view;=t&md;=820681 ...
3d_export
$28

Laserliner LRMPocket 40 3D Model
...3dexport laserliner lrm 40 electronics laserrange-master pocket laser distance finder measure laserliner lrmpocket 40 3d model mega3d 51533...
3ddd
$1

Раковина Laufen
...раковина laufen 3ddd laufen , ilbagnoalessi one , умывальник http://www.laufen.ru/ru/products/product-finder%d1%80%d0%b0%d0%ba%d0%be%d0%b2%d0%b8%d0%bd%d1%8b/813971 умывальник...
3ddd
$1

Occhio floor luminaire sento led lettura 2014
...luminaire sento led lettura 2014 3ddd occhio , lettura http://www.occhio.de/en/sento/sento-led-lettura?back=products/finder21&finder;=21 amp body 125 or 160 cm height, inclinable up...
Combo
turbosquid
$25

combo
... available on turbo squid, the world's leading provider of digital 3d models for visualization, films, television, and games.
turbosquid
$79

Mannequin Combo
...uid
royalty free 3d model mannequin combo for download as ma on turbosquid: 3d models for games, architecture, videos. (1172062)
turbosquid
$15

COMBO SOFA
...ty free 3d model combo sofa for download as max, obj, and fbx on turbosquid: 3d models for games, architecture, videos. (1558534)
turbosquid
$6

Combo Door
...e 3d model combo door for download as ma, max, fbx, and blend on turbosquid: 3d models for games, architecture, videos. (1273913)
turbosquid
$225

Eyes-Combo
... available on turbo squid, the world's leading provider of digital 3d models for visualization, films, television, and games.
turbosquid
$55

COMBO (Boots)
... available on turbo squid, the world's leading provider of digital 3d models for visualization, films, television, and games.
turbosquid
$10

Appliances !!COMBO!!
... available on turbo squid, the world's leading provider of digital 3d models for visualization, films, television, and games.
turbosquid
$5

combo chair
... available on turbo squid, the world's leading provider of digital 3d models for visualization, films, television, and games.
turbosquid
$2

Computador Combo
... available on turbo squid, the world's leading provider of digital 3d models for visualization, films, television, and games.
turbosquid
$100

FAHU With Combo Heater
...alty free 3d model fahu with combo heater for download as max on turbosquid: 3d models for games, architecture, videos. (1259461)
Code
turbosquid
$1

Code
...code
turbosquid
royalty free 3d model code for download as on turbosquid: 3d models for games, architecture, videos. (1293119)
3ddd
$1

банкетка code
...e , банкетка , капитоне
производитель
3d_export
$5

Code lock
...code lock
3dexport
realistic hight-poly model of code lock with high quality pbr textures (4096x4096). rendering in v-ray.
3d_export
$5

Code lock
...code lock
3dexport
realistic hight-poly model of code lock with high quality pbr textures (4096x4096). rendering in v-ray.
turbosquid
$10

Code Lock
...
royalty free 3d model code lock for download as max and fbx on turbosquid: 3d models for games, architecture, videos. (1368816)
turbosquid
$30

Code: MRN
... available on turbo squid, the world's leading provider of digital 3d models for visualization, films, television, and games.
3ddd
$1

DV home / CODE
...dv home / code
3ddd
dv home
итальянская фабрика dv home / стул code
3ddd
free

Blastation, Code 27
...ddd
blastation , code 27
диван фабрики blastation. размер 2700х950 h1100. 135 883 polys.
turbosquid
$10

Code Sofa, ENNE
...id
royalty free 3d model code sofa, enne for download as max on turbosquid: 3d models for games, architecture, videos. (1192986)
turbosquid
free

Armani Sport Code
...e 3d model armani sport code for download as ma, obj, and fbx on turbosquid: 3d models for games, architecture, videos. (1204039)
Lock
turbosquid
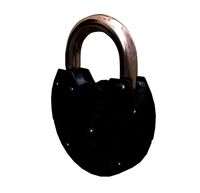
$1

Lock
...ck
turbosquid
royalty free 3d model lock for download as fbx on turbosquid: 3d models for games, architecture, videos. (1286851)
3d_export
$5

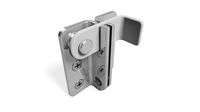
lock handle
...lock handle
3dexport
lock handle
3d_export
$5
hinged lock
...hinged lock
3dexport
hinged lock
turbosquid
$1
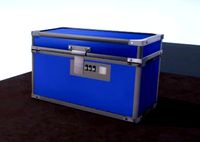
Lock Box with combination lock
...ee 3d model lock box for download as 3ds, obj, fbx, and blend on turbosquid: 3d models for games, architecture, videos. (1215494)
turbosquid
$2
Lock
...
royalty free 3d model lock for download as max, obj, and fbx on turbosquid: 3d models for games, architecture, videos. (1452660)
turbosquid
$35

Lock
... available on turbo squid, the world's leading provider of digital 3d models for visualization, films, television, and games.
turbosquid
$24

lock
... available on turbo squid, the world's leading provider of digital 3d models for visualization, films, television, and games.
turbosquid
$10

Lock
... available on turbo squid, the world's leading provider of digital 3d models for visualization, films, television, and games.
turbosquid
$6

Lock
... available on turbo squid, the world's leading provider of digital 3d models for visualization, films, television, and games.
turbosquid
$4

Lock
... available on turbo squid, the world's leading provider of digital 3d models for visualization, films, television, and games.