Thingiverse
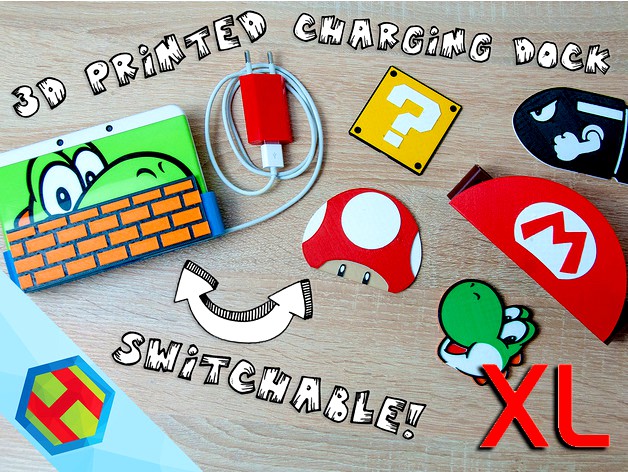
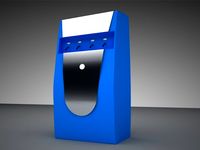
Charging dock for Nintendo New 3DS XL
by Thingiverse
Last crawled date: 4 years, 1 month ago
This is for the New 3DS XL! If you're looking for New 3DS version, go here.
WARNING: Since I do not own the XL version, I haven't been able to test this myself! I've had one feedback telling me the fit is ok. If you do print it, please get back and let me know if there are any issues.
A fully functional charging dock for the New 3DS XL! It also comes with swappable plates that you can print in multiple colors. Best of all, this works with most printers, because you simply have to change filament at certain heights.
I took extra care and designed it in such a way that you don't need any special tools or components, just a bit of wire and spring from an old pen. Everything is also printable 100% without any supports.
I've also made a build video if you're interested:https://youtu.be/3dQFI1BClfM
Adjusting the pin contacts
When you're adjusting the contacts on top of the charger, try to shape it in such a way to create a V shape. It can be a bit tricky and you'll probably have to try it a few times before it makes a good contact. Don't despair!
Adjusting the spring
The stiffness of the spring is very important. If the spring is too strong, it will tilt the 3DS and lose contact. If it's not strong enough, it won't push against the charging contacts. You will have to tinker with the spring until you get a good fit. I did it by cutting away one loop at a time, putting the spring back in and trying if it works. Keep doing it until you get a reliable contact.
Multi-color printing
For printing in multiple colors, you need to slice the model and save it as normal gcode. Then, you have to insert the M600 command. You can do this manually by opening the gcode, but the easiest way is to use the ColorPrint tool by Prusa. You simply upload the file, set height changes and save the new gcode. Here's the tool:https://www.prusaprinters.org/color-print/
If you're intereseted on how to design things for multi-color printing, you can watch my video that explains everything:https://youtu.be/KsbE2vEzS7U
I'm also including a blank plate so that you can design your own. Import it into CAD of your choice (I recommend Tinkercad or Fusion360). The first layer is 2mm thick, every subsequent layer should be 0.8mm.
Here's a list of heights and colors for each particular plate:
Question block
Start with BLACK, then
at z2.2 change to YELLOW,
at z3.0 change to WHITE.
Mario hat
Start with RED, then
at z2.2 change to WHITE,
at z3.0 change to RED.
Brick
Start with BLACK, then
at z2.2 change to BROWN.
Bullet Bill
Start with WHITE, then
at z2.2 change to BLACK,
at z3.0 change to WHITE.
Yoshi
Start with ORANGE, then
at z2.2 change to RED,
at z3.0 change to WHITE,
at z3.8 change to GREEN,
at z4.6 change to BLACK.
Mushroom
Start with BEIGE/SKIN, then
at z2.2 change to WHITE,
at z3.0 change to BLACK,
at z3.8 change to RED,
at z4.6 change to WHITE.
Similar models
thingiverse
free

el_Jimador_Keychain by Cletus67
...ngle extruder printer. i printed the keychain black on white. the resolution should probably be 0.1 or 0.2 to accent the details.
thingiverse
free

Apogee_Keychain by Cletus67
...er. i printed the keychain red on black and it looks perfect. the resolution should probably be 0.1 or 0.1 to accent the details.
thingiverse
free

Tequila Patron Keychain by Cletus67
...ingle extruder printer. i printed the keychain black on white. the resolution should probably be 0.1 since to accent the details.
thingiverse
free

Cabo Wabo Keychain by Cletus67
...ngle extruder printer. i printed the keychain black on white. the resolution should probably be 0.1 or 0.2 to accent the details.
thingiverse
free

Jim_Beam_Keychain by Cletus67
...inter. i printed the keychain black on white - looks awesome!
the resolution should probably be 0.1 or 0.2 to accent the details.
thingiverse
free

Jack_Daniels_Keychain by Cletus67
...inter. i printed the keychain white on black (looks awesome!). the resolution should probably be 0.1 since to accent the details.
thingiverse
free

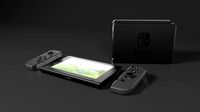
New 3DS XL Charging Stand by saturn639
... to support any charger, but feel free to customize if you want a more snug fit. this print is compatible with smaller print beds
thingiverse
free

Pokeball with Stand
... batteries and a charging module.
another headphone jack serves as the charging plug, since i also used it with my obliviondrone.
thingiverse
free

Nintendo Switch (Plate) for MMU or Dual Extruder
...i printed it red on white and white on red and decided that the white on red combination worked best for my son's room. ymmv.
thingiverse
free

Mr. Robot Logo plate by 1stgenbrz
...ting the logo in red. for a simpler option, just print in white and paint the logo red.
dimensions are 1 3/8" x 4 7/8"
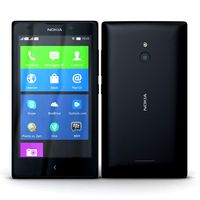
Xl
turbosquid
$33
Nokia XL and XL Dual Orange
... available on turbo squid, the world's leading provider of digital 3d models for visualization, films, television, and games.
turbosquid
$29
Nokia XL and XL Dual Yellow
... available on turbo squid, the world's leading provider of digital 3d models for visualization, films, television, and games.
turbosquid
$29
Nokia XL and XL Dual Cyan
... available on turbo squid, the world's leading provider of digital 3d models for visualization, films, television, and games.
turbosquid
$29
Nokia XL and XL Dual Black
... available on turbo squid, the world's leading provider of digital 3d models for visualization, films, television, and games.
design_connected
$13
Diana XL
...diana xl
designconnected
delightfull diana xl computer generated 3d model.
3ddd
$1
модель XL
...модель xl
3ddd
sklo+glas , дверь
стеклянные двери фирмы sklo+glas , модель xl
turbosquid
$69

Nokia XL and XL Dual All Color
... available on turbo squid, the world's leading provider of digital 3d models for visualization, films, television, and games.
turbosquid
$33
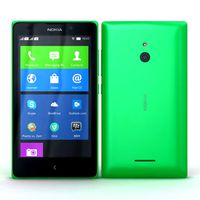
Nokia XL and XL Dual Bright Green
... available on turbo squid, the world's leading provider of digital 3d models for visualization, films, television, and games.
3ddd
$1

Oslo XL LB
...oslo xl lb
3ddd
камин , oslo
камин oslo xl lb
turbosquid
$4

Dice XL
...yalty free 3d model dice xl for download as max, obj, and fbx on turbosquid: 3d models for games, architecture, videos. (1313201)
Dock
design_connected
$20
Docks
...docks
designconnected
gandia blasco docks computer generated 3d model. designed by romero vallejo.
turbosquid
$5

Dock
...squid
royalty free 3d model dock for download as 3ds and fbx on turbosquid: 3d models for games, architecture, videos. (1159328)
turbosquid
$20

Dock
... available on turbo squid, the world's leading provider of digital 3d models for visualization, films, television, and games.
turbosquid
$10
Dock
... available on turbo squid, the world's leading provider of digital 3d models for visualization, films, television, and games.
turbosquid
$10
Dock
... available on turbo squid, the world's leading provider of digital 3d models for visualization, films, television, and games.
turbosquid
$2
dock
... available on turbo squid, the world's leading provider of digital 3d models for visualization, films, television, and games.
3d_export
$65

dock
...dock
3dexport
simple rendering of the scene file
design_connected
$16
Dry-Dock
...dry-dock
designconnected
restoration hardware dry-dock computer generated 3d model.
3d_ocean
$6
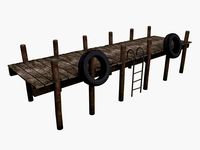
The Boat Dock
...s you see are separate, so you can remove the tyres and ladder and extend out the main section of the dock to make a long section
3ddd
$1
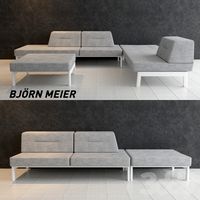
Bjorn Meier docks
... docks , модульный
bjorn meier docks
vray+corona
Nintendo
turbosquid
$25

Nintendo
...del super nintendo/ tv for download as 3ds, max, obj, and fbx on turbosquid: 3d models for games, architecture, videos. (1213066)
3d_export
$40

nintendo switch
...nintendo switch
3dexport
3d model of nintendo switch, made in blender.
3d_ocean
$18

Nintendo Wii
...h quality renders, close ups and animations. the polycount is manualy optimized so it’s not hardware intensive when importing ...
3d_export
$25

The heart of nintendo
...the heart of nintendo
3dexport
do you need to know how nintendo is inside? that's it!
turbosquid
$10
SUPER NINTENDO
...uid
royalty free 3d model super nintendo for download as c4d on turbosquid: 3d models for games, architecture, videos. (1291068)
turbosquid
$19
Nintendo Switch
...ree 3d model nintendo switch for download as ma, obj, and fbx on turbosquid: 3d models for games, architecture, videos. (1169424)
turbosquid
$8

Nintendo Switch
...ee 3d model nintendo switch for download as fbx, dae, and obj on turbosquid: 3d models for games, architecture, videos. (1617647)
turbosquid
$200
Nintendo Wii
... available on turbo squid, the world's leading provider of digital 3d models for visualization, films, television, and games.
turbosquid
$99
Nintendo Wii
... available on turbo squid, the world's leading provider of digital 3d models for visualization, films, television, and games.
turbosquid
$99

Nintendo 3DS
... available on turbo squid, the world's leading provider of digital 3d models for visualization, films, television, and games.
Charging
3d_export
$7
pneumatic charging car
...pneumatic charging car
3dexport
pneumatic charging car
turbosquid
$1

Charge Sword
...uid
royalty free 3d model charge sword for download as blend on turbosquid: 3d models for games, architecture, videos. (1196298)
turbosquid
$5

Overhead charge
...lty free 3d model overhead charge for download as fbx and obj on turbosquid: 3d models for games, architecture, videos. (1695997)
3d_export
$65
charging station
...charging station
3dexport
simple rendering of the scene file
3d_export
$65

soldiers charge
...soldiers charge
3dexport
simple rendering of the scene file
3d_export
$5
Charging Booth 3D Model
...charging booth 3d model
3dexport
charging booth
charging booth 3d model kanika 60018 3dexport
cg_studio
$30

Electric Vehicle Car Charging Station without Charging Units3d model
...ic vehicle car charging station without charging units 3d model, royalty free license available, instant download after purchase.
turbosquid
$29

Electric Vehicle / Car Charging Station without Charging Units(1)
... available on turbo squid, the world's leading provider of digital 3d models for visualization, films, television, and games.
3d_export
$5
glass battery with charge divisions
...glass battery with charge divisions
3dexport
glass battery with charge divisions, materials for eevee, under the subdiv.
turbosquid
$39

JBL Charge 3
... free 3d model jbl charge 3 for download as max, fbx, and obj on turbosquid: 3d models for games, architecture, videos. (1698833)
New
turbosquid
$119
New New Beetle
... available on turbo squid, the world's leading provider of digital 3d models for visualization, films, television, and games.
3d_export
$5

New-feather
...new-feather
3dexport
new-feather
3d_export
$6
new style
...new style
3dexport
new style room
3ddd
free
New Items
...ew items
3ddd
new items , барный
барный стул от китайского производителя фирмы new items
3d_export
$6

Logo new
...logo new
3dexport
new american style logo
3d_export
$10
New jersey
...new jersey
3dexport
new jersey stp and stl format
design_connected
$20
New Deal
...new deal
designconnected
new deal computer generated 3d model.
3d_ocean
$15
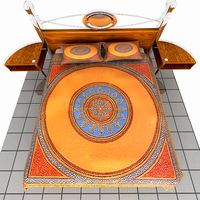
New bed
... for this bed all this file format include in zip file 3ds,obj,max,zip file change material and re-size very easy very for render
3ddd
free
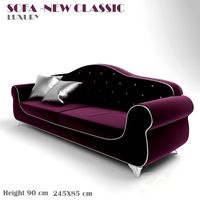
Sofa-New Classic
...sofa-new classic
3ddd
new classic
sofa,new classic
design_connected
$13
New Antiques
...new antiques
designconnected
cappellini new antiques computer generated 3d model. designed by wanders, marcel.