GrabCAD

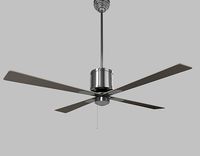
Ceiling fan assembly
by GrabCAD
Last crawled date: 1 year, 11 months ago
This is an assembly based on a ceiling fan I had at home, done as an assignment for a CAD subect at my local university. It's done with Solidworks 2019, and it includes a dynamic simulation in which drag is simulated based on the rotating speed of its blades. Techer graded it with a 3.5/4, so I guess it shouldn't have major flaws.
Most of the fasteners come from Toolbox. Bearings, some nut and some bolts are based in some models from catalogues in pdf attached in the folder "Grabcad". In case of not being able to open screws and nuts from Toolbox, you can model them with the info in the pdf's, knowing the drill diameter and depth.
Simulation: This thing was meant to have the motor working at 250 rpm, achieving that speed in around 45 s (solidworks motion, motion analysis). Feel free to play with material properties, speeds, etc.
Ok, let's go with the translation. "Spanish" -> English.
"Acople" -> Couple
"Arandela" -> Washer
"Aspa" -> Blade
"Bombilla" -> Bulb
"Carcasa" -> Carcass
"Eje" -> Shaft
"Ensamblaje" -> Assembly
"Estator" -> Stator, that static thing in electric motors
"Pasador" -> Nut
"Perno" -> Nut
"Soporte inferior bombilla" -> The lower "bracket" for the lamp holder. "Soporte bombilla" are the pieces that make the lamp holder
"portalámparas" -> Lamp holder
"Tornillo carcasa exterior" -> Screw for the outer central carcass
"Tubo soporte" -> Downrod
"Tuercas eje" -> Nuts for the shaft
"Union aspa" -> Piece that connects the blades with the engine carcass
"Union tubo silentblock" -> Piece that connects the downrod with the silentblock
"Ventilador" -> The ceiling fan assembly
"Partes moviles" -> It's the assembly with the rotating parts
"pasador" -> Fastener
"Rodamiento" -> Bearing
IMPORTANT NOTES:
1. If you want to play with different blade thicknesses or number of blades, don't forget to modify the function in SOLIDWORKS Motion. Otherwise you'll get wrong results for the desired thickness and blade number (I assume that you know what you're doing if you've read this far and understood this).
2. This is not intended to be commercialized, I'm not responsible for anything that might happen, in case that you manage to manufacture this product with the very same specifications of this model uploaded to Grabcad.
Similar models
cg_trader
$8

Kelsi 5 - Blade Standard Ceiling Fan with Pull Chain
...nopy body downrod diameter furniture decor lighting fans all bronze blades architectural ceiling lighting ceiling fan ceiling fan
3dwarehouse
free

Ventilador techo (Ceiling fan)
...ventilador techo (ceiling fan)
3dwarehouse
ventilador de techo de cinco aspas ceiling five-bladed fan
grabcad
free

Ceiling Fan
...box, two cone shaped sliders and blades. the blades are added with the motion in it. it can be rotated as per the required speed.
thingiverse
free

Ceiling Fan Yoke by bruckj
...will work with a large number of different models and vendors.
i am using slic3r to generate g-code.
sketchup files are included.
cg_trader
$11

Godbey 5 - Blade Standard Ceiling Fan with Pull Chain - 2 colour
... ceiling fan pull chain flush mount hanger ceilings mounting wind architectural lighting ceiling lighting ceiling fan ceiling fan
3dwarehouse
free

Celing Fan
...site. #abanico_de_cielo #aspas #bedroom #blades #ceiling #dormitorio #fan #living_room #madera #sala_de_estar #ventilador #wooden
3dwarehouse
free

Simple ceiling fan in motion
...ehouse
a ceiling mounted fan with a circle to simulate motion. #architecture #ceiling #details #fan #interior #lighting #mounted
grabcad
free

Bolt and Nut Assembly
...bolt and nut assembly
grabcad
>on process for motion simulation<
thingiverse
free

Eje y pasador para bobina de filamento by daviddaniel
...by daviddaniel
thingiverse
eje para colocar en los soportes de la bobina de filamento para la prusa i3. el pasador es opcional.
grabcad
free

4 Blade Ceiling Fan
...4 blade ceiling fan
grabcad
assembled model of a ceiling fan.....
Ceiling
3d_ocean
$5
ceiling lamp
...ceiling lamp
3docean
ceiling decoration lamp light
ceiling lamp
3ddd
$1
Ceil - Lamp
...ceil - lamp
3ddd
mouhamad asswad , ceil
ceil - lamp from i max render
3d_export
$269
ceiling lamp
...ceiling lamp
3dexport
ceiling lamp
3ddd
free

ceiling light
...ceiling light
3ddd
ceiling light
3d_export
$10

ceiling light
...ceiling light
3dexport
ceiling light branches
3ddd
$1
Ceiling Lamp
...ceiling lamp
3ddd
подвес
ceiling lamp
3d_ocean
$6
Ceiling fan
...ce blades ceiling ceiling fan cool cooling fan fixture
ceiling fan created in cinema4d. comes with various other formats as well.
turbosquid
$20

Plaster ceiling ornament, ceiling medallion
...iling ornament, ceiling medallion for download as max and obj on turbosquid: 3d models for games, architecture, videos. (1376554)
turbosquid
$17

Ceiling
... free 3d model ceiling for download as max, obj, fbx, and stl on turbosquid: 3d models for games, architecture, videos. (1367286)
3d_export
$5

ceiling fan
...ceiling fan
3dexport
a simple ceiling fan model.
Fan
3d_export
$5

fan
...fan
3dexport
fan 3d model, table fan, fan, electric fan, ventilator
archibase_planet
free

Fan
...fan
archibase planet
fan large fan
fan out n260707 - 3d model for interior 3d visualization.
archibase_planet
free

Fan
...fan
archibase planet
fan ceiling fan ventilator
fan stealth n300615 - 3d model (*.gsm+*.3ds) for interior 3d visualization.
3d_export
$15

fan
...fan
3dexport
is an ancient fan
3ddd
$1

Fan-C-Fan by marco gallegos
...n-c-fan by marco gallegos
3ddd
вентилятор , marco gallegos
fan-c-fan by marco gallegos
3d_export
$10

fan
...fan
3dexport
a detailed fan designed for home or space blowing is now available for only 19.99!
turbosquid
$1

Fan
...fan
turbosquid
free 3d model fan for download as on turbosquid: 3d models for games, architecture, videos. (1427865)
turbosquid
$14

Fan
...fan
turbosquid
royalty free 3d model fan for download as on turbosquid: 3d models for games, architecture, videos. (1415642)
3ddd
$1

Светильник Fan
...светильник fan
3ddd
fan , italamp
светильник fan, производитель italamp
turbosquid
$25

Fan
...fan
turbosquid
royalty free 3d model fan for download as c4d on turbosquid: 3d models for games, architecture, videos. (1483246)
Assembly
3d_export
$7
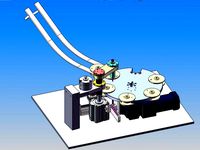
Electronic product assembly machine assembly machine
...electronic product assembly machine assembly machine
3dexport
electronic product assembly machine assembly machine
3d_export
$15
generator assembly line
...ced and assembled in the form of module block. it is a demonstration project of generator assembly. welcome to download and learn
3d_export
$10
elevator traction machine assembly line motor assembly process
... traction machine assembly line motor assembly process
3dexport
elevator traction machine assembly line (motor assembly process)
3d_export
$16
pin assembly machine
...pin assembly machine
3dexport
pin assembly machine
3d_export
$7
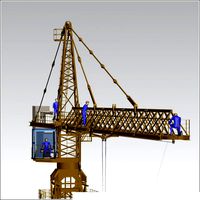
tower-crane-assembly
...tower-crane-assembly
3dexport
tower-crane-assembly
turbosquid
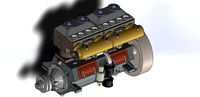
$100

Engine Assembly
...id
royalty free 3d model engine assembly for download as stl on turbosquid: 3d models for games, architecture, videos. (1658296)
turbosquid
$100

Engine Assembly
...id
royalty free 3d model engine assembly for download as stl on turbosquid: 3d models for games, architecture, videos. (1658293)
turbosquid
$100

Engine Assembly
...id
royalty free 3d model engine assembly for download as stl on turbosquid: 3d models for games, architecture, videos. (1658291)
turbosquid
$75
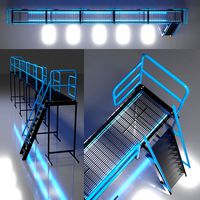
Platform Assembly
...royalty free 3d model platform assembly for download as blend on turbosquid: 3d models for games, architecture, videos. (1472939)
turbosquid
$15
generator assembly
...y free 3d model generator assembly for download as and sldas on turbosquid: 3d models for games, architecture, videos. (1469469)