Thingiverse
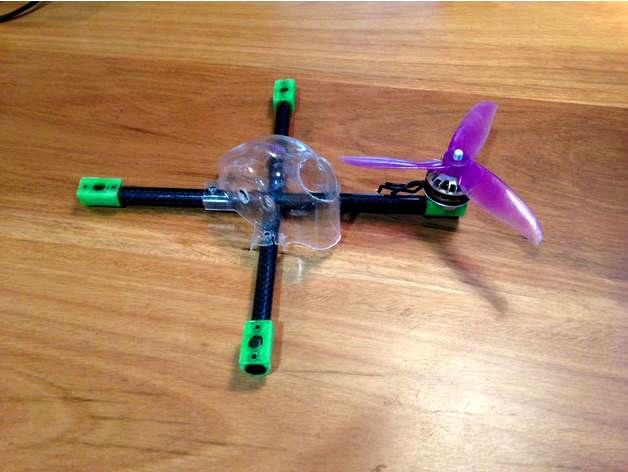
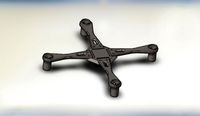
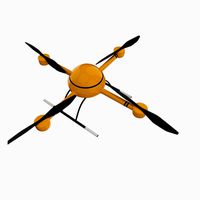
Carbon Fibre Tube Quadcopter - Kraken Pod by MantleQuads
by Thingiverse
Last crawled date: 3 years ago
UPDATE: Both V1 tube frames have been broken due to the carbon tubes not being properly secured and reinforced. I am working on a second revision that will use two small carbon plates to reinforce the arms, rather than relying on a big blob of epoxy.
Inspired by the Bexamous tube frame: https://imgur.com/a/hEevI
Final frame weights:
5" 200 size - 43g with a 2mm Kraken pod (31g without)
6" 230 size - 55g with a 3mm Kraken pod (34g without)
To make a frame you will need:
4x 10mm_tube_16mm_mount (the part the motors mount on to)
1x 10mm_tube_Kraken template (this part is used as a template for drilling the board and pod holes and filing the notch)
10mm OD, 8mm ID carbon fibre tube, length of your choosing. I get mine here: http://www.ebay.com.au/itm/1Pc-Roll-Wrapped-Carbon-Fiber-Tube-3K-8mm-x-10mm-X-500mm-For-Multicopter-DIY-/131665162489?hash=item1ea7daf0f9:g:i3MAAOSwNphWXWZJ
Epoxy, I used 5 minute epoxy.
Optionally, a Kraken pod, I find the 3mm pod to be indestructible but the thinner pods are much lighter. I'm currently working on my own TPU pod that will fit a 50x50mm mounting pattern. https://boltrc.com.au/index.php?id_product=162&controller=product&search_query=kraken+pod&results=15
How to put it all together: (Repeat steps 1,2,3,4. You will need to make two tubes)
NOTE: Carbon fibre dust is not good, avoid using rotary tools such as a dremel tool because it will throw dust in the air. A drill, hacksaw and a file are all that will be needed for the build and are all safe to use as long as the carbon is kept wet. I cut and drill my carbon outside spraying the tool and carbon tube with water frequently.
Tools:
Hacksaw
Drill
File
Water proof fine sanding paper (optional)
Measure
Measure a section of carbon tube, wrap the area to be cut with masking tape. For reference, I use two 250mm long tubes for a 6" and 220mm for a 5", both fitting a Kraken pod.
Cut
Cut the tubing as desired with a hacksaw, keeping the tube and saw wet so no carbon particles escape. You may have to roll the tube around to make the cut. If the end of the tube is left rough or uneven wet the sand paper and smooth out the tip of the carbon tube.
Drilling
Slide the template block on to a tube, lining the middle of the notch up with the centre of the tube. Place a motor mount on each end of the tube, ensuring that the end of the tube is level with the end of the motor mount. Ensure that both mounts and the template are correctly placed, you don't want misaligned holes. Drill a small pilot hole through all holes on one side of the tube, I use a 1/16 size bit. Repeat on the other side and follow up with a larger drill bit to widen the original holes so that they can all fit a M3 bolt. (Using a pilot hole minimises splitting of the carbon.) Wet the tube and drill bits as required.
Filing
For this task I use a 4mm wide file that is about 200mm long. Wet the notch and file and begin to wear at the exposed carbon in the notch with the side of the file. remove all carbon from the notch and attempt to make the edges as smooth and straight as possible.
Assembly
Remove the template and place all motor mounts on the ends of each tube, lined up with the holes. Notch the two carbon pieces together and check they will fit smoothly and correctly. Begin to mix the epoxy. (I use a broken prop for this, actually very good for scooping up a little bit of epoxy and applying it.) Coat the edges of the exposed notch on each tube with epoxy, Apply epoxy to the gap between arms at the centre of the frame as well as the top and bottom of where the notches meet. (Bexamous' guide has pictures detailing this process and shows how much epoxy should be used) To make sure the frame comes out straight I like to flip it over so the mounting surface of the motor mounts is upside down, then I screw on a Kraken pod to make sure it holds a good X shape. Allow the epoxy to cure for at least about 12 hours, preferably in a warm dry place.
Similar models
thingiverse
free

T-Bit by sebWW2
....asp?idproduct=80945
before drilling two holes per carbon tube i put in the tubes to make sure t-bit and tube line up perfectly.
thingiverse
free

4mm bowden tube end holder by apell
...h with the 4mm drill bit, then it may or may not hold the tube properly in place.
use m4x8mm screws for mounting to 2020 profile.
thingiverse
free

Tubequad
...ly, and will be for 12x12 mounting pattern. the carbon tube, frame, and motor mounts were glued together using a two part epoxy..
thingiverse
free

CARBON TUBE QUADCOPTER FRAME 10MM by giek2000
...for 10mm tube too. because props overlap you could make a 5" 170 racer.
comes with 19mm, 16mm, and 12mm spaced motor mounts.
thingiverse
free

Thrust bench by Tiktiki
...ght to get a good reading.
printable motor mounts:http://www.thingiverse.com/thing:723234http://www.thingiverse.com/thing:1459883
thingiverse
free

Cutting template for slots in half inch tube by bshephard
...a hose clamp so i made a pair of these to use as a template and to hold the pipe in the vice while i cut the slots with a hacksaw
thingiverse
free

Domino by R87Mavric
...angular domino keys after gluing templates on keys.
fill holes with epoxy glue and liquid dye to desired color.
polish and enjoy!
grabcad
free

drill bit
...drill bit
grabcad
drill bits are cutting tools used to create cylindrical holes
thingiverse
free

reprapguru Y plate replacement by ToddCarr
...ad to make two holes on the end slightly larger to keep the heatbed alignment but all in all it is fine.
i used 1.5 mm aluminum.
grabcad
free

Drill Bit
...drill bit
grabcad
drill bits are cutting tools used to remove material to create holes.
Mantlequads
thingiverse
free

Locust 6" by MantleQuads
... long as credit is given to the original design. please contact me if you are interested in using any of my designs commercially.
thingiverse
free

BOLT210 Race Runcam 3 40 degree mount by MantleQuads
...rips of velcro tape on the top of the mount and bottom of the rc3 to make sure the camera won't eject easily in a hard crash.
thingiverse
free

Reverie by MantleQuads
... long as credit is given to the original design. please contact me if you are interested in using any of my designs commercially.
thingiverse
free

Locust 4" by MantleQuads
... long as credit is given to the original design. please contact me if you are interested in using any of my designs commercially.
thingiverse
free

Locust 5" by MantleQuads
... long as credit is given to the original design. please contact me if you are interested in using any of my designs commercially.
thingiverse
free

Jackal 5" by MantleQuads
... long as credit is given to the original design. please contact me if you are interested in using any of my designs commercially.
Kraken
turbosquid
$10

Kraken
...oyalty free 3d model kraken for download as 3ds, obj, and fbx on turbosquid: 3d models for games, architecture, videos. (1401448)
3d_export
$5

rum kraken
...rum kraken
3dexport
3d model rum "kraken"
3d_export
$5

razer kraken
...razer kraken
3dexport
razer kraken headphones, modeled in cinema 4d, render in corona
turbosquid
$3

Mighty Hammer Kraken
...ree 3d model mighty hammer kraken for download as fbx and obj on turbosquid: 3d models for games, architecture, videos. (1611798)
turbosquid
$35

Octopus/Kraken pearl
... available on turbo squid, the world's leading provider of digital 3d models for visualization, films, television, and games.
3d_export
$5

Kraken two-handed sword
...kraken two-handed sword
3dexport
heavy two-handed sword. the height of the sword is 1.5 meters
3d_ocean
$20

Monster Creature - Clawler
...3docean alien creature melee fighter monster monster creature – kraken shell clawler head – from 1,538 to 1,572mil poly...
3d_ocean
$3

Square Scales Seamless Texture
...scales seamless texture 3docean aqua cartoon creature fin fish kraken mermaid merman monster ocean octopus scales scaly sea sea...
3d_export
$5

ancient sea chest for a game project low-poly
...other things. on top of the chest is a kraken with ruby stones for eyes. the chest is static....
thingiverse
free

Kraken by Kush
...r making the tinkercad tutorial for the kraken. here is the link to it:https://www.tinkercad.com/quests/adueoggzo9p-lesson-kraken
Fibre
turbosquid
$39

Natural fibre carry Bags
... available on turbo squid, the world's leading provider of digital 3d models for visualization, films, television, and games.
turbosquid
$24

Crinoline Chair With Armrests and Polyethylene Fibre
...hair with armrests and polyethylene fibre for download as max on turbosquid: 3d models for games, architecture, videos. (1390035)
turbosquid
$49

Futuristic Carbon Fibre Panels (PBR)
...istic carbon fibre panels (pbr) for download as fbx and blend on turbosquid: 3d models for games, architecture, videos. (1212926)
3ddd
$1

Resident "FIBRE LIGHT - BOTTLE"
... fibre light , bottle
led. подвесной светильник из ультратонкого углеволокна.
turbosquid
$10
Fibre-reinforced plastic rebar factory
... plastic rebar factory for download as mat, max, obj, and fbx on turbosquid: 3d models for games, architecture, videos. (1297054)
turbosquid
$45

Carbon fibre floor standing speakers
... available on turbo squid, the world's leading provider of digital 3d models for visualization, films, television, and games.
turbosquid
$10

Cedrimartini Ufo Glass-fibre Pendant Lamp
...cedrimartini ufo glass-fibre pendant lamp for download as max on turbosquid: 3d models for games, architecture, videos. (1386392)
3ddd
$1

Покрытие "Fibres de Cotex" (часть 1)
...uot; ткани. покрытие скрывает дефекты стен, не впитывает запахи, не выгорает, обеспечивает дополнительную тепло- и звукоизоляцию.
3ddd
$1

Покрытие "Fibres de Cotex" (часть 2)
...uot; ткани. покрытие скрывает дефекты стен, не впитывает запахи, не выгорает, обеспечивает дополнительную тепло- и звукоизоляцию.
3ddd
$1

Zanotta Undercover Sofa
...polyester fibre. removable quilted cover with heat bound polyester fibre in fabric or...
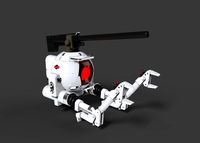
Quadcopter
3d_export
$5
quadcopter
...quadcopter
3dexport
futuristic quadcopter design.<br>original design davidflo 77
turbosquid
$19
quadcopter
...lty free 3d model quadcopter for download as max, ma, and obj on turbosquid: 3d models for games, architecture, videos. (1591426)
turbosquid
$25
QuadCopter
... available on turbo squid, the world's leading provider of digital 3d models for visualization, films, television, and games.
3d_export
$5
Quadcopter 3D Model
...quadcopter 3d model
3dexport
quadcopter studio shaders
quadcopter 3d model vortex333 93968 3dexport
3d_export
$5

Quadcopter 3D Model
...quadcopter 3d model
3dexport
quadcopter aircraft helicopter
quadcopter 3d model greatghost 94019 3dexport
3d_export
$18
passenger quadcopter
... a multicopter is an aircraft built according to a helicopter scheme, with three or more rotors. previews rendered with redshift.
turbosquid
$159
Quadcopter Animated.
... available on turbo squid, the world's leading provider of digital 3d models for visualization, films, television, and games.
turbosquid
$19
Drone Quadcopter
... available on turbo squid, the world's leading provider of digital 3d models for visualization, films, television, and games.
turbosquid
$12
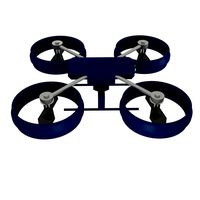
Drone Quadcopter
... available on turbo squid, the world's leading provider of digital 3d models for visualization, films, television, and games.
3d_export
$29

Quadcopter
...
questions about the continuation of the collection or the model can be asked here:<br>https://www.artstation.com/evgen_beg
Pod
design_connected
$13

Pod
...pod
designconnected
niche modern pod computer generated 3d model. designed by pyles, jeremy.
3d_export
$5

engine pod
...engine pod
3dexport
engine pod
turbosquid
$80
POD
...pod
turbosquid
royalty free 3d model pod for download as 3ds on turbosquid: 3d models for games, architecture, videos. (1234976)
3ddd
$1
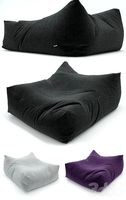
Pod 325
...pod 325
3ddd
пуф
pod 325
turbosquid
$4
PODS
...oyalty free 3d model pods for download as blend, fbx, and obj on turbosquid: 3d models for games, architecture, videos. (1563118)
3d_export
$5

coworking pods
...coworking pods
3dexport
private pods for workspaces, offices
3ddd
$1

Pod Meeting
...pod meeting
3ddd
pod meeting , martela
146cm x 205cm
design_connected
$16

Pod 325
...pod 325
designconnected
department pod 325 computer generated 3d model.
3d_ocean
$5

Ariel Power Pod
...model ariel power pod ariel power pod, modeled in cinema 4d r14 and all materials are included. if you like it, please rate this
3ddd
$1

POD 325
...pod 325
3ddd
кресло мешок
кресло мешок pod 325, room 21 85x50x100cm.
Carbon
3d_ocean
$2
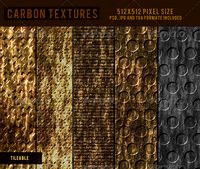
Carbon Textures
...usty shiny tga tileable
a pack of 5 carbon textures. tileable. 512×512 pixel sized. jpg , tga image format given. stay connected
design_connected
$16
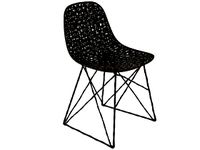
Carbon Chair
...carbon chair
designconnected
moooi carbon chair chairs computer generated 3d model. designed by marcel wanders.
3ddd
$1
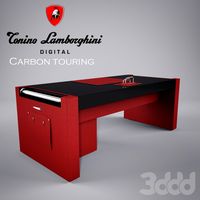
Carbon touring desk
... tonino lamborghini casa , стол
tonino lamborghini casa carbon touring desk
turbosquid
$1
carbonic acid
...id
royalty free 3d model carbonic acid for download as blend on turbosquid: 3d models for games, architecture, videos. (1517834)
design_connected
$7

Carbon Shagreen Box
...carbon shagreen box
designconnected
carbon shagreen box computer generated 3d model.
turbosquid
$90
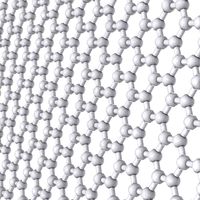
Carbon NanoSheet
... available on turbo squid, the world's leading provider of digital 3d models for visualization, films, television, and games.
turbosquid
$90
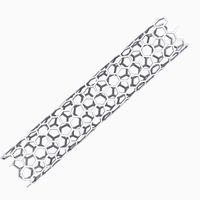
Carbon Nanotube
... available on turbo squid, the world's leading provider of digital 3d models for visualization, films, television, and games.
turbosquid
$40

carbon nanosheet
... available on turbo squid, the world's leading provider of digital 3d models for visualization, films, television, and games.
turbosquid
$38

Carbon Planet
... available on turbo squid, the world's leading provider of digital 3d models for visualization, films, television, and games.
turbosquid
$29

Carbon dioxide
... available on turbo squid, the world's leading provider of digital 3d models for visualization, films, television, and games.
Tube
archibase_planet
free

Tube
...tube
archibase planet
paint tube stationery
tube - 3d model (*.gsm+*.3ds) for interior 3d visualization.
turbosquid
free
tube
...tube
turbosquid
free 3d model tube for download as c4d on turbosquid: 3d models for games, architecture, videos. (1378271)
archibase_planet
free
Tube
...tube
archibase planet
mascara cosmetics make-up
tube 1 - 3d model (*.gsm+*.3ds) for interior 3d visualization.
3d_export
$5
Tube pants
...tube pants
3dexport
tube pants
3d_export
free
Tube
...tube
3dexport
turbosquid
free
TUBE
...
free 3d model tube for download as blend, dae, fbx, and obj on turbosquid: 3d models for games, architecture, videos. (1672199)
turbosquid
$29

tube
...lty free 3d model tube for download as 3ds, obj, c4d, and fbx on turbosquid: 3d models for games, architecture, videos. (1442047)
3ddd
$1

perfume tube
...perfume tube
3ddd
тюбик
perfume tube, тюбик
3ddd
$1
Olivieri Tube
...olivieri tube
3ddd
olivieri
кровать olivieri tube
turbosquid
$22

Tube
... available on turbo squid, the world's leading provider of digital 3d models for visualization, films, television, and games.