Thingiverse

Carbon cleaning adapter and instructions for Mini Cooper vehicles by geofox
by Thingiverse
Last crawled date: 3 years ago
If you make this, please post a picture! I'm still printing these for people. If you do not have a 3D printer, contact me and I can ship you one for cheap. Send me an email at brysonhicks56@gmail.com Thanks!
About
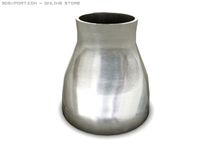
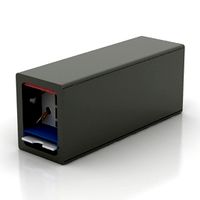
This is an adapter to make carbon blasting the intake valves on a Mini Cooper R56 / N14 much easier. Normally you have to custom make you own, and that can be very difficult. This replaces a $90 adapter made by mini.
I designed this for the N14 engine (The R56 turbo), but it may fit other engines.
Designed for a 1-1/4" vac connection.
If I designed this as one part with 4 mounting holes it would not have fit on the intake ports on the far left and right. Thus, you need two versions. A normal one and a mirrored one.
I made this to fit a cheap homemade blaster. Directions on how to make the blaster are below.
Why carbon clean?
On the N14 engine (and many others) pressure from the crankcase is vented directly into the intake. This pressure includes gasses like oil vapor. This is called the PCV (positive crankcase ventilation) system. The PCV system does a poor job getting rid of the oil vapor before it is vented into the intake. In fact, if you take apart the intake ducting you will often find oil lining the pipes. As a result, these oil droplets hit the hot intake valves and quickly bake on and turn to carbon. In the direct injection engine the gas is injected directly into the cylinder, so nothing ever cleans the intake valves. Over time the carbon builds up on the intake valves and slowly chokes the engine resulting in poor overall performance, misfires, low MPG, and poor idling performance. It can even cause catastrophic failure by allowing the valves to heat up more than normal causing the valve to have a hole burned into the edge resulting in a loss of compression.
If you Mini is over 40K miles, chances are you need it done.
The procedure is done often by Mini, but you are looking at around $600 for that. You save a ton of money by doing it yourself, especially because you will likely have to do this every 40K miles or so to keep it clean and you will already have all of the tools and knowledge from the first time. The first time I did this took me a day because I didn’t know all of the tricks and had a TON of carbon to remove, but I have done it again recently and it only took a few hours.
Obvious disclaimer
This is a fairly advanced project. However, it is perfectly doable and many have done it themselves without a problem. When doing work on your car there is always a risk of breaking something while you are in there. I am not responsible if you break something or damage your engine or car while using my guide. I have included as much information as possible to reduce the chances of something being forgotten or you getting stuck. If you don't feel comfortable changing your wheel, serpentine belt, oil, or coolant this is definitely not the project for you.
What you need
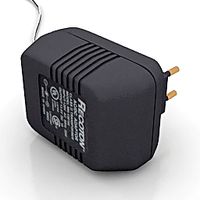
Total cost for the whole project should be around $50 assuming you have an air compressor and shop vac. If you don't have an air compressor I bought this one and it worked perfectly. The blaster and media can be used for other projects. This should just take a trip to harbor freight and home depot/lowes.
Air compressor. Ideally 1.5 horse power or higher and 6 gallons or higher. Less is fine, but you will have to take more breaks for it to recharge.
Shop vac with 1-1/4 hose connector.
Socket set and torque wrench. Need up to 17mm socket.
These adapters, bother normal and mirrored.
Portable abrasive blaster kit from harbor freight.
25lbs Fine walnut shell media (Do NOT use sand). This should be almost double what you need.
Air Blow Gun with 2 ft. Extension from Harbor Freight. Item 68257.
Watts A-827 1/2-in x 1/4-in Brass Pipe Fitting or similar
Watts A-390 1/2-in x 1/2-in Barb Fitting or similar
Electrical tape
A female air compressor fitting like this one
4 Intake manifold gaskets. Part# 11617528340 for the N14 as well as many other engines. Check realoem.com to find what part number you need. This is not required, but they are cheap and if you have a high mileage mini it’s a good idea to change them out.
If you are not very flexible a mirror is handy.
How to
If you are a DIY’er or someone mechanically savvy then this is a fairly straightforward project. Set aside one day for it, but it should only take an afternoon, especially if you have remove the intake manifold before.
(1. Make the blasting tool.
This is fairly easy. Download this guide and it shows how to make the tool. Here are some pictures of mine that shows how everything fits together. Test and make sure it works before use.
(2. Disconnect the battery.
(3. Remove the intake manifold.
This is the guide I use for removing the intake manifold. Here are some tips:
When removing the noise maker from the firewall (step 8) don’t worry about about breaking it. It’s tough. Just yank it off by hand.
When removing the ducting from the throttle housing (step 12), I leave the ducting connected to the throttle housing. It doesn’t get in the way when removing the manifold. I just remove the ducting connected to the angled ducting going into the throttle housing. This is much easier. The red line shows where I disconnect it.
When removing the purge solenoid tubing (step 13) don’t squeeze both sides of the connector. Only squeeze the top half of it. I use a set of pliers and a long flathead screwdriver to pop it off.
When removing the 10mm bolt bracing the manifold (step 14) I find it easiest to just remove the passenger tire and get to the bolt from that side instead of coming under the car. This is fairly easy so don’t over think it. You will have to remove the wheel later anyway. Here it is
Make sure when putting everything back together that both hoses are connected to EPPC solenoid (seen in step 21). They can fall off easily and you will have no boost if that happens.
(4. Check each intake port by eye or using a mirror to find what valves are closed. It is very important that you do NOT blast into a port that has valves that are open. Stuff a rag into all of the port except the one you are working on.
(5. Attach the 3D printed adapter to the engine head using one or two of the nuts you removed earlier. Make sure not to lose the nuts. Attach the vacuumed and blast for 10 seconds. I used 100 PSI. If there is a ton of carbon I found it helpful to stop blasting after a bit and then use a metal stick or similar to pick off big chunks of the carbon. This gave the walnut shell a better surface to attack. Before removing the wand pinch the media feeding hose so that you can just use the air pressure to blow away remaining walnut shell. Keep it pinched until it is removed so that the vacuumed doesn’t pull more walnut shell out.
(6. Once you have cleaned all of the ports with closed valves, you need to rotate the engine to close the other valves. The easiest / safest way to do this is to turn it by hand. Remove the passenger wheel as well as one of the expanding rivets holding the carpet wheel well liner so that you can get to the engine from inside the wheel well. You should see the serpentine belt attached to a pulley with a big bolt in it (16mm if my memory is correct.) Turn the bolt CLOCKWISE a few rounds. Do NOT turn it counterclockwise. This could lessen the bolt and then your timing will be off. This should not take much effort.
(7. Clean the remaining ports.
(8. Put everything back together. 14.7 ft/lbs for the intake manifold nuts and 100 ft/lbs for the wheel.
(9. When you start the engine. It will likely run rough or may take a while to turn over at all. This is because the engine ECU has slowly adjusted to running with the carbon, so now that it can breathe easier it is not used to that and has to adjust. Disconnecting and reconnecting the battery sometimes helps prevent this. It should run normal after 5 min or so, and then after a while should run much better than before the carbon cleaning.
Good luck and have fun saving around $500!
I copied some of this from this guide. I recommend reading it as well.
About
This is an adapter to make carbon blasting the intake valves on a Mini Cooper R56 / N14 much easier. Normally you have to custom make you own, and that can be very difficult. This replaces a $90 adapter made by mini.
I designed this for the N14 engine (The R56 turbo), but it may fit other engines.
Designed for a 1-1/4" vac connection.
If I designed this as one part with 4 mounting holes it would not have fit on the intake ports on the far left and right. Thus, you need two versions. A normal one and a mirrored one.
I made this to fit a cheap homemade blaster. Directions on how to make the blaster are below.
Why carbon clean?
On the N14 engine (and many others) pressure from the crankcase is vented directly into the intake. This pressure includes gasses like oil vapor. This is called the PCV (positive crankcase ventilation) system. The PCV system does a poor job getting rid of the oil vapor before it is vented into the intake. In fact, if you take apart the intake ducting you will often find oil lining the pipes. As a result, these oil droplets hit the hot intake valves and quickly bake on and turn to carbon. In the direct injection engine the gas is injected directly into the cylinder, so nothing ever cleans the intake valves. Over time the carbon builds up on the intake valves and slowly chokes the engine resulting in poor overall performance, misfires, low MPG, and poor idling performance. It can even cause catastrophic failure by allowing the valves to heat up more than normal causing the valve to have a hole burned into the edge resulting in a loss of compression.
If you Mini is over 40K miles, chances are you need it done.
The procedure is done often by Mini, but you are looking at around $600 for that. You save a ton of money by doing it yourself, especially because you will likely have to do this every 40K miles or so to keep it clean and you will already have all of the tools and knowledge from the first time. The first time I did this took me a day because I didn’t know all of the tricks and had a TON of carbon to remove, but I have done it again recently and it only took a few hours.
Obvious disclaimer
This is a fairly advanced project. However, it is perfectly doable and many have done it themselves without a problem. When doing work on your car there is always a risk of breaking something while you are in there. I am not responsible if you break something or damage your engine or car while using my guide. I have included as much information as possible to reduce the chances of something being forgotten or you getting stuck. If you don't feel comfortable changing your wheel, serpentine belt, oil, or coolant this is definitely not the project for you.
What you need
Total cost for the whole project should be around $50 assuming you have an air compressor and shop vac. If you don't have an air compressor I bought this one and it worked perfectly. The blaster and media can be used for other projects. This should just take a trip to harbor freight and home depot/lowes.
Air compressor. Ideally 1.5 horse power or higher and 6 gallons or higher. Less is fine, but you will have to take more breaks for it to recharge.
Shop vac with 1-1/4 hose connector.
Socket set and torque wrench. Need up to 17mm socket.
These adapters, bother normal and mirrored.
Portable abrasive blaster kit from harbor freight.
25lbs Fine walnut shell media (Do NOT use sand). This should be almost double what you need.
Air Blow Gun with 2 ft. Extension from Harbor Freight. Item 68257.
Watts A-827 1/2-in x 1/4-in Brass Pipe Fitting or similar
Watts A-390 1/2-in x 1/2-in Barb Fitting or similar
Electrical tape
A female air compressor fitting like this one
4 Intake manifold gaskets. Part# 11617528340 for the N14 as well as many other engines. Check realoem.com to find what part number you need. This is not required, but they are cheap and if you have a high mileage mini it’s a good idea to change them out.
If you are not very flexible a mirror is handy.
How to
If you are a DIY’er or someone mechanically savvy then this is a fairly straightforward project. Set aside one day for it, but it should only take an afternoon, especially if you have remove the intake manifold before.
(1. Make the blasting tool.
This is fairly easy. Download this guide and it shows how to make the tool. Here are some pictures of mine that shows how everything fits together. Test and make sure it works before use.
(2. Disconnect the battery.
(3. Remove the intake manifold.
This is the guide I use for removing the intake manifold. Here are some tips:
When removing the noise maker from the firewall (step 8) don’t worry about about breaking it. It’s tough. Just yank it off by hand.
When removing the ducting from the throttle housing (step 12), I leave the ducting connected to the throttle housing. It doesn’t get in the way when removing the manifold. I just remove the ducting connected to the angled ducting going into the throttle housing. This is much easier. The red line shows where I disconnect it.
When removing the purge solenoid tubing (step 13) don’t squeeze both sides of the connector. Only squeeze the top half of it. I use a set of pliers and a long flathead screwdriver to pop it off.
When removing the 10mm bolt bracing the manifold (step 14) I find it easiest to just remove the passenger tire and get to the bolt from that side instead of coming under the car. This is fairly easy so don’t over think it. You will have to remove the wheel later anyway. Here it is
Make sure when putting everything back together that both hoses are connected to EPPC solenoid (seen in step 21). They can fall off easily and you will have no boost if that happens.
(4. Check each intake port by eye or using a mirror to find what valves are closed. It is very important that you do NOT blast into a port that has valves that are open. Stuff a rag into all of the port except the one you are working on.
(5. Attach the 3D printed adapter to the engine head using one or two of the nuts you removed earlier. Make sure not to lose the nuts. Attach the vacuumed and blast for 10 seconds. I used 100 PSI. If there is a ton of carbon I found it helpful to stop blasting after a bit and then use a metal stick or similar to pick off big chunks of the carbon. This gave the walnut shell a better surface to attack. Before removing the wand pinch the media feeding hose so that you can just use the air pressure to blow away remaining walnut shell. Keep it pinched until it is removed so that the vacuumed doesn’t pull more walnut shell out.
(6. Once you have cleaned all of the ports with closed valves, you need to rotate the engine to close the other valves. The easiest / safest way to do this is to turn it by hand. Remove the passenger wheel as well as one of the expanding rivets holding the carpet wheel well liner so that you can get to the engine from inside the wheel well. You should see the serpentine belt attached to a pulley with a big bolt in it (16mm if my memory is correct.) Turn the bolt CLOCKWISE a few rounds. Do NOT turn it counterclockwise. This could lessen the bolt and then your timing will be off. This should not take much effort.
(7. Clean the remaining ports.
(8. Put everything back together. 14.7 ft/lbs for the intake manifold nuts and 100 ft/lbs for the wheel.
(9. When you start the engine. It will likely run rough or may take a while to turn over at all. This is because the engine ECU has slowly adjusted to running with the carbon, so now that it can breathe easier it is not used to that and has to adjust. Disconnecting and reconnecting the battery sometimes helps prevent this. It should run normal after 5 min or so, and then after a while should run much better than before the carbon cleaning.
Good luck and have fun saving around $500!
I copied some of this from this guide. I recommend reading it as well.
Similar models
thingiverse
free

N54 Intake Port Block off by FrijolesChingon
...od from entering the ports while working on the vehicle and the intake manifold is removed.
great for using when walnut blasting!
grabcad
free

intake manifold. exhaust manifold. Egzoz manifoldu. Emme manifoldu.
...inders. it collects exhaust gases from the exhaust ports of the various cylinders and conducts them to a central exhaust passage.
thingiverse
free

Intake Port Covers for BMW E36 by ki1244
...an m52 engine. it might fit on other models but not sure. used to block the intake ports to the engine to stop debris falling in.
grabcad
free

Formula SAE Carbon Fiber Intake Manifold
...bon fiber intake manifold
grabcad
intake manifold for gxsr600 engine to compete in fsae competition with 20mm intake restrictor.
grabcad
free

Engine intake manifold
...fold is mounted on the cylinder head/block depending on its design. however, it sits between the two cylinder banks in v engines.
cg_trader
$7

Carbon intake manifold
...carbon intake manifold
cg trader
race car intake manifold for super 2000 rally car, 2.0l engines
thingiverse
free

Compressed Air Engine by saleem145
...you are looking for a cheap compressor to power the model, harbor freight supply has one for $8 and it includes a pressure gauge!
thingiverse
free

Craftsman/Porter-Cable oil-less air compressor noise suppressor (muffler) by Revo_Emag
...for compressor heads that use filter/intake part #cac-1371 or similar (see images). this design is also only meant to...
thingiverse
free

Audi VW Intake Valve Carbon Cleaning Tool
... engines. instructions and usage pictures can be found elsewhere.
originally designed to fit a bpy fsi engine.
bpy, 2.0t, s4 3.0l
thingiverse
free

Audi 3.0 TFSI Walnut media blasting adapter
... hole. worked great for my own vehicle. please read up on the forums about the proper procedure before trying to tackle this job.
Geofox
thingiverse
free

Grand County, CO Topo Map by geofox
...grand county, co topo map by geofox
thingiverse
topo map of grand county, co. printed using hatchbox woodfill pla.
thingiverse
free

Convoy L6 Base Stand by geofox
...for filling a full room full of light while working on something. it fairly easy to knock over without and stand, so i made this.
thingiverse
free

Low Voltage Protector Disconnect Enclosure by geofox
...amazon.https://www.amazon.com/dp/b07929y5sz
designed to be mounted with the bolts coming from behind the box and nuts on the top.
thingiverse
free

50mm fan ducting for helping hands soldering by geofox
...ned to allow 50mm fan to be more effective at sucking up soldering fumes. wall thickness is .4mm so it should be one layer thick.
thingiverse
free

Reverse bowden / Filament guide mount / holder by geofox
...gned to allow a standard bowden mount to screw in. works well with my side spool mount. https://www.thingiverse.com/thing:2736335
thingiverse
free

Z height / first layer test by geofox
...ithout having to make a massive first layer. comes in various sizes so you can test only the part of the plate you will be using.
thingiverse
free

Berthoud Pass / Winter Park Resort Colorado Topo Map by geofox
...y geofox
thingiverse
topo map of berthoud pass including winter park resort. z axis scaled 200% to make everything more visible.
thingiverse
free

Side spool mount by geofox
...ur choice) 608 bearings. you may be to sand the bar a little to get it to fit smoothly.
works well with my reverse bowden mount.
thingiverse
free

Ripple, ringing, acceleration Test by geofox
...lines to make ringing very visible and acceleration easy to tune.
print in either vase mode or with a single perimeter no infill.
thingiverse
free

GT2 Idler Pully with chamfered edge by geofox
...ther. i could not find a design that had both so i made one.
includes a spacer so that it will not rub on a frame if applicable.
Cooper
design_connected
$18

Cooper
...cooper
designconnected
lammhults mobel cooper computer generated 3d model. designed by allard, gunilla.
3d_ocean
$39

Mini Cooper
...mini cooper
3docean
cabrioler cooper mini
mini cooper cabrioler
3d_ocean
$3

Vray Cooper
...vray cooper
3docean
vray cooper material for 3dmax
turbosquid
$27

Cooper
... available on turbo squid, the world's leading provider of digital 3d models for visualization, films, television, and games.
3ddd
$1

Frigerio COOPER
... плед
frigerio cooper
диван
ширина-3350мм
высота-650мм
глубина-1250мм
пуф
1050*1050*350мм
3ddd
$1

Frigerio Cooper
...cooper
ширина- 3700 мм.
высота- 650 мм.
глубина- 2600 мм.
в архиве присутствуют оба материала для дивана.
max файл - 2010 версия!
3ddd
$1

frigerio COOPER WINGS
...frigerio cooper wings
3ddd
frigerio
frigerio leather armchair cooper wings
3d_ocean
$55

Mini Cooper
...ts: -.blend, rendered with cycles, as seen in the images; -.obj, with materials and textures applied; -.dae, with materials an...
3d_ocean
$89

Mini Cooper 2011
.../watch?v=cdvah4ot4q8 the 3d model was created on real car base. model is created accurately, in real units of measurement, qua...
3d_export
$29

Mini cooper 3D Model
...del
3dexport
bmw mini cooper car speed sport high detailed poly
high poly model of mini cooper very detailed interrior .
Carbon
3d_ocean
$2

Carbon Textures
...usty shiny tga tileable
a pack of 5 carbon textures. tileable. 512×512 pixel sized. jpg , tga image format given. stay connected
design_connected
$16

Carbon Chair
...carbon chair
designconnected
moooi carbon chair chairs computer generated 3d model. designed by marcel wanders.
3ddd
$1

Carbon touring desk
... tonino lamborghini casa , стол
tonino lamborghini casa carbon touring desk
turbosquid
$1
carbonic acid
...id
royalty free 3d model carbonic acid for download as blend on turbosquid: 3d models for games, architecture, videos. (1517834)
design_connected
$7

Carbon Shagreen Box
...carbon shagreen box
designconnected
carbon shagreen box computer generated 3d model.
turbosquid
$90

Carbon NanoSheet
... available on turbo squid, the world's leading provider of digital 3d models for visualization, films, television, and games.
turbosquid
$90
Carbon Nanotube
... available on turbo squid, the world's leading provider of digital 3d models for visualization, films, television, and games.
turbosquid
$40

carbon nanosheet
... available on turbo squid, the world's leading provider of digital 3d models for visualization, films, television, and games.
turbosquid
$38

Carbon Planet
... available on turbo squid, the world's leading provider of digital 3d models for visualization, films, television, and games.
turbosquid
$29

Carbon dioxide
... available on turbo squid, the world's leading provider of digital 3d models for visualization, films, television, and games.
Instructions
3d_ocean
$5

Instruction pole
...ole signboard
here is the 3d model of instruction pole. model is low poly and good for games texture size – 2048*2048. poly – 381
3d_export
$30

Instructional Smart whiteboard 3D Model
...rt blackboard school education learning academic chalkboard classroom
instructional smart whiteboard 3d model braz 10766 3dexport
turbosquid
$5

instruction table140 cm x 70 cm x 76 cm
...m x 70 cm x 76 cm for download as c4d, 3ds, dxf, fbx, and obj on turbosquid: 3d models for games, architecture, videos. (1593138)
3d_ocean
$10
Realistic Cassette with Rendering Instructions
...ity recording devices acquired the most prestigious in its time, with its unique original design made ??by renowned manufactur...
3d_export
$20
Chest of drawers for laser cutting
...drawers for laser cutting 3dexport the file has assembly instructionsvectors for laser cutting and other product information,personal...
3d_ocean
$49
Lego Tie-vector
...ean
lego maya star wars starwars tie vector
3d lego tie-vector created by instruction step-by-step. included materials, .obj .mb
3d_ocean
$2

Stop Sign Game Asset
...other projects. this asset is uv mapped and comes with textures. package includes: stopsign_new.obj stopsign_old.obj stopsign_...
3d_ocean
$9

House
...4d with an element 3d compatible texture map and instructions ...
3d_ocean
$49
Lego X-wing
...stic shadow star wars toy toys x-wing
3d lego x-wing created by instruction step-by-step. included materials, textures, .obj .mb
3d_ocean
$3

Road Signs and Traffic
...ed speed signals stop sign traffic warnings
20 models of road signs and traffic mental ray render textures of each of the objects
Mini
turbosquid
$10

Mini Mini Luceplan
...
royalty free 3d model mini mini luceplan for download as max on turbosquid: 3d models for games, architecture, videos. (1227359)
3d_ocean
$39
Mini Cooper
...mini cooper
3docean
cabrioler cooper mini
mini cooper cabrioler
3d_export
$30

Mini lathe
...mini lathe
3dexport
mini lathe
3d_export
$5

mini mouse
...mini mouse
3dexport
mini mouse
3d_export
$5

mini house
...mini house
3dexport
mini house
3d_export
free

Mini Mecha
...mini mecha
3dexport
concept of mini mecha
3d_ocean
$20

Mini Gun
...mini gun
3docean
gatling gun gun machine gun mini gun weapon
model of a mini gatling gun.
3ddd
free

Herve mini
... кофейный , herve
http://www.mobiliavenanti.it/ru/products/hervè-mini
3d_export
$5

mini wall
...mini wall
3dexport
mini wall for living room
3d_export
$5

mini bank
...mini bank
3dexport
mini bank 3d model
Adapter
3d_export
$10
Adapter 3D Model
...adapter 3d model
3dexport
adapter
adapter 3d model mur 20260 3dexport
archive3d
free
Adapter socket 3D Model
...dapter socket adapter
adapter socket n090211 - 3d model (*.3ds) for interior 3d visualization.
turbosquid
$400

cell adaptation
...
royalty free 3d model cell adaptation for download as blend on turbosquid: 3d models for games, architecture, videos. (1701655)
archive3d
free
Adapter 3D Model
...ups pc equipment
adapter extron n180813 - 3d model (*.gsm+*.3ds) for interior 3d visualization.
turbosquid
$5
usb adapter
...royalty free 3d model usb adapter for download as ige and stl on turbosquid: 3d models for games, architecture, videos. (1582234)
turbosquid
$15
Power adapter
...free 3d model power adapter for download as max, obj, and fbx on turbosquid: 3d models for games, architecture, videos. (1510024)
turbosquid
$8
USB adapter
...e 3d model usb adapter for download as max, fbx, obj, and dwg on turbosquid: 3d models for games, architecture, videos. (1713542)
turbosquid
$30

adapter.3ds
... available on turbo squid, the world's leading provider of digital 3d models for visualization, films, television, and games.
turbosquid
$15
Nokia Adapter
... available on turbo squid, the world's leading provider of digital 3d models for visualization, films, television, and games.
turbosquid
$15
Universal adapter
... available on turbo squid, the world's leading provider of digital 3d models for visualization, films, television, and games.
Vehicles
3d_export
$30
Vehicle display
...vehicle display
3dexport
vehicle display consists of podium and vehicle cover no vehicle there is a veiled vehicle silhouette
turbosquid
$41

vehicle
... available on turbo squid, the world's leading provider of digital 3d models for visualization, films, television, and games.
turbosquid
$10

vehicle
... available on turbo squid, the world's leading provider of digital 3d models for visualization, films, television, and games.
3d_ocean
$40

Heavy vehicles
...el this model is created with 3ds max 2009 and content .max (3ds max), size: 7,65 mb this model can be used in any scene. enjoy !
3d_export
$6

Trailer Transporter Consignment Vehicle Turnover Vehicle
...trailer transporter consignment vehicle turnover vehicle
3dexport
trailer transporter consignment vehicle turnover vehicle
archive3d
free

Vehicle 3D Model
... sports and recreational vehicle n250714 - 3d model (*.gsm+*.3ds) for interior 3d visualization.
3d_export
$50
Vehicle 3D Model
...vehicle 3d model
3dexport
vehicle
vehicle 3d model fred-13 21262 3dexport
3d_export
$15

special vehicles
...special vehicles
3dexport
3d_export
$10
utility vehicle
...utility vehicle
3dexport
turbosquid
$9

Vehicles pack
...bosquid
royalty free 3d model vehicles pack for download as on turbosquid: 3d models for games, architecture, videos. (1635451)
Cleaning
turbosquid
$29

Clean Bow
...osquid
royalty free 3d model clean bow for download as blend on turbosquid: 3d models for games, architecture, videos. (1257234)
turbosquid
$25

Jacuzzi Clean
...quid
royalty free 3d model jacuzzi clean for download as max on turbosquid: 3d models for games, architecture, videos. (1461249)
turbosquid
$32

Bobcat Clean
... free 3d model bobcat clean for download as max, obj, and fbx on turbosquid: 3d models for games, architecture, videos. (1393706)
turbosquid
$1
Zanbato - Clean
...ree 3d model zanbato - clean for download as ma, obj, and fbx on turbosquid: 3d models for games, architecture, videos. (1328531)
turbosquid
$10

Cleaning Products
...model cleaning products for download as ma, max, fbx, and obj on turbosquid: 3d models for games, architecture, videos. (1559247)
turbosquid
$25

cleaning kit
... available on turbo squid, the world's leading provider of digital 3d models for visualization, films, television, and games.
turbosquid
$20

Cleaning pads
... available on turbo squid, the world's leading provider of digital 3d models for visualization, films, television, and games.
turbosquid
$16

Cleaning Bucket
... available on turbo squid, the world's leading provider of digital 3d models for visualization, films, television, and games.
turbosquid
$10
cleaning bucket
... available on turbo squid, the world's leading provider of digital 3d models for visualization, films, television, and games.
turbosquid
free

Cleaning robot
... available on turbo squid, the world's leading provider of digital 3d models for visualization, films, television, and games.