Thingiverse
Cantilever Laser Engraver by GeoDave
by Thingiverse
Last crawled date: 3 years, 3 months ago
10/20/2020
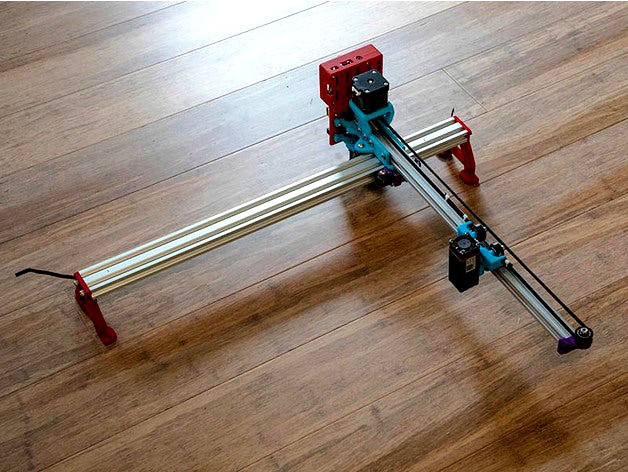
If you do not mount your electronics above the bottom of the 2020 extrusion, you could use a longer 2020 & extend it back further attaching that back screw that holds the plates together with a T-nut in the bottom of the 2020 instead of a locknut. This would give you more support for the cantilever. If you are enclosing your engraver, the enclosure would obviously have to be deeper depending on how far you extend it back.
9/26/2020 Update
Fixed a minor t-nut hole locations that someone spotted on the MotorMount_Above.stl part & replaced it with MotorMount_Above_V3.stl & the new assembly files have _V7 in the name. It was only off .13mm (.0051 inches) at the most, but not really an issue if you have printed the parts already.
Here is very short video of this machine working. https://youtu.be/HgV3grxkY44
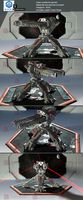
I also added optional CantileverStablizer.stl. New assembly files show how this is assembled & there are 2 photos that show it also. It mounts below the IdlerMount_Above_V3.stl using a M5x20mm screw instead of the M5x12mm for just the IdlerMount. You can use 1 or 2 wheels. If using 1 wheel, you need a M5x30mm screw, one precision washer & a locknut. If using 2 wheels, you need a M5x45mm screw, 2 precision washers, a 3mm spacer & a locknut. If using this optional part, be aware you need a clean surface for the wheel to roll on as an debris it rolls across could affect your laser engraving.
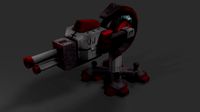
This is a cantilever laser Engraver design based on https://www.modelflying.co.uk/forums/postings.asp?th=147510 . I incorporated most of his design, but made some changes. The main change was moving the cantilever belt to above the 2020 extrusion. My build log can be found here: https://forum.v1engineering.com/t/cantilevered-laser-engraver/19179 You should be able to build this from $160-$200 & even less if you have a lot of the parts already. I used a 600mm length of 2040 & a 500mm length of 2020. 500mm for the cantilever is probably pushing it, but will see how it goes. I have put all the parts together & tested the laser, but have not put it into operation yet. For the electronics, I am currently running grbl firmware on a keyestudio CNC shiled V4 with a raspberry pi 3b Plus connected to it running v1pi (https://jeffeb3.github.io/v1pi/). I will probably switch the electronics to a custom board of the Eleksmaker mana 3-axis board eventually. I used 42.5" of GT2 belt for the cantilever arm & 31.5" for the 2040 motor but left a little extra on there in case I make it longer.
I have uploaded a fusion 360 assembly file as well as a sketchup assembly file so you can see how all the parts go together or modify them. A BOM is also included, but have not double checked the screw & nut count.
Warning:
Be sure to get some good laser safety glasses that protect your eyes against the wave length laser you are using. I found the electronics the most difficult part of this build because of the laser connections. Be sure to understand how to connect your particular laser before attempting this project because you could easily destroy your laser.
If you do not mount your electronics above the bottom of the 2020 extrusion, you could use a longer 2020 & extend it back further attaching that back screw that holds the plates together with a T-nut in the bottom of the 2020 instead of a locknut. This would give you more support for the cantilever. If you are enclosing your engraver, the enclosure would obviously have to be deeper depending on how far you extend it back.
9/26/2020 Update
Fixed a minor t-nut hole locations that someone spotted on the MotorMount_Above.stl part & replaced it with MotorMount_Above_V3.stl & the new assembly files have _V7 in the name. It was only off .13mm (.0051 inches) at the most, but not really an issue if you have printed the parts already.
Here is very short video of this machine working. https://youtu.be/HgV3grxkY44
I also added optional CantileverStablizer.stl. New assembly files show how this is assembled & there are 2 photos that show it also. It mounts below the IdlerMount_Above_V3.stl using a M5x20mm screw instead of the M5x12mm for just the IdlerMount. You can use 1 or 2 wheels. If using 1 wheel, you need a M5x30mm screw, one precision washer & a locknut. If using 2 wheels, you need a M5x45mm screw, 2 precision washers, a 3mm spacer & a locknut. If using this optional part, be aware you need a clean surface for the wheel to roll on as an debris it rolls across could affect your laser engraving.
This is a cantilever laser Engraver design based on https://www.modelflying.co.uk/forums/postings.asp?th=147510 . I incorporated most of his design, but made some changes. The main change was moving the cantilever belt to above the 2020 extrusion. My build log can be found here: https://forum.v1engineering.com/t/cantilevered-laser-engraver/19179 You should be able to build this from $160-$200 & even less if you have a lot of the parts already. I used a 600mm length of 2040 & a 500mm length of 2020. 500mm for the cantilever is probably pushing it, but will see how it goes. I have put all the parts together & tested the laser, but have not put it into operation yet. For the electronics, I am currently running grbl firmware on a keyestudio CNC shiled V4 with a raspberry pi 3b Plus connected to it running v1pi (https://jeffeb3.github.io/v1pi/). I will probably switch the electronics to a custom board of the Eleksmaker mana 3-axis board eventually. I used 42.5" of GT2 belt for the cantilever arm & 31.5" for the 2040 motor but left a little extra on there in case I make it longer.
I have uploaded a fusion 360 assembly file as well as a sketchup assembly file so you can see how all the parts go together or modify them. A BOM is also included, but have not double checked the screw & nut count.
Warning:
Be sure to get some good laser safety glasses that protect your eyes against the wave length laser you are using. I found the electronics the most difficult part of this build because of the laser connections. Be sure to understand how to connect your particular laser before attempting this project because you could easily destroy your laser.
Similar models
thingiverse
free

Cantilever Laser Engraver by FSMMeatball
...
all of the above parts can be found at openbuilds.com or amazon.com. i like the openbuilds low profile bolts, but any will work.
thingiverse
free

2020 to 2040 Profile Jig by EvoLabs
... 3mm x 30mm bolts with t-slot nuts.
useful if you have spare 2020 profile lengths available but don't want to purchase 2040.
thingiverse
free

Laser mounting bracket (OEM-style) for NEJE desktop USB laser engraver (and other brands) by xunker
...g on how much "squish" your first layer has, you may need to clean out the screw and mounting holes with a small knife.
thingiverse
free

kp08 2020 2040 support by blairq
...his is a part of my printer upgrade, but it can be used to fix a kp08 to a 2020 or 2040 support
use m4 nuts, length : undisclosed
thingiverse
free

Back Drop for FABSCAN by Ceb by ghfame
...ember to put the pieces together, you will flip one of the top, one of the bottom and one of the long connectors during assembly.
thingiverse
free

OpenBuilds ACRO Laser system - Panels by samCV
...e during 3d printing.
check out the youtube video for assembly instructions, parts and just the overall machine in general.
enjoy
thingiverse
free

Z Belt Idler Tension & Micro Adjust Z Limit Switch for Zyltech Gear V3 3D Printer by GeoDave
.... you could also use a little longer m3 screw.
i included stl files & the fusion 360 files if you want to modify these parts
thingiverse
free

CNC Pendant with wheel by menyiv
...avers, lasers, ...
usb connection
arduino uno inside
dead man safety switch
if you have any question you can write to discussion.
grabcad
free

OpenBuilds ACRO Laser system - Panels
...during 3d printing.
check out the youtube video for assembly instructions, parts and just the overall machine in general.
enjoy
thingiverse
free

Belted Extruder v4 bracket for 2020 Extrusion by yesimnathan
...er is built & connected to the bracket, connect the bracket to your 2020 extrusion with the m5x10mm screws & t-slot nuts.
Geodave
thingiverse
free
Shower Caddy accessory holder by GeoDave
... upside down on out shower caddy. i did this a few months back, but changed the design recently to make it stay in place better.
thingiverse
free

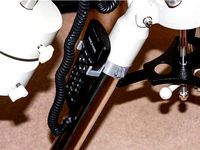
Wood Bracket with Wire Clip by GeoDave
...be either at 0 or 90 degrees to wood bracket. i included the openscad & dxf files if you want to adjust this to other sizes.
thingiverse
free
Gimbal Spinner by GeoDave
...elow 24mm for the inside width clearance distance or below 54mm for the gimbal distance. i will take a look at fixing that soon.
thingiverse
free
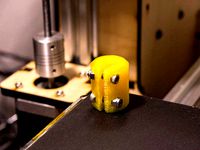
Spinning Top with Thumbwheel by GeoDave
... works.
https://youtu.be/fpaissfvmqm
here is the openscad source file for the thumbwheelhttps://www.thingiverse.com/thing:2407027
thingiverse
free
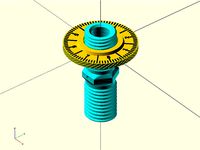
Parametric Shaft Coupler by GeoDave
... - m3x14mm bolts & locknuts for the 5mm to 5mm that is shown printed in yellow petg.
you can also open this in the customizer
thingiverse
free
Thumbwheel for a Jack Screw by GeoDave
...ese parts, i realized this might make a good spinning top. here is a link to that top. https://www.thingiverse.com/thing:2407034
thingiverse
free
Remix of Meade Autostar holder for LXD75/LX90 mount by GeoDave
... added 1mm extra around the holes.
i used 2 - m3x16mm screws with locknuts & printed at 40% infill with esun silver pla pro.
thingiverse
free
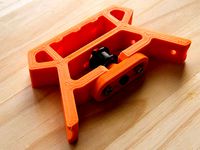
Parametric Tapered Spacer by GeoDave
... the larger diameter against the wheels & they did not roll at all. the 2nd & 3rd photo should show what i mean by this.
thingiverse
free
A Very Customizable Funnel by GeoDave
...gs in the openscad script.
i changed the hook_xx variable names to a more appropriate eye_xx names after a friend mentioned this.
thingiverse
free
Parametric Honeycomb containers by GeoDave
...file to varie the size of them based on 8 variables. since making this, i have made a number of containers for various purposes.
Cantilever
design_connected
free

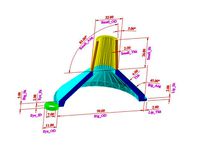
Modica Cantilever
...modica cantilever
designconnected
free 3d model of modica cantilever by willisau designed by ferrarini, mario.
turbosquid
$19

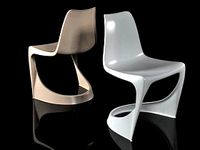
Cantilever Chair
...e 3d model cantilever chair for download as max, skp, and 3ds on turbosquid: 3d models for games, architecture, videos. (1695864)
turbosquid
$2

Cantilever roof
...ee 3d model cantilever roof for download as 3ds, obj, and fbx on turbosquid: 3d models for games, architecture, videos. (1221238)
turbosquid
$28

Cantilever Chair
... available on turbo squid, the world's leading provider of digital 3d models for visualization, films, television, and games.
turbosquid
$18

cantilever.3ds
... available on turbo squid, the world's leading provider of digital 3d models for visualization, films, television, and games.
turbosquid
free

Cantilever Stool
... available on turbo squid, the world's leading provider of digital 3d models for visualization, films, television, and games.
turbosquid
$5

Cantilevered Chair
...evered chair for download as c4d, 3ds, dae, dxf, fbx, and obj on turbosquid: 3d models for games, architecture, videos. (1553577)
turbosquid
$3

Cantilever Chair
... chair for download as max, max, max, fbx, gltf, obj, and usd on turbosquid: 3d models for games, architecture, videos. (1574695)
design_connected
$16
290 Cantilever Chair
...290 cantilever chair
designconnected
cado 290 cantilever chair computer generated 3d model. designed by østergaard, steen.
3d_export
$15

cantilever car shed
...cantilever car shed
3dexport
design of cantilever car shed by using pipe profile sections of different sizes as per loads.
Engraver
turbosquid
$8
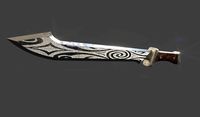
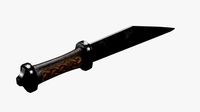
Engraved Sword
...alty free 3d model engraved sword for download as max and fbx on turbosquid: 3d models for games, architecture, videos. (1168563)
turbosquid
$1
Engraver(General)
... available on turbo squid, the world's leading provider of digital 3d models for visualization, films, television, and games.
turbosquid
$19
Seax Knife Engraved
...model seax knife engraved for download as blend, fbx, and obj on turbosquid: 3d models for games, architecture, videos. (1497294)
3d_export
$5
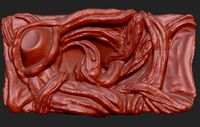
scary monster engraving
...nal engraving for 3d printing will give your environment an exotic look! it will look great if you paint it in the color of stone
turbosquid
$59
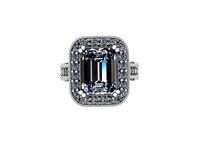
Emerald Engraving Ring
... available on turbo squid, the world's leading provider of digital 3d models for visualization, films, television, and games.
turbosquid
$23
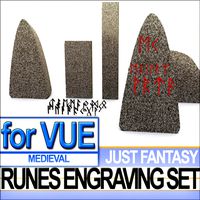
Runes Engraving Set
... available on turbo squid, the world's leading provider of digital 3d models for visualization, films, television, and games.
turbosquid
$15
Decoration Engraved table
... available on turbo squid, the world's leading provider of digital 3d models for visualization, films, television, and games.
turbosquid
$8
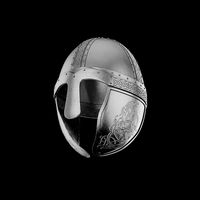
Viking helmet with engraved
...met with engraved for download as c4d, 3ds, dxf, fbx, and obj on turbosquid: 3d models for games, architecture, videos. (1618783)
turbosquid
$5

Engraved coffee cup
...ved coffee cup for download as blend, dae, fbx, obj, and gltf on turbosquid: 3d models for games, architecture, videos. (1713648)
turbosquid
$5

David Star Engraved
...ngraved for download as max, ige, obj, fbx, dwg, stl, and ipt on turbosquid: 3d models for games, architecture, videos. (1321537)
Laser
3d_export
$5
laser
...laser
3dexport
a 3d laser
3d_export
free
cnc 3dp laser nozzle for 2w laser opt lasers
...logy that gave birth to cutting and engraving laser heads this laser nozzle was designed for, read the article in the link below:
3d_export
free
cnc laser mount opt lasers
...eive the engraving and cutting laser heads this cnc machine laser mount was designed for, read the article on the following page:
turbosquid
$20
Laser
... available on turbo squid, the world's leading provider of digital 3d models for visualization, films, television, and games.
turbosquid
$15
Laser
... available on turbo squid, the world's leading provider of digital 3d models for visualization, films, television, and games.
turbosquid
$3
Laser
... available on turbo squid, the world's leading provider of digital 3d models for visualization, films, television, and games.
3d_export
$5

laser sword
...laser sword
3dexport
it is a blue laser sword with a metal frame
3d_ocean
$19
Laser Turret
...be used in any sf type of game, especially in tower defense games. - laser turret: 3025 polygons - props: 270 polygons - textu...
3d_export
free
workbee cnc laser mount for opt lasers
...the specifications of engraving and cutting laser heads this mount was designed for, please take a look at the following website:
3d_export
free

shapeoko cnc laser mount for opt lasers
...ind out the opportunities that adding a cutting and engraving laser head to your cnc can bring, take a look at the website below: