Thingiverse

CamJam EduKit #3 Robot Chassis for the Raspberry Pi by DanielBull
by Thingiverse
Last crawled date: 3 years ago
This is a 3D printable robot chassis designed to be used with the awesome CamJam Edukit #3 and ANY Raspberry Pi (all models supported).
The CamJam Edukit #3 is a kit of parts which when used in conjunction with a Raspberry Pi provide all the electronics and mechanics required to construct a programmable wheeled robot with distance sensing and line following capabilities (only a chassis such as this one is required).
Aimed at being a low cost educational tool for teaching robotics and programming, the EduKit 3 has a full suite of worksheets and is great value for hobbyists and educators alike.
For more information please check:http://camjam.me/
UPDATE 2015-11-08 Support for old Pi's
Added tray for older model A or B
Added tighter breadboard clamp
Improvements to instructions
UPDATE 2015-11-29: Powering the Pi
I've had a few people ask about powering the Pi; I was going to make a blank area for USB power packs but because they come in all shapes and sizes and it would have made the chassis too large for most people to print I decided against it.
However all is not lost, there are a number of options...
Like I mentioned above, by far the easiest thing to do is get a small USB power pack and mount it down one side using double sided tape or blue tack. I found some of the long thin narrow packs work well (see photos above, near the end)
The second option is to get a 2 cell LiPo battery (7.4v) and a buck converter to step it down to 5v. In the photos above I have included an example using a Ryanteck DC - DC stepdown ( https://ryanteck.uk/power/16-dc-to-dc-stepdown-regulator-with-4aa-battery-box-0635648607214.html ). If you use this method you will need to monitor the battery voltage to make sure it doesn't get too low otherwise this will damage the battery, I'm using one of those small low cost integrated LED volt meters.
The third option is to get a single cell LiPo battery (3.7v) and a boost converter to step it up to 5v. In the photos above I have included an example using an Adafruit Power Boost 500C ( http://makersify.com/products/adafruit-powerboost-500-charger-rechargeable-5v-lipo-usb-boost-500ma ). This is particularly useful as it also stops it getting too flat and charges the LiPo when you connect power your normal Pi power pack its microUSB.
UPDATE 2015-11-29: Larger wheel holes
We've had a report that some people are getting fouling between the axles/shafts on the wheels and the holes in the chassis.To solve this I have added a new version of the chassis with 14mm holes instead of the normal 13mm.
UPDATE 2015-11-29: Pi Zero tray!
Its finally here, the Pi Zero tray, using a Pi Zero will give you LOADS more space for all your extras :)
UPDATE 2015-12-04: Updated Pi Zero tray
Added missing SD card slot in the Pi Zero tray.
Similar models
thingiverse
free

Raspberry Pi model B robot chassis by topshed
...ed by a phone power bank. slots are included in the chassis to house both of these. example worksheets and code can be found here
thingiverse
free

CamJam Edukit #3 Frame by nieuwemaker
... developed for the bachelor of computer science first year course on robotics. in 2017 sixty of these robots were build and used.
thingiverse
free

Pi Zero legs by skspurling
... raspberry pi zero on a robot chassis with a standard cheap usb battery stick. just hot-glued the feet in place to get it to stay
thingiverse
free

DotBot Pi by Dotbot-io
...he hbr cloud platform:
https://www.youtube.com/watch?v=rmlaga6xuuw
note: raspberry and breadboard holders comes from this design.
thingiverse
free

Raspberry Pi Zero W Inky Phat Frame A v1.1
...any mounting hardware for the raspberry pi zero w (m2.5 hardware).
v1.1 update:
added fillets to the vertical support structures.
3dwarehouse
free

Chassis robot Arduin & Raspberry pi zero w
...chassis robot arduin & raspberry pi zero w
3dwarehouse
thingiverse
free

Tamiya Power Plug to Raspberry Pi Power Connection by matt5sean3
...lator's output, connect the grounds together, and connect the battery's positive side to the power regulator's input.
thingiverse
free

Raspberry Pi zero CCTV box by arnis
... printing i used one of those third party cheap chinese prusa printers. supports used for all parts.
https://youtu.be/0fyozigcftk
thingiverse
free

Stratux Case With internal Battery and UPS by robduby76
...expansion board power supply
-3.7v 10000mah 1165114 lipo battery rechargeable lithium polymer ion battery pack with jst connector
thingiverse
free

Raspberry Pi Zero single-case by leadpan
...i and micro-usb.
update:
added hole for power-led.
single-case for raspberry pi zero. slides right in with gpio pins.
click like
Camjam
thingiverse
free

CamJam Edukit #3 Frame by nieuwemaker
... developed for the bachelor of computer science first year course on robotics. in 2017 sixty of these robots were build and used.
thingiverse
free

Raspberry Pi model B robot chassis by topshed
...and wheels that come with kits like the excellent camjam edukit #3. it has a space at the front...
thingiverse
free

Pi Cam Ultimaker 2 mount block by sweenig
...thingiverse i needed to mount this arm to a camjam raspberrypi controlled robot, so i needed a larger flat...
thingiverse
free

DotBot Pi by Dotbot-io
...developed for the raspberry pi and compatible with the camjam edukit 3. we design it in order to have...
Edukit
thingiverse
free

CamJam Edukit #3 Frame by nieuwemaker
... developed for the bachelor of computer science first year course on robotics. in 2017 sixty of these robots were build and used.
thingiverse
free

Edukit 3 - Robot Parts by Phreak87
...der file to add or modify some parts.
this design is untested yet and still under construction.
feel free to send me improvements
thingiverse
free

Raspberry Pi model B robot chassis by topshed
...wheels that come with kits like the excellent camjam edukit #3. it has a space at the front for...
thingiverse
free

DotBot Pi by Dotbot-io
...for the raspberry pi and compatible with the camjam edukit 3. we design it in order to have a...
3dwarehouse
free

wheels with axle
...wheels with axle 3dwarehouse for use with thinkbelt #edukit ...
3dwarehouse
free

Railbus
...railbus 3dwarehouse diagrammatic model of a typical railbus #edukit ...
3dwarehouse
free

railbus bogie
...chassis or framework carrying wheels, for use in thinkbelt #edukit #railbased_learning_units...
3dwarehouse
free

fold-out decking (short)
...3dwarehouse decking for fold-out units (short - ie 14.600) #edukit ...
3dwarehouse
free

Inflatable structure - large
...3dwarehouse 15.75m x 22.5m x 7.875m #anticipatory_design #archiblog #cedric_price #edukit #fun_palace...
Danielbull
thingiverse
free

Odroid X Case by DanielBull
...odroid x case by danielbull
thingiverse
a 3d printable case for the odroid x including captive buttons for the microswitches
thingiverse
free

Large Luxo Jr by DanielBull
...ingiverse
a recreation of the snap together luxo jr lamp scaled up to be the maximum size possible on a 200mm x 200mm print bed.
thingiverse
free

HDMIPi Buttons by DanielBull
...igidity in the design.
you can find more info on hdmipi at http://hdmipi.com/
main photos thanks to alex eames http://raspi.tv/
thingiverse
free

Window blind cord or chain hook by DanielBull
...ords from dangling loose, either as a replacement for existing broken hooks or as an addition if you don't have them already.
thingiverse
free

Z-Probe bracket for NopHead Mendel90 (diabond) by DanielBull
...ht can be probed.
update:
please also see my new more accurate z-probe modification here:http://www.thingiverse.com/thing:1438782
thingiverse
free

Herringbone Wades Gear Set for NopHead Mendel90 by DanielBull
...metric herringbone gears scad file for the nophead mendel90.
i've also included my stl for those not wishing to use openscad.
thingiverse
free

3DFilaPrint spool brackets for the Nop Head Mendel90 by DanielBull
...pplied by 3dfilaprint.
update: now with spool guide wheels to allow the same brackets to be used with different diameter spools
thingiverse
free

Component Tester Case by DanielBull
...the bottom right is just a convenient place to store components while you are testing. it stops me losing smt's on the floor!
thingiverse
free

E3Dv6 Carriage Fan Duct for NopHead Mendel90 (dibond) by DanielBull
...he standard j head to an e3d hot end (in this case a v6) on a nophead mendel90. it uses the same 60mm fan as supplied by nophead.
thingiverse
free

Fuel Cap Grip with Ford Logo by DanielBull
... the 123 design file with the ford logo is not as editable as the one without the logo, as merging with the logo triangulated it.
Raspberry
3d_export
free

raspberry
...raspberry
3dexport
3d model of a raspberry. i tried to make it realistic.
turbosquid
$27
Raspberries
...y free 3d model raspberries for download as max, obj, and stl on turbosquid: 3d models for games, architecture, videos. (1354176)
turbosquid
$14

Raspberries
...y free 3d model raspberries for download as max, obj, and fbx on turbosquid: 3d models for games, architecture, videos. (1364663)
3d_export
$5

raspberry pi
...raspberry pi
3dexport
carcasa para la raspberry pi
turbosquid
$99

Raspberry
... available on turbo squid, the world's leading provider of digital 3d models for visualization, films, television, and games.
turbosquid
$10

raspberries
... available on turbo squid, the world's leading provider of digital 3d models for visualization, films, television, and games.
archive3d
free

Raspberries 3D Model
...raspberries 3d model archive3d raspberries raspberry raspberries n300911 - 3d model (*.3ds) for interior 3d...
3d_export
$5

raspberry fruit
...raspberry fruit
3dexport
3d_export
$5

raspberry
...y different sizes. their color ranges from light burgundy to pink. there are formats: obj, 3ds, blend, dae, fbx, mtl.<br>:)
evermotion
$12

raspberries 23 am130
...evermotion raspberries 23 am130 evermotion key 23 food fruit raspberry fruits am130 raspberries highly detailed 3d model of raspberries...
Chassis
design_connected
$16

Chassis
...chassis
designconnected
wilkhahn chassis chairs computer generated 3d model. designed by stefan diez.
3d_export
$10

truck chassis
...truck chassis
3dexport
truck chassis
3d_export
$5
Truck chassis
...truck chassis
3dexport
truck chassis
3d_export
$5

buggy chassi
...buggy chassi 3dexport chassis of a simple ride...
turbosquid
$35

Chassis
...odel chassis for download as 3ds, dxf, obj, c4d, fbx, and stl on turbosquid: 3d models for games, architecture, videos. (1413332)
design_connected
$16

Chassis Armchair
...chassis armchair
designconnected
baxter chassis armchair armchairs computer generated 3d model. designed by n/a.
turbosquid
$25
DRONE CHASSIS
...bosquid
royalty free 3d model drone chassis for download as on turbosquid: 3d models for games, architecture, videos. (1699724)
turbosquid
$79

Car Chassis
...quid
royalty free 3d model car chassis for download as blend on turbosquid: 3d models for games, architecture, videos. (1593376)
turbosquid
$50
Car Chassis
...osquid
royalty free 3d model car chassis for download as dwg on turbosquid: 3d models for games, architecture, videos. (1164087)
turbosquid
$75

Chassis 8x8
...free 3d model chassis 8x8 for download as ige, obj, and sldas on turbosquid: 3d models for games, architecture, videos. (1221250)
Pi
design_connected
$11

Pi
...pi
designconnected
ligne roset pi chairs computer generated 3d model. designed by thibault desombre.
3d_export
$5

raspberry pi
...raspberry pi
3dexport
carcasa para la raspberry pi
turbosquid
$18
pied
... available on turbo squid, the world's leading provider of digital 3d models for visualization, films, television, and games.
3ddd
$1

Emme pi light
...emme pi light
3ddd
emme pi light
люста emme pi light
3ddd
$1
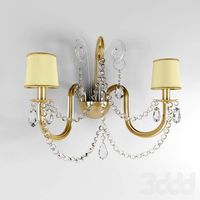
Emme pi light
...emme pi light
3ddd
emme pi light
бра классическое emme pi light
3ddd
$1

Emme Pi Light
...emme pi light
3ddd
emme pi light
3ddd
$1

Emme Pi Light
...emme pi light
3ddd
emme pi light
design_connected
$16
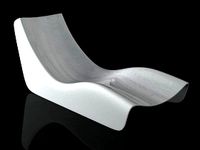
Pi-Air
...pi-air
designconnected
living divani pi-air lounge chairs computer generated 3d model. designed by harry & camila.
3d_ocean
$15

Manneken Pis
...picting a naked little boy urinating into a fountain’s basin. (wikipedia) the model was sculpted in blender 2.70a rendered wit...
3ddd
$1

Emme pi light
...emme pi light
3ddd
emme pi light
люстра классическая фирма: emme pi light
артикул: 3595/5/cot/12/wh
Robot
3d_ocean
$20

Robot
...robot
3docean
character metal robot robot robotic white
robot model for 3dsmax 2009 and greater
3d_ocean
$45

Robot
...robot
3docean
fighing machine robot
a fighting robot from the scrapyard.
3d_ocean
$18

Robot
...robot
3docean
machin robot science fiction
high poly robot.
3d_export
$7

Robot
...robot
3dexport
robot
3d_export
$5

robot
...robot
3dexport
robot
3d_export
free

Robot
...robot
3dexport
robot
turbosquid
$10

Robot/ Alien Robot
...
royalty free 3d model robot/ alien robot for download as max on turbosquid: 3d models for games, architecture, videos. (1442828)
3d_export
$5

robot
...robot
3dexport
robot in blender
3ddd
$1

robot
...robot
3ddd
робот
robot
3ddd
$1

Robot
...robot
3ddd
робот
robot
3
turbosquid
$10
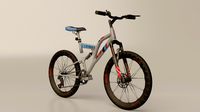
Mountain Bike 3 -3 of 3
...model mountain bike 3 (#3 of 3) for download as fbx and blend on turbosquid: 3d models for games, architecture, videos. (1438752)
turbosquid
$6

Rock 3-3
...urbosquid
royalty free 3d model rock 3-3 for download as obj on turbosquid: 3d models for games, architecture, videos. (1628065)
turbosquid
$29

Books 150 pieces 3-3-3
...books 150 pieces 3-3-3 for download as max, obj, fbx, and stl on turbosquid: 3d models for games, architecture, videos. (1384033)
turbosquid
$3

Genesis 3 Clothing 3
... available on turbo squid, the world's leading provider of digital 3d models for visualization, films, television, and games.
3d_export
$5
hinge 3
...hinge 3
3dexport
hinge 3
3ddd
$1
Розетка 3
...розетка 3
3ddd
розетка
розетка 3
turbosquid
$50

is-3
... available on turbo squid, the world's leading provider of digital 3d models for visualization, films, television, and games.
turbosquid
$10

Mountain Bike 3 -2 of 3
...model mountain bike 3 (#2 of 3) for download as fbx and blend on turbosquid: 3d models for games, architecture, videos. (1438750)
turbosquid
$10

Mountain Bike 1 -3 of 3
...model mountain bike 1 (#3 of 3) for download as fbx and blend on turbosquid: 3d models for games, architecture, videos. (1438743)
3d_export
$5

3 CATS
...3 cats
3dexport
3 cats pen holder
