Thingiverse

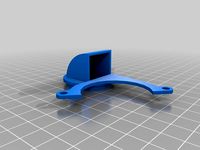
BRDD remix for fan 5015 and 4020 cr-6 se cr-6 Max by ktl-7
by Thingiverse
Last crawled date: 2 years, 11 months ago
BRDD remix
Need
M3 and nut
m3 10 mm
m3 20 mm
and 2 nut
Turbo Blower
Turbo Blower 5015
Turbo Blower 4020
Turbo Blower 5015https://bit.ly/3f7zMJX
Turbo Blower 4020https://bit.ly/3f7zQJH
Original BRDD
https://www.thingiverse.com/thing:4837410
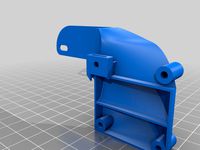
This project was a collaboration between Michael Bourque and Derek Rowland. Although it was modeled from scratch, it was heavily influenced by Matt Bevo’s fantastic “CR6 SE Direct Drive BMG Adapter” found on Thingiverse.
Our aim is to make a free and easy to print direct drive kit for the CR-6 SE that is strong, rigid, while avoiding problems plagued by the bowden tube and strain gauge systems.
As you may know, direct drive is all about rigidity and no backlash. In our testing this produces excellent prints with no stringing or issues plagued by less rigid systems. It does not break or interfere with the strain gauge. It’s a great upgrade you can do yourself.
You will need
BMG V2 Clone
Existing Extruder Stepper Motor
1 Meter Long Stepper Motor Cable
3 M3x40 Pan Head screws
2 M3 Pan Head screws
2 M3 Nuts
Loctite 242 (Medium Strength, Blue)
Required Printed Parts
dd_bmg_adapter.stl (or dd_bmg_adapter_thin.stl for standard length BMG bolts)
strain-washer.stl
bowden_connector.stl
Optional Printed Parts
filament_sensor_top.stl
filament_sensor_bottom.stl
2 PC4-M6 Pneumatic Couplers
1 pcb-housing.stl
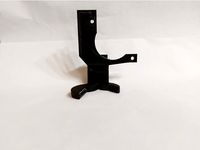
Note: We have also included a .step file so you can modify the bracket if needed. Please share what you do so we can continually improve the design.
How to Print
Use a stiff filament material like PLA, PLA+, or PLA Carbon Fiber. PETG is not recommended as it is too flexible. Use Cura or your favorite slicer; recommended settings and orientation of parts are shown below; print as shown to meet design intent.
Post-Printing
While the design includes rounded edges, be sure to manually remove all support, burrs, and break any sharp edges after printing.
How I Designed This
Designed in Creo 7
All of the design was done from scratch using Creo Parametric 7.0 from PTC
Print the bracket
Need
M3 and nut
m3 10 mm
m3 20 mm
and 2 nut
Turbo Blower
Turbo Blower 5015
Turbo Blower 4020
Turbo Blower 5015https://bit.ly/3f7zMJX
Turbo Blower 4020https://bit.ly/3f7zQJH
Original BRDD
https://www.thingiverse.com/thing:4837410
This project was a collaboration between Michael Bourque and Derek Rowland. Although it was modeled from scratch, it was heavily influenced by Matt Bevo’s fantastic “CR6 SE Direct Drive BMG Adapter” found on Thingiverse.
Our aim is to make a free and easy to print direct drive kit for the CR-6 SE that is strong, rigid, while avoiding problems plagued by the bowden tube and strain gauge systems.
As you may know, direct drive is all about rigidity and no backlash. In our testing this produces excellent prints with no stringing or issues plagued by less rigid systems. It does not break or interfere with the strain gauge. It’s a great upgrade you can do yourself.
You will need
BMG V2 Clone
Existing Extruder Stepper Motor
1 Meter Long Stepper Motor Cable
3 M3x40 Pan Head screws
2 M3 Pan Head screws
2 M3 Nuts
Loctite 242 (Medium Strength, Blue)
Required Printed Parts
dd_bmg_adapter.stl (or dd_bmg_adapter_thin.stl for standard length BMG bolts)
strain-washer.stl
bowden_connector.stl
Optional Printed Parts
filament_sensor_top.stl
filament_sensor_bottom.stl
2 PC4-M6 Pneumatic Couplers
1 pcb-housing.stl
Note: We have also included a .step file so you can modify the bracket if needed. Please share what you do so we can continually improve the design.
How to Print
Use a stiff filament material like PLA, PLA+, or PLA Carbon Fiber. PETG is not recommended as it is too flexible. Use Cura or your favorite slicer; recommended settings and orientation of parts are shown below; print as shown to meet design intent.
Post-Printing
While the design includes rounded edges, be sure to manually remove all support, burrs, and break any sharp edges after printing.
How I Designed This
Designed in Creo 7
All of the design was done from scratch using Creo Parametric 7.0 from PTC
Print the bracket
Similar models
thingiverse
free

BRDD Direct Drive for CR-6 SE by michaelbourque
...ura or your favorite slicer; recommended settings and orientation of parts are shown below; print as shown to meet design intent.
thingiverse
free

CR-6 SE, Max with BMG or OEM Direct Drive with 5015 Blower Fan by bansdiving
...
oem direct drive
m3 10mm x4
m3 12mm x2
5015 blower fan
m3 20mm x1 + nut
cable hplder
m3 10mmx2 +nut
https://youtu.be/6qib-mlznmc
grabcad
free

CR-6 SE/Max 6burner V2
...he air channel is terminated by a part cooling duct with 3 different options. the user can also design his own part cooling duct.
thingiverse
free

E3D Chimera + BMG X2 direct extruder mount for Ender-3 by Adolf_Muffin
...ts & bolts
also it will work in bowden setup, so you can use any extruders you prefer (for bowden setup, i suggest voron m4).
thingiverse
free

Ender 3 BMG E3D V6 Volcano Direct Drive with BLTouch by Simon3105
... is still in testing phase and i'm very new to designing models in fusion360. so please have mercy on me if it's ugly ;-;
thingiverse
free

CR-6 se Blower Fan 5015 by bansdiving
...cr-6 se blower fan 5015 by bansdiving
thingiverse
remix with hm_gen4_lightweignt_5015_duct_right
m3
10mm.
12mm.
20mm.
thingiverse
free

5015 Fan duct for Mellow BMG Aero (motor at right and with 4020 extruder cooler fan) by avbro
...ent 240/235/70
mounting hardware:
m2x8 screw - 2 pcs (one could be longer, second - could not fit when longer)
m3 nut
m3x20 screw
thingiverse
free

BRDD Direct Drive for BMG LGX by michaelbourque
...ect drive for bmg lgx by michaelbourque
thingiverse
this is a direct drive bracket for the bmg lgx extruder and pancake stepper.
thingiverse
free

TEVO Tarantula Control Board Cover by VecteR
... aliexpress
3 x m3 x 20mm bolts from aliexpress
freecad source files included
update 28/12/2016
version for 4020 blower fan added
thingiverse
free

BMG Direct Drive Mount Tevo Tarantula Pro / Flash
...4 for best results. also including the version with supports removed.
and a 40mm fan shroud for the v6. fits 22.3mm diameter fins
Brdd
3dfindit
free

BRDD
...brdd
3dfind.it
catalog: a&t
thingiverse
free
BRDD Direct Drive for BMG LGX by michaelbourque
...ect drive for bmg lgx by michaelbourque
thingiverse
this is a direct drive bracket for the bmg lgx extruder and pancake stepper.
thingiverse
free
BRDD Direct Drive for CR-6 SE by michaelbourque
...ura or your favorite slicer; recommended settings and orientation of parts are shown below; print as shown to meet design intent.
Ktl
thingiverse
free

under cable management by ktl-7
...under cable management by ktl-7
thingiverse
working screw 25mm.
grabcad
free

ktl
...ktl
grabcad
kdnvkfmvnjf
grabcad
free

Locinox Valentino surface mounted battery powered code lock
.../ locking of the mechanism. specification: • iso 9227 ktl / e-coated lock box withstands 1000 hours of salt...
grabcad
free

Locinox Vinci surface mounted mechanical code lock
...using the drill-fix drilling jig. specification: • iso 9227 ktl / e-coated lock box withstands 1000 hours of salt...
grabcad
free

Locinox LEKQ U4 electric gate lock fail open
...using the drill-fix drilling jig. specification: • iso 9227 ktl / e-coated lock box withstands 1000 hours of salt...
grabcad
free

Locinox Free Vinci surface mounted mechanical code lock
...using the drill-fix drilling jig. specification: • iso 9227 ktl / e-coated lock box withstands 1000 hours of salt...
3dwarehouse
free

ktl
...ktl
3dwarehouse
warehouse
3dwarehouse
free

3D KTL
...3d ktl
3dwarehouse
3dwarehouse
free

KTL PALLA-A
...ktl palla-a
3dwarehouse
4020
3ddd
$1

Reccagni Angelo P 4020
...льная лампа reccagni angelo p 4020, в классическом стиле. глубина: 210 мм. высота: 340 мм. производитель: reccagni angelo италия.
turbosquid
$29

Giorgio Collection Absolute Armchair ART. - 4020
... available on turbo squid, the world's leading provider of digital 3d models for visualization, films, television, and games.
3ddd
$1

Шкаф и комод DEFNE 4020
...шкаф и комод defne 4020
3ddd
шкаф , комод
шкаф купе и комод в современном стиле.
turbosquid
$15

Chair and Bar Stool Loft Design 4020 and 4023
...r stool loft design 4020 and 4023 for download as max and fbx on turbosquid: 3d models for games, architecture, videos. (1385230)
3ddd
$1

Giorgio Collection Absolute Armchair ART. 4020
...rmchair
art. - 4020
with materials(vray) and textures.
original fabric dimentions:
cm 60w x 62d x 84,5h
24’’w x 24”½d x 33’’½h
3d_ocean
$15

3D Character - Low Poly - Chibi - Rigged
...cinema4d low poly rigged 3d character for real time. 4020 triangles – rigged. textures size: 1024pxl 1 diffuse map...
3d_export
$15

Step ladder pbr game-ready
...adobe substance 3d painter, photoshop, blender<br>faces: 4020 verts:6312 tris: 4020lt;br>tris only model<br>includes maps: normal, roughness, metallic, height, basecolor<br>beautiful 3d...
3d_export
$20

modern bench
...0,0,0<br>--- geometry<br>all-quads, subdivision ready and clean topology.<br>polycount: 2680 total<br>vertexcount: 4020 total<br>--- dimensions<br>79.89 cm high<br>154.43 x 65.30 cm large<br>--- materials<br>1...
3dfindit
free

40-4020, 40-4020-Black
...40-4020, 40-4020-black
3dfind.it
catalog: 80/20
3dfindit
free

4020, 4420, 4020-Black, 4420-Black
...4020, 4420, 4020-black, 4420-black
3dfind.it
catalog: 80/20
5015
3ddd
$1

Скамья RUGIANO - COPERTINA BRONZA, 5015/130GL
...a bronza, 5015/130gl
3ddd
rugiano , скамья
скамья rugiano - copertina bronza, 5015/130gl
3d_export
$15

3d hair style for girl v94
...: 4811 - edges : 9836 - faces : 5015 - tris : 9642 - uvs : 5364 file...
thingiverse
free

5015 fan duct
...5015 fan duct
thingiverse
5015 fan duct
thingiverse
free

5015 Fan Guard
...5015 fan guard
thingiverse
5015 fan guard
3dfindit
free

294-5015
...294-5015
3dfind.it
catalog: wago
thingiverse
free
40MM to 5015 Adapter by 360alaska
...by 360alaska
thingiverse
this will adapt a 5015 fan to a 40mm fan mount. the 5015 fan mounts at a right angle and rotates fully.
thingiverse
free
Chiron 5015 blower by DK_Davis
...chiron 5015 blower by dk_davis
thingiverse
anycubic chiron 5015 blower
thingiverse
free

single 5015 to 50mnm by Kyledavis417
...single 5015 to 50mnm by kyledavis417
thingiverse
single 5015 to 50mm for tevo controller box
thingiverse
free
Cetus 3D 5015 Duct
...cetus 3d 5015 duct
thingiverse
twisted 5015 fan duct for cetus 3d mk2
thingiverse
free

Dual 5015 to 50mm by Kyledavis417
...dual 5015 to 50mm by kyledavis417
thingiverse
dual 5015 fan adapter for tevo tornado controller box
Cr
turbosquid
$15
Creazioni CR-673 CR-4461
... available on turbo squid, the world's leading provider of digital 3d models for visualization, films, television, and games.
3ddd
$1
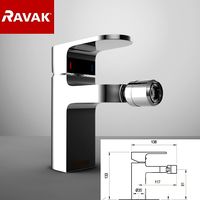
Ravak CR 055.00
...ravak cr 055.00
3ddd
ravak , смеситель
ravak cr 055.00
turbosquid
$100
CR-002
...
turbosquid
royalty free 3d model cr-002 for download as stl on turbosquid: 3d models for games, architecture, videos. (1686037)
3ddd
$1

Ravak CR 012.00
...ravak cr 012.00
3ddd
ravak , смеситель
смеситель ravak cr 012.00
3ddd
free
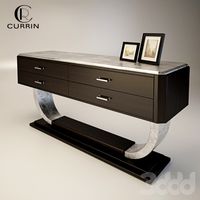
Консоль CR Currin
...ь , cr currin
консоль cr currin
ширина - 1675 мм
глубина - 510 мм
общая высота - 810 мм
3ddd
$1
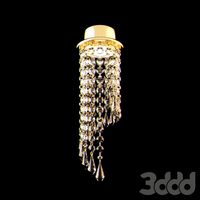
CR 39444
...0
диаметр: 100
тип патрона: gu5,3 gu10
количество ламп: 1
мощность: 35w
цвет: золото хрусталь
материал: металл хрусталь exclusive
3d_ocean
$89
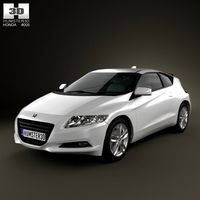
Honda CR-Z
...www.youtube.com/watch?v=rrbb4d4lypk ` he honda cr-z‘s exterior styling is formed around a “one-motion wedge” concept with a lo...
3ddd
$1

Creazoni / STEFY CR-8901
...creazoni / stefy cr-8901
3ddd
creazoni
creazioni stefy cr-8901
turbosquid
$60
Chain-CR-001
...squid
royalty free 3d model chain-cr-001 for download as stl on turbosquid: 3d models for games, architecture, videos. (1680536)
turbosquid
$99

Honda CR-Z
... available on turbo squid, the world's leading provider of digital 3d models for visualization, films, television, and games.
Fan
3d_export
$5

fan
...fan
3dexport
fan 3d model, table fan, fan, electric fan, ventilator
archibase_planet
free

Fan
...fan
archibase planet
fan large fan
fan out n260707 - 3d model for interior 3d visualization.
archibase_planet
free

Fan
...fan
archibase planet
fan ceiling fan ventilator
fan stealth n300615 - 3d model (*.gsm+*.3ds) for interior 3d visualization.
3d_export
$15

fan
...fan
3dexport
is an ancient fan
3ddd
$1

Fan-C-Fan by marco gallegos
...n-c-fan by marco gallegos
3ddd
вентилятор , marco gallegos
fan-c-fan by marco gallegos
3d_export
$10

fan
...fan
3dexport
a detailed fan designed for home or space blowing is now available for only 19.99!
turbosquid
$1

Fan
...fan
turbosquid
free 3d model fan for download as on turbosquid: 3d models for games, architecture, videos. (1427865)
turbosquid
$14

Fan
...fan
turbosquid
royalty free 3d model fan for download as on turbosquid: 3d models for games, architecture, videos. (1415642)
3ddd
$1

Светильник Fan
...светильник fan
3ddd
fan , italamp
светильник fan, производитель italamp
turbosquid
$25

Fan
...fan
turbosquid
royalty free 3d model fan for download as c4d on turbosquid: 3d models for games, architecture, videos. (1483246)
Remix
turbosquid
$5

MODA Collection Remix Chair
... available on turbo squid, the world's leading provider of digital 3d models for visualization, films, television, and games.
3d_export
$12

remix yamaha rm1x
...remix yamaha rm1x
3dexport
geometry triangles 15.2k vertices 7.6k pbr no textures 1 materials 1 uv layers yes
3d_ocean
$5

Vray fabric Kvadrat remix green - tileable
...th vray and 3dsmax. high-resolution texture images (2000×2000 px) file included: shader vray 2.40 texture image 3ds max 2011 file
turbosquid
$20

Gerrit Rietveld 1938 Zig Zag Chair Remix
... available on turbo squid, the world's leading provider of digital 3d models for visualization, films, television, and games.
3d_export
$10

multicolored remix parametric table furniture
... fbx, obj, mtl, archive with textures. the model has no glitches. render and materials - vray . without using plugins. good use!
3ddd
$1

Barovier&Toso / Manhattan Remix 7192
... 004293-142405
в коллекции есть люстры 7, 9, 12 рожковые. диаметр соответственный 1000, 1250, 1500 мм.
3ddd
$1

Muuto fiber chair
...grey/grey, dusty green/dusty green, nature/oak, natural white/oak upholstery options remix 183/black, remix 133/grey, remix 643/dusty red leather options black...
3ddd
$1

Barovier&Toso 7190-7195
...7190-7195 3ddd barovier&toso потолочнай люстра фабрики barovier&toso;, коллекция manhattan remix артикул 7190-7195. размеры в inches: 39"...
3d_export
$5

3D Locking Handle Weatherproof Storage Box Container
...handle weatherproof storage box container 3dexport new, improved and remixd! no screws required. print-in-place. weatherproof. parametric. 2 parts. easy...
cg_studio
$49

HTC One Mini 2 Amber Gold3d model
...cell phone mobile cellular super lcd touchscreen touch screen remix amber gold .max .obj .mb .lwo .fbx .c4d .3ds...
7
turbosquid
$6
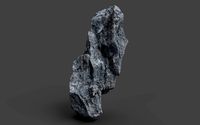
Rock 7-7
...urbosquid
royalty free 3d model rock 7-7 for download as obj on turbosquid: 3d models for games, architecture, videos. (1647866)
turbosquid
$8
Rock 7-7
...id
royalty free 3d model rock 7-7 for download as ma and fbx on turbosquid: 3d models for games, architecture, videos. (1693416)
design_connected
$16
No 7
...no 7
designconnected
sibast no 7 computer generated 3d model. designed by sibast, helge.
3ddd
$1
Team 7
...team 7
3ddd
team 7
моделилось с кталога team 7
3d_export
$5
hinge 7
...hinge 7
3dexport
hinge 7
turbosquid
$9
IS-7
... available on turbo squid, the world's leading provider of digital 3d models for visualization, films, television, and games.
turbosquid
$12

Calligraphic Digit 7 Number 7
...hic digit 7 number 7 for download as max, obj, fbx, and blend on turbosquid: 3d models for games, architecture, videos. (1389338)
3ddd
free
team 7
...team 7
3ddd
team 7
стол фабрики team 7.
типы размеров /900,1000/x/1750,2000,2250/x/750/
раздвигается +600 или +1200
3ddd
$1

PLANTS 7
...plants 7
3ddd
цветы , горшок
plants 7.. hope u all enjoying the series
3ddd
$1

Pillows #7
...pillows #7
3ddd
подушка , pillows
pillows #7
3ds max 2011,fbx + textures
6
3d_export
$18

tulip 6
...tulip 6
3dexport
tulip 6
3d_export
$5
hinge 6
...hinge 6
3dexport
hinge 6
3ddd
$1
MASIERO / FLASHWOOD STL 6 + 6
...6
3ddd
masiero
торшер flashwood stl 6 + 6 фабрики masiero
http://www.masierogroup.com/c87_697/it/flashwood%20stl%206%20+%206.ashx
turbosquid
$110

Atmos Cannon 2000 6*6
...yalty free 3d model atmos cannon 2000 6*6 for download as skp on turbosquid: 3d models for games, architecture, videos. (1528591)
turbosquid
$1
ae 6 6 electric locomotive
... free 3d model ae 6 6 electric locomotive for download as obj on turbosquid: 3d models for games, architecture, videos. (1707537)
turbosquid
$39
A-6
... available on turbo squid, the world's leading provider of digital 3d models for visualization, films, television, and games.
3ddd
$1
6 ковров
...6 ковров
3ddd
ковры , ковер
6 ковров
turbosquid
$12

Calligraphic Digit 6 Number 6
...hic digit 6 number 6 for download as max, obj, fbx, and blend on turbosquid: 3d models for games, architecture, videos. (1389336)
turbosquid
$19

Case For Phone 6 Girl 6
... available on turbo squid, the world's leading provider of digital 3d models for visualization, films, television, and games.
turbosquid
$35

Iphone 6 & 6 Plus All
... available on turbo squid, the world's leading provider of digital 3d models for visualization, films, television, and games.