Thingiverse

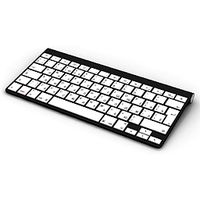
BootyShorts Ergonomic Mechanical keyboard by MrJeff01
by Thingiverse
Last crawled date: 3 years, 4 months ago
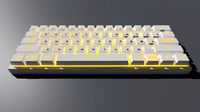
After months in the making, here it is.. The BootyShorts Ergonomic keyboard. (The non-extended version reminded me of that so the name stuck)
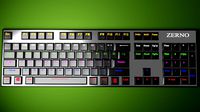
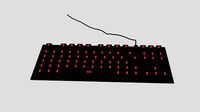
The Dark-Blue and Green ones in the pictures are the latest version. The Black one is the first one and has had many improvements since but is shown for the backlighing.
NOTE - THIS IS OFFERED AS-IS. I AM NOT RESPONSIBLE FOR ANY DAMAGE TO YOUR COMPUTER IF WIRED INCORRECTLY
Please read about hand-wiring keyboard before attempting this build.
This can be printed with or without the number pad based on preference.
There are no PCBs available so it must be hand-wired
Keycaps must be purchased separately. Designed for 3U space bar (Left) and 2.5U space bar (Right). I used the extra space and numberpad 0 as space bars because I have not found a good inexpensive keycap set with the right sized space bars. If you know where I can get these, please comment!
Printing:
You will need supports.
I have had best results with PLA or PLA+. I printed one with PETG and its slightly warped and not as stiff.
For a smoother print of the keyboard slope, Left and Right sides can be printed at the same time if printed vertically with the middle down on the print bed. I used Cura slicer and Tree Supports. Be careful when inserting switches not to crack the grid if printed vertically. (A hot air soldering iron can fix cracks by remelting it together)
For a stronger print, print left and right sides flat separately (Recommended if you don't have a hot-air soldering iron if you might need to repair the grid)
There is no PCB for this so keys must be hand-wired. I used a Teensy LC controller in most of them and a Teensy 3.2 controller in the other since it has more pins. Other controllers can be used, please research this before building.
All STL files are included. The Fusion 360 Design file is also included in case you want to modify it for your own needs. - I wouldn't mind seeing pictures :-)
I learned Fusion 360 making this keyboard and am not a professional CAD designer. There are probably a lot of things I could have done better/more efficiently but here it is.
Designed to use small hot-melt inserts for M2 screws. The opening for the inserts is 3mm
Additional parts needed:
Keycaps set. Ones shown are the inexpensive mixable OEM keycaps from flashquark.com
5x 2U Stabilizers for keyboard only. 8x 2u Stabilizers for extended version. (MUST be "Plate Mount", Cherry compatible)
2mm Hot-Melt screw mounts (I used these - https://flashquark.com/product/m2-standoffs-5mm-20-pack/ )
M2 screws to hold the back covers on
Cherry compatible Mechanical switches - 83x for main keyboard, 100 if making the extended keyboard.
1N4148 or similar diodes. Usually sold in 100 pack
Arduino micro controller. I used Teensy LC or Teensy 3.2 in my designs. Make sure your controller is compatible with QMK or TMK to ensure it will work.
Micro-USB cable
Wire - I used solid (not stranded) CAT5 cable in these since its fairly easy to work with and I had a bunch of it.
Tools Needed:
Soldering iron and solder
Wire cutters
Screwdriver
Credits and special thanks:
Matt3o Blog on hand-wiring and QMK basics - This got me interested in making my own keyboard - https://matt3o.com/hand-wiring-a-custom-keyboard/
Lars Christensen - HUGE THANK YOU for his excellent Fusion 360 tutorial videos. Start here if interested: https://www.youtube.com/watch?v=A5bc9c3S12g
flashquark.com for having most of the parts I needed in stock! (No, I didn't get a special deal from them)
QMK for their firmware - without this, it would be useless... https://qmk.fm/
Similar models
thingiverse
free

Clueboard 660 66% Mechanical Keyboard by fumbucker
...m3 bolt and nut
6 * 20mm m3 bolt and nut (although 16mm should be ok for these too)
wire and solder
sticky rubber feet (optional)
thingiverse
free

Clueboard / FC660m 66% Mechanical Keyboard v2 by fumbucker
...specifically for this keyboard with via support. it's wired similary to clueboard...
thingiverse
free

Mechanical keyboard cherry keycap stabilizers by fakeDeltatime
...eed to bend a stabilizing wire. the measurements that i found to work for the bend spots for a 2u keycap are 5mm-9mm-30mm-9mm-5mm
thingiverse
free

Keyboard foot
...es for the insertion of 3mm m2 brass standoffs (i used the tip of a soldering iron). the bar has countersunk holes for m2 screws.
thingiverse
free

Mechanical Keyboard Switch Doorbell by DesignSynthetics
... posted the .f3d file in case anyone needs to make any adjustments. please post your makes and remixes, i'd love to see them!
thingiverse
free

Teensy Friction Mount by kasm
... it down. includes room for solder/wire on underside.
gcode is for 1.75 pla on the makergear m2, will print 5 of them at .3 res.
thingiverse
free

keebcu - andimoto smallTKL iso - mechanical keyboard by andimoto
...rews
wiring will be added in the repository later… see also https://beta.docs.qmk.fm/using-qmk/guides/keyboard-building/hand_wire
thingiverse
free
Mini 10keys Keyboard by gmanzato
...rmware. for now i've just implemented a basic numkey keyboard
pinout for the teensy :
row : f5, f6, f7, b6
cols : f0, f1, f4
thingiverse
free

Redox handwire by MattDB
...e
a lot of soldering
build log: link
reddit thread: link
firmware:qmk
handwiring guides:
qmk handwiring guide
qmk let's split
thingiverse
free

Planck Mechanical Keyboard (Needs No Supports) by AzideMakes
..., and super glue (conservatively!) on the inside.
insert cherry compatible switches/keycaps, wire up/solder, and get to goin'

Mrjeff01
thingiverse
free

120mm to 92mm Fan adapter by MrJeff01
...ded this to reuse a good fan in a new pc case so figured i would share. i couldn't find one from someone else so made my own.
thingiverse
free

Toyota Window Regulator Clip by MrJeff01
...en installed it needs to be glued to the glass. it fits loose but is a closer tolerance than the factory one to make it stronger.
thingiverse
free

8x4 6x6 Parametric Keyboard Switch Tester by MrJeff01
...a 14mm square hole pattern.
designed with rounded edges and fairly heavy.
print with switch holes down so no supports are needed.
Ergonomic
turbosquid
$4

Ergonomic
... available on turbo squid, the world's leading provider of digital 3d models for visualization, films, television, and games.
turbosquid
$4

Ergonomic
... available on turbo squid, the world's leading provider of digital 3d models for visualization, films, television, and games.
turbosquid
$25

Ergonomic Table
...ree 3d model ergonomic table for download as ma, obj, and fbx on turbosquid: 3d models for games, architecture, videos. (1271588)
turbosquid
$4

Ergonomic mouse
...3d model ergonomic mouse for download as wire, wire, and wire on turbosquid: 3d models for games, architecture, videos. (1584948)
3ddd
$1

Ergonomic chair (Rei)
...ergonomic chair (rei)
3ddd
кресло
ergonomic chair made by our studio
3d_export
$15

ergonomic chair
...t geometry, fantastic detail, and the materials and textures are included. this chair is ideal for photorealistic visualizations.
turbosquid
$30

Ergonomic chair
... available on turbo squid, the world's leading provider of digital 3d models for visualization, films, television, and games.
turbosquid
$25

Ergonomic Stool
... available on turbo squid, the world's leading provider of digital 3d models for visualization, films, television, and games.
turbosquid
$15

ergonomic chair
... available on turbo squid, the world's leading provider of digital 3d models for visualization, films, television, and games.
turbosquid
$15

ergonomic workstation
... available on turbo squid, the world's leading provider of digital 3d models for visualization, films, television, and games.
Keyboard
3d_ocean
$9
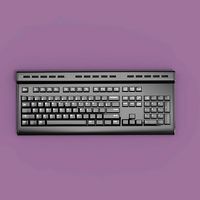
Keyboard
...odels computer electronics keyboard peripheral / part
computer keyboard 3d models. it’s computer keyboard. render ready keyboard.
archibase_planet
free
Keyboard
...keyboard
archibase planet
input keyboard keyboard office equipment
pro keyboard - 3d model for interior 3d visualization
3d_export
$5
keyboard
...keyboard
3dexport
computer keyboard
3d_export
$11
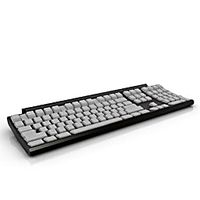
Keyboard
...keyboard
3dexport
gaming keyboard with backlight 1:1
3d_export
free
keyboard
...keyboard
3dexport
keyboard blender stl obj fbx
archibase_planet
free
Keyboard
...keyboard
archibase planet
keyboard pc equipment
keyboard apple n130315 - 3d model (*.gsm+*.3ds) for interior 3d visualization.
3d_export
free
keyboard gaming
...keyboard gaming
3dexport
keyboard gaming include: 1 x keyboard gaming.blend 3 x keyboard gaming.png
archibase_planet
free
Keyboard
...keyboard
archibase planet
keyboar pc equipment
keyboard - 3d model (*.gsm+*.3ds) for interior 3d visualization.
3d_ocean
$9

keyboard USB
...models computer electronics keyboard peripheral / part
keyboard for computer 3d models. high detailed model of computer keyboard.
turbosquid
$24

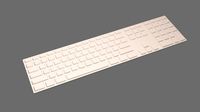
Keyboard
...urbosquid
royalty free 3d model keyboard for download as max on turbosquid: 3d models for games, architecture, videos. (1710291)
Mechanical
3d_export
$50
Mechanism
...mechanism
3dexport
mechanism -------- animation is present only in the blender file.
3d_export
$5

mechanics
...mechanics
3dexport
turbosquid
$50
mechanic
... available on turbo squid, the world's leading provider of digital 3d models for visualization, films, television, and games.
3ddd
$1
Mechanical Wasp
...mechanical wasp
3ddd
робот
mechanical wasp
3d_export
$20
Mechanical tail
...mechanical tail
3dexport
mechanical tail<br>four-part movement
3d_export
$5
mechanical ballista
...mechanical ballista
3dexport
a mechanical ballista useful for medieval or fantasy games does not contain animations
turbosquid
$59

Mechanical Part
...id
royalty free 3d model mechanical part for download as c4d on turbosquid: 3d models for games, architecture, videos. (1410833)
turbosquid
$50
Mechanical Spider
...royalty free 3d model mechanical spider for download as blend on turbosquid: 3d models for games, architecture, videos. (1599864)
turbosquid
$45

Mechanical Pencil
...royalty free 3d model mechanical pencil for download as blend on turbosquid: 3d models for games, architecture, videos. (1503379)
turbosquid
$35

Mechanical fish
...id
royalty free 3d model mechanical fish for download as max on turbosquid: 3d models for games, architecture, videos. (1152530)