CG Trader

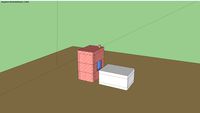
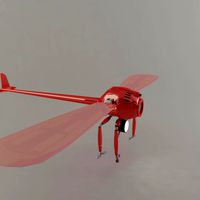
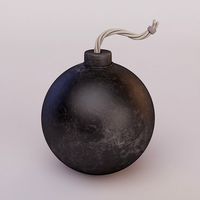
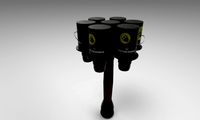
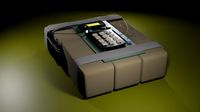
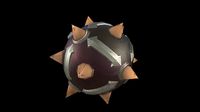
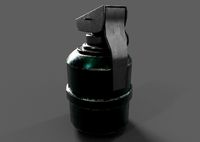
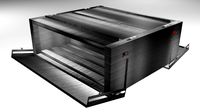
bomb with explode animation
by CG Trader
Last crawled date: 1 year, 10 months ago
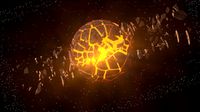
bomb with explode animation with default scanline rendering engine and this include with render out of project to get more models to low price follow us on linkedin [BINUK NETHDINU] this is my account nickname .do you want to learn 3d modelling and more visit and subscribe our youtube channel [TECH FEATHER] do you liked and satisfied about model please comment about your idea.im the beginner to this side please dont forget to comment my models .im only beginner but i want to be a pro please help me to be a pro in 3d model world.and my model buyers can get discounts , i dont want to earn money,i want to be a pro in 3d modelling world . amd ryzen 5000 series cpu
nvidia getforce gtx 2048
dts ultra
16 gb ram
acer
how to make this model This is a tutorial for creating explosions in 3ds max. In this tutorial I will show you how to blow up a planet by starting with a sphere, adding a bomb, adding fire and smoke, making the explosion into a movie, adding materials and a background. Using the tools covered in this tutorial you will be able to easily blow up just about anything. This file takes a minute to load. To get started, go to file and reset. 1. Making the Sphere Go to the shapes tool (highlighted sphere) and click on sphere. Click in the front panel and drag the mouse to create the sphere. In the parameters box, change the radius to 40. If you change your mind about the size of the sphere, you can click on the curved blue modifier and change the values. Adding a Bomb Now we need to add the bomb. So click on the Space Warps button (highlighted in yellow).
this file is 3d max file .
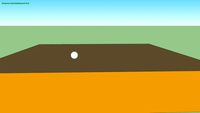
In the drop down menu under the space warp, choose Geometric/Deformable and select Bomb. Click somewhere in the top view to add the bomb close to the sphere. Now, we need to bind the bomb to the sphere. So click on the Bind to Space Warp tool (highlighted in yellow). Click on the bomb and drag your mouse to the sphere. The sphere will flash white for a second. I have dragged the time slider (at the bottom of the screen) to frame 12 to see the effect. I moved the bomb into the middle of the sphere, because I want the bomb to explode equally in all directions. To do this, use the move tool on the top task bar (the one with four arrows is the move tool). Now, dragging the timeslider to frame 14, has this effect: Adding Fire and Smoke First of all, we need to add a gizmo, so we can make an explosion with fire and smoke. Choose Helpers (highlighted yellow). In the drop down menu (where it says standard) choose Atmospheric Apparatus. Click on Sphere Gizmo and in the parameters rollout select Hemisphere. Click in the middle of the sphere and drag your mouse out past the sphere. Set its Radius to 150. Next you need to do 2 things. First, I used my cursor to make a box around everything on the screen and moved it to zero on the Z plane (I moved it up). Second, under the render window, choose environment, in the atmosphere rollout, click on Add. This opened up a window where I'm going to select Fire Effect and say OK. Be sure to click on the pick gizmo button and choose SphereGizmo01 (the object you just place on your screen) At the very bottom, in the explosion options, place a checkmark in the Explosion box and select Setup Explosion. Another window opens up. I have the fire effect of the explosion starting at frame 15 and ending at frame 50. Click OK to exit the environments and effects window. Now I'm going to modify the bomb. So hit the H key to select the bomb and select the modifier tool again (curved blue icon). Change the spin to 100, chaos to 2, detonation to 15. You can play around with the numbers to achieve different effects. The most common problem that happens now is, that you will want to look at a screen shot to see the fire and smoke (press F9) and you won't see the fire. You have to actually render the scene to an AVI video to see the fire. So click on Render and in the rollout select Render. Rendering And the following window opens up. Select the Active Time Segment: 0 To 100 with a resolution of 320x240 (makes the file smaller). You can watch the screen, rendering the AVI frame by frame and make notes about changes to improve the effect. Scroll down in this menu box and click on Files. Another window opens up. Here, you can give your file a name and in the drop down options (where it says .jpg) change this to .avi. Click Save and make sure the viewport is set to a perspective. Now, click on Render at the bottom of the first menu box. 5. Adding Materials Finally, I'm going to add some materials to the scene to make it look more realistic. Select the sphere and press M for materials. We will use a regular jpg graphic located in your handout folder. It is named earthmap. Drag and drop the graphic onto the upper left sphere Now you should see this. There's a little icon of a sphere with an arrow pointing to a cube. Click on this to assign the material to the sphere. Press F9 to see a screenshot of the material applied to the sphere. 6. Adding a Background Environment Now, we're going to add a background environment. Click on Rendering and select Environment. The following window will open up. Click on None. Another window opens up. Check off the “mtl library” and click on open. Locate the “materiallibray” folder the handout folder and double click on “3dsmax”. Scroll down and click on the “space_Hi-Res-Stars (stars 10.jpg) 7. Result You will want to re-render your scene to look at the result. It should look similar to this picture: For enrichment: • • • Try to make the earth spin Change/add different camera angles Create a meteor that flies into the earth prior to the explosion. do you have missing texture please comment below. and.............
thank you!!!!!!!!!!!!!!!!!!!!!!!!! millitary explode animated iron fireworks broke terrorism military rocketry
nvidia getforce gtx 2048
dts ultra
16 gb ram
acer
how to make this model This is a tutorial for creating explosions in 3ds max. In this tutorial I will show you how to blow up a planet by starting with a sphere, adding a bomb, adding fire and smoke, making the explosion into a movie, adding materials and a background. Using the tools covered in this tutorial you will be able to easily blow up just about anything. This file takes a minute to load. To get started, go to file and reset. 1. Making the Sphere Go to the shapes tool (highlighted sphere) and click on sphere. Click in the front panel and drag the mouse to create the sphere. In the parameters box, change the radius to 40. If you change your mind about the size of the sphere, you can click on the curved blue modifier and change the values. Adding a Bomb Now we need to add the bomb. So click on the Space Warps button (highlighted in yellow).
this file is 3d max file .
In the drop down menu under the space warp, choose Geometric/Deformable and select Bomb. Click somewhere in the top view to add the bomb close to the sphere. Now, we need to bind the bomb to the sphere. So click on the Bind to Space Warp tool (highlighted in yellow). Click on the bomb and drag your mouse to the sphere. The sphere will flash white for a second. I have dragged the time slider (at the bottom of the screen) to frame 12 to see the effect. I moved the bomb into the middle of the sphere, because I want the bomb to explode equally in all directions. To do this, use the move tool on the top task bar (the one with four arrows is the move tool). Now, dragging the timeslider to frame 14, has this effect: Adding Fire and Smoke First of all, we need to add a gizmo, so we can make an explosion with fire and smoke. Choose Helpers (highlighted yellow). In the drop down menu (where it says standard) choose Atmospheric Apparatus. Click on Sphere Gizmo and in the parameters rollout select Hemisphere. Click in the middle of the sphere and drag your mouse out past the sphere. Set its Radius to 150. Next you need to do 2 things. First, I used my cursor to make a box around everything on the screen and moved it to zero on the Z plane (I moved it up). Second, under the render window, choose environment, in the atmosphere rollout, click on Add. This opened up a window where I'm going to select Fire Effect and say OK. Be sure to click on the pick gizmo button and choose SphereGizmo01 (the object you just place on your screen) At the very bottom, in the explosion options, place a checkmark in the Explosion box and select Setup Explosion. Another window opens up. I have the fire effect of the explosion starting at frame 15 and ending at frame 50. Click OK to exit the environments and effects window. Now I'm going to modify the bomb. So hit the H key to select the bomb and select the modifier tool again (curved blue icon). Change the spin to 100, chaos to 2, detonation to 15. You can play around with the numbers to achieve different effects. The most common problem that happens now is, that you will want to look at a screen shot to see the fire and smoke (press F9) and you won't see the fire. You have to actually render the scene to an AVI video to see the fire. So click on Render and in the rollout select Render. Rendering And the following window opens up. Select the Active Time Segment: 0 To 100 with a resolution of 320x240 (makes the file smaller). You can watch the screen, rendering the AVI frame by frame and make notes about changes to improve the effect. Scroll down in this menu box and click on Files. Another window opens up. Here, you can give your file a name and in the drop down options (where it says .jpg) change this to .avi. Click Save and make sure the viewport is set to a perspective. Now, click on Render at the bottom of the first menu box. 5. Adding Materials Finally, I'm going to add some materials to the scene to make it look more realistic. Select the sphere and press M for materials. We will use a regular jpg graphic located in your handout folder. It is named earthmap. Drag and drop the graphic onto the upper left sphere Now you should see this. There's a little icon of a sphere with an arrow pointing to a cube. Click on this to assign the material to the sphere. Press F9 to see a screenshot of the material applied to the sphere. 6. Adding a Background Environment Now, we're going to add a background environment. Click on Rendering and select Environment. The following window will open up. Click on None. Another window opens up. Check off the “mtl library” and click on open. Locate the “materiallibray” folder the handout folder and double click on “3dsmax”. Scroll down and click on the “space_Hi-Res-Stars (stars 10.jpg) 7. Result You will want to re-render your scene to look at the result. It should look similar to this picture: For enrichment: • • • Try to make the earth spin Change/add different camera angles Create a meteor that flies into the earth prior to the explosion. do you have missing texture please comment below. and.............
thank you!!!!!!!!!!!!!!!!!!!!!!!!! millitary explode animated iron fireworks broke terrorism military rocketry
Similar models
3dwarehouse
free
Sketchyphysics Bomb
...s an explosion where you can't see the bomb. please rate. #bang #bomb #boom #chimney_sketchyphysics #explosion #house #window
3dwarehouse
free

MAgnet explode
...magnet explode
3dwarehouse
reedited. effects like just a bomb ... change the settings if you want skethcup-sketchyphysics
3dwarehouse
free
blast sketchyphysics
...ion? now is your chance! to start it, unhide the hidden box, click play and touch it with the sphere. #bomb #sketchyphysics #weak
3dwarehouse
free

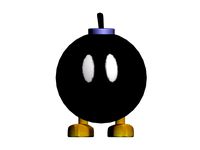
Bomb
...mple cartoonish bomb made in sketchup 8. #awesome #bomb #cartoonish #charge #explosive #explosives #fire #grenade #sphere #ticker
3dwarehouse
free

Bomb explosion
...bomb explosion
3dwarehouse
bomb explodes killing people #bomb #car #explodes #explosion #people
3d_export
$15
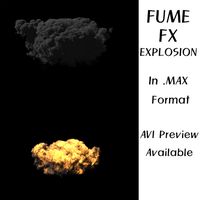
Bomb Explosion 3D Model
...b explosion 3d model
3dexport
explosion bomb fumefx fire effect special fx boom
bomb explosion 3d model johnnny364 88757 3dexport
cg_trader
$3
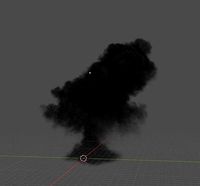
explosion
...ll the noise that you can see in the video. explosion bomb fire explosive dynamite boom grenade terrorism blasting military other
3dwarehouse
free
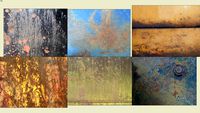
metal texture - 6 pack
...part, drag it out of the bottom bar and drag them back in the window, there you go! #2 #3 #ce #cool #game #half_life #halo #metal
3dwarehouse
free
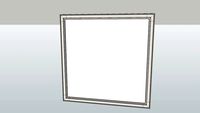
Adjustable window Detailed Frame
...ring the group highlighting the side you want to make bigger and moving it. do not scale ]the scale tool will distort the object]
3dwarehouse
free
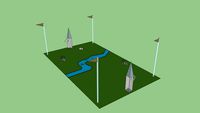
Playing Field
...es in useful when you want to join something together. to un-componentize, right click and select explode. #field #playing #sport
Explode
3d_ocean
$5

Exploding Bottle with Material
...atting liquid inside the bottle. included material for .max file so you can easily costumize the liquid color or bottle material.
turbosquid
$80
Exploding Planet
... available on turbo squid, the world's leading provider of digital 3d models for visualization, films, television, and games.
turbosquid
$50
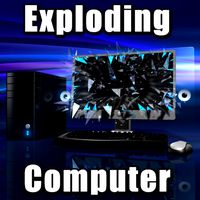
Exploding Computer
... available on turbo squid, the world's leading provider of digital 3d models for visualization, films, television, and games.
turbosquid
$29
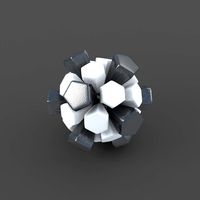
Soccerball exploded
... available on turbo squid, the world's leading provider of digital 3d models for visualization, films, television, and games.
turbosquid
$29
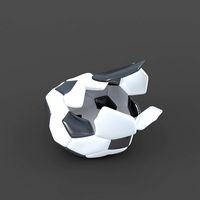
Soccerball explode
... available on turbo squid, the world's leading provider of digital 3d models for visualization, films, television, and games.
turbosquid
$25
Debris explode
... available on turbo squid, the world's leading provider of digital 3d models for visualization, films, television, and games.
turbosquid
$15

Exploding Barrel
... available on turbo squid, the world's leading provider of digital 3d models for visualization, films, television, and games.
turbosquid
$5
exploding robo
... available on turbo squid, the world's leading provider of digital 3d models for visualization, films, television, and games.
3d_export
$5

Exploding Barrels 3D Model
...el
3dexport
exploding barrels animation explossion barrel sequense images png
exploding barrels 3d model beatheart 67499 3dexport
3d_export
$55
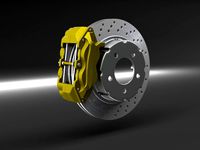
brakes exploded
...; mental ray max materials.<br>other file versions exported from 3ds max, it might be required to change the textures path.
Bomb
3d_ocean
$5
Bomb
...bomb
3docean
3d model bomb explosion medieval old war weapon wicks
medieval bomb
turbosquid
$3
Bomb bomb.7z
... available on turbo squid, the world's leading provider of digital 3d models for visualization, films, television, and games.
3d_ocean
$5

The Bomb
...the bomb
3docean
3d model design furnishings indoor lamps lighting
the bomb lighting 3d model
turbosquid
$1
The bomb
...urbosquid
royalty free 3d model the bomb for download as 3ds on turbosquid: 3d models for games, architecture, videos. (1145276)
3d_export
free
C4 Bomb
...c4 bomb
3dexport
c4 bomb
turbosquid
$13

Bomb
...squid
royalty free 3d model bomb for download as max and fbx on turbosquid: 3d models for games, architecture, videos. (1674821)
3d_export
$5
stylize bomb
...stylize bomb
3dexport
stylize bomb,gem
turbosquid
$2
bomb
...oyalty free 3d model bomb for download as blend, fbx, and obj on turbosquid: 3d models for games, architecture, videos. (1539243)
3d_export
$5
Bath bomb
...bath bomb
3dexport
cat bath bomb mold
turbosquid
$1
Bomb
... free 3d model voxel bomb for download as obj, fbx, and blend on turbosquid: 3d models for games, architecture, videos. (1225271)
Animation
turbosquid
$120
animals pack1 -animated animals
... available on turbo squid, the world's leading provider of digital 3d models for visualization, films, television, and games.
3ddd
$1
animals
... слон , носорог , медведь
animals
design_connected
$13

Animals
...animals
designconnected
hakusan animals computer generated 3d model. designed by mori, masahiro.
turbosquid
$10
Box Animated + Animation Video
...3d model box animated + animation video for download as blend on turbosquid: 3d models for games, architecture, videos. (1255250)
turbosquid
$90

animals
...turbosquid
royalty free 3d model animals for download as obj on turbosquid: 3d models for games, architecture, videos. (1377605)
turbosquid
$10
anime
...e
turbosquid
royalty free 3d model anime for download as obj on turbosquid: 3d models for games, architecture, videos. (1411892)
3ddd
$1

animated flag
...animated flag 3ddd flag flags animation animated cloth , флаг animated flag model .. about...
turbosquid
$48

animals
... available on turbo squid, the world's leading provider of digital 3d models for visualization, films, television, and games.
turbosquid
$10
ANIMAL
... available on turbo squid, the world's leading provider of digital 3d models for visualization, films, television, and games.
turbosquid
$8
animal
... available on turbo squid, the world's leading provider of digital 3d models for visualization, films, television, and games.