Thingiverse
Bolter Conversion for M4 Airsoft by xceptionzero
by Thingiverse
Last crawled date: 3 years ago
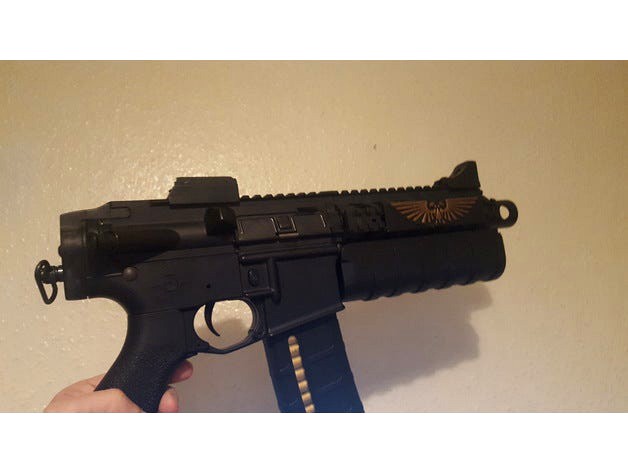
Bolter conversion for m4 Airsoft gun
UPDATES: Aug 2017
Fixes: July 2017 !
2 parts have been updated:
Boltergrip3.stl and BolterOuterBarrel4.stl
This now allows the handguard to lock in the outerbarrel :)
The donor used for this was a G&G Raider Polymer bodied airsoft M4.
The inner barrel, front iron sight, metal reinforcing bar and bushing from inside the rail system were disposed of.
If you choose assembly 1 or 2 also remove the stock and the stock protrusion from the receiver sawn off. The Charging handle was also removed.
(Included pictures show the result).
There are 3 ways to use this kit:
1: Front wired using all parts with a QD attachment at stock end.
2: Front wired using all parts without a QD attachment at stock end.
3: Rear Wired ( in which case do not use the Stock End parts)
Using other models of airsoft gun.
Some modification of these parts may be required as this was custom made for a G&G combat machine raider that was front wired.
The QD used for this was from:http://www.ant-supplies.uk/gun-sling-fittings/flush-fit-gun-sling-swivels.html
(picture attached)
Parts List
BolterFrontSight
BolterRearSight
BolterGrip1
BolterGrip2
BolterGrip3
BolterGrip4
BolterGripLock x2 (these go in after the nuts to keep them secure, if these dont fit tightly please gluse them in after the nut goes in)
BolterGripRib1 x5
BolterGripRib2
BolterOuterBarrel1
BolterOuterBarrel2
BolterOuterBarrel3
BolterOuterBarrel4
BolterStockEnd1
BolterStockEnd2
BolterStockEnd1withoutQD (this is the optional end for those not using a QD
M5X25MM Bolt (for stock end, you can use a 30mm or 35mm also)
M4X30MM Bolt x3
M4X10MM Bolt x2
M4 Nut x4 (x5 if using QD version of Stock End)
M4X8MM Bolt x1 (if using QD version of Stock End)
2 part Epoxy(Araldite or similar)
Notes
1: Parts on diagram with striped texture are points of contact that are glued.
Side Rail Covers
I have included these parts, but they are plain. I have included a file for the eagle logos too. (however i had trouble printing them and got some from shapeways instead: https://www.shapeways.com/product/CLWA9ZY2G/eagle2?optionId=62896387&li=shop-inventory)
Sights
I have drilled 2mm holes and set some tritium tubes into the sights. Very easy to do for night sites :)
Similar models
thingiverse
free

Strike front end for G&G Raider (Airsoft) by xceptionzero
...st a plain version.
some modification to the rear of the receiver using a saw/dremel is required** please see photos for guidance
thingiverse
free

Bolt Pistol - for G&G Raider (Basic Edition) by xceptionzero
... video: https://www.youtube.com/watch?v=lxie-fvn8hi
i bought a front wired mosfet with wiring harness which made it much simpler.
thingiverse
free

Mini Front End for G&G Raider by xceptionzero
...rail.
a additional nut(m4) and bolt(m4x25mm) are required to secure the slide on section
the nut is glued in place as per diagram
cg_trader
$5

QD Swivel and QD Ring Magpul Rifle Sling Attachment Detail Part
...ment in modern weapon systems sometimes from stock (m4, m16, hk416, scar, acr and more weapons with qd-mounts of different type).
thingiverse
free

Magpul PRS Pipe Adapter for M4 AIrsoft Gun by Kawadarze
...y mounted on a gr15 raider)
for mount it, use your original screw of your old stock and for the back use a m5 nut and m5x20 screw
thingiverse
free

Airsoft M4 M16 AR15 QD Stock Tube Mount by GriffonODST
...for a commercial spec stock tube. use an m4 bolt to tighten together. i would recommend boring the whole on the input side first.
thingiverse
free

Orion Blasters Lynx Ergo Stock Edition - QD and Sling Bar by ahalekelly
...ersions, sling bar fits a 1" sling and uses a 10-24 x 1-1/2" screw. qd geometry stolen from the endersavestheday remix.
thingiverse
free

Airsoft Picatinny Red Dot Sight Protector by micktay44
...ard picatinny rail.
i purchased some acrylic and cut out squares for the protector screen.
requires two bolts, m4 or m5 (i think)
thingiverse
free

Airsoft iron sights (10/22, ASG carbine, KC-02) by RJC0235
...rews (10mm long), but had to grind some of them down to lenght, and a single 3x8mm grum nut to hold the front lead sight in place
thingiverse
free

Fully adjustable rifle sights by kallehoeh
...ad screw
1 m4 hex nut
1 m3x20 cylinderhead screw
1 m3 hex nut
some good superglue to glue the motion prevention/m4 cover in place
Xceptionzero
thingiverse
free

Bulkhead Template by xceptionzero
...bulkhead template by xceptionzero
thingiverse
basic dimensions for compatibility
thingiverse
free

Compensator for SRU PDW (AIRSOFT) by xceptionzero
... for sru pdw (airsoft) by xceptionzero
thingiverse
compensator for the sru pdw kit for airsoft glocks.
a low profile attachment.
thingiverse
free

Necromunda style Bulkhead Template by xceptionzero
...necromunda style bulkhead template by xceptionzero
thingiverse
accurate bulkhead template for making your own bulkheads
have fun
thingiverse
free

Compensator for SRU PDW (AIRSOFT) v2 by xceptionzero
...2 by xceptionzero
thingiverse
remix of "compensator for the sru pdw kit for airsoft glocks.
a low profile attachment."
thingiverse
free

Compensator for SRU PDW (AIRSOFT) v3 by xceptionzero
...ru pdw kit for airsoft glocks.
a low profile attachment."
with separate rail that can be epoxyed or acetone glued to the top
thingiverse
free

Gladius FDM (Airsoft kit for the SRU PDW) by xceptionzero
...sru pdw)
optimised for fdm printing even at 0.2 resoloution.
parts are glued and model has superior strength over previous models
thingiverse
free

Airsoft FairBurn Sykes Replica by xceptionzero
...ip = ready to print (you need two also)
note to make it printable some dimensions were chnaged along with a blunt edge for safety
thingiverse
free

Airsoft MP5 Slimline Handguard by xceptionzero
...rent if you post pictures of the differences to how the handguard attaches i will see if i can design one for your type of mp5 :)
thingiverse
free

Airsoft MP5 slimline Handguard (ICS version v1) by xceptionzero
...requires supports for print
compatibility:
printer brand:
flashforge
printer:
creator pro
rafts:
no
supports:
yes
resolution:
0.2
thingiverse
free

HK416 (TR418) Handguard (Airsoft) by xceptionzero
... parts (see picture)
venttaila and ventrailb are alternative parts that also allow fitting of standard g36c rails.(see pictures)
Bolter
3d_export
$5

spacemarines bolter
...spacemarines bolter
3dexport
my first model , lowpoly , for render , thanks for rate
3d_export
$10

Havy Bolter Accatran
...drum: model in blender and fbx format, 2 texture sets: blue/rad exported from substance painter for opengldrum model-165 polygons
3d_ocean
$20

Low Poly Gun Set 01
...low poly gun set 01 3docean asset battle bitgem bolter game gun hammer low low poly poly ranged rifle...
3d_ocean
$6

Low Poly Gun 04
...low poly gun 04 3docean asset battle bitgem bolter game gun hammer human low low poly mallet poly...
3d_ocean
$5

Low Poly Gun 03
...low poly gun 03 3docean asset battle bitgem bolter game gun hammer human low low poly mallet poly...
3d_ocean
$5

Low Poly Gun 02
...low poly gun 02 3docean asset battle bitgem bolter game gun hammer human low low poly poly ranged...
3d_ocean
$5

Low Poly Gun 01
...low poly gun 01 3docean asset battle bitgem bolter game gun hammer human low low poly mallet poly...
3d_ocean
$5

Low Poly Gun 05
...low poly gun 05 3docean asset battle bitgem bolter game gun hammer human low low poly mallet poly...
3d_ocean
$5

Low Poly Gun Add Ons
...low poly gun add ons 3docean asset battle bitgem bolter chain saw flame thrower game gun hammer low low...
thingiverse
free

bolter
...bolter
thingiverse
for a mini
Airsoft
turbosquid
$25

Mask Airsoft
... available on turbo squid, the world's leading provider of digital 3d models for visualization, films, television, and games.
turbosquid
$2

Airsoft Tomahawk
...irsoft tomahawk for download as 3ds, obj, fbx, blend, and stl on turbosquid: 3d models for games, architecture, videos. (1145041)
turbosquid
$4

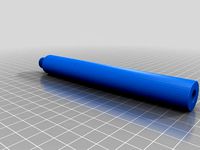
Extension Barrel for Airsoft Gun
...model extension barrel for download as max, obj, fbx, and stl on turbosquid: 3d models for games, architecture, videos. (1239268)
3d_export
$30
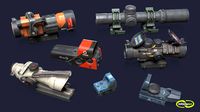
Gunsights
...trijicon rmr type, trijicon bac acog 4x32, aim m2 airsoft x2, vortex optics spr 1303 spitfire all models polygons...
thingiverse
free

AIRSOFT by Mr_akil
...airsoft by mr_akil
thingiverse
airsoft
thingiverse
free

Flashhider Airsoft
...flashhider airsoft
thingiverse
airsoft m4 flashhider
mounted @ my ares amoeba 008
thingiverse
free
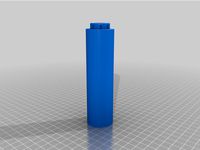
Airsoft Suppressor by KevinIhle
...airsoft suppressor by kevinihle
thingiverse
airsoft suppressor
thingiverse
free

airsoft suppressor by jordan250
...airsoft suppressor by jordan250
thingiverse
airsoft suppressor
thingiverse
free
Airsoft Silencer by UKnights
...airsoft silencer by uknights
thingiverse
airsoft silencer
thingiverse
free
Airsoft suppresor by 3dpoplauki
...airsoft suppresor by 3dpoplauki
thingiverse
airsoft suppresor rings
M4
turbosquid
$25

M4
...m4
turbosquid
royalty free 3d model m4 for download as obj on turbosquid: 3d models for games, architecture, videos. (1699396)
turbosquid
$25

M4
...bosquid
royalty free 3d model m4 for download as fbx and obj on turbosquid: 3d models for games, architecture, videos. (1563962)
3d_export
free

m4
...m4
3dexport
m4-modeling 3d object.<br>follow me on instagram it would help me a lot :) https://www.instagram.com/fustresd
turbosquid
$30

M4
... available on turbo squid, the world's leading provider of digital 3d models for visualization, films, television, and games.
turbosquid
$30

m4
... available on turbo squid, the world's leading provider of digital 3d models for visualization, films, television, and games.
turbosquid
$20

m4
... available on turbo squid, the world's leading provider of digital 3d models for visualization, films, television, and games.
turbosquid
$10

M4
... available on turbo squid, the world's leading provider of digital 3d models for visualization, films, television, and games.
turbosquid
$8

M4
... available on turbo squid, the world's leading provider of digital 3d models for visualization, films, television, and games.
turbosquid
$3

M4
... available on turbo squid, the world's leading provider of digital 3d models for visualization, films, television, and games.
turbosquid
$2

m4
... available on turbo squid, the world's leading provider of digital 3d models for visualization, films, television, and games.
Conversion
3ddd
$1

Conversation Seat
...шетка
the conversation seat made in englandhttp://www.squintlimited.com/products/the_conversation_seat/gold
+ max 2011
3d_export
$10

Converse 3D Model
...converse 3d model
3dexport
converse shoe pc unix mac
converse 3d model electropainter17075 38067 3dexport
turbosquid
$100

converse-shoe
...quid
royalty free 3d model converse-shoe for download as c4d on turbosquid: 3d models for games, architecture, videos. (1398427)
turbosquid
$10

Conversation Furniture
... available on turbo squid, the world's leading provider of digital 3d models for visualization, films, television, and games.
turbosquid
$7

Converse Allstars
... available on turbo squid, the world's leading provider of digital 3d models for visualization, films, television, and games.
design_connected
$16

Conversation Club Chair
...conversation club chair
designconnected
donghia conversation club chair chairs computer generated 3d model. designed by n/a.
design_connected
$27

Hemicycle Conversation Chair
...rsation chair
designconnected
ligne roset hemicycle conversation chair computer generated 3d model. designed by nigro, philippe.
3d_export
$24

Converse keds 3D Model
...converse keds 3d model
3dexport
converse all star ked shoe clothes sports
converse keds 3d model vermi1ion 26201 3dexport
3ddd
$1

Converse All-Star Shoes
...converse all-star shoes
3ddd
кеды , обувь
converse all-star shoes
design_connected
$18

CONVERSE Jack Purcell Sneakers
...converse jack purcell sneakers
designconnected
converse jack purcell sneakers computer generated 3d model.