Thingiverse

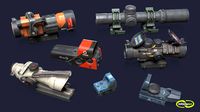
Bolter Conversion for G36 Airsoft by xceptionzero
by Thingiverse
Last crawled date: 3 years, 1 month ago
Bolt Gun G36 Kit
This Kit is designed to fit on airsoft G36 replica's. In this case an SRC GEN 3 was used. It is designed to be fully removalable for maintanance. Its internal design ensures it fits snug and secure on the airsoft replica.
*Note if you have a G36 of another brand compatiblity cant not be promised and some small modification may be required. A TM compatible magwell has been provided as an optional part if required.
Recommended Equipment:
Glue (2 part epoxy was used)
Various grades of sandpaper (from 150 down to 3000, though this is optional and use your own discretion)
Allen keys (to affix the bolts)
(Bolts/screws are qty=2 (M4x25mm), qty=6 (M4X8mm), qty=2 (M4x12mm), qty=1 (M6X45mm) and you will need nuts for those 10x m4 and 1x M6
Bar Clamps (or other equipment to hold parts while glue sets)
Needle files (for finishing and adjusting fit)
Parts List:
FPlate - Front Plate
FrontSideL - Front Side Left
FrontSideR - Front Side Right
FGrip - Front Grip
MidSideL - Middle Side Left
MidSideR - Middle Side Right
MidGrip - Middle Grip
RearSideL - Rear Side Left
RearSideR - Rear Side Right
RailA1 - Front end of railsection
RailB1 - 2nd part of rail section
RailC1 - 3rd part of rail section
RailD1 - 4th part of rail section
Connector1 - First part of the upper rail section
Connector2 - 2nd part of upper rail section
Connector3 - 3rd part of upper rail section
Connector4 - 4th part of upper rail section
Grips - Grips for front end (need 4 of these)
Muz - Muzzle
MuzRing - Muzzle ring
FNub - Front Nubbin
Eagle - Eagle Emblem
FSight - Front sight
Rsight - Rear Sight
ChargeH - Fake Charging Nubbin
Optional Parts:
TMMagTop - TM compatible Magwell Top
TMMagBot - TM compatible Magwell Bottom
Step 1: Front End
Assemble these parts to create Front End section 1 and glue (See image https://thingiverse-production-new.s3.amazonaws.com/renders/8f/df/9c/6d/3b/4175a38a32bbdcffdfbd120568a81e82_preview_featured.jpg)
FPlate - Front Plate
FrontSideL - Front Side Left
FrontSideR - Front Side Right
FGrip - Front Grip
Assemble these parts to create Front End section 2 and glue (See image https://thingiverse-production-new.s3.amazonaws.com/renders/7a/c8/e2/72/7f/77ae8c373087666dfa784e0bb3844616_preview_featured.jpg)
MidSideL - Middle Side Left
MidSideR - Middle Side Right
MidGrip - Middle Grip
RearSideL - Rear Side Left
RearSideR - Rear Side Right
*Note the part "ChargeH" needs to be fitted to the part "RearSideR"
Assemble both Sections and glue (See image "Front End")
Step 2: Top Rail
Assemble these parts to create Top Rail Section 1 and glue them together into 1 single piece.
Connect1
Connect2
Connect3
Connect4
Ensure they are orientated correctly!
Assemble the parts to create Top Rail Section 2 and only glue the nuts into each segment. The segments must remain seperate!
RailA1
RailB1
RailC1
RailD1
Step 3: Magwell
Assemble the parts to create the magwell and glue
MagL - Left hand side of magwell
MagR - Right hand side of magwell
MagLA - Left hand side magwell part2
MagRA - Ritght hand side magwell part2
*MagTop - Top section to interface with SRC hop unit
*Exchange for the two parts below to chnage it from SRC compatible to TM compatible
TMMagTop - Top section to interface with TM Style hop unit
TMMagBot - Bottom section to interface with TM Style hop unit
(some filing may be required to get it to feed BB's correctly and allow the nozzle to pass)
Step 4: Muzzle
Fit part: MuzRing into back of the frontplate, this will allow part: Muz to fit onto it
Step 5: Front Sight
The part: FSight allows two nuts to run inside of it and is the screwed on from underneath so that it attaches to part: RailA1
(see images for clarification)
Step 6: Rear Sight
The part: RSight other than providing a rear sight helps to hold the front end flush to the G36 replica.
Special Notes:
Step 7: Grips
The part: Grips can be fitted at your discretion and in any number (i used 4 evenly spaced.
Step 8: Eagle
The part: Eagle can be fitted at your discretion.
NOTES
Please refer to images prior to gluing. Always double check parts. Some sanding/adjustment may be required.
Have fun
Remixes should be great fun if you can improve this model :)
https://www.facebook.com/wallopsoftmodels/https://www.shapeways.com/shops/wallopsoft?li=pb
Similar models
thingiverse
free

G36 Rail by PopRocket
...ail by poprocket
thingiverse
model of a g36 rail for airsoft. note does not include front and rear sights or picatinny segments.
thingiverse
free

AK74 UltraLight Front End by DragonflyFabrication
...0mm piece of fibre optic, clear plastic cylinder, or lego piece for front sight post
-print all parts in the original orientation
thingiverse
free

G36 airsoft stubby forward grip by chike_h
... grip that can attach to g36's original front end without rail plate. tidy and simple. uses the same screw as the rail plate.
thingiverse
free

Prototype Coyotech Aperture Wye Mk 2 by ManiacalCoyote
...assembly (muzzle)
stick on the other end of the barrel.
you can sell these if you want, just make sure to credit it as my design.
thingiverse
free

Airsoft G36 Flat-Top Rail Adapter by npolanosky
...an airsoft g36. use when you want to mount a red dot or something else on the rail without having the original sights in the way.
thingiverse
free

Universal pistol rail adapter and AK-style adjustable sights by kallehoeh
...
all parts have a tight fit because that way they don´t fall of, so a little bit of force is required
(but don´t break it ;d ).
thingiverse
free

TM MP7 GBB Front Rail by DashDX
...d 3d printed my own front cover.
it has m-lok compatible holes in the bottom to attach rail section or m-lok grip directly to it.
thingiverse
free

G36 ambi charging handle (Updated) by ohman74
...ted on a umarex g36, should work for tm/jg/src etc. m3 screw/bolt used for attachment.
update: added reversed version by request.
thingiverse
free

Picatinny Iron Sights by flamex98
...but they should be compatible with any picatinny rail.
the two notches on the rear sight line up with the top of the front sight.
thingiverse
free

Nerf Kronos XVIII-500 Dual-Wield Attachments by seawitch4
...to use the ring-sight. center target in ring, use the top 1/4inch of rear sight to center the aim (any farther and it's low)
Xceptionzero
thingiverse
free

Bulkhead Template by xceptionzero
...bulkhead template by xceptionzero
thingiverse
basic dimensions for compatibility
thingiverse
free

Compensator for SRU PDW (AIRSOFT) by xceptionzero
... for sru pdw (airsoft) by xceptionzero
thingiverse
compensator for the sru pdw kit for airsoft glocks.
a low profile attachment.
thingiverse
free

Necromunda style Bulkhead Template by xceptionzero
...necromunda style bulkhead template by xceptionzero
thingiverse
accurate bulkhead template for making your own bulkheads
have fun
thingiverse
free

Compensator for SRU PDW (AIRSOFT) v2 by xceptionzero
...2 by xceptionzero
thingiverse
remix of "compensator for the sru pdw kit for airsoft glocks.
a low profile attachment."
thingiverse
free

Compensator for SRU PDW (AIRSOFT) v3 by xceptionzero
...ru pdw kit for airsoft glocks.
a low profile attachment."
with separate rail that can be epoxyed or acetone glued to the top
thingiverse
free

Gladius FDM (Airsoft kit for the SRU PDW) by xceptionzero
...sru pdw)
optimised for fdm printing even at 0.2 resoloution.
parts are glued and model has superior strength over previous models
thingiverse
free

Airsoft FairBurn Sykes Replica by xceptionzero
...ip = ready to print (you need two also)
note to make it printable some dimensions were chnaged along with a blunt edge for safety
thingiverse
free

Airsoft MP5 Slimline Handguard by xceptionzero
...rent if you post pictures of the differences to how the handguard attaches i will see if i can design one for your type of mp5 :)
thingiverse
free

Airsoft MP5 slimline Handguard (ICS version v1) by xceptionzero
...requires supports for print
compatibility:
printer brand:
flashforge
printer:
creator pro
rafts:
no
supports:
yes
resolution:
0.2
thingiverse
free

HK416 (TR418) Handguard (Airsoft) by xceptionzero
... parts (see picture)
venttaila and ventrailb are alternative parts that also allow fitting of standard g36c rails.(see pictures)
G36
3d_export
$99

Beechcraft Bonanza G36 3D Model
...training air taxi personal propeller airplane private prop plane small
beechcraft bonanza g36 3d model fisherman3d 79984 3dexport
3d_export
$69

G36 Assault Rifle 3D Model
...on machine night vision optical sight mg battle explosion special forces army
g36 assault rifle 3d model panaristi 27991 3dexport
3d_export
$69

Heckler Koch G36 Assault Rifle 3D Model
...ch commando h&k heckler koch g36 g36a riffle plastic weapon
heckler koch g36 assault rifle 3d model squir 82925 3dexport
cg_studio
$69

Heckler n Koch G36 Assault Rifle3d model
....fbx .lwo .max .obj - heckler n koch g36 assault rifle 3d model, royalty free license available, instant download after purchase.
3d_export
$27

G36CV 3D Model
...g36cv 3d model
3dexport
rifle g36 36c gun
g36cv 3d model pio33d 67124 3dexport
cg_studio
$99

Beechcraft Bonanza G363d model
...c4d .fbx .lwo .max .obj .xsi - beechcraft bonanza g36 3d model, royalty free license available, instant download after purchase.
3d_export
$99

Infiniti G37 coupe 3D Model
...infiniti g37 coupe 3d model 3dexport infiniti g37 g36 coupe g37c infinity g-37 2009 2010 2011 2012 sport...
thingiverse
free

G36 by Noise0815
...g36 by noise0815
thingiverse
g36 komplett oder in teilen um es größer zu drucken
thingiverse
free

tactical support HK G36
...tactical support hk g36
thingiverse
suport for hk g36
thingiverse
free

M4 stock adapter to G36
...m4 stock adapter to g36
thingiverse
m4 stock adapter to g36
Bolter
3d_export
$5

spacemarines bolter
...spacemarines bolter
3dexport
my first model , lowpoly , for render , thanks for rate
3d_export
$10

Havy Bolter Accatran
...drum: model in blender and fbx format, 2 texture sets: blue/rad exported from substance painter for opengldrum model-165 polygons
3d_ocean
$20

Low Poly Gun Set 01
...low poly gun set 01 3docean asset battle bitgem bolter game gun hammer low low poly poly ranged rifle...
3d_ocean
$6

Low Poly Gun 04
...low poly gun 04 3docean asset battle bitgem bolter game gun hammer human low low poly mallet poly...
3d_ocean
$5

Low Poly Gun 03
...low poly gun 03 3docean asset battle bitgem bolter game gun hammer human low low poly mallet poly...
3d_ocean
$5

Low Poly Gun 02
...low poly gun 02 3docean asset battle bitgem bolter game gun hammer human low low poly poly ranged...
3d_ocean
$5

Low Poly Gun 01
...low poly gun 01 3docean asset battle bitgem bolter game gun hammer human low low poly mallet poly...
3d_ocean
$5

Low Poly Gun 05
...low poly gun 05 3docean asset battle bitgem bolter game gun hammer human low low poly mallet poly...
3d_ocean
$5

Low Poly Gun Add Ons
...low poly gun add ons 3docean asset battle bitgem bolter chain saw flame thrower game gun hammer low low...
thingiverse
free

bolter
...bolter
thingiverse
for a mini
Airsoft
turbosquid
$25

Mask Airsoft
... available on turbo squid, the world's leading provider of digital 3d models for visualization, films, television, and games.
turbosquid
$2

Airsoft Tomahawk
...irsoft tomahawk for download as 3ds, obj, fbx, blend, and stl on turbosquid: 3d models for games, architecture, videos. (1145041)
turbosquid
$4

Extension Barrel for Airsoft Gun
...model extension barrel for download as max, obj, fbx, and stl on turbosquid: 3d models for games, architecture, videos. (1239268)
3d_export
$30
Gunsights
...trijicon rmr type, trijicon bac acog 4x32, aim m2 airsoft x2, vortex optics spr 1303 spitfire all models polygons...
thingiverse
free

AIRSOFT by Mr_akil
...airsoft by mr_akil
thingiverse
airsoft
thingiverse
free

Flashhider Airsoft
...flashhider airsoft
thingiverse
airsoft m4 flashhider
mounted @ my ares amoeba 008
thingiverse
free
Airsoft Suppressor by KevinIhle
...airsoft suppressor by kevinihle
thingiverse
airsoft suppressor
thingiverse
free

airsoft suppressor by jordan250
...airsoft suppressor by jordan250
thingiverse
airsoft suppressor
thingiverse
free
Airsoft Silencer by UKnights
...airsoft silencer by uknights
thingiverse
airsoft silencer
thingiverse
free
Airsoft suppresor by 3dpoplauki
...airsoft suppresor by 3dpoplauki
thingiverse
airsoft suppresor rings
Conversion
3ddd
$1

Conversation Seat
...шетка
the conversation seat made in englandhttp://www.squintlimited.com/products/the_conversation_seat/gold
+ max 2011
3d_export
$10

Converse 3D Model
...converse 3d model
3dexport
converse shoe pc unix mac
converse 3d model electropainter17075 38067 3dexport
turbosquid
$100

converse-shoe
...quid
royalty free 3d model converse-shoe for download as c4d on turbosquid: 3d models for games, architecture, videos. (1398427)
turbosquid
$10

Conversation Furniture
... available on turbo squid, the world's leading provider of digital 3d models for visualization, films, television, and games.
turbosquid
$7

Converse Allstars
... available on turbo squid, the world's leading provider of digital 3d models for visualization, films, television, and games.
design_connected
$16

Conversation Club Chair
...conversation club chair
designconnected
donghia conversation club chair chairs computer generated 3d model. designed by n/a.
design_connected
$27

Hemicycle Conversation Chair
...rsation chair
designconnected
ligne roset hemicycle conversation chair computer generated 3d model. designed by nigro, philippe.
3d_export
$24

Converse keds 3D Model
...converse keds 3d model
3dexport
converse all star ked shoe clothes sports
converse keds 3d model vermi1ion 26201 3dexport
3ddd
$1

Converse All-Star Shoes
...converse all-star shoes
3ddd
кеды , обувь
converse all-star shoes
design_connected
$18

CONVERSE Jack Purcell Sneakers
...converse jack purcell sneakers
designconnected
converse jack purcell sneakers computer generated 3d model.