Thingiverse

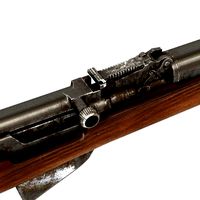
Bolt Action Air Rifle with Shell Ejection (CO2 Powered) by mechanic403
by Thingiverse
Last crawled date: 3 years ago
An Air Rifle that shoots 1 inch blow darts powered by CO2. Magazine fed with shell ejection mechanism
DISCLAIMER: By downloading these files, you agree that I shall not be liable for any damage, injury or harm resulting directly or indirectly from the use of these files or instructions. Always be safe and aware when operating these mechanical toys and enjoy!
Required Parts
CO2 Bike Pump:
Rigid Tube (10mm Inner Dia, 14mm Outer Dia)
Flexible tubing (4.25mm Inner Dia, 5.75mm Outer Dia). The inner dia is less critical than the outer dia, which should be between 5.5mm and 6mm.
Mini blow darts
16g or 20g threaded CO2 canisters
Neodymium cylinder magnets (5mm Dia, 3mm Height) [x8]
PVC Pipe (1in Outer Diameter 3/4in Inner Diameter)
M4x20 screws [x2]
M3x30 screw [x1]
M3x20 screws [x6]
M2x16 screws and nuts [x4]
M2x10 screws [x2]
Small and medium rubber bands
Assembly Guide
Shell Printing
Ive included two variants of the shell depending on your printer's tolerance / filament.
One has a 10.1mm inner diameter for a tight fit with the darts, and the other has a 10.3mm inner diameter for a somewhat looser fit. The darts should be pretty tight when inserted such that they dont fall out when tipped upsidedown, but not so tight that they cant be pushed out. Try printing one of each shell to see which works best for you. You can do finer adjustments to the tolerance by putting some scotch tape or masking tape on the inside of the shell wall.
Print the shells with the flat bottom on the build plate at 0.3mm layer height. You might want to add a 2 or 3 mm brim to keep them attached to the build plate. If so, ensure you cut off the brim with a knife so there is no extra flashing as this will prevent them from being properly ejected.
Magazine Assembly
Gather the two magazine halves, the MagazineShellLift, a rubber band, 4 Neodymium magnets and 4 M2x16 screws and nuts.
First, push the magnets into the holes on either side of the magazine. Ensure their polarity is consistent; the magnets on either side should have their North pole facing outward.
Sand down the inner faces of the magazine halves so that they can be placed together without gaps. Place the MagazineShellLift between the two halves with the small tabs in either slot of the magazine halves. Connect the two halves together, enclosing the lift, then secure with the 4 screws and nuts. Ensure the screw heads are fully inserted so the sides of the magazine are flat and the heads do not protrude. Loop the rubberband around the top of the magazine, above the two screw brackets, then bring the band underneath the two tabs of the Lift.
Receiver Assembly
Gather ReceiverTop, ReceiverBottom, ShellEjectorCam, the ForeGrip halves, RearSight, a small rubber band, 4 magnets, 8 M3x20 screws, 2 M2x10 screws.
Press the 4 magnets into the holes on the sides of ReceiverBottom, ensuring that the polarity of the magnets is such that they attract the magnets on the magazine when the mag is inserted into the magazine well on the bottom Receiver.
Sand down the top face of ReceiverBottom and the bottom face of ReceiverTop such that they can be placed together without gaps.
Take the ShellEjectorCam and use an M2x10 screw to secure it to the rear hole in the small recessed slot on the left side of ReceiverBottom. The Cam's hook should protrude slightly out of the left side. Ensure it can rotate freely around the screw. Next, screw in the other M2x10 screw into the hole in front of the cam. Dont screw it in all the way, leave enough room to loop a rubberband around that screw and connect it to the hook on the ShellEjectorCam.
Next, connect ReceiverTop and Bottom with 4 M3x20 screws using the front and rear most pair of holes.
Now take the two ForeGrip halves and screw them together with 2 M3x20 screws through the holes on the left side of the ForeGrip. Attach the ForeGrip to ReceiverBottom via two more M3x20 screws through the bottom of the ForeGrip going through the pair of holes second from the front of ReceiverBottom.
Take your rigid tube for the barrel and cut it to your desired length. Apply a small amount of hot glue to the edge of the tube and quickly press it into the front of the Receiver such that the glue forms a seal.
Finally, take the rear sight and glue it to the top of ReceiverTop, mating the small tab into the slot on the Receiver. Take the FrontSight and place the ring around the tip of the barrel.
Bolt Assembly
Gather the BoltSlider, the BoltLeverArm and BoltExtractorArm.
Depending on how you printed the BoltSlider (split halves or single peice with supports), clean it up and connect the halves with glue if necessary. Sand it down as so it is as smooth as possible and can slide and rotate freely into the shaft within the Receiver.
Once it is sufficiently smooth, glue the BoltExtractorArm into the small slot on the front of the Bolt. Next, take the LeverArm and glue it into the hole at the rear of the BoltSlider.
Use liberal amounts of glule as this should be as secure as possible.
Once all the glue is dry, you can insert the bolt into the rear shaft of the Receiver, starting at an angle and then straightening it out as it clears the small stop tab on the Receiver.
You can now test the system by loading up a few shells into a magazine, inserting the magazine while the bolt is fully pulled back, then pushing forward on the bolt to chamber a shell. The ExtractorArm should click onto the rim of the shell when fully chambered. Try ejecting the shell by pulling the bolt backwards smoothly. If the shell doesnt eject, try sanding down the rim of the shell a tiny bit as the very bottom of the shell might be a bit wider since it was printed first on the build plate.
Grip and Stock Assembly
Gather the two Grip halves, the StockMount, the StockButt, MainTrigger, TubeValveCoupler, flexible tubing, the CO2 pump head and your PVC pipe, along with 2 M4x20 screws and the M3x30 screw.
Again, sand down the two inner faces of the Grip halves so that they connect without gaps.
Disassemble the CO2 pump by unscrewing the handle and prying off the plastic cover and then removing the trigger.
Put the larger end of the TubeValveCoupler into the nozzle of the Pump head and seal with hot glue if necessary. Attach one end of the flexible tubing to the Coupler, and push the other end through the shaft of the BoltSlider.
Place the pump head in between the two grip halves such that the pump nozzle points backwards and the small pins on the bottom of the pump go through the small rectangular holes on either side of the grip halves.
Use the two M4 screws to mount the grip onto the back of the Receiver. The whole assembly should be fairly tight and the pump should be held in place.
Next, take the StockMount and place it around the rear of the grip such that the hole in the side of the StockMount is aligned with the trigger axis hole of the Grip. Using the M3x30 screw, slowly screw it into these holes, stopping when its about halfway to insert the MainTrigger into the Grip's slot such that the screw goes through the hole in the trigger. Finishing screwing to fully connect the StockMount to the Grip.
Now cut your PVC pipe to a length that feels comfortable to you. Connect the pipe to the cylinder on the StockMount and connect the other end to the StockButt. Depending on print tolerance, you might need to wrap some tape around the cylinders to tighten up the fit.
You can now insert a CO2 cartridge into the handle of the pump and load up some shells and magazines and test fire!
Similar models
thingiverse
free

The Double D: Derringer Crossbow Pistol by mechanic403
...e derringer and pull the trigger to fire both arrows at once! you can also optionally load a single arrow if you desire. enjoy!
thingiverse
free

Virage foregrip
...s and matching nuts
fits both the talon claw and caliburn pump grips.
holds up best if printed on their flat sides with supports.
thingiverse
free

Single Action CO2 Airgun Revolver by mechanic403
...was inspired by the webley revolver and has a similar form factor. disclaimer: by downloading these files, you agree...
thingiverse
free

Underbarrel Bigshock for Alpha Trooper
...give it a foregrip and mega dart firing capabilities similar to a stryfle. i designed it to use the...
thingiverse
free

Screwdriver bit cradle, magnetic, no glue by annab3l
...part holder with inner and outer shell that fit into each other and let you sandwich small magnets, without gluing them in place.
thingiverse
free

Shade Foregrip rail insert by TheLoneWolf052
...the .stp file with panels and insert is included.
thanks to user 'thefrenchiestfry' who suggested the rail on the bottom!
thingiverse
free

Picture Frame by dernst
...ry other hole and it would hold very well. test before glueing together. the magnets should be on the inside of the frame.
enjoy!
thingiverse
free

Hidden Pump or CO2 for Yeti Bikes by lukasseitz
... the groove on the adapter to ensure a tight fit.
the co2 might require a little wiggle to clear the dropper post actuator cable.
thingiverse
free

3doodler grip w/ magnet boss by ANONYMOUSALIEN
...
you'll just need the screws and magnet if you choose to use it.
i used pla at 205/ 90 w/ .3 infill and two perimeter shells.
thingiverse
free

Buck Converter Box (LM2596) with 6x2mm magnets by Adiyahu
...netic, i learned it the hard way:(
insert and glue the magnet, i specifically enlarged the hole a little bit for easy insertion.
Mechanic403
thingiverse
free

Circuit Six Sided Dice by mechanic403
...ve included two variations: one with thin lines connecting the pips and one where the lines are the same width as the pips
enjoy!
thingiverse
free

Designer Six Sided Dice by mechanic403
...er printing, i painted each pip with nail polish. after fully dried, i wet sanded each face with 220 grit to clean up the paint.
thingiverse
free
![[Star Wars] Batuuan Spira Credits by mechanic403](/t/8363693.jpg)
[Star Wars] Batuuan Spira Credits by mechanic403
...t an exact replica but pretty close. the back side is blank. you can print two and glue them together for a double sided model.
thingiverse
free

Spongebob and Patrick Earrings by mechanic403
... patrick, i printed in whatever color, sanded smooth and then painted with pink nailpolish and finished with a clear coat.
enjoy!
thingiverse
free

Gravitrax Compatible Trap Door Tile by mechanic403
...lever can then be snapped into place in the trapdoorinsert. finally, insert the whole assembly into oostmeijer's basic tile.
thingiverse
free
![Lament Configuration [Minimalist Version] by mechanic403](/t/8099464.jpg)
Lament Configuration [Minimalist Version] by mechanic403
...the surface. itll stick well and wont leave any discolored residue.
update: fixed some small gaps in the connector bits on facec
thingiverse
free

Gravitrax Compatible Ballista by mechanic403
...nel of the base. once a ball is rolled into the rear end, it should release the trigger and send the ball in the channel flying!
thingiverse
free
The Double D: Derringer Crossbow Pistol by mechanic403
...e derringer and pull the trigger to fire both arrows at once! you can also optionally load a single arrow if you desire. enjoy!
thingiverse
free
Single Action CO2 Airgun Revolver by mechanic403
... and press all the way back to have the rimtabs lock the shell rims in place. push the plunger down to have all six shells drop!
Ejection
3d_export
$50

Ejection seat 3D Model
...ion seat 3d model
3dexport
martin baker ejection seat eject martin-baker jet fighter
ejection seat 3d model tartino 1951 3dexport
3d_export
$55

Spacecraft ejection seat
... this ejection<br>seat to exit the descent module upon re-entry, after completing the<br>first manned orbit of earth.
cg_studio
$50

Ejection seat3d model
... seat3d model
cgstudio
.3ds .obj .obp - ejection seat 3d model, royalty free license available, instant download after purchase.
turbosquid
$199

ADAMS EJECTIONS SEAT
...oyalty free 3d model adams ejections seat for download as stl on turbosquid: 3d models for games, architecture, videos. (1290750)
turbosquid
$150

AIRCRAFT EJECTION SEAT
...alty free 3d model aircraft ejection seat for download as stl on turbosquid: 3d models for games, architecture, videos. (1290745)
turbosquid
$150

AIRCRAFT EJECTION SEAT
...alty free 3d model aircraft ejection seat for download as stl on turbosquid: 3d models for games, architecture, videos. (1290744)
turbosquid
$150

GEORGE EJECTION SEAT
...oyalty free 3d model george ejection seat for download as stl on turbosquid: 3d models for games, architecture, videos. (1290756)
turbosquid
$50
Saber ejecter seat
... available on turbo squid, the world's leading provider of digital 3d models for visualization, films, television, and games.
cg_studio
$45

F15 Ejection Seat3d model
...ection seat3d model
cgstudio
.max - f15 ejection seat 3d model, royalty free license available, instant download after purchase.
turbosquid
$40

Lowpoly Laptop with Ejectable Disk Drive
...ejectable disk drive for download as blend, max, fbx, and obj on turbosquid: 3d models for games, architecture, videos. (1614232)
Co2
turbosquid
$5

CO2 Assembly
...royalty free 3d model co2 assembly for download as ma and obj on turbosquid: 3d models for games, architecture, videos. (1471659)
turbosquid
$25

Balloon CO2
... available on turbo squid, the world's leading provider of digital 3d models for visualization, films, television, and games.
turbosquid
$2

co2 tank
... available on turbo squid, the world's leading provider of digital 3d models for visualization, films, television, and games.
turbosquid
free
CO2 Rifle
... available on turbo squid, the world's leading provider of digital 3d models for visualization, films, television, and games.
turbosquid
$10
CO2 fire extinguisher
...yalty free 3d model co2 fire extinguisher for download as max on turbosquid: 3d models for games, architecture, videos. (1700115)
turbosquid
$3

CO2 Fire Extinguisher
...ee 3d model co2 fire extinguisher for download as max and fbx on turbosquid: 3d models for games, architecture, videos. (1292094)
turbosquid
$6
Paintball Co2 Tank
... available on turbo squid, the world's leading provider of digital 3d models for visualization, films, television, and games.
turbosquid
free

Fire Extinguisher CO2
... available on turbo squid, the world's leading provider of digital 3d models for visualization, films, television, and games.
3d_export
$10

co2 fire extinguisher
...096<br>refract - 4096х4096<br>the archive contains files of universal formats for import:<br>.fbx<br>.obj
3d_export
$99

Citroen C zerro 2011 3D Model
...detailed 3d model europe auto vehicle car france zero co2 emissions electric urban creativity qualify emotion citroen c zerro...
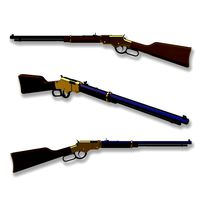
Rifle
3d_ocean
$9

rifle
...rifle
3docean
gun low poly rifle soldier weapon
rifle model max 2013 and obj 1024×1024 texture lowpoly
turbosquid
$30

Rifle
...le
turbosquid
royalty free 3d model rifle for download as ma on turbosquid: 3d models for games, architecture, videos. (1161496)
turbosquid
$1

rifle
...turbosquid
royalty free 3d model rifle for download as blend on turbosquid: 3d models for games, architecture, videos. (1344661)
3d_export
$5

longfire rifle
...longfire rifle
3dexport
longfire rifle
3d_export
free

butt of the rifle
...butt of the rifle
3dexport
butt of the rifle
3d_export
free

repeater rifle
...repeater rifle
3dexport
repeater rifle
3d_export
$15

Rifle v2
...rifle v2
3dexport
assault rifle, designed for the protection and storming of objects. the rifle has a paralytic function.
turbosquid
$20

Rifle
...quid
royalty free 3d model rifle for download as obj and fbx on turbosquid: 3d models for games, architecture, videos. (1301083)
3d_export
$5
rifle sks
...rifle sks
3dexport
rifle sks simonov
turbosquid
$49

Rifle
...
royalty free 3d model rifle for download as ma, fbx, and obj on turbosquid: 3d models for games, architecture, videos. (1582428)
Action
turbosquid
$5

Action Camera
...id
royalty free 3d model action camera for download as blend on turbosquid: 3d models for games, architecture, videos. (1673223)
turbosquid
$30

Action Hero
...royalty free 3d model action hero for download as obj and fbx on turbosquid: 3d models for games, architecture, videos. (1181694)
turbosquid
$6
Action Game
... available on turbo squid, the world's leading provider of digital 3d models for visualization, films, television, and games.
3ddd
free
triple action carabineer 2
...er 2
3ddd
triple action carabineer , карабин
triple action carabineer for safe climbing.
3d_export
$5
action camera
...els. but in general, the model is not bad enough, and if you use it correctly, then i'm sure your models will be very cool :)
3d_export
$5

300 bolt action rifle
...300 bolt action rifle
3dexport
300 bolt action rifle
3d_export
$7

woodstranding action figurine
...woodstranding action figurine
3dexport
turbosquid
$129
Lever Action Rifle
...
royalty free 3d model lever action rifle for download as obj on turbosquid: 3d models for games, architecture, videos. (1327623)
turbosquid
$10

Ricoh action camera
...royalty free 3d model ricoh action camera for download as fbx on turbosquid: 3d models for games, architecture, videos. (1421494)
turbosquid
$7
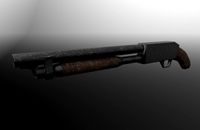
Pump Action Shotgun
...royalty free 3d model pump action shotgun for download as fbx on turbosquid: 3d models for games, architecture, videos. (1419882)
Shell
archibase_planet
free
Shell
...shell
archibase planet
sports shell playground
sports shell 1 - 3d model (*.gsm+*.3ds) for interior 3d visualization.
design_connected
$16
Shell
...shell
designconnected
fasem international shell armchairs computer generated 3d model. designed by roberto lazzeroni.
3ddd
$1

Shell Chair
...shell chair
3ddd
hans wegner , shell
shell chair
design_connected
$13
Shell
...shell
designconnected
fiam italia shell coffee tables computer generated 3d model. designed by danny lane.
3ddd
$1

Shell armchair
...shell armchair
3ddd
shell
shell armchair
designer don't remember
turbosquid
$1
Shells
...
turbosquid
royalty free 3d model shells for download as max on turbosquid: 3d models for games, architecture, videos. (1449062)
turbosquid
$10

Shell
...quid
royalty free 3d model shell for download as stl and obj on turbosquid: 3d models for games, architecture, videos. (1583461)
turbosquid
free
Shells
...uid
free 3d model shells for download as blend, fbx, and obj on turbosquid: 3d models for games, architecture, videos. (1562122)
turbosquid
$49

Shell
...yalty free 3d model shell for download as blend, fbx, and obj on turbosquid: 3d models for games, architecture, videos. (1569496)
turbosquid
$1

Shell
...yalty free 3d model shell for download as blend, fbx, and obj on turbosquid: 3d models for games, architecture, videos. (1606504)
Bolt
3d_export
$2
bolt
...
bolt - a fastener in the form of a rod with an external thread, usually with a hex head wrench, forming a connection with a nut.
3d_export
$5
bolted ring
...bolted ring
3dexport
bolted ring
3d_export
$5
royal bolt
...royal bolt
3dexport
royal bolt
turbosquid
$10
Bolt
...lty free 3d model bolt for download as max, c4d, obj, and fbx on turbosquid: 3d models for games, architecture, videos. (1681373)
turbosquid
$10
Bolt
...lty free 3d model bolt for download as max, c4d, obj, and fbx on turbosquid: 3d models for games, architecture, videos. (1680879)
turbosquid
$10
Bolt
...lty free 3d model bolt for download as max, c4d, obj, and fbx on turbosquid: 3d models for games, architecture, videos. (1680869)
turbosquid
$10

Bolt
...lty free 3d model bolt for download as max, c4d, obj, and fbx on turbosquid: 3d models for games, architecture, videos. (1680866)
turbosquid
$10
Bolt
...lty free 3d model bolt for download as max, c4d, obj, and fbx on turbosquid: 3d models for games, architecture, videos. (1680860)
turbosquid
$10

Bolt
...lty free 3d model bolt for download as max, c4d, fbx, and obj on turbosquid: 3d models for games, architecture, videos. (1680480)
turbosquid
$13
bolt
... available on turbo squid, the world's leading provider of digital 3d models for visualization, films, television, and games.
Air
3ddd
$1
Calligaris air
...calligaris air
3ddd
air , calligaris
cтул calligaris air
3ddd
$1

Air freshener
...air freshener
3ddd
air freshener , освежитель
air freshener
design_connected
$16

Air
...air
designconnected
flexform air lounge chairs computer generated 3d model. designed by antonio citterio.
turbosquid
$250
Heat pump air air
... available on turbo squid, the world's leading provider of digital 3d models for visualization, films, television, and games.
3d_export
$5
air
...air
3dexport
3ddd
$1
Кухня AIR
...кухня air
3ddd
air , мария
кухня air фабрики "мария"
3ddd
$1
Лампа AIR
...лампа air
3ddd
boconcept , air
настольная лампа air, boconcept. в50½xø32см
3d_export
$40
air deflector
...air deflector
3dexport
air deflector
3d_export
$15
air purifier
...air purifier
3dexport
air purifier
3d_export
$5

macbook air
...macbook air
3dexport
macbook air
Powered
turbosquid
$100

power
...ower
turbosquid
royalty free 3d model power for download as on turbosquid: 3d models for games, architecture, videos. (1421990)
3d_export
$5

Power
...power
3dexport
3d_export
$5

power outlets
...power outlets
3dexport
power outlets
3ddd
$1

lion power
...lion power
3ddd
лев , статуя
lion power gold sculpture
3ddd
$1

Sea Power
...
компас , море , часы
часы с компасом sea power
3ddd
free

Meridiani / Power
...power
3ddd
meridiani , круглый
стол power производитель meridiani, диаметр 120,высота 67
3d_export
$5

Power Surge
...power surge
3dexport
the power surge is a all mesh carnival ride to lower in game part count and lag
turbosquid
$8

Airport Ground Power Unit (AXA Power )
... available on turbo squid, the world's leading provider of digital 3d models for visualization, films, television, and games.
turbosquid
$50

Power Houser
...rbosquid
royalty free 3d model power houser for download as on turbosquid: 3d models for games, architecture, videos. (1333800)
3d_export
$5

power outlet
...power outlet
3dexport
power outlet<br>format file maya 2018, 3d max 2017, obj, fbx