Thingiverse
Bodgie the Little Quadrocopter by brucedjones
by Thingiverse
Last crawled date: 2 years, 11 months ago
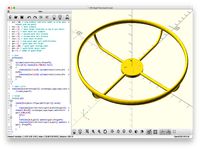
This is a fully parametric, fully printable, quadrocopter frame design done with Inventor. With this design you can print a quadrocopter with a 160-260mm motor to motor distance, giving enough room to accommodate props from 101.6mm (4") to 177.8mm (7").
Motivation: I wanted to build a quadrocopter which I could use to learn with, a basic requirement of this being that I need to be able to fix it with minimal cost and difficulty. So its a good job I have a 3d printer!
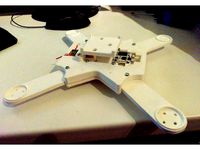
Draft: I started this design with the intention of squeezing all the electronics into the centre of the hub area, in the same plane as the arms. I completed a draft with this in mind, but I wasn't happy with how much plastic it consumed and I also hadn't given any though to how I would route cables around the frame. In addition to this, I based the design on "guestimate" dimensions, it was always going to need some sort of reworking.
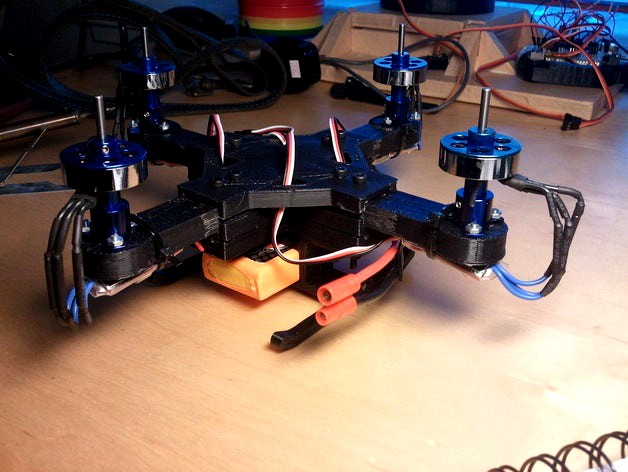
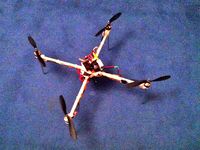
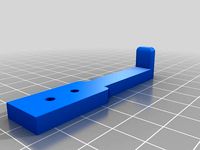
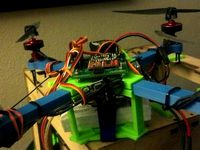
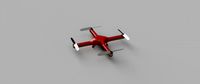
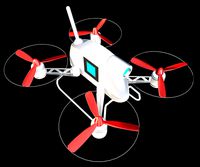
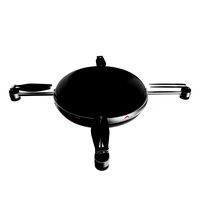
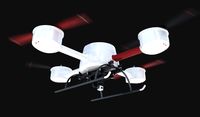
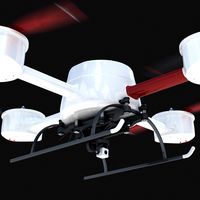
Revision 1 (Pictured): The draft design gave me some good ideas to move forward with, it also gave me the confidence to buy the parts I'd need to eventually get this thing into the air. For this revision I moved the electronics to a more standard location on top of the hub area. There are fixing holes for the electronics on a square of 45mm about the centre, this can be varied. Another variable dimension is the motor to motor distance, which for this revision is set at 180mm allowing for a 10.16-12.7mm (4-5") prop.
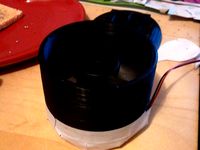
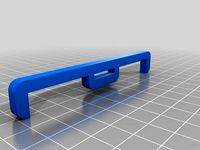
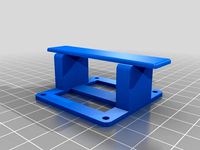
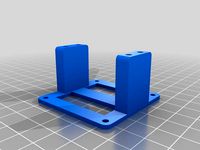
With this revision I gave a little thought to routing of wires and came up with the "power layer". This component stacks with the hub of the quadrocopter and allows the esc's and battery to plug into the frame. Many quadrocopters suffer from the "flying spaghetti monster" problem, this solution goes some way to alleviate that.
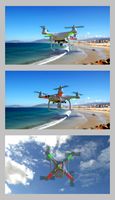
This is the design I have printed, as it turns out I was being a bit ambitious with the prop size, all things accounted for it weighs about 450g. I calculate about 600g of thrust with this set up meaning its going to have to run at over 3/4 throttle to fly. Whilst not a show stopper its certainly going to strain the motors and esc's, and I doubt its going to be manoeuvrable.
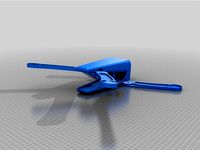
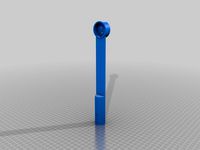
Landing gear has also been added, not sure how it will perform but it certainly looks the part.
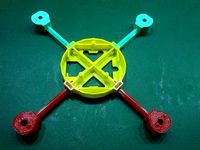
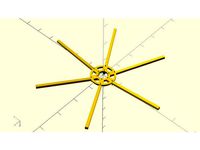
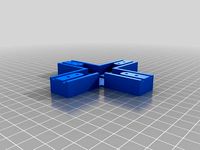
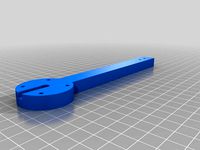
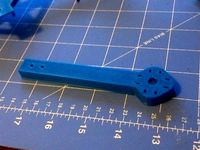
Revision 2: This design incorporates some lessons I learned from the previous revision. The arms are thinner, making them lighter per unit length, and allowing for greater prop sizes up to 177.8mm (7"). The thinner arms also mean the hub area uses less plastic, more weight saving. The minimum thickness of all components has also been reduced slightly in an attempt to remove some more redundant plastic. Due to the allowance for larger props I hope to achieve over 1kg of thrust with this design, giving much more acceptable performance.
Major Dimensions:
motor_to_motor = Distance between motor centers, dictates arm length which is limited by build platform size.
arm_width = Self explanatory
arm_height = Self explanatory
mounting_square = The side length of the square who's corners lie at the center of the mounting holes.
hub_square = Width of the hub.
pinch_gap = Width of the gap between the top and bottom hub components.
power_thickness = The max thickness of your power distribution circuit.
battery_width = Self explanatory
battery_thickness = Self explanatory
structural_cover = The minimum thickness of any section.
Please take note, I havent flown this yet. I ordered a receiver that as incompatible with my transmitter and am waiting for a replacement from chine (boo). I shall update this thing with pictures and hopefully videos when I get the last bits in place.
I'm open to any suggestions as to how I can improve this design further. Moving forward, I'm going to experiment with different thickness's in an attempt to find a good trade off between weight and strength.
Electronics Supplemental
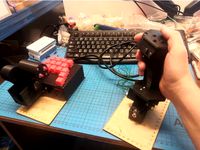
Some info on the electronics was requested. There is an awful lot of choice in this respect, you ultimately need to decide on a control unit and a drive system. For my control unit (not pictured) I use an Arduino nano, "All in one" sensor board which can be found on ebay, and a fly sky 6 channel receiver (FS-R6B) to go with my fly sky transmitter (FS-TH9X). Such a control system will work for any quad configuration. The drive system is dependent on the quadrocopter weight and maximum allowable prop diameter, this choice is non trivial and I suggest you visit some quadrocopter forums where you will find a huge amount of sadvice and suggestions.
There is a wealth of further information at Aeroquad.com and multiwii.com
Motivation: I wanted to build a quadrocopter which I could use to learn with, a basic requirement of this being that I need to be able to fix it with minimal cost and difficulty. So its a good job I have a 3d printer!
Draft: I started this design with the intention of squeezing all the electronics into the centre of the hub area, in the same plane as the arms. I completed a draft with this in mind, but I wasn't happy with how much plastic it consumed and I also hadn't given any though to how I would route cables around the frame. In addition to this, I based the design on "guestimate" dimensions, it was always going to need some sort of reworking.
Revision 1 (Pictured): The draft design gave me some good ideas to move forward with, it also gave me the confidence to buy the parts I'd need to eventually get this thing into the air. For this revision I moved the electronics to a more standard location on top of the hub area. There are fixing holes for the electronics on a square of 45mm about the centre, this can be varied. Another variable dimension is the motor to motor distance, which for this revision is set at 180mm allowing for a 10.16-12.7mm (4-5") prop.
With this revision I gave a little thought to routing of wires and came up with the "power layer". This component stacks with the hub of the quadrocopter and allows the esc's and battery to plug into the frame. Many quadrocopters suffer from the "flying spaghetti monster" problem, this solution goes some way to alleviate that.
This is the design I have printed, as it turns out I was being a bit ambitious with the prop size, all things accounted for it weighs about 450g. I calculate about 600g of thrust with this set up meaning its going to have to run at over 3/4 throttle to fly. Whilst not a show stopper its certainly going to strain the motors and esc's, and I doubt its going to be manoeuvrable.
Landing gear has also been added, not sure how it will perform but it certainly looks the part.
Revision 2: This design incorporates some lessons I learned from the previous revision. The arms are thinner, making them lighter per unit length, and allowing for greater prop sizes up to 177.8mm (7"). The thinner arms also mean the hub area uses less plastic, more weight saving. The minimum thickness of all components has also been reduced slightly in an attempt to remove some more redundant plastic. Due to the allowance for larger props I hope to achieve over 1kg of thrust with this design, giving much more acceptable performance.
Major Dimensions:
motor_to_motor = Distance between motor centers, dictates arm length which is limited by build platform size.
arm_width = Self explanatory
arm_height = Self explanatory
mounting_square = The side length of the square who's corners lie at the center of the mounting holes.
hub_square = Width of the hub.
pinch_gap = Width of the gap between the top and bottom hub components.
power_thickness = The max thickness of your power distribution circuit.
battery_width = Self explanatory
battery_thickness = Self explanatory
structural_cover = The minimum thickness of any section.
Please take note, I havent flown this yet. I ordered a receiver that as incompatible with my transmitter and am waiting for a replacement from chine (boo). I shall update this thing with pictures and hopefully videos when I get the last bits in place.
I'm open to any suggestions as to how I can improve this design further. Moving forward, I'm going to experiment with different thickness's in an attempt to find a good trade off between weight and strength.
Electronics Supplemental
Some info on the electronics was requested. There is an awful lot of choice in this respect, you ultimately need to decide on a control unit and a drive system. For my control unit (not pictured) I use an Arduino nano, "All in one" sensor board which can be found on ebay, and a fly sky 6 channel receiver (FS-R6B) to go with my fly sky transmitter (FS-TH9X). Such a control system will work for any quad configuration. The drive system is dependent on the quadrocopter weight and maximum allowable prop diameter, this choice is non trivial and I suggest you visit some quadrocopter forums where you will find a huge amount of sadvice and suggestions.
There is a wealth of further information at Aeroquad.com and multiwii.com
Similar models
thingiverse
free
250er Quadrocopter with CC3D by Cybi
...s and escs?
i've redesign it for 12a micro escs with variants for some parts here:https://www.thingiverse.com/thing:2339377
grabcad
free

Aluminium quadrocopter
...tors and 8x4.5 props.
dome is 3d printed.
servo gimbal for small cameras is also included.
sorry for any mistakes, i'm 16.
thingiverse
free
Mini quadrocopter Reely MC 120 by Scott77
...7
thingiverse
a small quadrocopter with 120mm motor distance for direct drive motors.
30.12.2015 - updated arms and lipo holder.
thingiverse
free
Quadrocopter - Explorer V1 Foldable by Didou7377
...air , i did not know that flying is so hard :-)
that was my first flight
important:
you have to mirror arm-v and arm-h on cura.
thingiverse
free
Printed Quadrocopter by Zaggo
...are cannibalized from the crashed gaui quadrocopter. but it should be no problem to use other motors and/or electronics for this.
thingiverse
free
Parametric Individual Motor Prop Guard for Multirotor
...f you need some changes.
update history :
2019 10 24
i just made the bolt angle parametric so you can set according to your frame
grabcad
free

unique Quadrocopter Design
...rabcad
some time ago i decided to make a unique design for my own quadrocopter. i have already built it and it is flying great!!
thingiverse
free
Hexacopter Frame Center by mschrock
..., your mileage may vary. this might not even work. i highly suggest you to stop and go buy a phantom or a inspire or a s1000...
thingiverse
free
Duplicator i3 Lighting by simhoney
...n... i'll modify the hub holder later (i'll upload it). so hope you enjoy and big thanks to rothestar for the great idea.
thingiverse
free
T4 Quadrocopter Mod by dannyboy1994
... my pla, so this was the way the arms and motormount get more stable and have a little more cooling. camera mount is coming soon.
Brucedjones
thingiverse
free
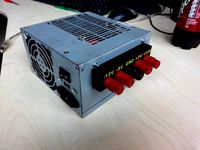
Bench Supply Panel by brucedjones
...m/convert-a-computer-atx-power-supply-to-a-lab-power-supplyhttp://www.maplin.co.uk/terminal-posts-with-gold-plated-contacts-34720
thingiverse
free
Hovercraft Prototype by brucedjones
....
note: this was designed with an educational copy of inventor which imposes its own limitations upon how the design may be used.
thingiverse
free
Bodgie foot by Ilkirius
...au dessus ou dessous du "testcagebottom" so thanks to brucedjones and octovir...
thingiverse
free
Bodgie X by Octovir
...of my arducoper, and instantly fell in love with brucedjones#39;s bodgie design. i also really want to do fpv...
Bodgie
thingiverse
free
Bodgie stronger power layer by Ilkirius
...power layer by ilkirius
thingiverse
another power layer for bodgie.
need to be improved (like my english speaking capacities...)
thingiverse
free
Bodgie foot v2 by Ilkirius
...bodgie foot v2 by ilkirius
thingiverse
feet for thing:40497
need to be glued
thingiverse
free
Bodgie Emo Hobby 2204/14 arms by Ilkirius
...n of the arms, compatible with the brushless motor from emo hobby, model 2204/14
option :
bodgie motor wire protect : thing:45645
thingiverse
free
Bodgie Turnigy 1300 mAh battery support by Ilkirius
...port for bodgie
compatible with turnigy 20-30c 1300 mah (75x30x20)
need 2 x thing:40818 to be complete (feet)
need to be improved
thingiverse
free
Bodgie another battery mount by Ilkirius
...bodgie another battery mount by ilkirius
thingiverse
compatible with :
turnigy 3s 20c 1300 mah
hyperion 3s 35c 1800 mah
thingiverse
free

bodgie motor wire protect by Ilkirius
...motor wire protect by ilkirius
thingiverse
for the 2204/14 arms (thing:45644) : just a little piece added to protect motor wires
thingiverse
free
Bodgie foot by Ilkirius
...es (pico vers le haut ou le bas, fixã©s au dessus ou dessous du "testcagebottom"
so thanks to brucedjones and octovir !
thingiverse
free
Bodgie Arm for Turnigy 2730-1500 by Octovir
...mount small quad-copter motors. i have also designed an arm with holes to mount the motors with screws, but have not printed it..
thingiverse
free
Bodgie X by Octovir
...ich is a bit promising.. between 1/2 to 2/3 throttle seemed to be about hover position.. again only one flight and distractions..
thingiverse
free
Bodgy HOTAS by drjake
...oard key x 16 (don't know the model name)
electronics
arduino pro micro
mcp23017 gpio expander
4.7k resistor x 2
lots of wire
Quadrocopter
3d_export
$5
Quadrocopter
...quadrocopter
3dexport
quadrocopter
3d_export
$50
quadrocopter
...quadrocopter
3dexport
assembled quadrocopter according to an individual concept.
turbosquid
$10
Quadrocopter
... free 3d model quadrocopter for download as 3ds, obj, and c4d on turbosquid: 3d models for games, architecture, videos. (1390839)
turbosquid
$45
Quadrocopter drone
...odel quadrocopter drone for download as c4d, max, ma, and fbx on turbosquid: 3d models for games, architecture, videos. (1608857)
turbosquid
$19
Drone Quadrocopter
... available on turbo squid, the world's leading provider of digital 3d models for visualization, films, television, and games.
cg_studio
$55
Drone Quadrocopter With Camera Rigged3d model
....fbx .max .3ds - drone quadrocopter with camera rigged 3d model, royalty free license available, instant download after purchase.
3d_ocean
$29
3D quadrocopter DJI Phantom 2 model
...the model contains animations. you get 3d model with 11 v-ray materials with hdri. also you get 3 high resolution 1920...
3d_ocean
$29
Drone Quadrocopter With Camera Rigged
...ry with turbosmooth in history. all object rigged or linked to easy manipulate. 3 special controller for camera rotation in 3 ...
3d_export
$30

LotusRC T580 quadcopter 3D Model
...lotusrc t580 quadcopter 3d model 3dexport lotusrc t580 quadrocopter drone copter helicopter quadrotor quadcopter quad rc camera go...
3d_ocean
$19

Hovercopter (concept)
...hovercopter (concept) 3docean concept helicopter hover bike prototype quadrocopter you probably heard about the hover bike. of course...
Little
3d_ocean
$8
Little Zombie
...little zombie
3docean
little zombie
little zombie
3d_export
$60
Little Badger
...little badger
3dexport
little badger
3d_export
$5
little house
...little house
3dexport
little house
3d_ocean
$10
Little Wolf
...little wolf
3docean
wolf
little wolf for game
3d_export
$5
a little home
...a little home
3dexport
a little home for your games)
3d_export
$5

little monster
...little monster
3dexport
little toothy funny monster
3ddd
$1

little squirt
...little squirt
3ddd
детская
коллекция обоев little squirt
design_connected
$20

Little Bloom
...little bloom
designconnected
devon&devon little bloom computer generated 3d model.
design_connected
$16

Little Albert
...little albert
designconnected
moroso little albert computer generated 3d model. designed by arad, ron.
3d_ocean
$5

Little Bag
...little bag
3docean
accessory bag bundle design fashion handbag interior
a little bag model.