Thingiverse

B&O Speaker: Creative 9 by svigermor
by Thingiverse
Last crawled date: 3 years ago
Final Project:https://www.youtube.com/watch?v=JZt4YDcrQ08
Link to our blog:https://svigermors.wordpress.com/
The speaker is very easy to assemble and disassemble, which makes it easy for the user to change the shell of the speaker if broken, or simply if wanting to change the design of the speaker
We have made a smaller speaker because we want it to fit into more versatile environments, like a kitchen or an office. The size comprimizes the sound quality a bit, but compliments the context.
Weight
We have placed the heavy parts in the bottom of the speaker for stability.
Furthermore we did not use a solid filament pattern.
The speaker ended up with a weight of 700 grams.
We created a simple base, in the form of a cylinder, so it would be easy to create a new custom shell, and slide it on. The aestethics therefore relies on the premade B&O shells and the custom mades. The colours are up to the users, and the base parts can be created in various colours aswell.
As previously mentioned the sound test showed us, that larger the cabinet, the better sound. This means, that our compact speaker has a sound limit for maximum quality sound.
The tweeter is placed on top of the woofer, with a fitting distance in between, to avoid destructive interference.
Because of the cylindrical shape, we split the base into two parts, so it didnt need any support material. This was a huge factor for the printing time, and saved us alot of hours and material. We also lasercut the mounting plates to reduce printing time and precision
The print time, using only one 3D printer, takes about 40 hours of printing.
The cabinet has a medium filling, that is rather strong, with a high durability. To be safe, we mounted our speaker parts on a lasercut Acryl plate, since this is stronger than a 3D print, giving us more stability.
The internal design is created with the intentions of an easy assembly.
Assembly & maintenance
The base is created with fittings, so it has an easy assembly / disassembly.
Everything inside is only fastened by tension and friction – no gluing or screws needed. It is a very compact internal design.
The internal bits are connected to eachother following the instructions mentioned earlier. We have changed the power cord, from a Raspberry Pi 5V wall plug, to a 5V USB cable, that can be used in any computer or phone charger. This also gave an advantage creating a compact design.
We have designed the speaker, so it has to be plugged in with the USB cable to work.
There’s no interface on the speaker, because we decided to solely use airplay connetivity, from a compatible device. This means that the user has to control volume, tracks, etc. on their device.
Similar models
grabcad
free

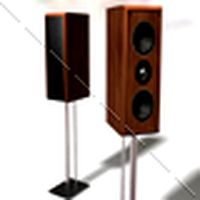
Bang and Olufsen Speaker
...acturer) – disassembly (user) – reassembly (user).
portfolio: https://www.behance.net/gallery/136089273/bang-and-olufsen-speaker
thingiverse
free

MecaduinOpen One printer by MECADUINO
...y and logical assembly machine.
printing time of parts is below 20 h, the parts are simple in design and therefore easy to print.
cg_trader
free

Antique radio
...the model contains internal parts and disassembly animation retro music sound analog audio speaker audio device radio electronics
thingiverse
free

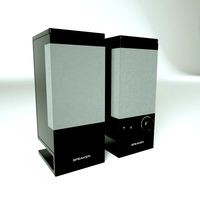
speaker by Carter_boaz
... used a piece of filament right from the spool and it has held up well it is a lot louder in the new case than it was originally.
grabcad
free

Phone Sound Amplifier
...in the sound amplifier. this design is perfect for any college student because it is inexpensive, portable and multi-functioning.
cg_trader
$5

Lasercut Wood Easy Assembly Library
...lue and a hammer. all you have to do is download the files and send the dxf file to laser cutting.and assembly of incoming parts.
thingiverse
free

Spool Holder - One to rule them all by Libfall
...cking.
minimal mass reduces printing times.
wide base guarantees stability.
all parts can be printed in a single operation.
thingiverse
free

Desk Organizer by kadotomatojuice
...sound waves in one direction to magnify the sound similar to a megaphone. it also has a slot for...
cg_trader
$5

Lasercut Wood Easy Assembly Wooden Table
...lue and a hammer. all you have to do is download the files and send the dxf file to laser cutting.and assembly of incoming parts.
cg_trader
$5

Lasercut Wood Easy Assembly Wooden Coffee Table
...lue and a hammer. all you have to do is download the files and send the dxf file to laser cutting.and assembly of incoming parts.
Svigermor
thingiverse
free

Svigermors Clockplotter by svigermor
...https://svigermors.wordpress.com/
all credits rights to joo for creating the clockplotter.http://www.thingiverse.com/thing:248009
thingiverse
free

Spencer -The spicedispenser by svigermor
...the level of spice remaining, and he alerts you, whenever your are running low.
visit our blog :https://svigermors.wordpress.com/
Speaker
3d_ocean
$12
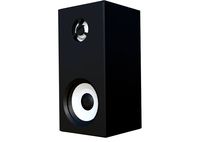
Speakers
...speakers
3docean
beautiful customizable customizable speakers
speakers 3d model
3d_ocean
$5

Speaker
...speaker
3docean
audio speaker
minimalist audio speaker for your design.
3d_export
$5
speaker
...speaker
3dexport
speaker
archibase_planet
free

Speaker
...er
archibase planet
acoustic system column speaker loud speaker
speaker 3 - 3d model (*.gsm+*.3ds) for interior 3d visualization.
archibase_planet
free

Speaker
...er
archibase planet
column speaker loud speaker acoustic system
speaker 2 - 3d model (*.gsm+*.3ds) for interior 3d visualization.
archibase_planet
free

Speaker
...er
archibase planet
loud speaker column speaker acoustic system
speaker 1 - 3d model (*.gsm+*.3ds) for interior 3d visualization.
archibase_planet
free

Speaker
...speaker
archibase planet
speaker audio
speaker din - 3d model for interior 3d visualization.
archibase_planet
free

Speakers
...speakers
archibase planet
speaker speakers audio
speakers1 - 3d model for interior 3d visualization.
3d_ocean
$6
Speaker
...speaker
3docean
3d model music sound speaker
model,3d,speaker,sound,best,music
3d_ocean
$4
Speaker
...speaker
3docean
audio computer desktop electronic headphone microphone music pc speaker speakers technology
.
Creative
turbosquid
$25

Cabin of creativity
...royalty free 3d model cabin of creativity for download as max on turbosquid: 3d models for games, architecture, videos. (1184990)
turbosquid
$15

creative Jant
...quid
royalty free 3d model creative jant for download as max on turbosquid: 3d models for games, architecture, videos. (1235663)
3d_export
$5

creative flower pot
...creative flower pot
3dexport
creative flower pot
turbosquid
$6

Creative lighting
... 3d model creative lighting for download as 3ds, max, and fbx on turbosquid: 3d models for games, architecture, videos. (1475393)
turbosquid
$20

creative speakers
... available on turbo squid, the world's leading provider of digital 3d models for visualization, films, television, and games.
turbosquid
$15

Creative Lamp
... available on turbo squid, the world's leading provider of digital 3d models for visualization, films, television, and games.
turbosquid
$10

CREATIVE ARMS
... available on turbo squid, the world's leading provider of digital 3d models for visualization, films, television, and games.
turbosquid
$3

Table Creativ
... available on turbo squid, the world's leading provider of digital 3d models for visualization, films, television, and games.
turbosquid
$2

Creative Speaker
... available on turbo squid, the world's leading provider of digital 3d models for visualization, films, television, and games.
turbosquid
free

Creative speakers
... available on turbo squid, the world's leading provider of digital 3d models for visualization, films, television, and games.
B
3ddd
$1
B&B
...b&b
3ddd
b&b italia
statue b&b italy
3ddd
$1
B&B Italia
...b&b italia
3ddd
b&b italia
b&b; italia
3ddd
$1

b&b italia
...b&b italia
3ddd
b&b italia
b&b; italia
3ddd
$1
B&B LAZY
...b&b lazy
3ddd
b&b italia
b&b; lazy
3ddd
$1
B&B Italy
...b&b italy
3ddd
b&b italia
диван b&b; italy
3ddd
$1
b&b RAY
...b&b ray
3ddd
b&b italia , угловой
диван b&b; ray
3ddd
$1
B&B Beverly
... b&b italia , beverly
cтул beverly от b&b.; текстуры в архиве
3ddd
$1

B&B ITALIA
...lia , журнальный , круглый
стол b&b; italia
3ddd
$1
шезлонг B&B
...шезлонг b&b
3ddd
b&b italia , шезлонг
шезлонг b&b; terminal 1
3ddd
$1

B&B J.J
...b&b j.j
3ddd
b&b italia , журнальный
b&b;
j.j
45x40x49 cm
9
3ddd
$1
9
...9
3ddd
консоль
9
turbosquid
$40

Apple iPhone 9 & 9+
...del apple iphone 9 & 9+ for download as max, obj, and fbx on turbosquid: 3d models for games, architecture, videos. (1284550)
turbosquid
$12

Calligraphic Digit 9 Number 9
...hic digit 9 number 9 for download as max, obj, fbx, and blend on turbosquid: 3d models for games, architecture, videos. (1389349)
3ddd
$1

PLANTS 9
...plants 9
3ddd
папоротник , кашпо
plant 9.. hope u all like it
design_connected
$11
194 9
...194 9
designconnected
194 9 computer generated 3d model. designed by lissoni, piero.
design_connected
free

Tangram 9
...tangram 9
designconnected
free 3d model of tangram 9 by lago designed by lago, daniele.
design_connected
$11
Domino 9
...domino 9
designconnected
zanotta domino 9 computer generated 3d model. designed by progetti, emaf.
design_connected
$20
Docks 9
...docks 9
designconnected
gandia blasco docks 9 computer generated 3d model. designed by romero vallejo.
3d_export
$80

mq-9
...mq-9
3dexport
3d_export
$6
washbasin-9
...washbasin-9
3dexport
O
design_connected
$13
O Tables
...o tables
designconnected
oxdenmarq o tables computer generated 3d model. designed by marquart, dennis.
design_connected
$11
O Bench
...o bench
designconnected
robert kuo o bench computer generated 3d model. designed by kuo, robert.
design_connected
$9

Doble O
...doble o
designconnected
nomon doble o computer generated 3d model. designed by reina, josé maría.
design_connected
$11
O-Nest
...o-nest
designconnected
moroso o-nest seating objects computer generated 3d model. designed by tord boontje.
turbosquid
$2

skillet casseroles o sarten o caserola
... available on turbo squid, the world's leading provider of digital 3d models for visualization, films, television, and games.
3ddd
$1

Foscarini O-Space
...foscarini o-space
3ddd
foscarini , o-space
o-space, suspension
design luca nichetto
turbosquid
$20

Ring O
...
turbosquid
royalty free 3d model ring o for download as stl on turbosquid: 3d models for games, architecture, videos. (1353794)
turbosquid
$5

Letter O
...urbosquid
royalty free 3d model letter o for download as max on turbosquid: 3d models for games, architecture, videos. (1408519)
turbosquid
$5

Letter O
...urbosquid
royalty free 3d model letter o for download as max on turbosquid: 3d models for games, architecture, videos. (1408496)
turbosquid
$5

Letter o
...urbosquid
royalty free 3d model letter o for download as max on turbosquid: 3d models for games, architecture, videos. (1408493)