Thingiverse

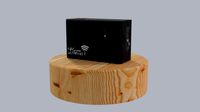
Bluetooth Action Cam Slider by xack
by Thingiverse
Last crawled date: 3 years, 1 month ago
######### Update 1: #########
Updaten Software files in MnM_ActionCamSlider_Software.zip
Changelog App:
1.1
Added App Icon
changed max time in [h] from 60 to 24
setting time in [h] now with minutes
Angle now ranges from -180 to + 180°
Changelog Scetch:
More Comments
Changed Steps/rev to DRV8834
Added Wiring Diagram
########################
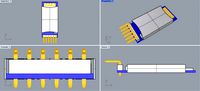
This is my GoPro compatible Action Cam Slider Project.
It's main goal is to make an easy, cheap slider for timelapses.
This slider can take up to ~10^38 sec for the distance... should be slow enough xD
Fastest Speed is 500 Steps/Sec => 1 Revolution in 4 Sec => 20mm/sec (at 26mm wheels)
######### HARDWARE #########
There are two Versions:
3D-Printed [PV]: Just print all the parts.
Non-Printed [NV]: Print the ActionCamSlider_Plans.pdf in 100% scale, glue it to a sheat of your favourite material and cut along the Lines
For all Versions;
2x M8 Screws (25mm for PV, 30-35mm for NV)
6-8x M3x10mm (8 if you do not glue the TopMotor Mount to the Base)
1x M5x15mm
1x 10mm tension spring or a rubber band
2x 608zz (Skateboard) Ball Bearing
For NV:
2-X M8 Nuts (depends on wanted hight and material)
2x 20mm Spacer (with M3 Thread)
Electronics (Linked parts on eBay [affiliated]):
1x Arduino Nano (or compatible)https://goo.gl/6Ux23S
1x HC-05 Bluetooth Modulehttps://goo.gl/X27cM0
2x 28BYJ-48 Stepper Motorshttps://goo.gl/TDYjsP
2x Stepper motor drivers. Best would be to use DRV8824 or DRV8834 https://goo.gl/Bni40L
Both can drive low voltage Stepper motors but they are relativly expancive (~10$).
That way you could run everything from a power bank.
If you have some A4988 laying around you can also use these, but than you have to supply >8V and step it down to 5V for the arduino and Bluetooth with this converter https://goo.gl/sWpdlK for example.
######### SOFTWARE #########
(all in MnM_ActionCamSlider_Software.zip)
Arduino:
Custem settings (e.g. Wheel Diameter) are set in the Top of the Scetch
Upload the Arduino Scetch to the Arduino
Smartphone (App Android only, workaround for iOS):
The App was made using the free "MIT App Inventer 2"
You can just download the APK and install it (allow Unknown sources under Settings>Security)
If you want to have a look at the Code or don't trust me (;P) create an App Inventor account and import the .aia-file.
Pair the HC-05 and your Smartphone before connecting the App to the slider or it will not show up.
iOS:
You can use a Bluetooth Terminal app like BluTerm to control the Slider.
Just send the commands explaned in the following protocol.
######### PROTOCOL #########
The protocol is pretty basic but easy to extend. The commands ALWAYS have the pattern: #;#;#;#.
The first digit (at the moment)can be 0 (=Set) or 1 (=Move)
For now you can only set the wheel diameter (diameter on that it is running). Default is 26mm
To set 30mm wheel diameter: 0;30;0;0. (Canges are NOT stored in EEPROM at the moment!)
Moving: 1;TimeForTheMove;Distance;TiltCamAngle
Example: 1;20;100;30. The move will take 20 sec, along 100mm (left to right) and tilt the cam 30°
You can use negative Values for Way and Tilt to move into the other direction
If you set Time to 0 it will move as fast as possible.
######### MORE INFO #########
For more infos see the Project-Videos
Part1: https://www.youtube.com/watch?v=jT-A2rkLJT4
Part2: https://youtu.be/9_ftOecn1go
Musik used in Video:
Tours - Enthusiast http://freemusicarchive.org/music/Tours/Enthusiast/Tours_-_Enthusiast
Updaten Software files in MnM_ActionCamSlider_Software.zip
Changelog App:
1.1
Added App Icon
changed max time in [h] from 60 to 24
setting time in [h] now with minutes
Angle now ranges from -180 to + 180°
Changelog Scetch:
More Comments
Changed Steps/rev to DRV8834
Added Wiring Diagram
########################
This is my GoPro compatible Action Cam Slider Project.
It's main goal is to make an easy, cheap slider for timelapses.
This slider can take up to ~10^38 sec for the distance... should be slow enough xD
Fastest Speed is 500 Steps/Sec => 1 Revolution in 4 Sec => 20mm/sec (at 26mm wheels)
######### HARDWARE #########
There are two Versions:
3D-Printed [PV]: Just print all the parts.
Non-Printed [NV]: Print the ActionCamSlider_Plans.pdf in 100% scale, glue it to a sheat of your favourite material and cut along the Lines
For all Versions;
2x M8 Screws (25mm for PV, 30-35mm for NV)
6-8x M3x10mm (8 if you do not glue the TopMotor Mount to the Base)
1x M5x15mm
1x 10mm tension spring or a rubber band
2x 608zz (Skateboard) Ball Bearing
For NV:
2-X M8 Nuts (depends on wanted hight and material)
2x 20mm Spacer (with M3 Thread)
Electronics (Linked parts on eBay [affiliated]):
1x Arduino Nano (or compatible)https://goo.gl/6Ux23S
1x HC-05 Bluetooth Modulehttps://goo.gl/X27cM0
2x 28BYJ-48 Stepper Motorshttps://goo.gl/TDYjsP
2x Stepper motor drivers. Best would be to use DRV8824 or DRV8834 https://goo.gl/Bni40L
Both can drive low voltage Stepper motors but they are relativly expancive (~10$).
That way you could run everything from a power bank.
If you have some A4988 laying around you can also use these, but than you have to supply >8V and step it down to 5V for the arduino and Bluetooth with this converter https://goo.gl/sWpdlK for example.
######### SOFTWARE #########
(all in MnM_ActionCamSlider_Software.zip)
Arduino:
Custem settings (e.g. Wheel Diameter) are set in the Top of the Scetch
Upload the Arduino Scetch to the Arduino
Smartphone (App Android only, workaround for iOS):
The App was made using the free "MIT App Inventer 2"
You can just download the APK and install it (allow Unknown sources under Settings>Security)
If you want to have a look at the Code or don't trust me (;P) create an App Inventor account and import the .aia-file.
Pair the HC-05 and your Smartphone before connecting the App to the slider or it will not show up.
iOS:
You can use a Bluetooth Terminal app like BluTerm to control the Slider.
Just send the commands explaned in the following protocol.
######### PROTOCOL #########
The protocol is pretty basic but easy to extend. The commands ALWAYS have the pattern: #;#;#;#.
The first digit (at the moment)can be 0 (=Set) or 1 (=Move)
For now you can only set the wheel diameter (diameter on that it is running). Default is 26mm
To set 30mm wheel diameter: 0;30;0;0. (Canges are NOT stored in EEPROM at the moment!)
Moving: 1;TimeForTheMove;Distance;TiltCamAngle
Example: 1;20;100;30. The move will take 20 sec, along 100mm (left to right) and tilt the cam 30°
You can use negative Values for Way and Tilt to move into the other direction
If you set Time to 0 it will move as fast as possible.
######### MORE INFO #########
For more infos see the Project-Videos
Part1: https://www.youtube.com/watch?v=jT-A2rkLJT4
Part2: https://youtu.be/9_ftOecn1go
Musik used in Video:
Tours - Enthusiast http://freemusicarchive.org/music/Tours/Enthusiast/Tours_-_Enthusiast
Similar models
cults
free

SMARS QUAD MOD
...ell
-1x frame_e
-1x servo driver cover
-1x holding board spark
-2x foot
-2x foot_m
-4x servo case
-4x servo case_m
-4x servo arm
thingiverse
free

Dolly Slider for a DSLR camera controlled Bluetooth by SocialSound
... any other. hc-05
you can power the arduino with lipo battery
and feed the driver + motor nema with 8 aa batteries holder case .
cults
free

SMARS Three wheeled mod
...tronics of the original smars (except the n20 motors)
join us on facebook for updates and software help: https://goo.gl/qla9ag
thingiverse
free

arduino nano io shield with bluetooth HC-05
...arduino nano io shield with bluetooth hc-05
thingiverse
arduino nano io shield with bluetooth hc-05
thingiverse
free

3D Scanner Rotary Surface (w/ speed control) by AndreCarvalho
...sideration that adjustments may be needed. any faulty piece or some improvement that you may require, please notify me.
thanks :d
thingiverse
free

LED Matrix Display 8x24 by isaac879
...t the text to be displayed.
arduino nano code: https://github.com/isaac879/led-matrix-display
video: https://youtu.be/auglqu87xkq
thingiverse
free

Mix Diameter Atomizer Stand by 3dprintesk
...tand by 3dprintesk
thingiverse
3x 510 drip tip
1x 27mm
1x 26mm
1x 25mm
1x 24mm
2x 23mm
1x 20mm atomizer stand made by 3dprintesk
thingiverse
free

A Printed Three-wheeled Smart Car Kit. by trauma50
.... it regulates the 5 volts to 3.3v and provides bypass capacitors for reliable operation. 5v dc is required to power this module.
thingiverse
free

Bluetooth Mini Track Loader by Backmann
...the servo i'm using is emax es08ma , other similar 9gram servo should be ok but not tested" parts...
thingiverse
free

Stepper Motor 17mm Hex Wheel Hub by daemonz144
...n nema17 motor's 5mm shaft and a 1/8 buggy wheel.
you will need:
1x nema17 stepper motor
1x 1/8 buggy wheel
2x m3x8 hex screw
Xack
thingiverse
free

Desoldering Pump Mod by xack
...e it the video:https://youtu.be/3ajmhqk4pow
i printed this in abs. it should not get to hot for pla up there, but just in case ;)
thingiverse
free

Tutorial: D20 - Icosahedron in Fusion360 by xack
...st thing to do in fusion but it was a nice challenge and it might help some of you ;)
https://www.youtube.com/watch?v=rajrv7xv7h4
thingiverse
free

Top cover for Neon 250 Quadcopter by xack
... neon250 quadcopter to protect the flightcontroller and the cables.
for my quad i painted them to look like used painted metal.
thingiverse
free

Tutorial: Parametric Letter Case by xack
...ted to any size. helped me a lot to better organize my stuff ^^
the tutorial can be found on youtube:https://youtu.be/lqz62_c8zu0
thingiverse
free

Tutorial: Rendering in Fusion360 by xack
...ou want to try it with the same model, i attached a step file of the cooler.
video can be found here:https://youtu.be/w_zv2yodvca
thingiverse
free

Quanum Neon250 "Bodykit" by xack
...i painted the controller case and than scraped the paint away where i wanted some glow ;)
update 10.05.2015:
added mobius mount
thingiverse
free

Vibration Dampener Mold for Quadcopters (2 sizes) by xack
...ome dampeners ;)
here i made a video where i show you how i did some for my miniquad.https://youtu.be/gs8nwtyvluk
have fun ;)
thingiverse
free

DIY Helping/Third Hand +Flexpipe Tool by xack
...te]
the flexpipe tool should be printed on a high infill setting (80%-100%)
more help in the video ;)https://youtu.be/thriefmgqfq
thingiverse
free

Quadcopter powerboard case (for Peon230) by xack
...ided tape on top.
btw. yes i sleeved my cables with paracord (used for case modding)
you finde sleeving tutorials on youtube ;)
thingiverse
free

RepRapPro Mendel Carriage for E3D Hotend and capacitive Z-Probe by xack
...lip.
next to it i added a place for a capacitive probe.
you can see it in action here:https://www.youtube.com/watch?v=mjdhabo7zic
Bluetooth
3d_ocean
$16

Bluetooth handset
...ooth handset
3docean
bluetooth bluetooth handset concept handset headphone high poly modern music new
high poly bluetooth handset
turbosquid
$35

Bluetooth
... available on turbo squid, the world's leading provider of digital 3d models for visualization, films, television, and games.
3ddd
free

USB-Bluetooth
...luetooth
3ddd
bluetooth
usb-bluetooth с прозрачным корпусом. камера и освещение выставлены. камера проанимирована на презентацию.
3d_export
$5
bluetooth card
...bluetooth card
3dexport
this is a simplified bluetooth card with which you can create cases
turbosquid
$2
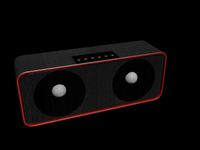
Bluetooth Speaker
...royalty free 3d model bluetooth speaker for download as blend on turbosquid: 3d models for games, architecture, videos. (1281743)
turbosquid
$5

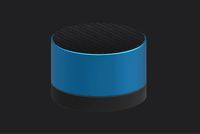
Bluetooth Speaker
...y free 3d model bluetooth speaker for download as max and fbx on turbosquid: 3d models for games, architecture, videos. (1336601)
turbosquid
$5
Bluetooth Speaker
...y free 3d model bluetooth speaker for download as max and fbx on turbosquid: 3d models for games, architecture, videos. (1336600)
turbosquid
$5

Bluetooth Speaker
...y free 3d model bluetooth speaker for download as max and fbx on turbosquid: 3d models for games, architecture, videos. (1336599)
turbosquid
$3
Bluetooth speaker
...y free 3d model bluetooth speaker for download as obj and fbx on turbosquid: 3d models for games, architecture, videos. (1165662)
turbosquid
$19
Bluetooth Speaker
...odel bluetooth speaker for download as 3ds, obj, c4d, and fbx on turbosquid: 3d models for games, architecture, videos. (1432534)
Slider
3d_export
$5
slider
...slider
3dexport
slider
3d_export
$5

Camera Slider
...camera slider
3dexport
camera slider toy
turbosquid
$10

SLIDER RAW
... available on turbo squid, the world's leading provider of digital 3d models for visualization, films, television, and games.
turbosquid
free

Slider V1
... available on turbo squid, the world's leading provider of digital 3d models for visualization, films, television, and games.
turbosquid
free

Vitrocsa3001-Slider-Fixed
... available on turbo squid, the world's leading provider of digital 3d models for visualization, films, television, and games.
3ddd
$1

ЭКМИ-МЕБЕЛЬ / Регина-slider
...er
3ddd
угловой , экми-мебель
диван "регина-slider". производитель экми-мебель
3d_ocean
$12
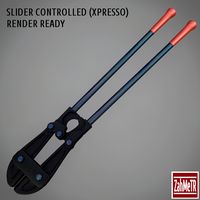
Bolt Cutter (Xpresso Slider Controlled)
...are to use slider controller. you can see how to use slider in preview video. render system and materials are ready. c4d and o...
3ddd
free

Шкатулка-держатель для фотографий Slider
...рмы umbra. вмещает три фотографии размером 8 х 8 см, 10 х 10 см и 10 х 15 см.http://www.umbra.com/usd/slider-photo-dis
3d_ocean
$9
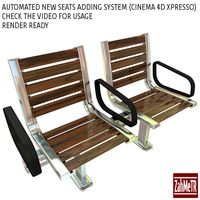
Seats with Automatic Adding Slider (Xpresso)
... / images and read description carefully before you buy. thanks. you need cinema 4d software to use slider controller or just ...
turbosquid
$15

Computer Camera Slider, closes and opens camera view
...der, closes and opens camera view for download as skp and stl on turbosquid: 3d models for games, architecture, videos. (1331206)
Cam
archibase_planet
free

Cam
...cam
archibase planet
tv camera equipment
cam dolly - 3d model (*.gsm+*.3ds) for interior 3d visualization.
3d_export
$8

Cam and Follower
...ry to linear (reciprocating) motion. as the cam rotates, the follower rises and falls in a process known as reciprocating motion.
3d_ocean
$15
Studio Cam
...p. made in 3ds max 2013 1- 3dsmax with vray render included material and light 2- obj file 3- fbx file hope you like it please...
3d_export
$37

thermal cam
...thermal cam
3dexport
turbosquid
$19
Security cam
...oyalty free 3d model security cam for download as ige and obj on turbosquid: 3d models for games, architecture, videos. (1331128)
turbosquid
$40
Security Cam
...y free 3d model security cam for download as ma, fbx, and obj on turbosquid: 3d models for games, architecture, videos. (1601103)
3d_export
$40
security cam
...security cam
3dexport
home security camera
turbosquid
$280

cam-bot
... available on turbo squid, the world's leading provider of digital 3d models for visualization, films, television, and games.
turbosquid
$33

AT_minivan_(CAM)
... available on turbo squid, the world's leading provider of digital 3d models for visualization, films, television, and games.
turbosquid
$10

Security Cam
... available on turbo squid, the world's leading provider of digital 3d models for visualization, films, television, and games.
Action
turbosquid
$5

Action Camera
...id
royalty free 3d model action camera for download as blend on turbosquid: 3d models for games, architecture, videos. (1673223)
turbosquid
$30

Action Hero
...royalty free 3d model action hero for download as obj and fbx on turbosquid: 3d models for games, architecture, videos. (1181694)
turbosquid
$6
Action Game
... available on turbo squid, the world's leading provider of digital 3d models for visualization, films, television, and games.
3ddd
free
triple action carabineer 2
...er 2
3ddd
triple action carabineer , карабин
triple action carabineer for safe climbing.
3d_export
$5
action camera
...els. but in general, the model is not bad enough, and if you use it correctly, then i'm sure your models will be very cool :)
3d_export
$5

300 bolt action rifle
...300 bolt action rifle
3dexport
300 bolt action rifle
3d_export
$7

woodstranding action figurine
...woodstranding action figurine
3dexport
turbosquid
$129
Lever Action Rifle
...
royalty free 3d model lever action rifle for download as obj on turbosquid: 3d models for games, architecture, videos. (1327623)
turbosquid
$10

Ricoh action camera
...royalty free 3d model ricoh action camera for download as fbx on turbosquid: 3d models for games, architecture, videos. (1421494)
turbosquid
$7
Pump Action Shotgun
...royalty free 3d model pump action shotgun for download as fbx on turbosquid: 3d models for games, architecture, videos. (1419882)