Thingiverse

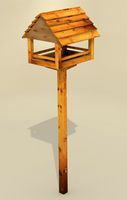
Bird House with IP Camera
by Thingiverse
Last crawled date: 4 years, 3 months ago
Reasonably simple set up:
Print
A: 1 Birdhouse Top
B: 1 Birdhouse Bottom (it has a 1-1/2" hole for various birds). It also has a 1/4" hole for a perch if you want a perch!
C: 1 Birdhouse Hole (1-1/8" hole for Wrens) (Plug perch hole for a Wren house!)
D: 1 Birdhouse Plug (if you want to paint your birdhouse)
Buy:
1 Camera with 64mm Outside Diameter (or make the hole in the top the correct size for whatever cam you have).
Either of these two cameras have a 64mm outside diameter, there are probably others, but I OWN these so I know they're both the correct diameter body (tip, buy them ON SALE, they go on sale for a TON cheaper than "normal" price:
https://www.amazon.com/gp/product/B07DYS149B
https://www.amazon.com/gp/product/B01G1U4MVA
You may be able to find a wifi camera so that you don't need to run Ethernet out to it (just power), but I have easy places to put mine and didn't bother looking for wifi cams...
Things you need to do:
Print all the parts :p
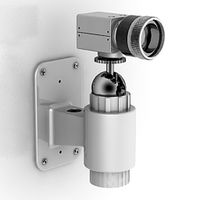
Take the front off of the camera (1 phillips screw) and re-focus the camera for near distance focusing. The lens is held in place with a dab of hot melt glue. Luckily, you are going to unscrew (counter clockwise) the lens about 3/4 of a turn (CAREFULLY using a pliers to do so). I didn't need to try anything to pull off the hot melt glue because it simply came loose while unscrewing the lens. Use a ruler to test your focus distance as you want it to focus well between 2" and 8" which is well within it's autofocusing IF you take the time to focus it well.
Now, with the front still off of the camera, stick the camera through the Birdhouse Top and then re-attach the front to the camera. If you're planning on painting the birdhouse, put a piece of blue painter's tape over the lens leaving one end sticking way up so you can pull it out through the hole. Glue (I used hot melt glue) the top, bottom and hole in place.
Now you're at the point where you want to make sure the camera is orientated the way you want it. Plug your camera in and check out placement (you see how I've got mine orientated in the 3rd pic. I have the hole facing down). Being a fussbudget, I made my camera orientated parallel to the front and back. Holding it there, put a few dabs of hot melt glue to keep it in place. After the hot melt glue cooled, I then put a ring of hot melt glue all the way around the camera/top.
If you're going to paint it, push the plug into the hole. Paint. Remove plug. Remove painter's tape.
I used PLA+ and have the house located under an eave of the house for shade and protection from the elements.
A: 1 Birdhouse Top
B: 1 Birdhouse Bottom (it has a 1-1/2" hole for various birds). It also has a 1/4" hole for a perch if you want a perch!
C: 1 Birdhouse Hole (1-1/8" hole for Wrens) (Plug perch hole for a Wren house!)
D: 1 Birdhouse Plug (if you want to paint your birdhouse)
Buy:
1 Camera with 64mm Outside Diameter (or make the hole in the top the correct size for whatever cam you have).
Either of these two cameras have a 64mm outside diameter, there are probably others, but I OWN these so I know they're both the correct diameter body (tip, buy them ON SALE, they go on sale for a TON cheaper than "normal" price:
https://www.amazon.com/gp/product/B07DYS149B
https://www.amazon.com/gp/product/B01G1U4MVA
You may be able to find a wifi camera so that you don't need to run Ethernet out to it (just power), but I have easy places to put mine and didn't bother looking for wifi cams...
Things you need to do:
Print all the parts :p
Take the front off of the camera (1 phillips screw) and re-focus the camera for near distance focusing. The lens is held in place with a dab of hot melt glue. Luckily, you are going to unscrew (counter clockwise) the lens about 3/4 of a turn (CAREFULLY using a pliers to do so). I didn't need to try anything to pull off the hot melt glue because it simply came loose while unscrewing the lens. Use a ruler to test your focus distance as you want it to focus well between 2" and 8" which is well within it's autofocusing IF you take the time to focus it well.
Now, with the front still off of the camera, stick the camera through the Birdhouse Top and then re-attach the front to the camera. If you're planning on painting the birdhouse, put a piece of blue painter's tape over the lens leaving one end sticking way up so you can pull it out through the hole. Glue (I used hot melt glue) the top, bottom and hole in place.
Now you're at the point where you want to make sure the camera is orientated the way you want it. Plug your camera in and check out placement (you see how I've got mine orientated in the 3rd pic. I have the hole facing down). Being a fussbudget, I made my camera orientated parallel to the front and back. Holding it there, put a few dabs of hot melt glue to keep it in place. After the hot melt glue cooled, I then put a ring of hot melt glue all the way around the camera/top.
If you're going to paint it, push the plug into the hole. Paint. Remove plug. Remove painter's tape.
I used PLA+ and have the house located under an eave of the house for shade and protection from the elements.
Similar models
thingiverse
free

Raspberry pi Camera - Focus ring by anykey
...ning). you have to make sure that when your press the focus ring on the lens, no glue is being sqeezed out into the lens opening.
thingiverse
free

Google Maps Pin Birdhouse by wgss
... a perch, one could drill a small hole and glue it in, or possibly combine with the front and extrude it straight out, up to you.
thingiverse
free

Birdhouse Stronger Pegs by malakid
...stick (vogelhaus_zweifarbig_stoeckchen.stl) horizontally, as well.
i also recommend printing the pegs and the perch 100% infill.
thingiverse
free

Round Birdhouse with Perch by AdamsLab
... material. you can use infill if you want to reinforce the mounting bracket on the back.
i suggest printing it with 3 perimeters.
thingiverse
free

ProjectCase_v2_4AAA by Lionshead
...ded insert's hole with hot glue and use any screw you want. or just hot glue it closed if you're feeling really confident
thingiverse
free

Birdhouse (modular) by jarend01
...direction you want!! and glue is not the only option, you could melt the birdhouses together or any way you can get them to stick
thingiverse
free

Sunlu/Jayo S1 Hole Plug by suthrnstyl
...is silicone, and glue will not adhere to it. if you decide to glue it in place, be careful not to glue the lid shut on the dryer.
thingiverse
free

Simple Birdhouse by SlickStretch
...t back that i could just glue on. (the threaded hole is still there if you'd like to use the perch from the original design.)
thingiverse
free

Samsung Galaxy Tab A Charging Station by Junkmail90210
...om
flip right-side and gently remove tablet.
add more hot glue from top
route cable through rest of holder and hot-glue in place.
grabcad
free

Infiray T2L
...rmal camera. note the front lens twists to focus the camera, so don't forget to account for the lens distance in your design!
Ip
3ddd
$1

IPE CAVALLI
...ipe cavalli
3ddd
ipe cavalli
ipe cavalli
3ddd
$1

Ipe Cavalli
...ipe cavalli
3ddd
ipe cavalli
фабрика ipe cavalli
3ddd
$1

IPE Cavalli
...ipe cavalli
3ddd
ipe cavalli
диван ipe cavalli
3ddd
$1

ipe cavalli
...ipe cavalli
3ddd
ipe cavalli
стул ipe cavalli
3ddd
free

IPE Сavalli
...ipe сavalli
3ddd
ipe сavalli
кровать ipe сavalli
3ddd
$1

Ipe Cavalli
...ipe cavalli
3ddd
ipe cavalli
производитель: ipe cavalli
модель: bibli hight1
3ddd
$1

Ipe Cavalli
... scandal , балдахин
кровать с балдахином ipe cavalli
3ddd
$1

Ipe Cavalli
... ipe cavalli , giorgio collection luna
столик журнальный ipe cavalli
3ddd
$1

Ipe Cavalli
...li
3ddd
ipe cavalli , комод
ipe cavalli
тумба модель midnight
зеркало модель visionnare
3ddd
$1

Спальня IPE CAVALLI
...e , ipe cavalli , капитоне
спальня ipe cavalli.
Bird
design_connected
$18
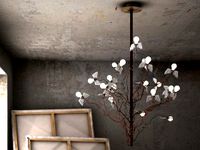
Birds Birds Birds
...oto-realistic 3d models of the birds birds birds pendant from ingo maurer for 3d architectural and interior design presentations.
archibase_planet
free
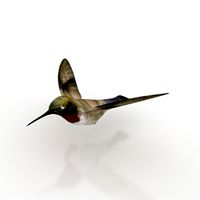
Bird
...bird
archibase planet
humming-bird hummingbird bird
humbird - 3d model (*.gsm+*.3ds) for interior 3d visualization.
design_connected
$13
Birds
...birds
designconnected
architectmade birds computer generated 3d model. designed by vedel, kristian.
3ddd
$1
Birds
...birds
3ddd
статуэтка
modern abstract resin animal bird sculpture,casting sculpture
3d_ocean
$7
bird feeders
...bird feeders
3docean
bird feeders wood
bird feeders
3ddd
$1
Bird mirror
...bird mirror
3ddd
visionnaire , bird
visionnaire - bird mirror
3ddd
free

Angry birds
...angry birds
3ddd
angry birds , птица
angry birds
archibase_planet
free
Bird
...bird
archibase planet
parrot birds macaw
macaw n200908 - 3d model (*.gsm+*.3ds) for interior 3d visualization.
3d_export
$25

heron bird
...heron bird
3dexport
heron bird
3d_export
$25

crane bird
...crane bird
3dexport
crane bird
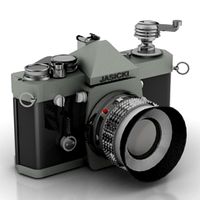
Camera
archibase_planet
free
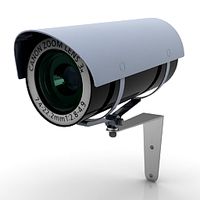
Camera
...base planet
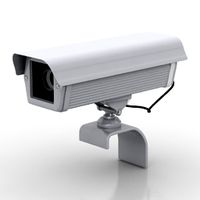
camera surveillance camera video camera
camera surveillance n090211 - 3d model (*.3ds) for interior 3d visualization.
archibase_planet
free
Camera
...hibase planet
camera security camera video camera
camera security n210515 - 3d model (*.gsm+*.3ds) for exterior 3d visualization.
archibase_planet
free
Camera
...se planet
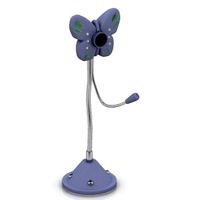
camera web camera webcam
camera butterfly usb pc camera n090713 - 3d model (*.gsm+*.3ds) for interior 3d visualization.
archibase_planet
free
Camera
...mera
archibase planet
surveillance camera video camera camcorder
camera n011211 - 3d model (*.3ds) for exterior 3d visualization.
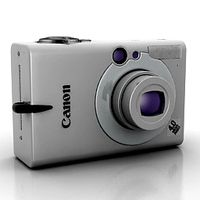
archibase_planet
free
Camera
...camera
archibase planet
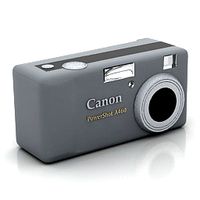
camera digital camera
camera canon digital n041211 - 3d model (*.3ds) for interior 3d visualization.
archibase_planet
free
Camera
...camera
archibase planet
camera film camera phototechnique
camera n100214 - 3d model (*.gsm+*.3ds) for interior 3d visualization.
archibase_planet
free

Camera
...amera
archibase planet
camera video camera camcorder
camera video n070315 - 3d model (*.gsm+*.3ds) for interior 3d visualization.
archibase_planet
free
Camera
...rchibase planet
camera video camera camcorder
camera studio n101213 - 3d model (*.gsm+*.3ds+*.max) for interior 3d visualization.
archibase_planet
free
Camera
...ibase planet
digital camera camera phototechnique
camera canon ixus 400 n310311 - 3d model (*.3ds) for interior 3d visualization.
archibase_planet
free
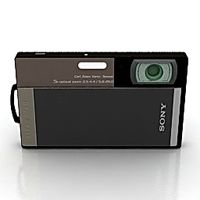
Camera
...ase planet
photocamera video camera camera
camera sony t300 black n291010 - 3d model (*.gsm+*.3ds) for interior 3d visualization.
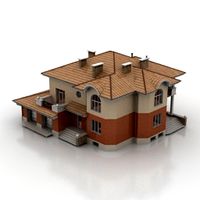
House
archibase_planet
free
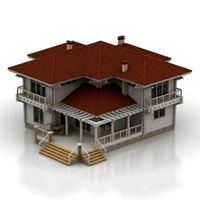
House
...t
house residential house private house wooden house
house wooden n290815 - 3d model (*.gsm+*.3ds) for exterior 3d visualization.
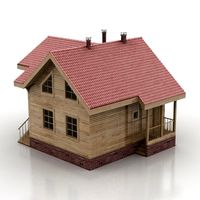
archibase_planet
free
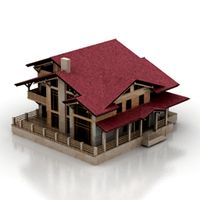
House
...use residential house private house wooden house
house wood stone n140815 - 3d model (*.gsm+*.3ds) for exterior 3d visualization.
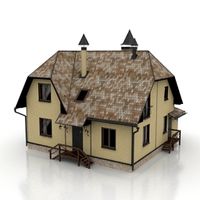
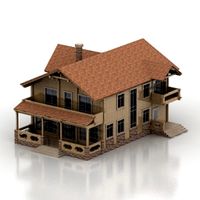
archibase_planet
free

House
...ibase planet
house residential house building private house
house n050615 - 3d model (*.gsm+*.3ds) for exterior 3d visualization.
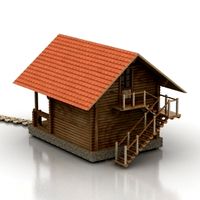
archibase_planet
free
House
...ibase planet
house residential house building private house
house n030615 - 3d model (*.gsm+*.3ds) for exterior 3d visualization.
archibase_planet
free
House
...ibase planet
house residential house building private house
house n230715 - 3d model (*.gsm+*.3ds) for exterior 3d visualization.
archibase_planet
free
House
...ibase planet
house residential house building private house
house n240615 - 3d model (*.gsm+*.3ds) for exterior 3d visualization.
archibase_planet
free

House
...ibase planet
house residential house building private house
house n290815 - 3d model (*.gsm+*.3ds) for exterior 3d visualization.
archibase_planet
free

House
...ibase planet
house residential house building private house
house n110915 - 3d model (*.gsm+*.3ds) for exterior 3d visualization.
archibase_planet
free
House
...ibase planet
house residential house building private house
house n120915 - 3d model (*.gsm+*.3ds) for exterior 3d visualization.
archibase_planet
free
House
...ibase planet
house residential house building private house
house n210915 - 3d model (*.gsm+*.3ds) for exterior 3d visualization.