Thingiverse

Bird Feeders; Tray Type
by Thingiverse
Last crawled date: 4 years, 3 months ago
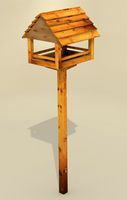
Six Versions of a Bird Feeder Tray
This project consists of a set of tray-type bird feeders that I have deployed on my deck.
The basic square tray is 120mm on a side, and the long trays are 120mm x 240mm. The long trays come in single and double compartment versions. All trays also come in a version with a perch. The perch is flattened on the bottom, so you won't need supports
All versions have recessed holes to take #8 deck screws. They attach easily to fence rails and balcony/deck cap rails. Note the slots in the corners to drain water.
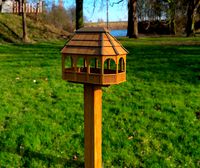
I use these feeders in conjunction with a large tube type feeder. I attached the version with the perch outside my kitchen window on a couple of three-inch corner brackets -- with sheet metal screws up into the sides on the ends. I can reload the feeder by just opening the window and adding seed. The perch accommodates scrub jays when they load up with whole peanuts.
Consider where you deploy these feeders. If you have squirrels these may not be for you. They can be mounted on a pole, but since they do not have mesh bottoms, that will make them difficult to keep clean and you might be better off with a larger screen-bottomed tray. Since these are on my deck, it is easy for me to keep an eye on them.
Printed in PLA/PLA+ you might expect one or two seasons, depending on your local UV light. PLA prints could be treated with a UV shielding finish. Better yet, print with PETG. Don't be afraid to print these with a 0.30 nozzle height. That gives the edges and perch a little more grip, and looks a little more rustic if you use brown or green filament.
Depending how you mount a tray, you might want to close the screw holes with a dab of silicone adhesive.
I've also included a file for a 4 x 10 x 120mm spacer that you can use under the tray if you are concerned about rot developing underneath.
Update #1: I added drain slots at the interior wall of the two-compartment trays.
Update #2: I added a small (120 x 120mm) version with a perch for those with smaller build surfaces. This could also be a handy size for multiple trays with some separation.
Update#3: I've added two non-marring mounts for the two sizes of tray. These can be zip-tied to either a 2x4 or 2x6 cap rail. The tray can then be attached to the mount using #6 x 1/2" flat head screws. A dab of silicone adhesive/sealant can be applied to the recessed circles to help bed the tray, reduce wobble, and reduce pulling at the screws. Infill of 30% to 40% is recommended to give the screws better "bite". Don't over-torque the screws. The long tray version is big -- 286mm / 11 1/4".
This project consists of a set of tray-type bird feeders that I have deployed on my deck.
The basic square tray is 120mm on a side, and the long trays are 120mm x 240mm. The long trays come in single and double compartment versions. All trays also come in a version with a perch. The perch is flattened on the bottom, so you won't need supports
All versions have recessed holes to take #8 deck screws. They attach easily to fence rails and balcony/deck cap rails. Note the slots in the corners to drain water.
I use these feeders in conjunction with a large tube type feeder. I attached the version with the perch outside my kitchen window on a couple of three-inch corner brackets -- with sheet metal screws up into the sides on the ends. I can reload the feeder by just opening the window and adding seed. The perch accommodates scrub jays when they load up with whole peanuts.
Consider where you deploy these feeders. If you have squirrels these may not be for you. They can be mounted on a pole, but since they do not have mesh bottoms, that will make them difficult to keep clean and you might be better off with a larger screen-bottomed tray. Since these are on my deck, it is easy for me to keep an eye on them.
Printed in PLA/PLA+ you might expect one or two seasons, depending on your local UV light. PLA prints could be treated with a UV shielding finish. Better yet, print with PETG. Don't be afraid to print these with a 0.30 nozzle height. That gives the edges and perch a little more grip, and looks a little more rustic if you use brown or green filament.
Depending how you mount a tray, you might want to close the screw holes with a dab of silicone adhesive.
I've also included a file for a 4 x 10 x 120mm spacer that you can use under the tray if you are concerned about rot developing underneath.
Update #1: I added drain slots at the interior wall of the two-compartment trays.
Update #2: I added a small (120 x 120mm) version with a perch for those with smaller build surfaces. This could also be a handy size for multiple trays with some separation.
Update#3: I've added two non-marring mounts for the two sizes of tray. These can be zip-tied to either a 2x4 or 2x6 cap rail. The tray can then be attached to the mount using #6 x 1/2" flat head screws. A dab of silicone adhesive/sealant can be applied to the recessed circles to help bed the tray, reduce wobble, and reduce pulling at the screws. Infill of 30% to 40% is recommended to give the screws better "bite". Don't over-torque the screws. The long tray version is big -- 286mm / 11 1/4".
Similar models
thingiverse
free

Bird Feeder Perch by bbennington
...e can be found at lowes or walmart. i am in the process of making my own bird feeder that will be compatible with these perches.
thingiverse
free

Printed Bird Feeder (Hanging and Post) by Revamped_Outdoors
...roject if you're interested in seeing it greater detail:https://youtu.be/-audghkqoeo
keep your amps up and your filament dry!
thingiverse
free

Suspended bird perch and feeder by Mikebarber
...lar perch, can either be hung from wire cage or another perch, suitable for smaller birds example cockatiel, dowel parts all 10mm
thingiverse
free

Bottle Feeder Hook by Gazorpa
...ng enough if printed in abs and given an acetone vapor bath.
stick it to the bottom of a soda bottle with gap-filling super glue.
thingiverse
free

Acrylic bird feeder perch
...rse
perch for acrylic bird feeder with suction cups and triangular roof from aliexpress.
thing dimensions:
154mm x 61,5mm x 10mm
thingiverse
free

Soda Bottle Bird Feeder by Gazorpa
...te
added grip to feeder chute for easier removal from the bottle. prevents breakage when tempted to torque it off by the perch.
thingiverse
free

Bird Feeder for Large Bottle with Perch by growe41
...this will allow you to make a quick print of the neck and make adjustments as needed to your printer and adjust for shrinkage....
thingiverse
free

Apple logo Bird Feeder by TheSeend
...t; file added, so you can create a logo/hole your self.
use four bolds (m3 12mm) to assembly the "bird feeder house".
thingiverse
free

Bird feeder by ThingiJay
...structions.
i found that larger birds couldn't cling to the original feeder base. so i created another version with a perch.
thingiverse
free

Big Bird Bottle Feeder by Gazorpa
...d grip to feeder chute for easier removal from the bottle. prevents breakage when tempted to torque it off by the wavy supports.
Feeders
3d_export
free

Feeder
...feeder
3dexport
feeder.
3d_ocean
$7
bird feeders
...bird feeders
3docean
bird feeders wood
bird feeders
3d_export
$6
bird feeder
...bird feeder
3dexport
bird feeder
3d_export
free
Bird feeder
...feeder
3dexport
a beautiful, lovely and tranquil bird feeder, which you can use for your amazing games, animations, or pictures.
turbosquid
$59

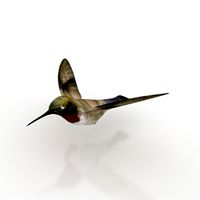
Hummingbird Feeder
... free 3d model hummingbird feeder for download as max and obj on turbosquid: 3d models for games, architecture, videos. (1444996)
turbosquid
$2
Baby Feeder
...y free 3d model baby feeder for download as max, obj, and fbx on turbosquid: 3d models for games, architecture, videos. (1488786)
archive3d
free
Bird feeder 3D Model
...r tray feeder
bird feeder n250714 - 3d model (*.gsm+*.3ds+*.max) for interior 3d visualization.
turbosquid
$18
Pet feeder
...ee 3d model pet feeder for download as max, max, fbx, and obj on turbosquid: 3d models for games, architecture, videos. (1559898)
turbosquid
$3
dog feeder
... 3d model dog feeder for download as blend, dae, fbx, and obj on turbosquid: 3d models for games, architecture, videos. (1545601)
turbosquid
$29

Chicken Feeder
... available on turbo squid, the world's leading provider of digital 3d models for visualization, films, television, and games.
Bird
design_connected
$18
Birds Birds Birds
...oto-realistic 3d models of the birds birds birds pendant from ingo maurer for 3d architectural and interior design presentations.
archibase_planet
free
Bird
...bird
archibase planet
humming-bird hummingbird bird
humbird - 3d model (*.gsm+*.3ds) for interior 3d visualization.
design_connected
$13
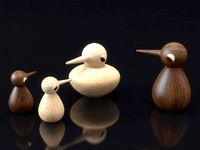
Birds
...birds
designconnected
architectmade birds computer generated 3d model. designed by vedel, kristian.
3ddd
$1

Birds
...birds
3ddd
статуэтка
modern abstract resin animal bird sculpture,casting sculpture
3d_ocean
$7
bird feeders
...bird feeders
3docean
bird feeders wood
bird feeders
3ddd
$1
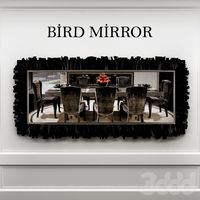
Bird mirror
...bird mirror
3ddd
visionnaire , bird
visionnaire - bird mirror
3ddd
free

Angry birds
...angry birds
3ddd
angry birds , птица
angry birds
archibase_planet
free
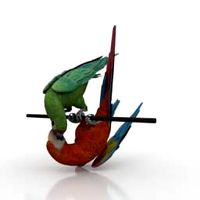
Bird
...bird
archibase planet
parrot birds macaw
macaw n200908 - 3d model (*.gsm+*.3ds) for interior 3d visualization.
3d_export
$25

heron bird
...heron bird
3dexport
heron bird
3d_export
$25

crane bird
...crane bird
3dexport
crane bird
Tray
archibase_planet
free

Tray
...tray
archibase planet
tray salver tea-tray
tray 1 n210312 - 3d model (*.gsm+*.3ds) for interior 3d visualization.
archibase_planet
free

Tray
...tray
archibase planet
tray salver tea-tray
tray 2 n210312 - 3d model (*.gsm+*.3ds) for interior 3d visualization.
3d_export
$8

tray
...tray
3dexport
design of tray
archibase_planet
free

Tray
...tray
archibase planet
tray salver stand
tray - 3d model (*.gsm+*.3ds) for interior 3d visualization.
archibase_planet
free

Tray
...tray
archibase planet
tray salver
tray n050408 - 3d model (*.gsm+*.3ds) for interior 3d visualization.
archibase_planet
free

Tray
...tray
archibase planet
tray salver kitchen ware
tray - 3d model (*.gsm+*.3ds) for interior 3d visualization.
archibase_planet
free

Tray
...tray
archibase planet
tray salver
tray 2 n050408 - 3d model (*.gsm+*.3ds) for interior 3d visualization.
archibase_planet
free

Tray
...tray
archibase planet
tray salver kitchen ware
tray n241211 - 3d model (*.3ds) for interior 3d visualization.
archibase_planet
free

Tray
...tray
archibase planet
tray salver office ware
tray n160808 - 3d model (*.gsm+*.3ds) for interior 3d visualization.
archibase_planet
free

Tray
...tray
archibase planet
donuts donuts tray donut food
tray donuts n190614 - 3d model (*.gsm+*.3ds) for interior 3d visualization.
Type
3d_export
$5
s type
...s type
3dexport
s type formats max 3ds obj stl
3d_export
$5

l-type conveyor
...l-type conveyor
3dexport
l-type conveyor
3d_export
$5

volkswagen type 2
...volkswagen type 2
3dexport
volkswagen type 2
turbosquid
$150
RBC types
...osquid
royalty free 3d model rbc types for download as blend on turbosquid: 3d models for games, architecture, videos. (1343563)
turbosquid
$1
B-Type
...urbosquid
royalty free 3d model b-type for download as blend on turbosquid: 3d models for games, architecture, videos. (1609608)
3ddd
$1
shoes type A
...shoes type a
3ddd
туфли
shoes
turbosquid
$39

R-type
...oyalty free 3d model r-type for download as max, obj, and fbx on turbosquid: 3d models for games, architecture, videos. (1303675)
turbosquid
$5
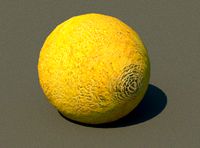
melon type
...ee 3d model melon galia type for download as ma, fbx, and obj on turbosquid: 3d models for games, architecture, videos. (1557188)
3d_export
free
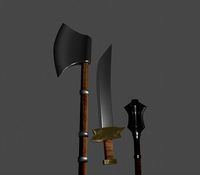
three different type
...three different type
3dexport
three different type: mace, axe, sword
turbosquid
$49
Types of Placentation
... available on turbo squid, the world's leading provider of digital 3d models for visualization, films, television, and games.