Thingiverse

Bike Hoist (35lbs max) by cyamate
by Thingiverse
Last crawled date: 3 years, 1 month ago
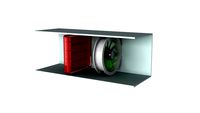
This is my Junior year machine design project for chico state mechanical engineering program. it is a bike hoist that is meant for limited space in an apartment or house to store your bike vertically with ease. The assembly is made mostly from Hatchbox PETG except for a few pieces are printed in Taulman 618 Nylon. This is an ADVACED printing project based on the materials used and the pauses that MUST be inserted into the GCode.
I used a 0.6 mm nozzle for everything but the nylon gears.
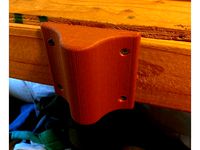
m3 washers may need to be epoxied to the ends of the two towers out the back of FrameFront4 because the screw head surfaces may be missing, I apologize if you downloaded this before I could fix the model and replace it with FrameFront5.
[UPDATE] 10-09-2017: I posted the STL file for Frame Front5, so if your downloading this after the update you're in the clear. Frame Front4 is missing very small yet important features to allow the 2 m3 body screws to do their job.
Where ever there is a m3 machine screw in this assembly shown in the photos (2 for body, 4 for motor mount, 4 for spool, 4 for battery door) you must find the layer that corresponds to the last open layer for the hexagon voids I created to insert m3 nuts mid print. Creating pauses during the print is crucial, to insert the nuts I partially threaded them onto a long screw and hit them with a propane torch for 2 sec so they can melt their way into the hole. BE SURE the nuts are below the surface of the part or you could damage your brass nozzle.
please notice that the renderings and photos have 2 pulleys top and bottom, where as this model is meant for 3 pulleys top and bottom to increase the mechanical advantage.
Color switching can be done to make the arrows pop out on the front piece. This will require 2 more pauses at the exact right layer, unless your using dual extruder.
Printed Parts:
1X Frame Front#, Frame Back#, Batt Door, Ceil_Bracket, Hook2, Lower_Cablegide, motor bracket, spool#, top pulley holder - PETG
(#) indicates parts that require pauses to insert m3 nuts
6x single pulley - PETG
6X nylon bushing, nylon washer - Taulman 618 nylon
1x BigGear - Taulman 618 nylon
1x DriveGear - Taulman 618 nylon
Hardware:
10x double battery terminals (amazon stopped selling the ones i used. Similar to these; http://a.co/jk0yA94
1x dc female and male charge jack http://a.co/7Yt8o51
1x Double momentary rocker switch http://a.co/5i4lC7O
1x dc right angle gear motor http://a.co/5WFvhQe
6x terminal connectors (small gauge)
8x 608zz bearings
10x rechargable AA batteries
1x Battery charger https://www.amazon.com/Tenergy-Universal-Battery-Charger-Batteries/dp/B003MXMJX8/ref=sr_1_5?ie=UTF8&qid=1507405049&sr=8-5&keywords=battery+charger+tenergy
2x m8x80mm hex bolts
2x m8x50mm hex bolts
8X m8 flat washers
4x m8 nylock nuts
6x m3x25mm machine screws
1x 14"x.125" rubber grommet
1x JST locking connector with 2 conductor paths
9x m3x8mm machine screws
15x m3 nuts (14 nuts heated and inserted mid print last one pushed into drive gear)
3x 8mmx57mm shafts (must be cut to length, same rod stock as most printers use)
small amount of 22awg stranded wire (~2ft)
spool of 65 lb test fishing line (80lb break strength, 60% strengh @knots)
https://www.youtube.com/watch?v=mAbKNog0SMw&t=329s
Note:
-The battery terminals must be glued or epoxied to the frame front and battery door.
-one battery terminal should be cut in half with tin snips to make a positive and negative terminal. solder wires to those terminals and solder the other ends to the middle two terminals on the switch. The tops of the middle two terminals are also connected to the charging port so leave room!!
-polarity doesn't matter until the end when you wire the JST2 connector to the motor, the worst that could happen is when you push the up button it goes down. if that happens, obviously switch something like the polarity of the wires or the orientation of the batteries. that should fix it.
-also if you wire the charger to the male DC jack incorrectly, the charger I posted has a reverse polarity shut down feature.
good luck, happy printing! and try not to make a mess with your epoxy! please comment if you have questions and please post your make if you accomplish this project!!
Chase
I used a 0.6 mm nozzle for everything but the nylon gears.
m3 washers may need to be epoxied to the ends of the two towers out the back of FrameFront4 because the screw head surfaces may be missing, I apologize if you downloaded this before I could fix the model and replace it with FrameFront5.
[UPDATE] 10-09-2017: I posted the STL file for Frame Front5, so if your downloading this after the update you're in the clear. Frame Front4 is missing very small yet important features to allow the 2 m3 body screws to do their job.
Where ever there is a m3 machine screw in this assembly shown in the photos (2 for body, 4 for motor mount, 4 for spool, 4 for battery door) you must find the layer that corresponds to the last open layer for the hexagon voids I created to insert m3 nuts mid print. Creating pauses during the print is crucial, to insert the nuts I partially threaded them onto a long screw and hit them with a propane torch for 2 sec so they can melt their way into the hole. BE SURE the nuts are below the surface of the part or you could damage your brass nozzle.
please notice that the renderings and photos have 2 pulleys top and bottom, where as this model is meant for 3 pulleys top and bottom to increase the mechanical advantage.
Color switching can be done to make the arrows pop out on the front piece. This will require 2 more pauses at the exact right layer, unless your using dual extruder.
Printed Parts:
1X Frame Front#, Frame Back#, Batt Door, Ceil_Bracket, Hook2, Lower_Cablegide, motor bracket, spool#, top pulley holder - PETG
(#) indicates parts that require pauses to insert m3 nuts
6x single pulley - PETG
6X nylon bushing, nylon washer - Taulman 618 nylon
1x BigGear - Taulman 618 nylon
1x DriveGear - Taulman 618 nylon
Hardware:
10x double battery terminals (amazon stopped selling the ones i used. Similar to these; http://a.co/jk0yA94
1x dc female and male charge jack http://a.co/7Yt8o51
1x Double momentary rocker switch http://a.co/5i4lC7O
1x dc right angle gear motor http://a.co/5WFvhQe
6x terminal connectors (small gauge)
8x 608zz bearings
10x rechargable AA batteries
1x Battery charger https://www.amazon.com/Tenergy-Universal-Battery-Charger-Batteries/dp/B003MXMJX8/ref=sr_1_5?ie=UTF8&qid=1507405049&sr=8-5&keywords=battery+charger+tenergy
2x m8x80mm hex bolts
2x m8x50mm hex bolts
8X m8 flat washers
4x m8 nylock nuts
6x m3x25mm machine screws
1x 14"x.125" rubber grommet
1x JST locking connector with 2 conductor paths
9x m3x8mm machine screws
15x m3 nuts (14 nuts heated and inserted mid print last one pushed into drive gear)
3x 8mmx57mm shafts (must be cut to length, same rod stock as most printers use)
small amount of 22awg stranded wire (~2ft)
spool of 65 lb test fishing line (80lb break strength, 60% strengh @knots)
https://www.youtube.com/watch?v=mAbKNog0SMw&t=329s
Note:
-The battery terminals must be glued or epoxied to the frame front and battery door.
-one battery terminal should be cut in half with tin snips to make a positive and negative terminal. solder wires to those terminals and solder the other ends to the middle two terminals on the switch. The tops of the middle two terminals are also connected to the charging port so leave room!!
-polarity doesn't matter until the end when you wire the JST2 connector to the motor, the worst that could happen is when you push the up button it goes down. if that happens, obviously switch something like the polarity of the wires or the orientation of the batteries. that should fix it.
-also if you wire the charger to the male DC jack incorrectly, the charger I posted has a reverse polarity shut down feature.
good luck, happy printing! and try not to make a mess with your epoxy! please comment if you have questions and please post your make if you accomplish this project!!
Chase
Similar models
thingiverse
free

Bike light by Wiktorszop
...1 ohm 5w
-1x micro usb lithium battery charger module
-1x screw m5 and nut m5
-7x 3w led(i used cool white)
-1x switch
some wires
thingiverse
free

MPCNC software endstop 25mm
...stop 25mm
thingiverse
extra material
1x m4 screw and nut
1x m3 screw and nut
you have to pause your print and put m4 nut inside.
thingiverse
free

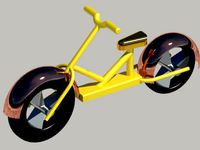
Wooden trike electric set by wwwektor
...pack
my motor needs 18v but i used 11v battery pack to reduce power.
i have used some glue together with screws to hold big gear.
thingiverse
free

12v led inspection lamp by nikki81
...ed 12v bulb
6x m3 x 25mm bolts
6x m3 nuts
1x pcb terminal block
1x 18mm x 13mm switch
and a suitible lengh and thickness of cable
thingiverse
free

Skid steer Loader
...-32 nylon collar lock nuts
6x #10 flatwashers (optional)
1x m3 x 15mm machine screw
1x m3 nut
8x ~45mm o-rings
thingiverse
free

Particulate Matter SMOG Sensor frame for Wemos ESP8266 PMS7003 by Szmalu
... shield
wemos battery shield
wemos proto shield
oled i2c (128x64)
1x kcd11 rocker switch
1x 18650 battery
1x 18650 battery holder
thingiverse
free

PCB scraper by Ostrovak
...sert=10mm m3 bolts=+-15mm
ver.2: insert=5mm m3 bolts=+-10mm
ver.3: insert=15mm m3 bolts=+-20mm
body4: just print as it is
thingiverse
free

Tevo Tarantula adjustable z stop by twb010
...supports.
do not use teeth to set locknut in insert!
extra parts used:
4x m4 screw
4x m4 t-nut
1x m3 screw
1x m3 nylon lock nut
thingiverse
free

LIR18650 charger/tester adapter by evgs
...gs, wires, m3 screws and nuts, and a spring for negative battery terminal (i've got one from broken toy from aa-battery bay).
thingiverse
free

Belt tensioner pulley for Tevo Tarantula by Banholm
...e belt tensioner to 2040 extrusion with m4x10 screws and m4 t-nuts.
use the turnwheel to adjust the belt tension.
start printing!
35Lbs
thingiverse
free

Hellsing Jackyl by myk3sr
...a length of 39cm (16 in), weight of 16kg (35lbs, and a black gunmetal construction, it is one of...
thingiverse
free

Kettlebell set (1:18 scale) by zanzastoys
...ur projects, please join us on our facebook page.
we also have an ever-growing subset of our items available for purchase on ebay
thingiverse
free

4" Hairpin Leg by ahuczekdesign
...itx build but i did test them up to 35lbs but for actual weight bearing scenarios i recommend printing...
thingiverse
free

LackRack mounts by niik
...id cooled with 5hdd, a gtx670 and 800w psu, i would guess at least 35lb.
update 9/aug/17
uploaded v6 files to improve the design.
thingiverse
free

Low Profile Airtag Dog Collar by future_luddite
...is design has 1-2 mm of extra top material to do a negative/subtractive design on top. i put a qr code with my info for instance.
thingiverse
free

Dog Biscuit Roller - Paw Print Design by sweetpeamcgeeaatb
...ingiverse! please post a picture of your print or biscuits if you make it.
treat your pups to some homemade biscuits :)
enjoy!
thingiverse
free

Strong clip-on hook for wire shelves by rbeverly
...e what you're comfortable hanging from them, and what they're useful for, and let me know :)
solvespace file is included.
thingiverse
free

C-bot Monster V1 533mm x 711mm x 711mm by konkop
...this design was able to move up and down 35lbs of weight before it started to skip. each corner...
grabcad
free

M2A1 Ammo Can Storage Rack
...m2a1, 50 caliber ammo cans. each can weight is 35lbs must be anchored to the concrete floor. matterials: l2x2x1/8,...
Cyamate
thingiverse
free
Massage Bump by cyamate
...sage bump by cyamate
thingiverse
find a place to put this opposite of your tv and work out some knots.
nothing much more to say.
thingiverse
free

Raiders Three Tone Logo by cyamate
... three tone logo by cyamate
thingiverse
this is a three color print. try and time the color switching right. or dont, whatever
thingiverse
free
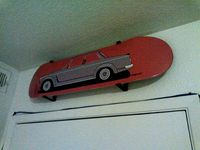
Skateboard Wall Mount (no trucks) by cyamate
...nting a 8" wide skateboard 3" away from the wall so the tip and tail dont touch the wall. needed these so i drew them.
thingiverse
free
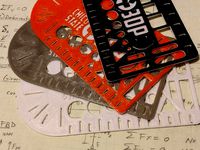
Drawing Template (Chico State 3DP Club) by cyamate
...is a design i created as a giveaway to advertise the chico state club on campus. print this in abs with a very slow base layer.
thingiverse
free
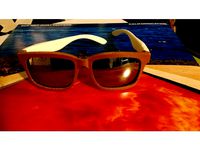
Sunglasses by cyamate
...your makes, thanks everyone!!
for best results, print the main frame in abs and the arms in pla. don't leave them in the car!
thingiverse
free
Tabletop Football (Chico State 3DP) by cyamate
... designed these as a giveaway for our 3d printing club at chico state. i may change the laces to be cut out instead of embossed.
thingiverse
free
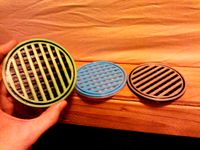
Perfect Coaster by cyamate
... and slow your printer down to 10% and change the color. i made three and they look pretty cool. the green and black one is v3.
thingiverse
free
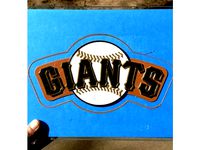
SF Giants Logo by cyamate
... as i would have hoped. but if you get the right colors it should look great!!
color switching order: wood, white, black, orange
thingiverse
free

Chico State 3DP Flex Bracelet by cyamate
...eone wearing one!! :) ... "he makes jewelry now..." portlandia quote
print with ninja flex or equivalent tpe plastic
cy
thingiverse
free
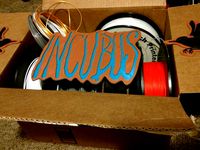
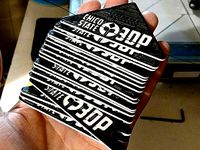
INCUBUS (crow left of a murder) LOGO with birdies by cyamate
... i don't know if all the lines show up when you reduce the size. make it your own with any color combination you'd like.
Hoist
3ddd
$1
Hoist
...hoist
3ddd
тренажер
fitness equipment
3d_ocean
$20
Hoist Crane
...hoist crane
3docean
crane industrial lift loader machine outdoor work
3d model crane hoist
turbosquid
$10
Hoist 2
... available on turbo squid, the world's leading provider of digital 3d models for visualization, films, television, and games.
turbosquid
$7

Hoist 1
... available on turbo squid, the world's leading provider of digital 3d models for visualization, films, television, and games.
3ddd
free
тренажер Hoist PTS Ensemble
...тренажер hoist pts ensemble
3ddd
тренажер
hoist pts ensemble
turbosquid
$60

Material Hoist Construction
...free 3d model material hoist construction for download as max on turbosquid: 3d models for games, architecture, videos. (1375181)
turbosquid
$20
HOIST WAY FAN
...quid
royalty free 3d model hoist way fan for download as max on turbosquid: 3d models for games, architecture, videos. (1259868)
3d_export
$10
Crane Hoist Podem 3D Model
...crane hoist podem 3d model
3dexport
crane loader lift work machine hoist
crane hoist podem 3d model genkot27 68607 3dexport
3d_ocean
$20
Crane Hoist Stahl ST50
...crane hoist stahl st50
3docean
crane industrial lift loader machine outoor work
3d model crane hoist stahl st50
3d_export
$10
Chain hoist lifting beam 3D Model
...chain hoist lifting beam 3d model
3dexport
chain hoist lifting beam
chain hoist lifting beam 3d model flash 53891 3dexport
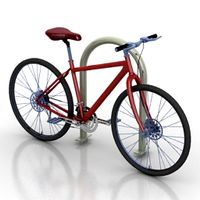
Bike
3d_ocean
$18
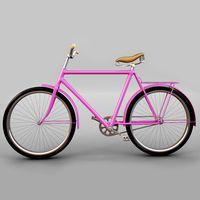
Bike
...bike
3docean
bicycles bike sports transport
3d model bike
3d_export
$5
bike
...bike
3dexport
bike
3d_export
$50
bike
...bike
3dexport
3d bike model
turbosquid
free
bike-bike-rack
... available on turbo squid, the world's leading provider of digital 3d models for visualization, films, television, and games.
archibase_planet
free

Bike
...bike
archibase planet
bike bicycle cycle
bike n161113 - 3d model (*.gsm+*.3ds+*.max) for exterior 3d visualization.
archibase_planet
free
Bike
...bike
archibase planet
bike bicycle cycle
bike and rack n220613 - 3d model (*.gsm+*.3ds+*.max) for exterior 3d visualization.
archibase_planet
free
Bike
...rchibase planet
bike bicycle cycle two-wheeled bicycle
bike n031213 - 3d model (*.gsm+*.3ds+*.max) for exterior 3d visualization.
archibase_planet
free
Bike
...rchibase planet
bike bicycle cycle two-wheeled bicycle
bike n180714 - 3d model (*.gsm+*.3ds+*.max) for exterior 3d visualization.
3d_ocean
$35
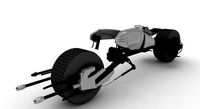
Batpod Bike
...cean
batman batman bike batpod bike bike motorcycle stylish bike
detailed model of a famous batpod bike used in the movie batman.
3d_export
$5
exercise bike
...exercise bike
3dexport
exercise bike, spin bike, bike, gym equipment, exerciser