Thingiverse

Benchtop DC Power Supply with 2 adjustable outputs
by Thingiverse
Last crawled date: 4 years, 3 months ago
I was in need of a reliable power supply for my maker space. I need two adjustable outputs, constant voltage/current, and voltages from 3.3 up to 30 V. Having 5A was one goal as well.
https://www.youtube.com/watch?v=weG6X18faGc
BE CAREFUL! WARNING: Voltage from mains is dangerous and can cause serious injuries or death. BE CAREFUL or ask a professional to help you with the wiring.
Bill of materials:
1x Mean Well AC/DC LRS 200/36 https://www.amazon.de/gp/product/B07FM9T9ZV
1x C14 socket with switch and 6A fuse https://www.amazon.de/gp/product/B01H5MK3OI
2x DC-DC https://www.amazon.de/gp/product/B07DWX96M9
1x Buck converter https://www.amazon.de/gp/product/B077VW4BTY
1x 120mm fan, 12V https://www.amazon.de/gp/product/B002KTVFTE
7x Cable shoes 4.8x0.8 https://www.conrad.de/de/p/vogt-verbindungstechnik-3805-67-flachsteckhuelse-steckbreite-4-8-mm-steckdicke-0-8-mm-180-unisoliert-metall-1-st-1226359.html
2x fuse holders https://www.conrad.de/de/p/tru-components-tc-r3-12-sicherungshalter-passend-fuer-feinsicherung-5-x-20-mm-10-a-250-v-ac-1-st-1587496.html
2x Fuses 20x5mm, 6.3A https://www.conrad.de/de/p/eska-522525-feinsicherung-x-l-5-mm-x-20-mm-6-3-a-250-v-traege-t-inhalt-10-st-533556.html
1x Binding post 4mm, green https://www.conrad.de/de/p/cliff-tp-1-polklemme-gruen-15-a-1-st-705938.html
2x Binding posts 4mm, red https://www.conrad.de/de/p/cliff-tp-1-polklemme-rot-15-a-1-st-705914.html
2x Binding posts 4mm, black https://www.conrad.de/de/p/cliff-tp-1-polklemme-schwarz-15-a-1-st-705902.html
15x Cable shoes M3.5 https://www.conrad.de/de/p/conrad-components-93014c221-gabelkabelschuh-1-50-mm-2-50-mm-loch-3-7-mm-teilisoliert-blau-100-st-745312.html
4x screws Cylinderhead M4x20
2x screws Cylinderhead M4x15
1x screw Cylinderhead M4x6
25x screws Cylinderhead M3x20
2 screws Cylinderhead M3x16
5 screws Cylinderhead M3x12
2 M3 nuts
Heat shrinking tube, 5mm diameter, about 250mm
2.5 sqmm wire, 3 colors, rated for at least 6 A
solder stuff
zip ties
4x selfadhesive rubber feet
3D print all the parts once each. Forget about support, rafts, brims etc. Just 3 shells in each direction, and 20% cubic infill. I used standard PLA from https://dasfilament.de, and the stuff printed well on my Prusa I3 Mk3. If you have a printer with less then 250mmx200mm print bed, this thing might not be for you.
Once you have the printed parts available, and sourced the list above, this was my way to go.
BE CAREFUL! WARNING: Voltage from mains is dangerous and can cause serious injuries or death. BE CAREFUL or ask a professional to help you with the wiring.
Before you start make sure the voltage switch at the Mean Well is set to the voltage your mains are running on.
1.) Mount the Mean Well to the bottom, fix it using M3x20. The screw terminals point to the right
2.) Mount the back to the bottom using M3x20. Use M4x15 to mount the Mean Well to the back
3.) Mount DC/DCs, all the binding posts and the fuse holders to the front. From left to right the fuse holders and binding posts go like this: red, fuse holder, black, green, black, fuse holder, red
4.) Prepare 10cm wires to connect the OUT- of the DCs to the black binding posts, one side just with some solder on it, other side with cable shoe M3.5. Use heat shrink to cover the cable shoe
5.) Prepare 10cm wires to connect the OUT+ of the DCs to the fuse holders, both sides just with some solder on it
6.) Prepare 6cm wires to connect the fuse holders with red binding posts, one side just with some solder on it, other side with cable shoe M3.5. Use heat shrink to cover the cable shoe
7.) connect fuse holders and red binding posts using the cables from 6.)
8.) prepare 1 cable 15cm long, both sides with cable shoes M3.5, convered with heat shrink
9.) use M4x6 and connect the cable from 8.) to the front side of the Mean Well, connect the other end to the green binding post
10.) prepare 2 cables 20cm long, 2 cables 24cm long. One side just with some solder, other side with cable shoe M3.5. Use heat shrink to cover the cable shoe
11.) Connect Mean Well 36V outputs and DC/DCs. Do not confuse Voltage and ground!
12.) Prepare 2 15cm wires, One side just with some solder, other side with cable shoe M3.5. Use heat shrink to cover the cable shoe
13.) Use cables from 12 to connect the buck converter and the Mean Well 36V outputs
14.) Mount the DCHolder to the back using 2 M3x20 screws, pointing inside the case. Do not confuse voltage and ground
15.) Mount the C14 socket to its place of the back. Secure it using M3x16 and the M3 nuts
16.) Prepare 1 cable 20cm, having Cable shoe 4.8x0.8 on one side, and Cable shoe M3.5 on the other side, and cover the cable shoes with heat shrink. BE CAREFUL!
17.) connect this cable to the earth of the C14, and to earth of the Mean Well. BE CAREFUL!
18.) Prepare 2 cables 20cm, having Cable shoes 4.8x0.8 on one side, and Cable shoes M3.5 on the other side, and cover the cable shoes with heat shrink. BE CAREFUL!
19.) Connect Mean Well 240V and the switch of the C14 socket using the cables from 18.)
20.) Prepare 2 cables 8cm, having Cable shoes 4.8x0.8 on each side, and cover the cable shoes with heat shrink. BE CAREFUL!
21.) Connect the connector of the switch and the left connectors of the C14 socket itself using cables from 20.) BE CAREFUL!
22.) Doublecheck all the wiring, you can use a multimeter. BE CAREFUL!
23.) Doubecheck you can measure connected earth between C14 earth, all M4 screws and the green binding post at the front. BE CAREFUL! Doublecheck not to have a connection from any of the C14 connectors to any 36V connectors of the Mean Well
24.) Mount the right case to the case, use 9 M3x20
25.) Mount the left case to the case, use 9 M3x20
26.) Doublecheck you did not kill any wires when screwing the stuff together. BE CAREFUL!
27.) Connect the power cord, and switch the device on using the switch at the C14 socket. BE CAREFUL not to touch the mains!
28.) Trim down the buck converter to deliver 8-10V
29.) Switch your power supply off, and remove the power cord. BE CAREFUL!
29.) Solder the fan wires to the outputs of the buck converter without confusing ground and voltage. If there is a socket at the cable, remove it. If there are 3 cables, use the one marked ground as ground, and the middle one as voltage. Mount the buck converter to the DCHolder using zip ties
30.) Mount the fan to the top, using the screws delivered with the fan. Make sure the fan is blowing the air OUT of the case.
31.) Close the case using the left M3 screws. Attention: on the fans side use the shorter screws!
32.) Connect the power cord, switch the power supply on, switch the DC/DC on, set a voltage to each and measure the outputs. Are they delivering the right voltage?
33.) Mount the rubber feet to the cases bottom
Done!
Again, BE CAREFUL! WARNING: Voltage from mains is dangerous and can cause serious injuries or death. BE CAREFUL or ask a professional to help you with the wiring.
Similar models
thingiverse
free

3x XT60 fused and switched PSU cover (114x50mm)
...bles and socket module (you know what to do...)
screw lid on
(the prototype pictured is missing the vents in the lid added later)
thingiverse
free

Frontplate ATX powersupply by Glennpieterse
...ter.
just use 4 spacers to connect the frontplate to the atx powersupply and solder the wires to the switch and the binding post!
thingiverse
free

Remote Cable Switch by TheBlueSkywolf
...itch which is soldered to a wire and secured with some hot glue.
i added some heat-shrink tubing for protection and a better look
thingiverse
free

Mean Well RSP Power Supply Cover by gkstmr
...20 c14 power cord inlet socket 250v/10a with fuse holder rocker switch.
1x pg7 cable gland
2x m5 nut
2x m5x10 screw
2x m5x5 screw
thingiverse
free

Splice Jig by EelAudio
...cold wires.
put the jig into position and then solder the shield wire over them.
seal up with heat shrink (glue filled preferred)
thingiverse
free

DPS3003 Power Supply Case by stlspartan
... configuration the jacks on the back are switched but unfused and are connected directly to the wall supply (19v dc for example).
thingiverse
free

PSU box Constant Current/Voltage 0-50v 5A by Jono_corp
...screws m3 x 6mm self tapping
some cable to wire inside
2a fuse
some spade terminals / or solder directly to terminals
heat shrink
thingiverse
free

DIY Power Supply DPS5005 by RianB
...electronic stores) ac-dc converter (geekcreit 36v 180w ac-dc or similar form factor/hole spacing) on/off switch (rocker switch) fuse holder...
thingiverse
free

Extension Cord connection (Splice Box)
...me.
put connection in one half of splice box and attach with 4" cable ties.
attach 2nd half of splice box using 2 wire ties.
thingiverse
free

Hictop Printer Power Switch by chuckbobuck
...pin on/off dpst snap in rocker switchhttps://www.amazon.com/gp/product/b00duysopg/ref=oh_aui_detailpage_o02_s01?ie=utf8&psc=1
Benchtop
turbosquid
$7

Benchtop Cooktop
...top cooktop for download as obj, fbx, blend, and unitypackage on turbosquid: 3d models for games, architecture, videos. (1275640)
thingiverse
free

ATX BENCHTOP POWER SUPPLY by ymtlab
...ower supply by ymtlab
thingiverse
atx benchtop power supply
my blog posthttps://ymt-lab.com/3dprinted-atx-benchtop-power-supply/
3dfindit
free

Benchtop Robot Parts and Accessories
...benchtop robot parts and accessories
3dfind.it
catalog: henkel
3dfindit
free

D-Series Benchtop Robots
...d-series benchtop robots
3dfind.it
catalog: henkel
thingiverse
free

Benchtop Power Case by HungryHam
...power.
use 2-56 x 1/2 screws for mounting, but the size of the hole for mounting can be easily changed.
designed using openscad.
thingiverse
free

Benchtop Tool Holder by shingabiss
...benchtop tool holder by shingabiss
thingiverse
a tool holder with different size holes,
thingiverse
free

ATX Benchtop Power Supply Board Mount by promethium
...atx benchtop power supply board mount by promethium
thingiverse
basic atx benchtop power board mount
thingiverse
free

Trinus ATX Benchtop Power Board mount by SheepsFeaTheR
...trinus atx benchtop power board mount by sheepsfeather
thingiverse
trinus atx benchtop power board mount
thingiverse
free

SparkFun Benchtop Power Board Kit - Enclosure by krwynn
...sparkfun benchtop power board kit - enclosure by krwynn
thingiverse
enclosure for a sparkfun benchtop power board kit.
thingiverse
free

MINI dc benchtop power supply unit by lilcoco
...mini dc benchtop power supply unit by lilcoco
thingiverse
mini dc benchtop power supply unit
Outputs
turbosquid
$5

Electrical Output
... available on turbo squid, the world's leading provider of digital 3d models for visualization, films, television, and games.
turbosquid
$20

Female USB Output plug
... available on turbo squid, the world's leading provider of digital 3d models for visualization, films, television, and games.
turbosquid
$25

three stage planetary gearbox with two output shafts
... planetary gearbox with two output shafts for download as iam on turbosquid: 3d models for games, architecture, videos. (1648451)
3d_export
$10

zkb type double output shaft fan cooling magnetic powder clutch
...ng magnetic powder clutch
3dexport
zkb type double output shaft, fan cooling magnetic powder clutch (11 specifications in total)
3ddd
$1

lily flower
... ваза , цветы
this model will enhance your render output
3d_export
$50

no burning brick machine hollow brick machine cement brick machine brick making machine
...utput of 80000-85000, 6 hollow bricks with a daily output of 12000-14000, and 15 porous bricks with a daily output of 30000-35000
3d_export
free

moon moh24wh60
... ring completely diffused focusing its output in a wide beam drawing attention to interior space by making the ambiance standout.
3ddd
$1

Круглые столы
...руглый
модели из реальных интерьеров. делались по фото. производители неизвестны.
в материалах подкручены кривые в output свитке.
3d_ocean
$21

6G-Player
... arman3dg energy fire for games heart light low max output player poly
6g-player… / bones + / physique + / animation – / skin – /
3ddd
$1

Cтул, черный
...
3ddd
cтул, черный, текстура дерева есть, для ее появления подкрутить rgb offset в диффузной текстуре в разделе output
Dc
design_connected
$27

DC 290
...dc 290
designconnected
ceccotti collezioni dc 290 computer generated 3d model. designed by de cotiis, vincenzo.
design_connected
$27

DC 300
...dc 300
designconnected
ceccotti collezioni dc 300 computer generated 3d model. designed by de cotiis, vincenzo.
design_connected
$27

DC Bed
...dc bed
designconnected
ceccotti collezioni dc bed sleep furniture computer generated 3d model. designed by vincenzo de cotiis.
turbosquid
$1

DC motor
...urbosquid
royalty free 3d model dc motor for download as 3dm on turbosquid: 3d models for games, architecture, videos. (1188219)
3ddd
$1

Ceccotti | DC
...ceccotti | dc
3ddd
ceccotti
фабрика ceccotti
turbosquid
$35

DC Skateboard
... available on turbo squid, the world's leading provider of digital 3d models for visualization, films, television, and games.
turbosquid
$13

DC Motor
...l dc motor for download as max, ige, obj, fbx, stl, and sldas on turbosquid: 3d models for games, architecture, videos. (1493908)
3ddd
free

Ceccotti / DC Bed
...://freshome.com/2009/05/12/dc-bed-by-ceccotti-collezioni/ http://www.switchmodern.com/beds/ceccotti-dc-bed.asp
3ddd
$1

Кресло CECCOTTI DC 90
...кресло ceccotti dc 90
3ddd
ceccotti
кресло ceccotti dc 90
3ddd
$1

Ceccotti Collezioni DC 90
... кресло , armchair
кресло ceccotti collezioni dc 90. размеры:850-800-406.7
Supply
turbosquid
$1

supplies
... available on turbo squid, the world's leading provider of digital 3d models for visualization, films, television, and games.
3d_export
$5

black supply
...black supply
3dexport
black supply size: 57.9 x 29.2 x 34 sm
turbosquid
$20

Office Supplies
...lty free 3d model office supplies for download as max and obj on turbosquid: 3d models for games, architecture, videos. (1273636)
3d_export
free

office supplies
...office supplies
3dexport
turbosquid
$8

Supply Drop
...e 3d model supply drop for download as fbx, obj, dae, and stl on turbosquid: 3d models for games, architecture, videos. (1663721)
turbosquid
$75

Supply Helicopter
... available on turbo squid, the world's leading provider of digital 3d models for visualization, films, television, and games.
turbosquid
$65
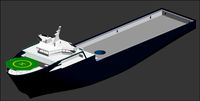
Supply Ship
... available on turbo squid, the world's leading provider of digital 3d models for visualization, films, television, and games.
turbosquid
$29

Village Supplies
... available on turbo squid, the world's leading provider of digital 3d models for visualization, films, television, and games.
turbosquid
$19

Power Supply
... available on turbo squid, the world's leading provider of digital 3d models for visualization, films, television, and games.
turbosquid
$5

school supplies
... available on turbo squid, the world's leading provider of digital 3d models for visualization, films, television, and games.
Adjustable
3d_ocean
$7
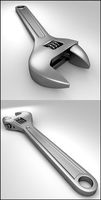
Adjustable Wrench
...adjustable wrench
3docean
adjustable wrench highly detailed wrench
highly detailed adjustable wrench.
3ddd
$1
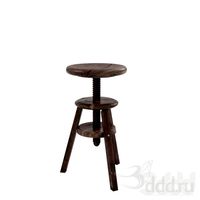
Adjustable Stool
...adjustable stool
3ddd
табурет
wooden adjustable stool.
3d_ocean
$20

Adjustable Gym Bench
...st adjustable bench black equipement gym gymnastic indoor silver sport workout
3d model of black and silver adjustable gym bench.
3d_ocean
$20
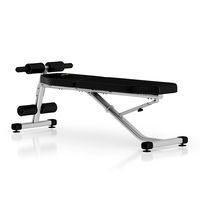
Adjustable Gym Bench
...st adjustable bench black equipement gym gymnastic indoor silver sport workout
3d model of black and silver adjustable gym bench.
3d_ocean
$16

Adjustable Weight Bench
...arbell bench black equipement gym gymnastic indoor sport weight workout
3d model of black adjustable weight bench with a barbell.
turbosquid
$5

Adjustable wrench
...
royalty free 3d model adjustable wrench for download as fbx on turbosquid: 3d models for games, architecture, videos. (1313414)
3d_export
$5
adjustable tension lock
...adjustable tension lock
3dexport
adjustable tension lock
turbosquid
$1

Adjustable Wrench
...free 3d model adjustable wrench for download as obj and blend on turbosquid: 3d models for games, architecture, videos. (1446736)
turbosquid
$1

Adjustable Wrench
...y free 3d model adjustable wrench for download as c4d and fbx on turbosquid: 3d models for games, architecture, videos. (1379022)
3d_export
$5

Adjustable key
...adjustable key
3dexport
Power
turbosquid
$100
power
...ower
turbosquid
royalty free 3d model power for download as on turbosquid: 3d models for games, architecture, videos. (1421990)
3d_export
$5

Power
...power
3dexport
3d_export
$5

power outlets
...power outlets
3dexport
power outlets
3ddd
$1

lion power
...lion power
3ddd
лев , статуя
lion power gold sculpture
3ddd
$1
Sea Power
...
компас , море , часы
часы с компасом sea power
3ddd
free

Meridiani / Power
...power
3ddd
meridiani , круглый
стол power производитель meridiani, диаметр 120,высота 67
3d_export
$5

Power Surge
...power surge
3dexport
the power surge is a all mesh carnival ride to lower in game part count and lag
turbosquid
$8
Airport Ground Power Unit (AXA Power )
... available on turbo squid, the world's leading provider of digital 3d models for visualization, films, television, and games.
turbosquid
$50

Power Houser
...rbosquid
royalty free 3d model power houser for download as on turbosquid: 3d models for games, architecture, videos. (1333800)
3d_export
$5

power outlet
...power outlet
3dexport
power outlet<br>format file maya 2018, 3d max 2017, obj, fbx
2
design_connected
$11
No 2
...no 2
designconnected
sibast no 2 computer generated 3d model. designed by sibast, helge.
turbosquid
$6
Cliff Rock 2-2
...uid
royalty free 3d model cliff rock 2-2 for download as obj on turbosquid: 3d models for games, architecture, videos. (1619161)
turbosquid
$29

Book variation 2 2
...3d model book variation 2 2 for download as max, obj, and fbx on turbosquid: 3d models for games, architecture, videos. (1366868)
turbosquid
$22
Classic baluster (2) (2)
...assic baluster (2) (2) for download as max, obj, fbx, and stl on turbosquid: 3d models for games, architecture, videos. (1483789)
turbosquid
$99

Smilodon 2 Pose 2
... available on turbo squid, the world's leading provider of digital 3d models for visualization, films, television, and games.
turbosquid
$20
Barrel Barricade 2-2
... available on turbo squid, the world's leading provider of digital 3d models for visualization, films, television, and games.
turbosquid
$6
Wall Trophy (2) (2)
... available on turbo squid, the world's leading provider of digital 3d models for visualization, films, television, and games.
turbosquid
free
Tire label 2 of 2
... available on turbo squid, the world's leading provider of digital 3d models for visualization, films, television, and games.
3ddd
$1

Кровать, 2 тумбочки, 2 светильника
...кровать, 2 тумбочки, 2 светильника
3ddd
кровать, 2 тумбочки, 2 светильника
нормальное качество
формат 3ds max
без текстур
3ddd
free

Кровать, 2 тумбочки, 2 светильника
...кровать, 2 тумбочки, 2 светильника
3ddd
кровать, 2 тумбочки, 2 светильника
нормальное качество
формат 3ds max
без текстур
