Thingiverse
BB Band Mine by Rockthill
by Thingiverse
Last crawled date: 3 years ago
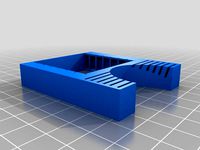
New update as of 4/14!! Pocket version is only an 3x2x1" dimensions an fits in your magazine pouch, has a string latch or trigger latch and only takes four printed parts, a pen spring, trim nail, and of course the rubber band. Coming soon = extra fan file for wall mount applications!!!
They print reliably and smoothly on all the infill styles I've tried so far, and the whole thing only takes about two hours at 80mm/s and .2mm layers!!!!
Problem: airsoft claymores/mines/traps take batteries, fail to be sensitive enough to reliably trigger, and have limited areas of effectiveness,
Requirements:
1: Cannot cause any serious harm to wildlife/persons/ecology (wear eye pro)
2: Must reliably and quickly coat 15sqft or more area with BBs
3: Must be durable enough to be stepped on by 250lb+ players
4: Must be self contained, including renewable power source
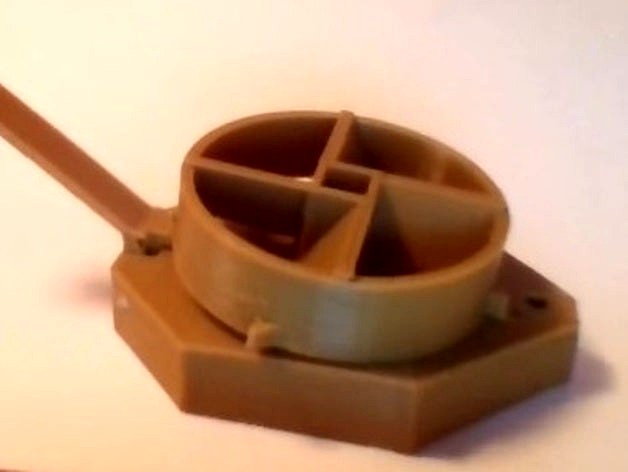
Answer: Big Rubber Band and a Fan!
The first one I made was from a personal hand held fan set in a food bowl on top of a square carriage that was screws, standoffs, and a few scraps of flat metal I had laying around the hill. Had all sorts of trouble with triggering ideas and reliability, so went to a metal assembly using shortened coffee can and 5inch oven hood fan. added a gear to the axle and pin guides to the carriage assembly for somewhat more reliable triggering, but it threw BBs 25ft+ in every direction, which was awesome!! Unfortunately, its not real safe to go skipping through a field with a sharp cut-off can that some idiot could fall on, so my design still didn't fit the bill... Enter 3d printing... plastic won't really cut you unless it was designed to, holds weight, energy and enough rigidity for high speed torque relief... Best of all its DURABLE!
VERSION 2.0 Pocket band mine
It prints great can even be scaled up for larger rubber bands!!!!
video coming soon!!!
Parts to find:
Spring from click pen, cut in half or third
Normal rubber band
Trim nail, cut down
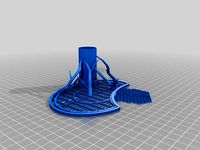
Parts to print and assembly, bottom to top:
Print one each of the case, fan, and axle and whichever of the two latches you prefer. the latch.stl is string trigger only, but compact, whereas the extralatch.stl file is pressure or string trigger with lesser draw weight.
Step 1: place the spring in the round guides in the case and whichever latch you intend to use.
Step 2: pin with trim nail.
Step 3: slip band through axle.
Step 4: place axle in case and slip band around circular bars with a toothpick/key etc.
Step 5: flip over, place fan on axle, twist fan counterclockwise.
TEST: after turning the fan one full rotation (I find it helpful to mark one blade), you should be able to see the marked blade spin back about one and a third rotations the other direction by simply pressing on the latch, you should also notice if you don't release the latch that the Fan will bounce back and forth for a second before coming to a halt.
OPERATION: Twist one and a half to three full rotations (just try not to break the sears on fan edge), place it, add 10-25 BBs directly into the Fan, slide a nail through the tie down hole, and run away before somebody sees you. I'm thinking a stick on the extra latch trigger notch would increase sensitivity and triggerable range.
Like and follow here and my soon to be fully up and running youtube channel: Rock't Hill
They print reliably and smoothly on all the infill styles I've tried so far, and the whole thing only takes about two hours at 80mm/s and .2mm layers!!!!
Problem: airsoft claymores/mines/traps take batteries, fail to be sensitive enough to reliably trigger, and have limited areas of effectiveness,
Requirements:
1: Cannot cause any serious harm to wildlife/persons/ecology (wear eye pro)
2: Must reliably and quickly coat 15sqft or more area with BBs
3: Must be durable enough to be stepped on by 250lb+ players
4: Must be self contained, including renewable power source
Answer: Big Rubber Band and a Fan!
The first one I made was from a personal hand held fan set in a food bowl on top of a square carriage that was screws, standoffs, and a few scraps of flat metal I had laying around the hill. Had all sorts of trouble with triggering ideas and reliability, so went to a metal assembly using shortened coffee can and 5inch oven hood fan. added a gear to the axle and pin guides to the carriage assembly for somewhat more reliable triggering, but it threw BBs 25ft+ in every direction, which was awesome!! Unfortunately, its not real safe to go skipping through a field with a sharp cut-off can that some idiot could fall on, so my design still didn't fit the bill... Enter 3d printing... plastic won't really cut you unless it was designed to, holds weight, energy and enough rigidity for high speed torque relief... Best of all its DURABLE!
VERSION 2.0 Pocket band mine
It prints great can even be scaled up for larger rubber bands!!!!
video coming soon!!!
Parts to find:
Spring from click pen, cut in half or third
Normal rubber band
Trim nail, cut down
Parts to print and assembly, bottom to top:
Print one each of the case, fan, and axle and whichever of the two latches you prefer. the latch.stl is string trigger only, but compact, whereas the extralatch.stl file is pressure or string trigger with lesser draw weight.
Step 1: place the spring in the round guides in the case and whichever latch you intend to use.
Step 2: pin with trim nail.
Step 3: slip band through axle.
Step 4: place axle in case and slip band around circular bars with a toothpick/key etc.
Step 5: flip over, place fan on axle, twist fan counterclockwise.
TEST: after turning the fan one full rotation (I find it helpful to mark one blade), you should be able to see the marked blade spin back about one and a third rotations the other direction by simply pressing on the latch, you should also notice if you don't release the latch that the Fan will bounce back and forth for a second before coming to a halt.
OPERATION: Twist one and a half to three full rotations (just try not to break the sears on fan edge), place it, add 10-25 BBs directly into the Fan, slide a nail through the tie down hole, and run away before somebody sees you. I'm thinking a stick on the extra latch trigger notch would increase sensitivity and triggerable range.
Like and follow here and my soon to be fully up and running youtube channel: Rock't Hill
Similar models
thingiverse
free

Drill trigger lock for Bosch GSR 12V by M2rt
...o printed parts.
one rubber band.
one part must be rotated in slicing software.
two small ribs need to be removed after printing.
thingiverse
free

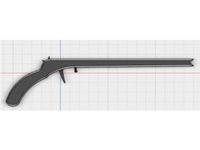
Working Gun Fully 3D Printed with spring and rubber band
...fully 3d printed with spring and rubber band
thingiverse
this is a working gun and you only need a pen spring and a rubber band
grabcad
free

Positive Connection
...9;s of acceleration.
all components can easily be cnc machined, laser cut and lathed; no special manufacturing methods required.
cults
free

One peace rubber gun with trigger for loom bands
...th trigger for loom bands
cults
one peace rubber gun with trigger for loom bands
one peace rubber gun with trigger for loom bands
thingiverse
free

Nerf Doublestrike Trigger mod by LeftBrainCo
... take aprt the inside of the gun. if you can get a picture of it's correct position, as i guessed as to where it should lay.
thingiverse
free

Rubber Band Gun remix by iClint
...ogether design, studs press into matching holes, no glue necessary.
printed and testedhttps://www.youtube.com/watch?v=mx-lsur2rqu
thingiverse
free
Rubber Band Gun by 22wongdesmond
...t of said trigger. to use the toy, a rubber band should be placed on the uppermost tooth of the gear before pressing the trigger.
thingiverse
free

Mini Rubber Band Gun by ROBK636
...75mm
created over a weekend in a few hours.
printed in pla on a taz 4 at the st. louis hackerspace http://www.archreactor.org/
grabcad
free

hatch latch
...el glider canopy just import in to your cad model place it were you need it and trim it to the outer surface
spring 0.1x3x5x35mm
thingiverse
free

Baofeng UV-5R Battery Latch by AngelDMercedes
...his latch, so be aware of that. print at the highest resolution your printer can do, mines can print to up to 0.1mm layer height.
Rockthill
thingiverse
free
Undergravel aquarium system amphibians paridise shelf tube by Rockthill
...se
so my kids found tadpoles this spring, i made these so we could keep them longer and they could see them grow. they loved it!
thingiverse
free

Belt Bottle holder by Rockthill
...or others it needs +/- 4% to fit properly, water bottles usually + 6%.
they work great as bb carriers on my airsoft vest as well.
thingiverse
free

Airsoft AK-M4 adapter by Rockthill
...lar options!!
photos tomorrow, video maybe next week (maybe)
like, share, and follow here and on my youtube channel @ rocket hill
thingiverse
free

Wind Reduction Frame for studio mike by Rockthill
...version 2 will have hooks for the mesh, so it can be replaceable as opposed to the glue n trim method ill use for this prototype.
thingiverse
free
aquarium undergravel filtration system by Rockthill
...w my clams survive, isn't that grand? boifiltering here i come again!
soon to come: tube topper for activated charcoal filter
thingiverse
free
One Hour 40mm Fan Shroud for MK8 by Rockthill
...est.
this one can be made to fit, but i broke my first one (did i mention thin?) the second one scaled to 102% worked flawlessly.
thingiverse
free

PLAirplane glider/rubberband flier by Rockthill
...ough play in the tailfin that's whole if there isn't cut it on its groove and use tape as with the other control surfaces
Bb
design_connected
$13

BB
...bb
designconnected
poliform bb computer generated 3d model. designed by borghi, matteo.
turbosquid
$5

bbs
... available on turbo squid, the world's leading provider of digital 3d models for visualization, films, television, and games.
turbosquid
free
bb
... available on turbo squid, the world's leading provider of digital 3d models for visualization, films, television, and games.
3ddd
$1
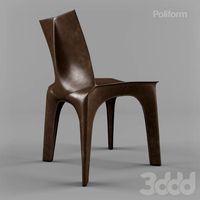
Poliform Bb chair
...poliform bb chair
3ddd
poliform , bb
poliform bb chair
3ddd
$1
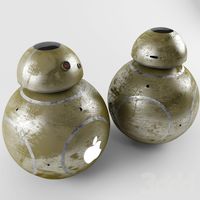
bb-8 apple
...bb-8 apple
3ddd
apple
bb-8 apple
turbosquid
$49
BB ROBOT
...urbosquid
royalty free 3d model bb robot for download as max on turbosquid: 3d models for games, architecture, videos. (1556522)
turbosquid
$11

ROBOT BB
...bosquid
royalty free 3d model robot bb for download as blend on turbosquid: 3d models for games, architecture, videos. (1336640)
turbosquid
$4
sofa bb
...turbosquid
royalty free 3d model sofa bb for download as obj on turbosquid: 3d models for games, architecture, videos. (1658053)
3ddd
$1
Quasar Royal BB
... , quasar
светильник royal bb
бренд: quasar
страна:голландия
дизайнер: van vliet edward
3d_export
free
BBS disc
...bbs disc
3dexport
Band
3d_ocean
$3

Band
...band
3docean
band elastic fitness product sport
4 color band
turbosquid
$3

Band
...
royalty free 3d model band for download as 3dm, stl, and obj on turbosquid: 3d models for games, architecture, videos. (1564868)
3ddd
$1

BANDS chair
... varaschin
http://varaschin.it/en/products/small-armchairs/chair-with-armrests-bands-1407/#
turbosquid
$3

Love Band
...
turbosquid
royalty free 3d model love band for download as on turbosquid: 3d models for games, architecture, videos. (1173692)
turbosquid
free

Eternity Band
...bosquid
royalty free 3d model eternity band for download as on turbosquid: 3d models for games, architecture, videos. (1174397)
turbosquid
$34

Men_s Band
...bosquid
royalty free 3d model men_s band for download as 3dm on turbosquid: 3d models for games, architecture, videos. (1304739)
turbosquid
$29

cartoon band
...squid
royalty free 3d model cartoon band for download as c4d on turbosquid: 3d models for games, architecture, videos. (1508906)
turbosquid
$26

Twist Band
...bosquid
royalty free 3d model twist band for download as 3dm on turbosquid: 3d models for games, architecture, videos. (1318832)
turbosquid
$25

Rose band
...rbosquid
royalty free 3d model rose band for download as 3dm on turbosquid: 3d models for games, architecture, videos. (1198325)
turbosquid
$25

Wedding band
...squid
royalty free 3d model wedding band for download as 3dm on turbosquid: 3d models for games, architecture, videos. (1202055)