GrabCAD
Bar and Microwave Rack
by GrabCAD
Last crawled date: 1 year, 10 months ago
Hello everybody!
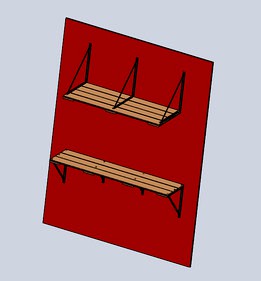
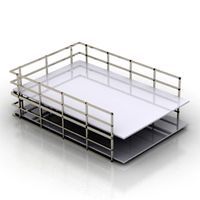
I present to you a bar and a microwave rack for a small kitchen. It is made with simple cheap parts from the building supply store. Planks, rebar, a steel strip and a few bolts and rings. It is all welded together and fixed to the wall with 8mm wall plugs and screws. Some paint is added to make sure it is up for the job of being a bar.
A video is added on how to bend the metal strip and make it into a 90 degree steel profile. There are holes in the steel strip so you can weld the rabar to it on the rear. Its probably best to weld the 2 pieces of rebar together (on 3 points of 2 inch welds (the middle and the middle of the middle)) before attaching it to the 90 degree strip. That ensures everything will fit fine, so you wont have to fool around trying to weld the two rebar pieces together. The reason there are 2 pieces of rebar at the bottom brackets is because there is called buckling of columns. So you need more material for compression (if you have long spans) and less material for tension (of course that also depends on the kind of material). With steel this is the case. And that is why the bottom brackets have 2 pieces of rebar instead of 1, like the top brackets.
Some parts of the engineering process are also added. Today i added the rabar file, and now the bar and microwave rack are complete.
The height of the bar is 100cm, it is designed to go with 3 80cm high bar stools. The bar is 160cm x 42cm. The microwave rack is designed so you can put 2 60cm wide microwaves next to each other. The microwave rack is 130cm x 56cm. The space available is 164cm length, 114cm wide and 266cm high. It all fits and you can do your normal kitchen duty.
Best results will be gotten if you use 2 component paint, while its the most resistant to abrasion.
Get a mitre saw for the planks, otherwise the results wont be as good.
I did not add screw to the disign, while you want see them when everything is painted. Screw the planks together from both sides to get the best results, add wood putty to fill up the holes.
Similar models
grabcad
free

Scaffold Bracket 5mm Mild Steel Welded-Assembly
...fold bracket 5mm mild steel welded-assembly
grabcad
90 degree (cross) scaffold bracket welded mild steel for 40mm diameter pipes
thingiverse
free

Corner Magnet by alex7786
...bracket for clamping stuff together in a corner or 90 degree.
for either gluing or welding. for welding you might want to use abs
thingiverse
free

Expandable Filament Rack by RobertHarrison
...ired. the coupler should snap together with the bar pieces and glue should no longer be required with the middle bracing bracket.
thingiverse
free

2020 Corner Bracket
...fili corner bracket 90 degree for m5 screw
2 or 4 piece m5x10 bolts and m5 nuts (for sigma) are required for the model you choose
3dwarehouse
free

Rebar size #2
...a size #2 (2/8) reinforcing-bar for adding tensile strength to concrete. #bar #concrete #construction #rebar #reinforcing #steel
thingiverse
free

2"x 2" Furring Strip 90 Degree Corner Bracket by BrutalRG
...urring strip construction grade lumber sanding the lumber may be required.
if you use screws to assemble, pre drill the holes...
thingiverse
free

LED/TL Tube light bracket (⌀ 3mm) by ComedianTF2
... plank is 2.5mm wide, so that's what the bracket is meant for, you can find the fusion 360 file here: https://a360.co/2q3xpcp
thingiverse
free

90 degree angle Led Strip by granmaito
...90 degree angle led strip by granmaito
thingiverse
90 degree angle led strip for rgbw 1cm wide
thingiverse
free

Moccamaster Measuring Cup and Travel Lid Bracket by kmbartlett22
.../2018 - added version 2 with a better scoop holder, beefier connection piece, and some tall bins for stir sticks/sugar spoon..etc
thingiverse
free

90 Degree Bracket - M8 Hardware by beta_ready
...y variations of spool container brackets you may find scattered about the thingiverse.
prints without support.you might need two.
Microwave
archibase_planet
free

Microwave
...microwave
archibase planet
microwave oven kitchen equipment
microwave - 3d model for interior 3d visualization.
archibase_planet
free

Microwave
...ave oven gorenje kitchen equipment
microwave gorenje bm6250 ora w n100915 - 3d model (*.gsm+*.3ds) for interior 3d visualization.
archibase_planet
free

Microwave
...microwave
archibase planet
microwave oven kitchen equipment
microwave - 3d model (*.gsm+*.3ds) for interior 3d visualization.
archibase_planet
free

Microwave
...microwave
archibase planet
kitchen equipment microwave oven
microwave - 3d model (*.gsm+*.3ds) for interior 3d visualization.
archibase_planet
free

Microwave
...microwave
archibase planet
microwave oven kitchen equipment
microwave - 3d model (*.gsm+*.3ds) for interior 3d visualization.
archibase_planet
free

Microwave
...microwave
archibase planet
microwave oven kitchen equipment
microwave - 3d model (*.gsm+*.3ds) for interior 3d visualization.
archibase_planet
free

Microwave
...microwave
archibase planet
microwave oven kitchen equipment
microwave - 3d model (*.gsm+*.3ds) for interior 3d visualization.
archibase_planet
free

Microwave Unit
...microwave unit
archibase planet
microwave oven microwave
detail microwave for kitchen visuals
archibase_planet
free

Microwave
...microwave
archibase planet
kitchen equipment micriwave oven
microwave - 3d model (*.gsm+*.3ds) for interior 3d visualization.
turbosquid
$1

microwave
...osquid
royalty free 3d model microwave for download as blend on turbosquid: 3d models for games, architecture, videos. (1556023)
Rack
archibase_planet
free
Rack
...ack
archibase planet
rack paper rack rack for paper
rack 6 office n060914 - 3d model (*.gsm+*.3ds) for interior 3d visualization.
archibase_planet
free
Rack
...ack
archibase planet
rack paper rack rack for paper
rack 3 office n060914 - 3d model (*.gsm+*.3ds) for interior 3d visualization.
archibase_planet
free
Rack
...ack
archibase planet
rack paper rack rack for paper
rack 5 office n060914 - 3d model (*.gsm+*.3ds) for interior 3d visualization.
archibase_planet
free
Rack
...ack
archibase planet
rack paper rack rack for paper
rack 7 office n060914 - 3d model (*.gsm+*.3ds) for interior 3d visualization.
archibase_planet
free
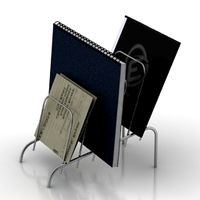
Rack
...for magazines rack for notebooks notebooks notebook
rack notebook n120614 - 3d model (*.gsm+*.3ds) for interior 3d visualization.
archibase_planet
free

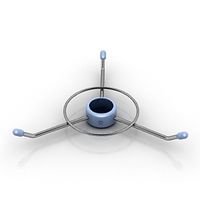
Rack
...rack
archibase planet
rack umbrella umbrella rack
rack n180811 - 3d model (*.3ds) for interior 3d visualization.
archibase_planet
free
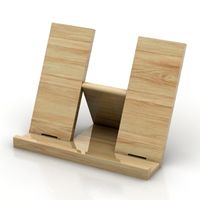
Rack
...rack
archibase planet
rack book rack stand
rack - 3d model (*.gsm+*.3ds) for interior 3d visualization.
archibase_planet
free

Rack
...rack
archibase planet
rack rack for glasses
rack 1 - 3d model (*.gsm+*.3ds) for interior 3d visualization.
archibase_planet
free
Rack
...rack
archibase planet
rack rack for glasses
rack 2 - 3d model (*.gsm+*.3ds) for interior 3d visualization.
3d_export
free
rack
...rack
3dexport
rack
Bar
archibase_planet
free
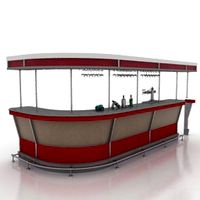
Bar
...bar
archibase planet
bar bar rack
bar 2 - 3d model for interior 3d visualization.
archibase_planet
free
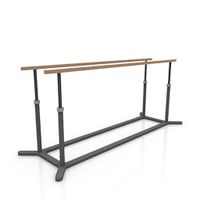
Bars
...bars
archibase planet
horizontal bar parallel bars
parallel bars - 3d model for interior 3d visualization.
3d_export
$10

bar
...bar
3dexport
modern bar
3d_export
$10

bar
...bar
3dexport
modern bar
3d_export
$10

bar
...bar
3dexport
modern bar
3d_export
$10

bar
...bar
3dexport
modern bar
3d_export
$10

bar
...bar
3dexport
modern bar
3d_export
$10

bar
...bar
3dexport
modern bar
3d_export
$10

bar
...bar
3dexport
modern bar
3d_export
$10

bar
...bar
3dexport
modern bar