Thingiverse
Auto aligning chisel sharpener by rrrlasse
by Thingiverse
Last crawled date: 2 years, 11 months ago
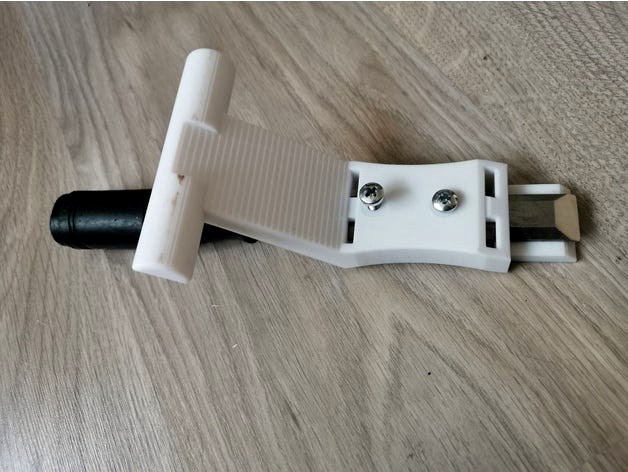
This jig is for sharpening chisels on sandpaper. It has auto aligning pins and wide sliding feet that gives a perfectly square bevel, at 25 degrees.
Prerequisites: Two 10 mm M5 screws and two nuts.
Print with extra wall/top/bottom thickness for better strength. When printed, pressfit the two nuts in the roof inside the jig (this can be a bit tricky).
Print with no support.
How to use it:
1) Loosen the screws and insert the chisel so far that its bevel is directly above the outer edge of the jig (see photo).
2) Insert the two aligning pins from above to get the blade straight. The pins might be a bit tight until they wear in. Else polish them with a bit of sandpaper.
4) Tighten the two screws very lightly. Not much torque is needed to keep it stable. Then remove the pins,
3) Now slide the jig on a plane surface with sandpaper, such that the sliding feet stay outside the sandpaper. You can hold the jig in two positions (see photos). The position where the chisel handle points away from you lets apply lots of downwards force.
Max chisel width is 30 mm, and max blade height is 7.5 mm (hope it's enough, else comment in the comments).
Similar models
thingiverse
free

Super fast chisel sharpener for sandpaper by rrrlasse
...is 10-30 mm, and max blade height is 7.5 mm (hope it's enough, else let me know in the comments).
fusion 360 source included.
3dwarehouse
free

plane blade sharpening jig
...o the jig, by moving the wing knobs to the best positions #plane_blade_sharpening_jig #plane_blades #sharpening #woodworking_jigs
thingiverse
free

sharpening jig for chisels and plane blades by chatzi88
...ls and plane blades.
for 10mm chisels to 70mm plane irons
new .stl double size jig same size chisels and irons
bigger tolerances
grabcad
free

Chisel sharpener tool
...chisel sharpener tool
grabcad
bearing is 8x7x22 mm
two rods 6mm inox etc.
m8 65mm hex screw and three nuts
grabcad
free

Universal Chisel Sharpening Jig
...universal chisel sharpening jig
grabcad
printed on ender 3 pro with .4mm nozzle with .2 mm height.
thingiverse
free

Bevel Gauge for 'Eclipse' Style Honing Guide by dsc68
...in the top of the guide match the corresponding bevel angles. insert the pointy end of your iron/chisel to find the closest fit.
3dwarehouse
free

Plane Blade Sharpening Jig
...ces can be cut to what ever angle you want. enjoy. if you like it, please provide a positive comment. p-j-h@westnet.com.au cheers
thingiverse
free

Chisel Sharpening Jig by TheRepairbox
...s
2 m5x16mm bolts
1 m6 nut
1 m6x50mm bolt
i showed the jig working in one of my youtube video's: https://youtu.be/nkmsglhb3ws
thingiverse
free

Chisel sharpening jig adjustable replacement head by mystrey2010
...0
thingiverse
replacement adjustable head for chisel sharpening jig, narrower for smaller chisels.
also optional lockdown plate.
thingiverse
free

Chisel / Plane Honing / Sharpening Jig by varngold
...d angle by eye. then scrub the chisel lightly over the stone.
the grinding marks will tell you immediately which way to readjust.
Rrrlasse
thingiverse
free

Toothbrush holder (supportless print) by rrrlasse
...der (supportless print) by rrrlasse
thingiverse
can be glued to the tiles with a few dabs of super glue.
print with no supports!
thingiverse
free

Gaggia MDF coffee grinder tray by rrrlasse
...
the coffee tray is designed to compress tightly around the sides of the grinder to hold it in place.
fusion 360 source included.
thingiverse
free

Pully for roller skate bearings (supportless) by rrrlasse
...7.7 mm so that the screw will thread it).
no need for support if printed as oriented in the stl files.
fusion360 source included.
thingiverse
free

New kind of tight-fit saw guide by rrrlasse
...en the 90 and 45 degrees of the box (slicers and printers may vary the gaps depending on overhang).
fusion360 source is included.
thingiverse
free
Super fast chisel sharpener for sandpaper by rrrlasse
...is 10-30 mm, and max blade height is 7.5 mm (hope it's enough, else let me know in the comments).
fusion 360 source included.
thingiverse
free

Drill bit sharpener for Dremel (supportless) by rrrlasse
...is will not affect any angles. you can also switch disc at any time, for example from diamond to stone, to get a smoother finish.
Chisel
turbosquid
free

Chisel
...l
turbosquid
royalty free 3d model chisel for download as ma on turbosquid: 3d models for games, architecture, videos. (1626970)
turbosquid
$14

Chisel
...uid
royalty free 3d model chisel for download as max and obj on turbosquid: 3d models for games, architecture, videos. (1224787)
turbosquid
$1

Chisel
...royalty free 3d model chisel for download as ma, obj, and fbx on turbosquid: 3d models for games, architecture, videos. (1362331)
turbosquid
$39

chisel
...free 3d model chisel for download as 3ds, obj, fbx, and blend on turbosquid: 3d models for games, architecture, videos. (1190007)
turbosquid
$24

Chisel
... available on turbo squid, the world's leading provider of digital 3d models for visualization, films, television, and games.
turbosquid
$22

chisel
... available on turbo squid, the world's leading provider of digital 3d models for visualization, films, television, and games.
turbosquid
$20

Chisel
... available on turbo squid, the world's leading provider of digital 3d models for visualization, films, television, and games.
turbosquid
$10

Chisel
... available on turbo squid, the world's leading provider of digital 3d models for visualization, films, television, and games.
archive3d
free

Chisel 3D Model
...e chisel bit
tools chisel n191213 - 3d model (*.gsm+*.3ds+*.max) for interior 3d visualization.
turbosquid
$5

Mortise Chisel
... available on turbo squid, the world's leading provider of digital 3d models for visualization, films, television, and games.
Sharpener
turbosquid
$5

Sharpener
...
turbosquid
royalty free 3d model sharpener for download as on turbosquid: 3d models for games, architecture, videos. (1603397)
3d_export
$5

sharpener
...r is made in the compass 3d program, the rendering is made in the keyshot program. the model is saved in the stl, fbd, stl format
turbosquid
$19

Sharpener
... available on turbo squid, the world's leading provider of digital 3d models for visualization, films, television, and games.
turbosquid
$19

Sharpener
... available on turbo squid, the world's leading provider of digital 3d models for visualization, films, television, and games.
turbosquid
$19

Sharpener
... available on turbo squid, the world's leading provider of digital 3d models for visualization, films, television, and games.
turbosquid
$19

Sharpener
... available on turbo squid, the world's leading provider of digital 3d models for visualization, films, television, and games.
turbosquid
$19

Sharpener
... available on turbo squid, the world's leading provider of digital 3d models for visualization, films, television, and games.
turbosquid
$19

Sharpener
... available on turbo squid, the world's leading provider of digital 3d models for visualization, films, television, and games.
turbosquid
$19

Sharpener
... available on turbo squid, the world's leading provider of digital 3d models for visualization, films, television, and games.
turbosquid
$11

Sharpener
... available on turbo squid, the world's leading provider of digital 3d models for visualization, films, television, and games.
Aligning
3d_export
$5
orthodontic aligners
...aligners are plastic replicas of your teeth. wearing them puts gentle pressure on the teeth, ever-so-slightly repositioning them.
3d_export
$15
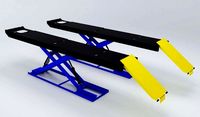
Wheel Alignment Lifts 3D Model
...heel alignment lifts
wheel alignment lifts 3d model download .c4d .max .obj .fbx .ma .lwo .3ds .3dm .stl poothian 108990 3dexport
3d_export
$99

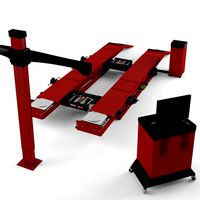
Alignment Systems
...dimensions. -ideal for your auto service project. -scene for 3ds max 2012 and v-ray 2.0 !!!in file only 3d model without light!!!
turbosquid
$85

Film laser alignment cutting machine
...ng machine for download as 3ds, max, ige, obj, fbx, and sldas on turbosquid: 3d models for games, architecture, videos. (1423482)
3d_export
$159
Alignment Systems with Car Lift
...dimensions. -ideal for your auto service project. -scene for 3ds max 2012 and v-ray 2.0 !!!in file only 3d model without light!!!
3d_export
$15

modular rpg game environment - low poly - pbr - gameready
...aligned). textures folder(all pbr textures) other formats modular pieces (dae obj stl fbx ) modular environment (dae obj stl fbx)
3d_export
$5

bookshelf
...g unit a well-thought-out and solid look. the shelves align perfectly with the frame to create a strong and uniform expression.
3d_ocean
$4
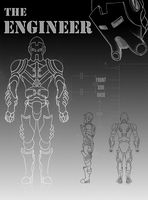
The Engineer
... to model: front view back view side view / both left and right with and without arm composite psd file of all views each imag...
3d_ocean
$25
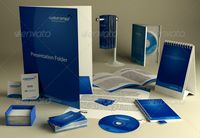
Stationary Presentation Kit
...st to the biggest, all beautifully aligned and positioned and ready to render. here’s what the scene contains: 1. single-fold ...
vizpark
$15

HDRI Skydome 30
...non mk5 camera. all images were manually adjusted and corrected with dust removal, alignment and chromatic abberation correction.
Auto
3d_export
$5

auto
...auto
3dexport
auto
3ddd
$1

auto
...auto
3ddd
max7
turbosquid
$69
AUTO
...to
turbosquid
royalty free 3d model auto for download as obj on turbosquid: 3d models for games, architecture, videos. (1453538)
3d_export
$10

Auto
...auto
3dexport
3d_export
free

auto
...auto
3dexport
3ddd
$1

Auto posters
...auto posters
3ddd
машина
auto posters
turbosquid
$50

auto
... available on turbo squid, the world's leading provider of digital 3d models for visualization, films, television, and games.
turbosquid
$28

Auto
... available on turbo squid, the world's leading provider of digital 3d models for visualization, films, television, and games.
turbosquid
$20
auto
... available on turbo squid, the world's leading provider of digital 3d models for visualization, films, television, and games.
turbosquid
$5
auto
... available on turbo squid, the world's leading provider of digital 3d models for visualization, films, television, and games.