Thingiverse
Arrma 4x4 Driveshaft & Steering Crank Cover Set by suchtragedy
by Thingiverse
Last crawled date: 3 years, 3 months ago
Description
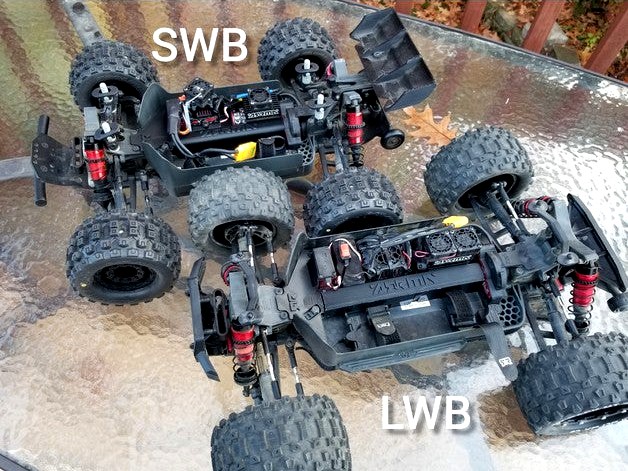
This cover set is designed to keep larger rocks/debris that fall in from the top and get caught in the center driveshaft or steering crank for Arrma 4x4 vehicles (Mega/3s/4s) with two options to pick from to accommodate both the short wheel base (SWB) and long wheel base (LWB) chassis. See below for further description for each component's fitment/install descriptions which will vary depending on your specific application.
Steering Crank Cover
The steering crank cover is universal fit for all Arrma 4x4 based vehicles. To install simply fit it in between the steering servo and front side guards and it will naturally fall into place. To secure it remove the (2) servo mounting screws that face the front of the vehicle and line up the cover's mounting holes on top of the servo mounting holes. Next, run the screws back through the holes to sandwich the cover between the screws and the top of the servo mounting tabs. If necessary use longer M3 screws to accommodate the extra thickness of the mounting plate tabs.
Backside Plates
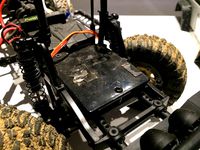
These plates should be installed first before the driveline and center shaft cover. The plates will close up the exposed backside (ESC/motor side) of the center driveline that remains after the main center driveline cover is installed.
There are 3 different plate options that can be used in combination with each other since the exposed area will vary depending on your motor/heatsink/esc install setup. The large plate (58mm) has 2 mounting points (1 on each end), the small plate (40mm) has 1 center mounting point, and the small plate w/offset (40mm) has it's mounting point located at one end. The small plate w/offset is intended to close any gaps that can't fully be covered with the normal small and large plates due to lack of mounting holes remaining or obstruction from the center driveline bearing retainer. If you need to use the small plate w/ offset but the mounting point is on the wrong side just mirror it in your slicer to move it to the other side. Worst case scenario any of these plates can be trimmed after printing to best suit your needs.
To install line up the cover(s) you choose with the hex(es) in the center spine then secure them with M3x8 flat head screws (don't use longer screws than this otherwise you will potentially screw through the bottom of the chassis. The M3 screw is designed to expand the hex to hold the plates in with friction.)
Note: I recommend printing the covers with the mounting hex notches facing the bed and using supports. This method ensures best hex dimension accuracy, plus the surface imperfection from the supports won't be seen since it faces the chassis once installed.
Center Driveline Cover
The center driveline cover is a 1 piece construction and designed to replace your center spine block. To install simply remove your center spine block then slide the center shaft cover into place while the center shaft is installed. To secure it re-use the stock M4 screw removed from the stock center block through the bottom of the chassis.
Important Notes:-The center block portion of the cover is built with tight tolerances and is intended to be as close in dimensions to the stock center block as much as possible. Be sure your chassis is very clean with no dirt/sand/debris around the rear block area in order for the block to not get stuck during install/removal. If necessary use a hobby knife to trim any parts of the center block if fitment is too tight.
-Be sure to install the rear battery strap through the cover's strap hole before sliding into place so you can easily remove the cover later by using the battery strap as leverage to pull it out. If you forget to do this first then install of the strap may be difficult and removal of the cover may be an issue due to the lack leverage and poor access to pry it out with a screwdriver.
-The LWB center drive cover has a notch cut out to allow clearance for the center drive shaft bearing retainer. Be sure to install the bearing retainer in 3rd spine hole from the rear of the vehicle so it will line up properly with the cut out.
-For best print detail print the the center driveline covers in vertical orientation w/ supports/brim.
This cover set is designed to keep larger rocks/debris that fall in from the top and get caught in the center driveshaft or steering crank for Arrma 4x4 vehicles (Mega/3s/4s) with two options to pick from to accommodate both the short wheel base (SWB) and long wheel base (LWB) chassis. See below for further description for each component's fitment/install descriptions which will vary depending on your specific application.
Steering Crank Cover
The steering crank cover is universal fit for all Arrma 4x4 based vehicles. To install simply fit it in between the steering servo and front side guards and it will naturally fall into place. To secure it remove the (2) servo mounting screws that face the front of the vehicle and line up the cover's mounting holes on top of the servo mounting holes. Next, run the screws back through the holes to sandwich the cover between the screws and the top of the servo mounting tabs. If necessary use longer M3 screws to accommodate the extra thickness of the mounting plate tabs.
Backside Plates
These plates should be installed first before the driveline and center shaft cover. The plates will close up the exposed backside (ESC/motor side) of the center driveline that remains after the main center driveline cover is installed.
There are 3 different plate options that can be used in combination with each other since the exposed area will vary depending on your motor/heatsink/esc install setup. The large plate (58mm) has 2 mounting points (1 on each end), the small plate (40mm) has 1 center mounting point, and the small plate w/offset (40mm) has it's mounting point located at one end. The small plate w/offset is intended to close any gaps that can't fully be covered with the normal small and large plates due to lack of mounting holes remaining or obstruction from the center driveline bearing retainer. If you need to use the small plate w/ offset but the mounting point is on the wrong side just mirror it in your slicer to move it to the other side. Worst case scenario any of these plates can be trimmed after printing to best suit your needs.
To install line up the cover(s) you choose with the hex(es) in the center spine then secure them with M3x8 flat head screws (don't use longer screws than this otherwise you will potentially screw through the bottom of the chassis. The M3 screw is designed to expand the hex to hold the plates in with friction.)
Note: I recommend printing the covers with the mounting hex notches facing the bed and using supports. This method ensures best hex dimension accuracy, plus the surface imperfection from the supports won't be seen since it faces the chassis once installed.
Center Driveline Cover
The center driveline cover is a 1 piece construction and designed to replace your center spine block. To install simply remove your center spine block then slide the center shaft cover into place while the center shaft is installed. To secure it re-use the stock M4 screw removed from the stock center block through the bottom of the chassis.
Important Notes:-The center block portion of the cover is built with tight tolerances and is intended to be as close in dimensions to the stock center block as much as possible. Be sure your chassis is very clean with no dirt/sand/debris around the rear block area in order for the block to not get stuck during install/removal. If necessary use a hobby knife to trim any parts of the center block if fitment is too tight.
-Be sure to install the rear battery strap through the cover's strap hole before sliding into place so you can easily remove the cover later by using the battery strap as leverage to pull it out. If you forget to do this first then install of the strap may be difficult and removal of the cover may be an issue due to the lack leverage and poor access to pry it out with a screwdriver.
-The LWB center drive cover has a notch cut out to allow clearance for the center drive shaft bearing retainer. Be sure to install the bearing retainer in 3rd spine hole from the rear of the vehicle so it will line up properly with the cut out.
-For best print detail print the the center driveline covers in vertical orientation w/ supports/brim.
Similar models
thingiverse
free

ARRMA TYPHON/ BIG ROCK 3S CENTER SHAFT COVER 4S KRATON
... printed in tpu... no ninjaflex needed just standard tpu...
the cover is printed in tpu to allow flex with the chassis...
enjoy!
thingiverse
free
Chassis mount for Steering Servo SCX10 Chassis by MrCadillacsts
... be necessary), have fun!!!!
use pla or abs for printing (standard settings)
ps: the wheels are also available on youmagine.com
thingiverse
free

ARRMA raider steering servo mount by Nys1
...arrma raider steering servo mount by nys1
thingiverse
arrma raider steering servo mount
thingiverse
free

ARRMA raider steering servo mount (b) by Nys1
...arrma raider steering servo mount (b) by nys1
thingiverse
arrma raider steering servo mount (b).
thingiverse
free

Arrma 4x4/BLX steering crank cover by resu13
...justed the angle and added another top stop where the screw is mounted from top so that it can be easier printed without support.
thingiverse
free

17mm hex for Arrma Senton 4x4 by Rowster
...17mm hex for arrma senton 4x4 by rowster
thingiverse
17mm hex for the arrma senton 4x4 so you can mount wheels with 17mm hex.
thingiverse
free

Dust cap for bicycle cranks by LamimaGC
...ng the mounting screw of bicycle cranks.
the cap snaps in place and and has a small hole for removing it with a flat screwdriver.
thingiverse
free

Tactic TTX300 steering angle increaser by MasteroFlego
...riginal coarse thread screw.
using the 3x8mm screws, attach the cover.
install original steering wheel with the last 3x5mm screw.
thingiverse
free

MAX10 (SCT) Mount For Arrma 4x4 / BLX by resu13
...unk screws to fit the plate below the esc
2x m3x16mm screws to mount the plate onto the default receiver box (instead of m3x12mm)
thingiverse
free

WPL Axel thrus with servo mount by Sasmlt
... you can position and used any type of servo. i you want to secure make hole on truss servo mount rail and drill for fixed screw.
Suchtragedy
thingiverse
free

50cal Ammo Box Lipo Organizer Tray by suchtragedy
... of trays to fill out a 50cal ammo box. if you want the trays to be shorter or taller simply resize the z height in your slicer.
thingiverse
free

Arrma 3-4s Wing Mount Bracing by suchtragedy
... for the right side i used 3x20mm and for the left i used 3x8mm.
i printed in petg but should be suitable for all filament types.
thingiverse
free

30mm to 40mm Fan Adapter for Hobbywing/Spektrum/Hexfly/Arrma 1/8 ESCs by suchtragedy
...ex8
spektrum firma 150
arrma blx200
the adapter should not require you to have to remove the stock cover of the esc to mount it.
thingiverse
free

Arrma 6s Shock Bushing for 3s Vehicles by suchtragedy
...e gap left on the other end.
get the axial bushing here:https://www.amazon.com/axial-axa1356-silicone-shock-bushing/dp/b0051w7r1m
thingiverse
free

EMAX Interceptor Friction-fit Battery Cover by suchtragedy
...ge of the cover. you only have to pry the cover up enough to grab the sides with your fingers to pull it off the rest of the way.
thingiverse
free

Hobbywing Max6 ESC mount for Arrma 6s vehicles by suchtragedy
...of the chassis once fully installed.
**note: this mount also works with hobbywing max6 rebranded escs such as the hexfly hex6***
thingiverse
free

Rapidfire Top plate for URUAV analog receiver adapter
...so i remixed my own. note you will need suchtragedy#39;s download to make use of this. this is just...
thingiverse
free

BLX185 ESC Mount for Arrma 3s Vehicles by suchtragedy
...rap around the esc then secure it accordingly. for best fit make sure to the face the motor wires to the outside of the vehicle.
thingiverse
free

Arrma 3s Shock Bushing for Ebay 3s Big Bore Shocks by suchtragedy
...s big bore shocks:https://www.ebay.com/sch/i.html?_from=r40&_trksid=m570.l1313&_nkw=arrma+3s+big+bore+shocks&_sacat=0
thingiverse
free

16mm Shock Bladder for Arrma 3s Big Bore Ebay Shocks by suchtragedy
...s big bore shocks:https://www.ebay.com/sch/i.html?_from=r40&_trksid=m570.l1313&_nkw=arrma+3s+big+bore+shocks&_sacat=0
Driveshaft
turbosquid
$1

Gear Hub, Driveshaft Key
... available on turbo squid, the world's leading provider of digital 3d models for visualization, films, television, and games.
3d_export
$40

Driveshaft gear and sprocket assembly 3D Model
...rocket roller chain engine transmission realistic materials
driveshaft gear and sprocket assembly 3d model tartino 60194 3dexport
cg_studio
$40

driveshaft gear and sprocket assembly3d model
....dxf .fbx .obj - driveshaft gear and sprocket assembly 3d model, royalty free license available, instant download after purchase.
3d_export
$39

dually axle and driveshaft
...usage:<br>this model is suitable for design visualization, broadcast, forensic presentation, technical demonstrations, etc.
3d_export
$39

heavy duty axle and driveshaft
...usage:<br>this model is suitable for design visualization, broadcast, forensic presentation, technical demonstrations, etc.
3d_export
$100

Truck engine 3D Model
...model 3dexport truck engine trasmission car motor chassis drive driveshaft vehicle bus truck engine 3d model tartino 14701...
3d_export
$140

Undercarriage 3D Model
...undercarriage steering car suspension spring damper axle brakes gearbox driveshaft automobile vehicle parts repair chassis mechanic motor engine frame...
cg_studio
$140

Undercarriage3d model
...undercarriage steering car suspension spring damper axle brakes gearbox driveshaft automobile vehicle parts repair chassis mechanic motor engine frame...
3d_export
$5

uralzis 355m 1944
...leaf springs at the front, rear axle, front beam, driveshaft muffler, fuel tank. some small details are not visible...
thingiverse
free

Micro RS4 driveshaft by k0b3rIT
...micro rs4 driveshaft by k0b3rit
thingiverse
micro rs4 driveshaft
Arrma
thingiverse
free

Arrma Outcast grill (calandre Arrma) by somethingsbyj
...arrma outcast grill (calandre arrma) by somethingsbyj
thingiverse
this is arrma oucast 6s grill with 22mm light
thingiverse
free

ARRMA Mudguards by Bodsgo
...arrma mudguards by bodsgo
thingiverse
mudguards für arrma kraton
thingiverse
free

Arrma Bodywashers by Basuu
...arrma bodywashers by basuu
thingiverse
washers to protect your arrma-body
thingiverse
free

Arrma Typhon V4 cover set DIFF Other ARRMA models possible.
...ma typhon v4 cover set diff other arrma models possible.
thingiverse
arrma typhon v4 cover set diff
other arrma models possible.
thingiverse
free

ARRMA raider headlight by Nys1
...arrma raider headlight by nys1
thingiverse
arrma raider headlight...
thingiverse
free

ARRMA raider roof by Nys1
...arrma raider roof by nys1
thingiverse
arrma raider roof
thingiverse
free

Arrma Mudguards by Basuu
...arrma mudguards by basuu
thingiverse
arrma mudguards for kraton, talion & outcast/notorious 6s from 23 mp
thingiverse
free

Arrma louvers for the Infraction by Rowster
...arrma louvers for the infraction by rowster
thingiverse
arrma infraction front wheel louvers.
thingiverse
free

Arrma spoiler.com by Noah152
...arrma spoiler.com by noah152
thingiverse
thingiverse
free

Arrma Bodysafe by Basuu
... by basuu
thingiverse
to protect your body from damage. developed by 23 mp. fits for arrma kraton, outcast/notorious, talion 6s.
Crank
3d_export
free
crank shaft
...crank shaft
3dexport
crank shaft with piston with different materials
turbosquid
$3
Crank Shaft
...lty free 3d model crank shaft for download as x, ige, and stl on turbosquid: 3d models for games, architecture, videos. (1694841)
design_connected
$13
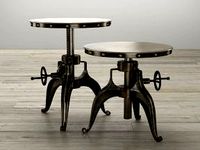
Crank 22 End Table
...crank 22 end table
designconnected
four hands crank 22 end table computer generated 3d model.
turbosquid
$50

Wooden Crank Toy
... available on turbo squid, the world's leading provider of digital 3d models for visualization, films, television, and games.
3d_export
$7
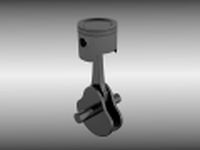
Piston and crank 3D Model
...ycle bearing pulley push rod valve bolt spring screw metal new moped stroke
piston and crank 3d model dragosburian 80941 3dexport
3d_export
$15
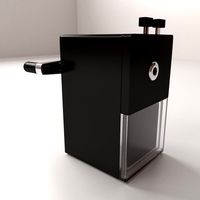
Hand Cranked Sharpener 3D Model
...cranked spring office supplies sharp supply tools equipment school writing
hand cranked sharpener 3d model firdz3d 84605 3dexport
3d_export
$9

Crank Wheel 3D Model
...ainless iron industrial machine
crank wheel 3d model download .c4d .max .obj .fbx .ma .lwo .3ds .3dm .stl firdz3d 105897 3dexport
turbosquid
free
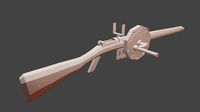
Low Poly Crank Gun
...bosquid
free 3d model low poly crank gun for download as fbx on turbosquid: 3d models for games, architecture, videos. (1436642)
turbosquid
$10

Hand Crank Drill Press
...model hand crank drill press for download as ma, fbx, and obj on turbosquid: 3d models for games, architecture, videos. (1548994)
turbosquid
$5

Air Crank Rifle (HD)
... available on turbo squid, the world's leading provider of digital 3d models for visualization, films, television, and games.
4X4
turbosquid
$12

4x4 Bundle
...bosquid
royalty free 3d model 4x4 bundle for download as obj on turbosquid: 3d models for games, architecture, videos. (1243408)
turbosquid
$6

4x4 Pickup
...bosquid
royalty free 3d model 4x4 pickup for download as obj on turbosquid: 3d models for games, architecture, videos. (1243410)
turbosquid
$6

4x4 SUV
...turbosquid
royalty free 3d model 4x4 suv for download as obj on turbosquid: 3d models for games, architecture, videos. (1243409)
turbosquid
$5

4x4 Car
...rbosquid
royalty free 3d model 4x4 car for download as blend on turbosquid: 3d models for games, architecture, videos. (1545830)
turbosquid
$1

4X4 ROOM
...urbosquid
royalty free 3d model 4x4 room for download as max on turbosquid: 3d models for games, architecture, videos. (1415863)
turbosquid
$29

Military 4X4
... free 3d model military 4x4 for download as 3ds, obj, and fbx on turbosquid: 3d models for games, architecture, videos. (1339605)
turbosquid
$20

Military 4X4
...ty free 3d model military 4x4 suv for download as 3ds and obj on turbosquid: 3d models for games, architecture, videos. (1340520)
turbosquid
$10

Bookshelf (4x4)
... model bookshelf (4x4) for download as 3ds, max, obj, and fbx on turbosquid: 3d models for games, architecture, videos. (1410538)
turbosquid
$75

trabant 4x4
... available on turbo squid, the world's leading provider of digital 3d models for visualization, films, television, and games.
turbosquid
$57

4x4-max
... available on turbo squid, the world's leading provider of digital 3d models for visualization, films, television, and games.
Steering
3d_export
$5

steering wheel
...steering wheel
3dexport
steering wheel
3d_export
$5

steering wheel
...steering wheel
3dexport
steering wheel
3d_ocean
$2

Car steering wheel
...car steering wheel
3docean
car car wheel steering steering wheel wheel
high poly car steering wheel.
3d_ocean
$15

Steering Wheel
... all the meshes are clean and have elegent wireframe -this is a high poly detailed model ready for close up renders. – correct...
design_connected
$7

Steering Wheel
...steering wheel
designconnected
vitra steering wheel computer generated 3d model. designed by nelson, george.
turbosquid
$15
Steering Mechanism
...oyalty free 3d model steering mechanism for download as sldas on turbosquid: 3d models for games, architecture, videos. (1458880)
turbosquid
$4

Steering Wheel
...d
royalty free 3d model steering wheel for download as blend on turbosquid: 3d models for games, architecture, videos. (1562629)
turbosquid
$4
Steering wheel
...d
royalty free 3d model steering wheel for download as blend on turbosquid: 3d models for games, architecture, videos. (1376488)
turbosquid
$4

Steering Wheel
...d
royalty free 3d model steering wheel for download as blend on turbosquid: 3d models for games, architecture, videos. (1562611)
turbosquid
free
Steering Wheel
...uid
royalty free 3d model steering wheel for download as max on turbosquid: 3d models for games, architecture, videos. (1663117)
Cover
archibase_planet
free

Cover
...cover
archibase planet
cover place setting
cover n170807 - 3d model for interior 3d visualization.
3ddd
$1
cover
...cover
3ddd
ковер , круглый
cover decor
archibase_planet
free

Cover
...cover
archibase planet
cover place setting setting
servis-cafe1930 - 3d model for interior 3d visualization.
turbosquid
free
Coverings
...rings
turbosquid
free 3d model coverings for download as dwg on turbosquid: 3d models for games, architecture, videos. (1279391)
3d_export
$5
plug cover
...plug cover
3dexport
plug cover
turbosquid
$25
Covers
... available on turbo squid, the world's leading provider of digital 3d models for visualization, films, television, and games.
3d_export
$10
manhole cover
...manhole cover
3dexport
manhole cover gost, stl, step
turbosquid
$5

Street Gas Cover Manhole Cover
... available on turbo squid, the world's leading provider of digital 3d models for visualization, films, television, and games.
3ddd
free
Bed cover
...bed cover
3ddd
постельное белье
very useful bed cover
3d_export
$5
cpu cover
...cpu cover
3dexport
cpu cover, cpu box, sheet metal container
Set
archibase_planet
free

Setting
...setting
archibase planet
setting cover place setting
setting - 3d model (*.gsm+*.3ds) for interior 3d visualization.
archibase_planet
free
Setting
...setting
archibase planet
setting place setting cover
setting - 3d model (*.gsm+*.3ds) for interior 3d visualization.
archibase_planet
free

Setting
...setting
archibase planet
setting place setting cover
setting - 3d model (*.gsm+*.3ds) for interior 3d visualization.
3d_export
$8

decorative set mens set
...decorative set mens set
3dexport
decorative set men's set
archibase_planet
free
Set
...anet
set kitchen ware kitchen set kitchen tools
set kitchen tools n281114 - 3d model (*.gsm+*.3ds) for interior 3d visualization.
archibase_planet
free
Set
...set
archibase planet
beer set bar equipment
beer set - 3d model for interior 3d visualization.
archibase_planet
free

Set
...set
archibase planet
cover place setting
set - 3d model (*.gsm+*.3ds) for interior 3d visualization.
archibase_planet
free
Set
...set
archibase planet
kitchen set kitchen ware
set - 3d model (*.gsm+*.3ds) for interior 3d visualization.
archibase_planet
free

Set
...set
archibase planet
set cup glass kitchen ware
set - 3d model (*.gsm+*.3ds) for interior 3d visualization.
archibase_planet
free

Set
...set
archibase planet
flatware cover place setting
set n311210 - 3d model (*.gsm+*.3ds) for interior 3d visualization.