Thingiverse
Aoc 27G2 Hero stand repurpose 75mm by thigo94
by Thingiverse
Last crawled date: 2 years, 10 months ago
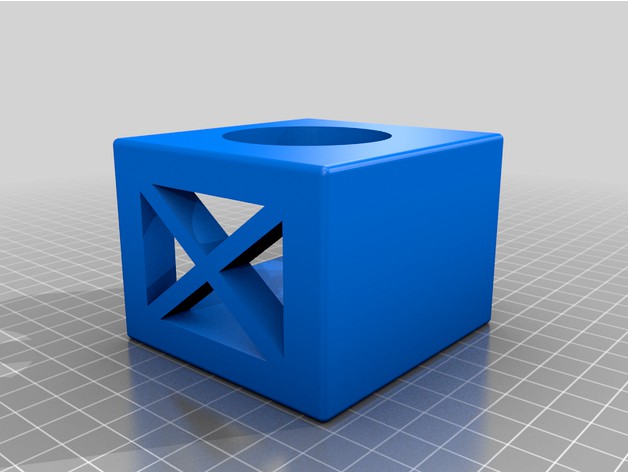
This project is composed of 2 parts that i designed to adapt the original aoc hero 27g2 monitor stand to use with my old lg ultrawide monitor (but should work with any light and sub 29" 75mm vesa monitor). This files are designed to allows the monitor to rotate 360 degrees around the base, allow height adjustment, tilt and both vertical and horizontal positioning of the monitor while using as little desk space as possible.
Things needed:
To use this mount you will need a screw with a matching nut (6mm diameter should be more than enought) and 2 large washers to mount the table base to the table, for this you will need a hole in the table and is also recomended to use a little bit of rubber between the base and the table to avoid the base rotating or moving. To attach the vesa adapter to the post you will need 4 (i believe the are 10mm, but i might be wrong on this one if those are too long they will lock the horizontal and vertical rotation of the monitor) screws with the correct thread. To attach the pole you will need 4 15mm long screws that fit the threads under the AOC post. I had a hard time removing the black screws that attached the post to the base originally but with a little bit of heat the thread lock softened. (thread lock is recomended fot every screw that goes on metal threads).
I recommend first attaching the Vesa 75mm adapter to the post and verifying if it can rotate normally. Then you will attach the post to the base using the metal plate, the 2 big plastic whashers (to avoid friction between the base and the metal parts you can also lubricate this parts) and the 15mm long screws, for this the base has a hole to allow a screwdriver to reach the screws. After this the base and the post should have a relatively easy rotation.
At last you will use the long screw to go through the table and the base center hole, using the washer between the screw head and the bottom of the table and the other between the nut and the base (to distribute the force evenly). Now all that is left is to attach your monitor in a way that will allow it to rotate to the desired positions (landscape and portrait or landscape and upsidedown portraid)
I TAKE NO RESPONSABILITY FOR ANY DAMAGE CAUSED BY THIS PROJECT.
Printing:
Supports only for steep angles, i used 75°.
I recommend 1-1.2mm walls/top/bottom layers with 30% infill (remember that is better to use a little more plastic and not have any issues later.
I will attach a picture with the recomended printing orientation to all parts to allow the best result. (remember, you will only need one table base)
Please, share your results and any modifications that you think are needed.
Hope this is usefull and sorry for my terrible english.
Similar models
thingiverse
free

VESA Mount Adapter for AOC 24B1XH by ohyohyohyoo2011
... 24b1xh by ohyohyohyoo2011
thingiverse
this adapter convert aoc 24b1xh monitor stay to vesa mount.
you need an m4 nut to use it.
thingiverse
free

AOC Monitor VESA Adapter by Jonathan924
...or vesa adapter by jonathan924
thingiverse
this is an adapter i made so i could use my aoc i2267fw monitors with my vesa mounts,
thingiverse
free

AOC to VESA 75mm adapter by Dankton
...need to shrink to 97% or something. print the 1st layer and measure the distances between the holes, they have to be 75 mm apart.
thingiverse
free

AOC Monitor VESA adapter by sisimomo111
...s
1 x m3 10mm screw
3d print inspired by this product:https://www.etsy.com/ca-fr/listing/696287416/pour-aoc-27b1h-24b1h-et-24b1xh
thingiverse
free

Monitor VESA mount adapter (75 to 100) by waste
...the 100mm side as the stand ι want to use is not threaded.
i also include the freecad file for those who would like to edit it :)
thingiverse
free

ASUS VX239 VESA Mount by awasobabba
...d to the vesa mount using 4 m4 screws.
in addition, you will need some spacers depending on how long the plugs are you are using.
thingiverse
free

Intel NUC VESA mount by skutt
...adapter for mounting intel nuc on monitors with vesa mount 75mm or 100mm.
use m3 screws to attach the nuc, and m4 for vesa mount.
grabcad
free

Vesa adapter for monitor
...vesa adapter for monitor
grabcad
vesa adapter for aoc 2879 without mount
one print+ completed with 2x m6x15mm screws.
thingiverse
free

VESA Monitor Arm by stunner2211
... have designed the holes as tight as possible. if you have issues to get screws in it, drill the hole with the right drill (8mm).
thingiverse
free

AOC Q3279VWFD8 VESA adapter by Luka51
...aoc q3279vwfd8 vesa adapter by luka51
thingiverse
smal part which comes between vesa plate mount and monitor mount.

Aoc
turbosquid
$3

AOC Screen
... available on turbo squid, the world's leading provider of digital 3d models for visualization, films, television, and games.
turbosquid
$2

AOC Monitor
... available on turbo squid, the world's leading provider of digital 3d models for visualization, films, television, and games.
turbosquid
free

AOC monitor
...model aoc monitor for download as 3ds, obj, fbx, dae, and skp on turbosquid: 3d models for games, architecture, videos. (1235768)
3d_export
free

Monitor aoc q27g2u
...monitor aoc q27g2u
3dexport
3ddd
free

Монитор AOC D2757PH
...м экране с диагональю 68,6 см (27″). - see more at:http://aoc-europe.com/ru/products/d2757ph#product-detail-accessoires
3d_ocean
$4

Acer Monitor 23"
...acer monitor 23" 3docean acer aoc apple asus benq computer desktop gadget hardware laptop lg...
thingiverse
free

AOC n950 stand
...aoc n950 stand
thingiverse
simple stand for aoc n950 screen
thingiverse
free

Suporte monitor AOC by Moelcompany
...suporte monitor aoc by moelcompany
thingiverse
suporte de parede para monitor aoc
thingiverse
free

AOC PSU wall mount
...aoc psu wall mount
thingiverse
this is a bracket for mounting the external psu of aoc monitors on the wall or under the desk.
thingiverse
free

AOC Monitor Stand Riser by Boneloc
... brand monitor. print two of these and slip one on to each side of the base of a 27" aoc monitor. aoc monitor model i2757fh.
Repurpose
turbosquid
$16

Repurposing Old Crates
...odel repurposing old crates for download as max, obj, and fbx on turbosquid: 3d models for games, architecture, videos. (1280535)
3d_export
$25

gameready- rc spy helicopter
...gameready- rc spy helicopter 3dexport a repurpose rc helicopter with a camera attached beneath it, usefull...
unity_asset_store
$30

Repurposed Truck
...your workflow with the repurposed truck asset from ryan skinner. find this & other land options on the unity asset store.
thingiverse
free

Battle Top 1 by repurposer
...battle top 1 by repurposer
thingiverse
its a top. see top launcher
thingiverse
free

Repurposed Prusa MMU spool holder rails
...d prusa mmu spool holder rails
thingiverse
repurposed the mmu2 spool holders into drawers with some rails designed in tinkercad.
thingiverse
free

Battle Top 2 by repurposer
...purposer
thingiverse
this top has a receptacle for a 10d 3" finishing nail, for strength as an improvement on battle top 1.
thingiverse
free

Battle Top Launcher by repurposer
...und the stem of the top, put the top in the big hole and pull. more fun with more people.
no frills, just trying to get spinning.
thingiverse
free

Light Enclosure for a repurposed IR Board ex Security Camera
...light enclosure for a repurposed ir board ex security camera
thingiverse
cut a lense from an old cd cover...51mm dia...
thingiverse
free

repurposed cardboard thread rack by ameliechucky
...am using re purposed material that we got from equipment packages.
*ima: interactive media arts program
photos by kevin bin ni
thingiverse
free

Repurposed Wal-Mart Floor Lamp by doctriam
...all have this mount on the wall. just feed power cable through the side. you may want to sand it down there, but i haven't.
75Mm
cg_studio
$79

75mm Pak 97/383d model
...rld ww2 wwii
.obj .jpg .max .fbx .3ds - 75mm pak 97/38 3d model, royalty free license available, instant download after purchase.
3d_export
$79

75mm Pak 97-38 3D Model
... pak tank war weapon world
75mm pak 97-38 3d model download .c4d .max .obj .fbx .ma .lwo .3ds .3dm .stl graverino 108478 3dexport
3d_ocean
$79
75mm Pak 97/38
...el originally created with 3ds max and rendered with vray the model is easy to modify, the main parts can be easily moved as i...
cg_studio
$149

M4A3 Sherman - 75mm - Mid production3d model
... .c4d .lwo .obj - m4a3 sherman - 75mm - mid production 3d model, royalty free license available, instant download after purchase.
cg_studio
$139
M4A2 Sherman - Colorado3d model
...m4a2 sherman colorado tank us marine corps pacific theatre 75mm m3 l/40 gun .c4d .obj .lwo .fbx .3ds -...
cg_studio
$139

M4A2 Sherman - Destroyer3d model
...m4a2 sherman destroyer tank us marine corps pacific theatre 75mm m3 l/40 gun .c4d .obj .lwo .fbx .3ds -...
cg_studio
$65

Pak 403d model
...pak 403d model cgstudio gun ww2 75mm artillery world war wwii 1943 army 1945 anti tank...
cg_studio
$125
Anti tank guns ww23d model
...anti tank guns ww23d model cgstudio gun ww2 75mm artillery wwii army 1945 antitank projectile weapon shell case...
3ddd
free
Indian vase
...311742 размеры: длинна маленькой вазы - 460mm, ширина - 75mm высота - 130mm длинна большой вазы - 600mm, ширина...
3d_export
$7
facemaskearloopweldingmachine
...the welding of one-time plane mask ear belt with 75mm standard ear band spacing. if you want to weld...
Hero
3d_ocean
$30
Super Hero
...hero mask ninja super hero sword zbrush
super hero created in zbrush 4.0 hero body—6 division levels 1.668 poly to 1.705mil poly.
turbosquid
$70

hero
... available on turbo squid, the world's leading provider of digital 3d models for visualization, films, television, and games.
turbosquid
$59

Hero
... available on turbo squid, the world's leading provider of digital 3d models for visualization, films, television, and games.
turbosquid
$22

Hero
... available on turbo squid, the world's leading provider of digital 3d models for visualization, films, television, and games.
turbosquid
free

HERO
... available on turbo squid, the world's leading provider of digital 3d models for visualization, films, television, and games.
turbosquid
free

Heros Frames Super heroes Frames
... available on turbo squid, the world's leading provider of digital 3d models for visualization, films, television, and games.
3ddd
$1

htc Hero
...ефон , смартфон , htc
смартфон htc hero, черный
3ddd
free

MARVEL-Heroes-1
...marvel-heroes-1
3ddd
marvel
marvel-heroes-1
turbosquid
$280

Hero Knight
...bosquid
royalty free 3d model hero knight for download as ma on turbosquid: 3d models for games, architecture, videos. (1326296)
turbosquid
$55

Super Hero
...squid
royalty free 3d model super hero for download as blend on turbosquid: 3d models for games, architecture, videos. (1387035)
Stand
turbosquid
$50

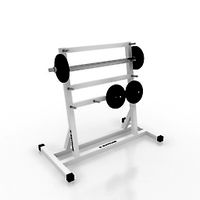
stand watermelon stand
...yalty free 3d model stand watermelon stand for download as ma on turbosquid: 3d models for games, architecture, videos. (1528284)
archibase_planet
free
Stand
...stand
archibase planet
stand post pole
stand - 3d model for interior 3d visualization.
archibase_planet
free
Stand
...stand
archibase planet
stand sport barbell
stand kettler - 3d model for interior 3d visualization.
archibase_planet
free
Stand
...stand
archibase planet
locker drawer stand
stand 897810 - 3d model for interior 3d visualization.
archibase_planet
free
Stand
...stand
archibase planet
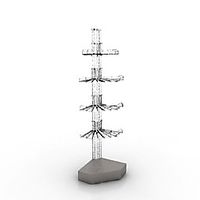
stand rack post
stand 2 - 3d model for interior 3d visualization.
archibase_planet
free
Stand
...stand
archibase planet
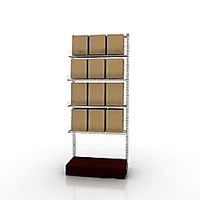
stand storefront shelving
stand 3 - 3d model for interior 3d visualization.
archibase_planet
free

Stand
...stand
archibase planet
stand shelf shelving
stand 4 - 3d model for interior 3d visualization.
archibase_planet
free
Stand
...stand
archibase planet
stand post stall
stand 5 - 3d model for interior 3d visualization.
archibase_planet
free
Stand
...stand
archibase planet
stand post stall
stand 6 - 3d model for interior 3d visualization.
archibase_planet
free
Stand
...stand
archibase planet
stand post shelving
stand 7 - 3d model for interior 3d visualization.