Thingiverse
Anycubic Kossel Magnetic Arms Kit by spikelee
by Thingiverse
Last crawled date: 3 years ago
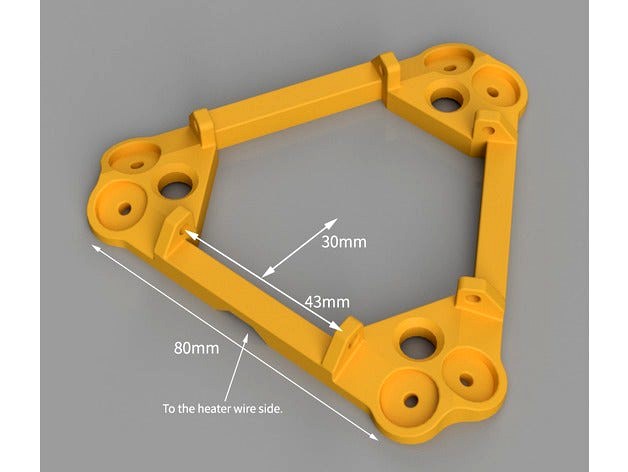
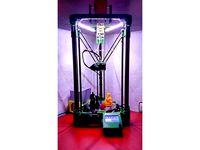
This is a solution for both Anycubic Kossel Plus and non-plus to upgrade to magnetic arms with minimum modification.
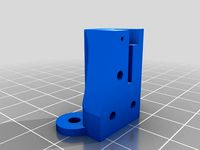
This package contains an effector adapter model and a carriage model.
The effector adapter adapts the stock effector to provide an interface to magnetic arms which means you can keep the whole stock effector assembly unchanged.
SAFETY FIRST
When using magnetic arms , make sure the effector or the arms won't touch anything during the printing or the magnetic joints may break loose and it is not safe.
Managing the cable well is the first step.
The cable may touch the arms or the belts when printing near the edge of print bed.
Try to avoid that.
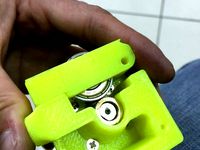
if you get the magnets which are not strong enough, there is one simple thing you can try.
Get some shorts M4 screws and screw them from the back of the carriages and effector through the hole of the magnets but do not touch the steel ball of the rods.
Make sure you get the steel screws not stainless steel ones.
You can tell by touching them with magnets.
This will improve magnetic field.
The other parts required:
12pcs of 12mm diameter magnet
12pcs of 10mm diameter steel balls with thread or screw on it.
6pcs of carbon fiber rods
or get the per-assembled rods.
6pcs 8mm M3 screws to lock the adapter to effector.(The stock screws are too long)
Super glue or epoxy glue to glue the magnets to printed parts.
My Magnetic Arm Alignment Tool : https://www.thingiverse.com/thing:2843487
If you made one , please sign "I made one". Thanks! :)
This package contains an effector adapter model and a carriage model.
The effector adapter adapts the stock effector to provide an interface to magnetic arms which means you can keep the whole stock effector assembly unchanged.
SAFETY FIRST
When using magnetic arms , make sure the effector or the arms won't touch anything during the printing or the magnetic joints may break loose and it is not safe.
Managing the cable well is the first step.
The cable may touch the arms or the belts when printing near the edge of print bed.
Try to avoid that.
if you get the magnets which are not strong enough, there is one simple thing you can try.
Get some shorts M4 screws and screw them from the back of the carriages and effector through the hole of the magnets but do not touch the steel ball of the rods.
Make sure you get the steel screws not stainless steel ones.
You can tell by touching them with magnets.
This will improve magnetic field.
The other parts required:
12pcs of 12mm diameter magnet
12pcs of 10mm diameter steel balls with thread or screw on it.
6pcs of carbon fiber rods
or get the per-assembled rods.
6pcs 8mm M3 screws to lock the adapter to effector.(The stock screws are too long)
Super glue or epoxy glue to glue the magnets to printed parts.
My Magnetic Arm Alignment Tool : https://www.thingiverse.com/thing:2843487
If you made one , please sign "I made one". Thanks! :)
Similar models
thingiverse
free

Anycubic Kossel Magnetic Effector for E3D V6 by spikelee
... arm alignment tool : https://www.thingiverse.com/thing:2843487
if you made one , please sign "i made one". thanks! :)
thingiverse
free

Anycubic Kossel magnetic rods mount
...al, but i recommend to print some spare ones. remove that cylindrical support from the centre. i mounted magnets with super-glue.
thingiverse
free

Anycubic Kossel Linear Plus Magnet Upgrade by Atziano
...1x 2k or super glue
some links:magnets 10x5mmsteelballs 10mmcarbon rods
update 19.08.2018:
-added a version for 12 x 3 mm magnets
thingiverse
free

Rostock reused effector and carriage magnetic solution by kakbit
...ue gun to attach the magnets
i reused the m3 screws and nuts to mount the magnet and ball holders, that earlier mounted the rods.
thingiverse
free

Anycubic Kossel - magball effector and custom arms from stock - volcano + 5015 + flying BMG extruder + belts tensioners by FilamentorCZ
... epoxy glue for magball arms
more information about material for printed parts u can find in simillar parts for anycubic predator
thingiverse
free

Anycubic Kossel Effector Cable Management by spikelee
...anycubic kossel effector cable management by spikelee
thingiverse
cable management of the stock anycubic kossel.
thingiverse
free

Anycubic Kossel Plus, upgrade to magnetic rods by carlosteiner
...rods 6mm ext, 4mm int plus the magnetic spherical joints.
old rods are recycled using some clamps to add rigidity to the printer.
thingiverse
free

Cerberus Carriage Adapter for Magnetic Arms by blah_59
...designed cerberus delta printer found here: http://grabercars.github.io/cerberus by just printing 3 very small replacement parts.
thingiverse
free

Magnetic Joint Carriage for Kossel Mini by cffellows
...ge provides the capability of building a kossel mini with magnetic ball joints using the magnetic effector from the cerberus pup.
thingiverse
free

mini kossel JT effector ballend by davejavu123
...by davejavu123
thingiverse
for use with the jt magnetic effector and rods and carriage
not 3d printable
machine out of steel
Spikelee
thingiverse
free

Kossel Cable Mount 2020 by spikelee
...kossel cable mount 2020 by spikelee
thingiverse
cable diameter 8.5mm max.
thingiverse
free
Anycubic Kossel Effector Cable Management by spikelee
...anycubic kossel effector cable management by spikelee
thingiverse
cable management of the stock anycubic kossel.
thingiverse
free

Case for cheap electronic component tester by spikelee
... by spikelee
thingiverse
a simple case used only for specific model.(see pic.)
4x m3x6mm screws needed.
a step file is included.
thingiverse
free

Anycubic Kossel Angled Extruder Mount by spikelee
...stock extruder mount often cause bowden tube bended and the tube has interference with the tower.
so i made this to improve that.
thingiverse
free

Anycubic Kossel 4020 Blower Adapter by spikelee
... 4020 blower.
just use twin adhesive to secure the blower to the heat sink house.
(original screws are m2 which is annoying.....)
thingiverse
free

Kossel Delta Magnetic Rods Glue Helper by spikelee
...diy delta printer magnetic arms.
using large fillets in modeling to prevent ringing effect during print.
ball:10mm
carbon arm:6mm
thingiverse
free

Anycubic Kossel Z Probe Extension For E3D Volcano by spikelee
...s extension extends the z probe z offset -10mm for e3d volcano nozzle.
make it a tight fit between the extension and the z probe.
thingiverse
free

Cat Bowl , Pet Bowl by spikelee
...lcome to scale it.
make sure the material you use is non-toxic.
if you made one , please sign "i made one". thanks! :)
thingiverse
free

Simple Strong Frame Brace for KOSSEL 2020 by spikelee
...10mm long screws and t-nuts to secure it.
print with at least 1.5mm in perimeters and 1.5mm in top and bottom layers.
infill 40%.
thingiverse
free

Probe Protector for Anycubic Kossel by spikelee
...re the protector is 0.2~0.8mm thicker(taller) than the switch body.
scale the height if it's necessary.
tested with v1 probe.
Kossel
thingiverse
free
kossel bottom by keisukelin
...kossel bottom by keisukelin
thingiverse
kossel bottom
thingiverse
free
Leg for kossel by exelon
...leg for kossel by exelon
thingiverse
leg for kossel
thingiverse
free
Extruder for kossel by spencer_chen7
...extruder for kossel by spencer_chen7
thingiverse
extruder for kossel
thingiverse
free
Kossel parts by breezer83
...kossel parts by breezer83
thingiverse
kossel parts
thingiverse
free

Anycubic Kossel PID calibration
...ir mount:
kossel raspberry camera ir mount
extruder pid calibration.
simple extruder temperature calibration of your 3d printer.
thingiverse
free

Kossel Medium by flux83
...kossel medium by flux83
thingiverse
vertex for upgraded kossel mini
thingiverse
free
Kossel Mini by salesmendesandre
...kossel mini by salesmendesandre
thingiverse
custom kossel mini
frame 20x20
thingiverse
free

leg for kossel by ionulet
...leg for kossel by ionulet
thingiverse
leg for kossel with channel for end- stop cables
thingiverse
free

Optical Endstops Mounts for Kossel (with Better Kossel carriages) by dellfer
...stops on the anycubic kossel with better kossel carriages by codefreak https://www.thingiverse.com/thing:2501337
more precission
thingiverse
free
kossel??????? by wangrui19890704
...kossel??????? by wangrui19890704
thingiverse
??2020?2060???
Anycubic
thingiverse
free

anycubic filament holder
...anycubic filament holder
thingiverse
anycubic filament holder
thingiverse
free

Cableholder Anycubic Mega
...cableholder anycubic mega
thingiverse
cableholder anycubic mega
thingiverse
free

AnyCubic Toolholder by WildManPrinting
...anycubic toolholder by wildmanprinting
thingiverse
anycubic i3 mega toolholder that clips on the side of the spool a-frame.
thingiverse
free

AnyCubic Funnel by phana007
...anycubic funnel by phana007
thingiverse
funnel for anycubic resin and also a reducer for a normal soda bottle.
thingiverse
free
Anycubic Kossel PID calibration
...ir mount:
kossel raspberry camera ir mount
extruder pid calibration.
simple extruder temperature calibration of your 3d printer.
thingiverse
free

anycubic mega i3
...anycubic mega i3
thingiverse
anycubic i3 mega/mega s led 30mm 10-14v 6500k
thingiverse
free

Handle for anycubic by cruiser7
...handle for anycubic by cruiser7
thingiverse
its easier to handle the cover of the anycubic mono x and wash&care
thingiverse
free

anycubic predator Printbed by Lihyon
...anycubic predator printbed by lihyon
thingiverse
anycubic predator printbed
thingiverse
free

Anycubic Predator Triggers by marcelcountry
...anycubic predator triggers by marcelcountry
thingiverse
anycubic predator triggers
thingiverse
free

support anycubic cable by sarpdental
...support anycubic cable by sarpdental
thingiverse
support anycubic cable
Magnetic
3d_ocean
$2

Magnet
...magnet 3docean 3d 3ds max electric magnet magnetic magnetism max model polygon realistic tesla magnet created in...
turbosquid
$6
Magnet
...
turbosquid
royalty free 3d model magnet for download as obj on turbosquid: 3d models for games, architecture, videos. (1548733)
turbosquid
$6

magnet
...uid
royalty free 3d model magnet for download as 3dm and max on turbosquid: 3d models for games, architecture, videos. (1670606)
turbosquid
$1

Magnet
...y free 3d model magnet for download as 3ds, max, obj, and fbx on turbosquid: 3d models for games, architecture, videos. (1215037)
turbosquid
$7

Magnet
...agnet for download as blend, unitypackage, fbx, gltf, and obj on turbosquid: 3d models for games, architecture, videos. (1576588)
3d_export
$5

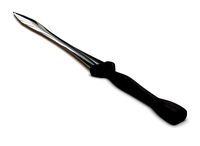
magnetic knife holder
...magnetic knife holder
3dexport
ordinary magnetic knife holder
archive3d
free

Fridge magnet 3D Model
...3d model archive3d refrigerator magnet fridge magnet magnet toy magnetic s n280712 - 3d model (*.3ds) for interior 3d...
turbosquid
$35

Magnetic butterflies
...alty free 3d model magnetic butterflies for download as blend on turbosquid: 3d models for games, architecture, videos. (1315792)
turbosquid
$2
Magnetic Board
...quid
royalty free 3d model magnetic board for download as ma on turbosquid: 3d models for games, architecture, videos. (1264141)
turbosquid
$977
Magnetic Lego
...oyalty free 3d model magnetic lego for download as ma and obj on turbosquid: 3d models for games, architecture, videos. (1142761)
Kit
turbosquid
$3

Bathroom Kit Baño kit
... available on turbo squid, the world's leading provider of digital 3d models for visualization, films, television, and games.
turbosquid
$19

Kit
... available on turbo squid, the world's leading provider of digital 3d models for visualization, films, television, and games.
3d_export
$20

Drift Kit
...drift kit
3dexport
turbosquid
$40

BitCoin Kit
...urbosquid
royalty free 3d model bitcoin kit for download as on turbosquid: 3d models for games, architecture, videos. (1519068)
turbosquid
$9

Industrial kit
...osquid
royalty free 3d model industrial kit for download as on turbosquid: 3d models for games, architecture, videos. (1144117)
turbosquid
$6

Kit Vases
...
turbosquid
royalty free 3d model kit vases for download as on turbosquid: 3d models for games, architecture, videos. (1285114)
turbosquid
free

Survival Kit
...rbosquid
royalty free 3d model survival kit for download as on turbosquid: 3d models for games, architecture, videos. (1637721)
turbosquid
$50

Ninja Kit
...rbosquid
royalty free 3d model ninja kit for download as fbx on turbosquid: 3d models for games, architecture, videos. (1672364)
turbosquid
$35

Brushes Kit
...osquid
royalty free 3d model brushes kit for download as max on turbosquid: 3d models for games, architecture, videos. (1216721)
turbosquid
$19
Medical kit
...osquid
royalty free 3d model medical kit for download as fbx on turbosquid: 3d models for games, architecture, videos. (1486089)
Arms
archibase_planet
free
Arm
...ase planet
arm hand right hand skeleton
arm human skeleton right arm n030515 - 3d model (*.gsm+*.3ds+*.max) for 3d visualization.
3ddd
$1

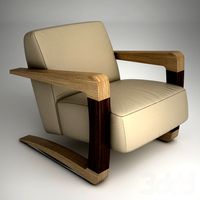
arm chair
...arm chair
3ddd
arm chair , пуф
arm chair
turbosquid
$5
arm
...arm
turbosquid
royalty free 3d model arm for download as obj on turbosquid: 3d models for games, architecture, videos. (1306158)
turbosquid
free

Arm
...arm
turbosquid
free 3d model arm for download as obj and fbx on turbosquid: 3d models for games, architecture, videos. (1346955)
turbosquid
$29

Arm
...osquid
royalty free 3d model arm for download as obj and fbx on turbosquid: 3d models for games, architecture, videos. (1382436)
3d_export
$5

coat of arms
...coat of arms
3dexport
coat of arms
3ddd
$1
ARM SOFA
...arm sofa
3ddd
arm sofa
3ddd
$1

Arm chair
...arm chair
3ddd
arm chair
3ddd
$1

Arm chair
...arm chair
3ddd
угловое
arm chair
3ddd
$1
ARM CHAIR
...arm chair
3ddd
arm chair clothes