Thingiverse
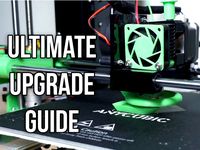
Anycubic I3 Mega ULTIMATE Upgrade Guide by petrzmax
by Thingiverse
Last crawled date: 3 years ago
If You enjoyed this guide and You want to say "Thank You" please consider supporting me by sending a tip on thingiverse or my PayPal here.
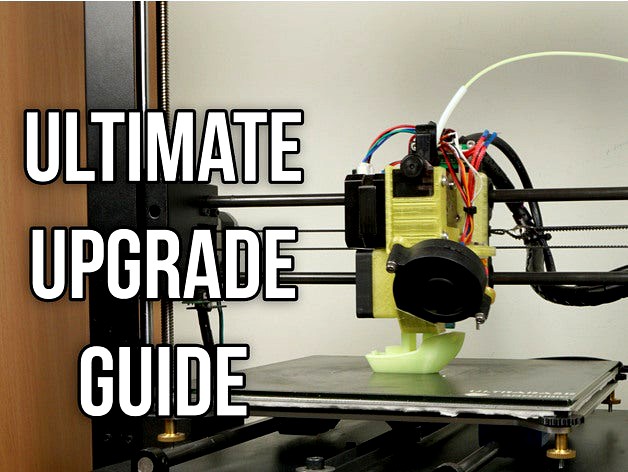
Within the past few months I was working on my I3 Mega. I have tested a lot of different combinations of extruders, hotends, bearings and their configuration, Linear Advance etc. My goal was to get best results possible, make it more reliable, quiet and in the same time make it faster. In this guide I will try to explain every upgrade i have made, why it was necessary and what it gives. Read it and say what You think about it in the comments. And remember that the more You dig in this topic the more imperfections of Your prints you will see. (Master Yoda style xD) I have added to this thing a few of my designs so it will be easier for You to download them.
1. Silencio!
I3 Mega is a very good printer out of the box, but it has really big issue. It sounds like a giant fan! First thing that You want to do is to swap cheap, Chinese fans for better ones, for example Noctua, or some other brand that You know is good. I'm using SilentiumPC Zephyr fans, but it's a Polish brand so it may be hard to get for You. They are cheap and really silent for its price.
You will need:
PSU: 60x60x15mm fan (original one is rated 14V, but I have installed standard 12V fan and it's working fine)
Motherboard cooler: 50x50x10mm 12V
Hotend radiator cooler: 40x40x10mm 12V
Nozzle fan - This one isn't standard fan and I couldn't find a good replacement. Also it's a turbine so it's normal that it will make some noise. I suggest leaving it as it is because it's working great.
Of course I was trying different cooling ducts which were using non turbo fans. What I have tested:
https://www.thingiverse.com/thing:2577163
https://www.thingiverse.com/thing:2635522
https://www.thingiverse.com/thing:2529499
and probably some others which I couldn't find now.
Conclusions:
DO NOT use non turbo fans for material cooling! Especially the silent ones. They are silent because, they are using better bearings, but they also pump less air. When printing with PLA it was giving worse results then the original fan duct. If You are printing with PETG or ABS mainly - go for it. If your main material is PLA don't waste your time on this topic. Of course You can install non silent fan which will make wind like crazy, but it will not be silent and probably the original fan and fanduct will be still better.
What You can consider installing:
https://www.thingiverse.com/thing:2457516
or this part:
https://www.thingiverse.com/thing:2706092
(I was trying only the first one)
Original cover has a lot of holes which are making whining noise when the air is going through them. Installing this covers will get rid of this annoying sound.
2. Silencio is not enough!
Now Your 3D printer is deprived of one third of its noise. When You will start to print, You will realize that the most annoying sound that CNC machines are making - stepper sound is now in the foreground. Solution for getting rid of this is really simple - You need to swap Your cheap A4988 drivers for better ones. I'm using TMC2208 which I bought here:
http://bit.ly/TMC2208
They are easy to install. You just need to throw out old ones and put new ones in their place. Then You just need to invert your stepper motor spin direction by connecting stepper connectors upside down or by inverting it in firmware. (Firmware things later) Except that they will make Your printer deadly silent, they will improve print quality (A4988 has 1/16 microstepping, TMC2208 has 1/256) also You are able to make your 3D printer smart with them, but I will talk about it later.
EDIT: 11.2019 - Today You should choose TMC2209: http://bit.ly/TMC-2209
ATTENTION!
Before You will order them check Your motherboard. New version of I3 Mega has 32 bit motherboard and it has non swapable drivers. My friend desoldered them and soldered TMC2208. It is working fine, but unless You are familiar with hot-air soldering don't even think about it.
You can watch swapping process, and sound comparison on my video about it here:
https://www.youtube.com/watch?v=efpZR1sLH6o
It's in Polish language, but it should be easy to follow even if You don't understand a word.
3. Silencio is STILL not enough! - Optional! - Really not worth the effort
Your 3D printer should be almost silent now. The only thing which can irritate You now is rattling sound of standard linear bearings. The easiest solution? Swap standard bearings for polymer bushings! Great idea! No moving parts, self-lubricating, silent!
Unfortunately it's not that awesome as it sounds.
Most popular solution that i see very often is Igus RJ4JP-01-08 bearing probably because It's relatively cheap. I will say it straight. Don't waste Your time on them! They are all polymer and even a small tension will bend them and create friction. I was working on them for a while. I have even designed my own holders which are holding bearings by using small stripes, and not creating tension on them. You can find them here:
https://www.thingiverse.com/thing:2791727
Conclusion:
Even with proper setup (Which is really hard to achieve) they will not run as smooth as original bearings. Also they will have higher clearance (which is bad) because they need to be squished with some force in the casing which is impossible to do at home without press.
If You still want to have silent bearings here is a solution:
Use Igus RJZM-02-08. These are also polymer bushings but closed in metal case which allows them to ensure proper clerance and they will not bend under tension. You will find them here:
http://bit.ly/2GecZat
I'm using them with Igus high precision aluminum shaft:
http://bit.ly/2GendaF
Polymer bushings are working better with them, bearings should last longer and the printer is much lighter. Also it looks cool because these shafts are black! For the heated bed You need 2 x 360 mm shafts and for X carriage 2 x 330 mm. Don't use these shafts with standard linear bearings. Steel balls in bearings will ruin the shaft really quickly. It's not crucial upgrade - You can use RJZM-02-08 with original rods.
Caution! After some time I realized that these shafts are bending under the weight of the direct carriage. Aluminum shafts under the bed probably do the same which makes weird stuff with printer geometry. I highly recommend to stick with original steel shafts.
IMPORTANT THING TO CHECK
Even if You are not changing shafts, check if Your bed shafts are rotating freely in the clamps. Mine were not and this means that the clamps are not aligned properly. This can make your shafts bend a bit and it will cause problems with leveling and in critical situation even some weird things with layering. It's way more important with aluminum shafts because they are less stiff than original ones. To align them properly grab a 8 mm drill and put it in the clamp. (Use side without cutting edge) Bend it a bit in proper way, then put shaft inside and check if it's aligned better. Repeat for all the clamps.
When clamps are aligned properly, You should be able to easily rotate shafts when they are in both clamps (but without tightened screws).
The best bearing holders I found and which I'm using with RJZM-02-08 are these:
https://www.thingiverse.com/thing:1062598
I have printed mine with ABS and I can recommend them to You.
Now, if You installed properly Igus RJZM-02-08 in mentioned above holders Your Y plate should run smoothly without using too much force. You're happy now so You're installing heated bed, leveling it, and...? Probably It's not moving as freely as before installing the bed!
Why? It's because standard Y plate is made with not stiff enough material and when you compress the springs when leveling the bed it's bending a bit and it's misaligning bearings.
Solution?
Get rid of springs and use self-locking nuts with for example my nut covers:
https://www.thingiverse.com/thing:2843274
Leveling in this way may be a bit tricky, but it will not create unnecessary tension on Y plate. (If You will level it correctly) Quick leveling guide:
Level one bed corner and tighten nut under it.
Level opposite bed corner and tighten nut under it.
Level one of two last corners and tighten nut under it
Now check if three leveled corners are at proper height, and correct them if needed.
Level last corner and tighten nut under it. Do not touch the rest now.
Now Your bed should be leveled without creating unnecessary tension. There is one more advantage of leveling the bed without springs. Now when You dismount bed from the plate and install it again it will probably by leveled immediately or it will need only small correction.
If Your Y plate is bent already I suggest You to install better Y plate. I'm using this one:
http://bit.ly/2pMdqmX
It will fit Your I3 Mega, but original belt holder will not, so I have created new belt holder which You can find here:
https://www.thingiverse.com/thing:2843271
Now when everything is straight it should move properly. Theoretically these bearings are self-lubricating but I found that they are running much smoother with a bit of lithium grease.
4. No wobble please
My I3 mega was equipped with non elastic couplers for connecting Z motors with lead screw. It would be a good solution if everything were parallel and straight, but this is Chinese, cheap 3D printer and trust me it will never be machined well enough. It was giving me a bit of Z wobble effect, so I have switched from stock couplers for elastic ones:
http://bit.ly/2jNzA4U (25 mm diameter will not fit, this is just example)
It was much better, but these cheap couplers may also be not machined precise enough. For example: In one of mine couplers 5 mm hole was not on the axis with 8 mm. They are also bad for one big reason. Screw and motor axis are locked by pressing to a wall by the screw. It's not a ideal way to set two rods in one axis, so I bought better couplers for use with cnc machines:
http://bit.ly/2rAuptv
http://bit.ly/2IxDgSo
You need 5 mm to 8 mm coupler with 20 mm diameter. (I'm using the second one)
These are machined a lot better, and they are clamping on shafts which should set them in axis a lot better. I have also inserted 6.5 mm steel ball inside the couplers. (between the shafts) It makes them work even better.
5. Forget about leveling
This part is easy but it requires modifying firmware. It gives You the ability to do everything with Your printer but it requires some coding skills. Unless You are familiar with Arduino and coding skip this step for now.
I'm using dual Z endstops and BLtouch. Why? When printer is homing Z axis dual Z endstops are synchronizing Z motors, so the X axis is always at the same angle to heated bed. Then the probe is measuring the distance to bed and it's setting the nozzle always at the same height from the bed. It's also compensating for not ideally flat bed.
For Autoleveling I'm using Unified Bed Leveling system. You can read about it here:
http://bit.ly/2GdQB10
Ok so what You need? You need some probe to measure the distance between X carriage and heated bed. I'm using BLTouch which You can find here:
http://bit.ly/2Qi7GPd
You can install it to original X carriage by using my mount:
https://www.thingiverse.com/thing:2824005
Or You can read next point.
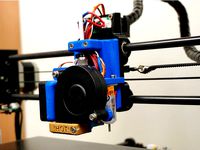
6. New X carriage
I really liked original X Carriage, but when I started to tinker with bearings etc. it started to be really painful. You need to disassemble it almost completely when You want to change the bearings or bearing holders. Also it has one big disadvantage especially when using polymer bushings. When You assemble it You need to manually set bearing holders parallel when tightening the screws. It's simply time consuming and not worth the effort, so I have remixed one of Prusa X carriages to fit our printer. I have also added place for pcb and cable holder. You can find it here:
https://www.thingiverse.com/thing:2838383
It's simply much easier to use, it has less screws and You don't need to set Your bearings parallel because it's doing it for You. When using this X carriage You will need to invert X motor spin direction, and probably make X endstop leaver a bit shorter.
Now You need to make holder for hotend, cooling etc. If you want to use bowden I suggest You to use this:
https://www.thingiverse.com/thing:2023947
I was using it for some time and it was working great. To build this You will need:
5015 Sunon Fan: http://bit.ly/2pLkG2l
40x40x10mm 12V fan: http://bit.ly/2FMJ0X3
J-Head v6 (E3D V6 clone): http://bit.ly/2uslKNx
BLTouch if You don't have it already: http://bit.ly/2p8kWYe
I have also installed this heat block and sock:
http://bit.ly/2IBMH7i
On Chinese J-Head V6 heatblock is smaller than original one from E3D, so I have ordered this. It's also Chinese but with this You can install original socks from E3D which I also recommend. They keep the heat inside so material can cool quicker and also it prevents cooling heat block by material cooling fan.
Here are original E3D socks, which I'm using:
http://bit.ly/2Gdt7sH
Does not matter if You stay with standard X carriage or You are making a new one. In both cases I suggest You to install this:
Capricornus PTFE Tube (1 meter is more than enough): http://bit.ly/2I9GUXe
This tube has smaller inner diameter than standard bowden tube, so the filament has less clearance there. It will help a bit with retraction and it will make laying the material a bit more precise.
7. We need more precision
If You are printing with 0.1 mm layer height or maybe even 0.06 mm You can encounter problems while printing really small areas. (Even with 0.4mm nozzle. If You are going to use smaller nozzles You can be sure that this will happen) It will look like under-extrusion in for example circuits of small holes while everything else will be printed well. That's because standard extruder has too small resolution and it can't dose slowly really small amounts of material.
Solution?
Install Titan extruder. I'm using this one:
Titan extruder(E3D clone): http://bit.ly/2rn4u7r
You can use it with stock motor and it will work well, but there may be a problem with retraction. Stock stepper is not high speed and max retraction speed which I was able to achieve without loosing steps was about 30 mm / s (I do not remember exactly, sorry)
This wasn't satisfying me, so I have installed better stepper motor:
http://bit.ly/2G6NE2e
This is original stepper motor from E3D designed to use with Titan extruder. With this stepper I'm using retraction speed 45 mm/s. It can go higher but I found that too high speed is also not so good. It's 400 steps per revolution, so it gives twice more resolution than standard engine. Titan extruder + this engine = six times more resolution than in stock I3 mega. I don't think that we need so high resolution here but the truth is that more is better. You can order "Set 2" of titan extruder mentioned above and it will come with pancake stepper motor.
8. Making bowden extruder more reliable
If You need to use really long retracion for example 6 mm there's obviously something wrong with Your setup. The first thing You should check are pneumatic fittings. In cheap Chinese 3D printers we have cheap Chinese pneumatic fittings. Are You surprised? xD They may work as they should but sooner or later they will get loose. Take a black marker and make a line on bowden tube close to the fittings. Now print some retraction tests and observe lines which You have made. If they are moving back and forth when retraction is going this means that Your setup is not reliable. There are two ways of fixing it:
First - temporary. If You take Your bowden out of the pressing You should see that Your tube is grinded in place which fitting was holding it. You can make Your tube a bit shorter so the pneumatic fitting will hold the tube in new non grinded place. Make new line and check if it's still moving.
Second - permanent. Use high quality pneumatic fittings or print this:
https://www.thingiverse.com/thing:1993384
I was using it for some time and it fixed my problems. Just remember to tighten it with filament inside the tube. It will squish the tube and at the beginning filament may not move as easy as it should. After some time the tube will adapt to this fitting and everything will work as it should. Still make mark on the tube and observe it. If it's moving tighten the nut more.
9. Preassure problems and Linear Advance
At this point I was happy with the results, so I started increasing some speeds. Bowden printers are ment to be fast, X carriage is much lighter than on direct extruder printers, isn't it? And here we go again it's not as good as it should be. In bowden type printers the pressure needs to build up inside the bowden tube and only after that the pressure behind the nozzle is enough for printing line as it should be printed. But there is a problem. If we stop printing this line especially if it's printed with higher speed for example 80 mm/s and next printed line is outline which in my case was printed with 30 mm/s the pressure which was builded up in the tube makes this new line much thicker than it should be. Some people are getting rid of this effect by using negative extra retraction distance, but in mine opinion it's really stupid idea... Yes it will fix it but when You will print something which needs a lot of retraction for example this:
https://www.thingiverse.com/thing:1388237
In better case You will end up with a lot of under-extrusion. In the worst case Your printer will stop to print at some point because the filament will be going more backwards than inwards. You can also use coasting but it's not complex solution in some cases it can create under-extrusion and still not fix the problem in every place which it's appearing.
The proper way to fix this problem is to use Linear Advance in Marlin. (Again You need to be able to modify your firmware and understand what You are doing) Linear Advance and problems with pressure are greatly described here:
http://bit.ly/2G6ZNEh
So i will not talk about it much here, because I can't explain it better.
In my case K value was somewhere about 0.3 - 0.5 mm. It fixed the problem but here another problem appeared. Linear Advance requires high E Jerk value to work without reducing printing acceleration if You have as high K value as me. When I was using E jerk at 10 it was almost not reducing acceleration, but the extruder was loosing steeps while retraction. So I was made to reduce it to standard value - 5. But printing acceleration was reduced so much now that whole "Great, fast bowden" experience was messed up - printing time was really high now. I will quote the Linear Advance author's words:
It’s like painting a picture: try to paint with a 1m long brush, grabbing the rear end of the handle which is made from rubber. Even if you try to compensate for the wobbly brush tip (which is basically what LIN_ADVANCE does), it will never be as good as using a usual brush.
At this point I have realized that there is only one solution to get fast and accurate prints - Direct extruder.
10. Goliathus Extruder
I was looking for good X carriage which will be as good and compact as this which I was already using but with place for Titan extruder. Unfortunately I couldn't find one so again I was made to create my own - Goliathus Extruder:
https://www.thingiverse.com/thing:2894777
I'm still using Linear Advance with this one but the K value is 0.05 mm which does not require high E jerk value and In the same time it's not limiting my acceleration.
Conclusion:
With direct extruder I'm printing faster than with bowden extruder (Which was meant to be faster...) and in the same time I'm getting more accurate prints. Also retraction is easier to set up, it's shorter and faster so also it takes less time which also means shorter printing times. Changing the filament is also easier and faster. There is only one disadvantage of this setup - ghosting in X axis is a bit more visible but it's a small price for so many advantages.
If You don't know how to calibrate Your Flowrate check this guide: http://bit.ly/2V2uXEF
11. Let's make heating faster!
Heat bed insulation is the first upgrade I'm doing on every new 3D printer that I'm going to keep. For this I'm using cotton insulation:
http://bit.ly/2z2oxyr
You need 220 x 220 for I3 Mega. Use glue for styrofoam and sponge. This simple mod will make Your heated bed more efficient and it will be possible to achieve higher temperatures.
If you are going to use PID bed control which is stressing Mosfet a bit more than standard BANG BANG system I suggest You to install Mosfet on Your printer. I'm using this one:
http://bit.ly/2gZkxnQ
You will also need a holder to install it but I have made one some time ago:
https://www.thingiverse.com/thing:2758279
It will also remove some stress from the motherboard because now most current will bypass it.
Attention!
Do next step at Your own risk! (Like every mod, but it's crucial here).
If You want Your bed to heat faster and to be able to reach even higher temps You can do really simple mod. On Your PSU You can find small potentiometer close to the connectors. You can increase output voltage a bit by turning it. Take a multimeter and measure the output. It should be around 12V. Now by turning the potentiometer set it for example at 13V (I have set mine somewhere between 13 - 14 V I don't remember) By increasing the voltage You will increase current going through heaters and as a result also power.
When it was setup for 12V the current going through bed heater were about 13,33A (I guess, but it's just an example. I assume that the bed heater resistance is 0,9 Ohm) This means about 160 Watts of power. When we increase it by 1V, current will be 14,44A so the Output power on heated bed will be around 187,7W. So by increasing the voltage by ~8,3% we have increased the output power by ~17,3%. This means of course - faster heating and higher temps easier to achieve. Our PSU has some unused power, so we can utilize it here. After adjusting the voltage don't forget to do PID tuning because old values will not work now.
More about PID tuning:
http://bit.ly/2G7oSyY
12. No more SD card!
Printing from SD card is really comfortable at the beginning, but when You start to tinker with Your printer, calibrate flow, jerks, accelerations etc it's beginning to be annoying. You can easily take Your printing to next level by making Octoprint server on Raspberry Pi.
Octoprint will allow You to control everything on Your 3D printer wirelessly from Your PC or smartphone and even from the internet if You want. You can connect web cam to raspberry and check if Your print is going on fine. If something is going wrong, You can just pause it or stop it being on the second side of the earth. Isn't that awesome? If You want to print something You simply drag and drop Your Gcode file on the page in Your browser or You can connect Cura to Octoprint and control it from there.
You can find OctoPrint download and starting guide here:
http://bit.ly/2G8V8BU
You will of course need Raspberry Pi. The best experience You will get with Raspberry Pi 3 which You can find here:
http://bit.ly/2G7uqcM
It will run fast and smooth. You can use Web cam and stream video without problems. You can even play games from PlayStation One, when You don't use it as a Server... :)
If You want to go cheaper and You are not going to use Web Cam, You can use Raspberry Pi Zero W:
http://bit.ly/2jPS5Wg
It's smaller, cheaper but it's also a bit slower - startup time is longer and plugins are installing slower. Also You can't use web cam because it will not handle - there will be problems with printing when You will try to stream video.
I wanted to close it inside my I3 Mega and power it from PSU, so I bought this 5A DC-DC Step Down module:
http://bit.ly/2Icevjl
I have connected it to PSU and set up output voltage for 5V. Then I have soldered it to GPIO pins (ground and 5V) of Raspberry. Now when I switch my I3 Mega on server is starting automatically and after a few minutes I'm able to control it from my web browser.
Unfortunately closing it inside metal case of I3 Mega limited the range of Wifi so much that it wasn't working well because my router is 2 rooms away from my printer. But It's not a big problem. I have simply added external antenna to my raspberry. You can find more about it here:
http://bit.ly/2G8YKDC
If You are not good with soldering really small things, give Your raspberry to someone who will make this mod for You.
You can find external Wifi Antenna here:
http://bit.ly/2Iuoyj9
After adding Raspberry to my printer, touch screen and SD card slot became useless for me, so I have disconnected these from the motherboard.
13. Let's play with Marlin
Now it's time for the fun part. If You just want to have the possibility of using Autoleveling and making Your TMC drivers controllable from Gcode but without losing the support for touch screen, You should flash this:
http://bit.ly/2Gc34lL
I was using it for some time, so I know that it's working. Benefits of installing it even if You are not going to use AutoLevel? You will never hear this annoying melody again when switching the printer on! :) Of course there is more technical advantages.
Disadvantage of using it? No Outage support. Also now Voltage going to material cooling fan is not limited so it will blow like crazy. Simply use 70% for maximum fan speed and it will work same as before.
14. My custom Marlin configuration
In download section You will find my custom Marlin configuration. The goal was to disable every unnecessary function and in the same time make use of every feature possible. It allows me to easily flash every new marlin version without porting for example Anycubic tft support etc. I have also disconnected filament sensor, because it was only annoying me and really it didn't help me even once.
What You can except from my configuration:
No SD card support
No filament sensor support
No beeper
No Screen support
You can adjust stepper current just by sending command through terminal
Stepper drivers are reducing current when they are only holding position - less heat, less power consumed = more efficient 3D printer.
BLtouch support
Linear Advance setup for Goliathus extruder
Jerk Controlled Motion
UBL
And some other small but important changes.
I will be updating it regularly, so look for fresh version in download section.You need to have TMC2208 library installed to be able to compile it.
Of course if You know what You are doing it's easy to turn SD card or filament sensor back on. If You want to use my setup You need to connect a few things like this:
BLTouch probe signal - D15
BLTouch control signal (Moving pin up and down) - D11
TMC2208 - X Axis PDN_UART - D21
TMC2208 - Y Axis PDN_UART - D14
TMC2208 - Z1 and Z2 stepper PDN_UART - D4
TMC2208 - E stepper PDN_UART - D20
ATTENTION!
By using D15 pin for the probe You will probably stop Your touch screen from working. If You are going to keep original screen just use another free pin. (Thanks to rronni for reporting this) You will have to change this line:
#define Z_MIN_PROBE_PIN 15
in the file pins_TRIGORILLA_13.h.
Before You will be able to connect TMC with PDN_UART to motherboard You need to prepare them. You can find short visual tutorial here:
http://bit.ly/2Gd9Yag
When You are done this will help You - Trigorilla pinout documentation:
https://www.thingiverse.com/thing:2485534
I still do not recommend flashing my config unless You are sure what You are doing. Also simply copying and pasting my config to fresh Marlin will not work because I have made there changes in pins_TRIGORILLA_13.h. It's build upon 13.05.2018 bugfix version so this config will not work with actual stable version.
The easiest way to check if TMC's are connected properly in smart mode is to send "M906 X5 Y5 Z5" command which will set X, Y and Z motors current to 5 mA. Then send commands to move each axis. For example G0 X100. (Do it for each Axis) If motor doesn't spin or it's easy to stop by hand - You are good to go. Set proper motor current for each Axis with M906 command and save the settings.
15. Slicer and printer tuning
This is probably most time consuming part. I will not be teaching You here how to do it but I can give You some tips:
Do not change X, Y, Z steps / mm values. These are calculated and it can't be better. If dimensions slightly do not match your project it's more flowrate calibration problem not the Axis steps. Also remember that small holes are often printed smaller. I'm just compensating for it, when i'm designing something.
With Goliathus extruder for PLA I use 0.5 mm retraction distance, 45 mm / s speed and 2000 acceleration. No stringing, no oozing, no loosed steps. I was using higher speeds and accelerations for some time but it was causing problems sometimes.
With bowden but also with Jhead v6 I was using retraction distance less than 3 mm. (Again I do not remember exact value. It was probably even lower)
Use slow unretract speed. I'm using 20 mm / s. High unretract speed may cause thicker lines after retraction.
Use high travel speed. I'm using only 200 mm / s (which is low) but I'm going for silence my friend. At higher speeds I was made to use Spread cycle which is louder and I didn't like it. But it was working great even with 380 mm / s and 4000 acceleration! Btw. It sounded like shooting with AK-47. (I was working with these speeds on old marlin version.)
Check your skew by printing this and measuring distances: https://www.thingiverse.com/thing:2563185
In my case it was almost ideal (That really surprised me) so I didn't have to compensate it in Marlin skew compensation.
Do not forget about calibrating Your E steps when You change something in Your extruder! :)
Here are some other settings which I'm using at the moment:
Outer shell Speed 30 mm/s, acceleration 800.
Inner shell Speed 60 mm/s, acceleration 1500.
Infill speed 80 - 100 mm/s (it depends), acceleration 3000.
Default printing speed 60 mm/s, default acceleration 3000.
Travel speed 200 mm/s, acceleration 4000.
Bottom Solid fill speed 40 mm/s, acceleration 3000.
Top Solid fill speed 30 mm/s, acceleration 3000.
These are mostly standard settings, but I didn't have time to push it more. Probably I will do it in the future but for now I'm using it like this.
I know that some of You guys will ask, so I will write it here:
I'm using IdeaMaker.
For me it's the best, free slicer ever.
(Now I'm using also Cura. It depends on the application)
16. Y Belt Tensioner
This one is really simple, just print and install this:
https://www.thingiverse.com/thing:2789837
It's plug & play and it just makes belt tensioning easier. Also the belt roller will be supported in two points which is simply a better solution from engineer's point of view. In original configuration the screw may bend in time and it will be bad for bearing life in the roller.
Using for example springs for this (What I was doing for some time, as You can see on the photos) is not the best solution. It works (kind of) but it will make Your belt a bit springy, which is not good especially with polymer bearings. Firstly it may give You more ghosting. Secondly, when using polymer bushings which has more drag than standard linear bearings, it will make positioning hysteresis more noticeable. Especially when printing circles. They may be oval or have some weird start and end printing points. (I don't know how to explain it, but You will know when You will see it)
It would be great to have also X belt tensioner. Maybe I will design it in the future, but I'm more into designing my own 3d printer now. But we will see.
You can find this guide as videos on my channel here:
http://bit.ly/2vDdefa.
Part 1: https://www.youtube.com/watch?v=aUQ81NesJEc
Part 2: https://www.youtube.com/watch?v=8NVh-e2zEmw
Videos will be in Polish language, but if there will be a good feedback from international viewers (You my friend!) I will provide English subtitles.
There is a chance, that I didn't mention some things which I have made. As You can see there were a lot of different things going on so It's possible. Don't worry I will be updating this guide if I remember something.
That was really long adventure which consumed a few months of my life. If You are just a standard I3 Mega user which just want to improve something - stick to the guide. If You are not familiar with engineering stuff and 3D printers from development side You can really easily end up with worse results then You had at the beginning, a lot of frustration and wasted time. I have learned a lot during this time and I really know the consequences of improper upgrades - trust me.
Of course there may be a better X carriage, better bearings etc. I'm writing this guide only basing on my own experience, so I'm not recommending solutions which I wasn't testing.
If You find any typos etc. let me know in private message or in the comment section. English is not my native language, so it is very possible that there is a lot of mistakes.
You can share my guide on Your website if You will share it in unchanged form and Credit me and my social medias:
Youtube: https://www.youtube.com/user/petrzmax
Facebook: https://www.facebook.com/ArtekDiy
Changelog
03.06.2018 - Added new Marlin with some fixes and Jerk Controlled Motion. With the new Jerk Controlled Motion function I'm not using jerk control in my slicer settings. More about it here: http://bit.ly/2xEyxOB
08.07.2018 - Some text bugfixes and changes. Added point 16.
11.07.2018 - Added more result photos. (Still not ideal but it's close)
25.07.2018 - Added new version of Marlin based on 24.07.2018 bugfix. Attention! There is a bug (I hope it's a bug) when using faster travel speed then 135 mm/s the movement is stuttered. Just use 135 mm/s travel speed if You want to use this version.
06.08.2018 - Added new version of Marlin based on 06.08.2018 bugfix. Bug mentioned above is fixed. Max XY feed rate is capped to 180 mm/s, tmc hybrid mode is turned off, some acceleration and feed rate changes.
22.08.2018 - First part of the video is ready: https://www.youtube.com/watch?v=aUQ81NesJEc
05.10.2018 - Added new version of Marlin based on 04.10.2018 bugfix. Some problems with TMC's, LA and s-curve acceleration turned on on the same time seem to be fixed.
12.10.2018 - Added new version of Marlin based on 10.10.2018 bugfix. I have made some parameters tweaks. Second part of the video is ready: https://www.youtube.com/watch?v=8NVh-e2zEmw
05.11.2018 - Added new version of Marlin based on 05.11.2018 bugfix.
03.12.2018 - Added new version of Marlin based on 02.12.2018 bugfix.
21.02.2019 - Added crucial information about aluminium shafts.
25.02.2019 - Added new version of Marlin based on 25.02.2019 bugfix.
(This guide contains affiliate links)
Within the past few months I was working on my I3 Mega. I have tested a lot of different combinations of extruders, hotends, bearings and their configuration, Linear Advance etc. My goal was to get best results possible, make it more reliable, quiet and in the same time make it faster. In this guide I will try to explain every upgrade i have made, why it was necessary and what it gives. Read it and say what You think about it in the comments. And remember that the more You dig in this topic the more imperfections of Your prints you will see. (Master Yoda style xD) I have added to this thing a few of my designs so it will be easier for You to download them.
1. Silencio!
I3 Mega is a very good printer out of the box, but it has really big issue. It sounds like a giant fan! First thing that You want to do is to swap cheap, Chinese fans for better ones, for example Noctua, or some other brand that You know is good. I'm using SilentiumPC Zephyr fans, but it's a Polish brand so it may be hard to get for You. They are cheap and really silent for its price.
You will need:
PSU: 60x60x15mm fan (original one is rated 14V, but I have installed standard 12V fan and it's working fine)
Motherboard cooler: 50x50x10mm 12V
Hotend radiator cooler: 40x40x10mm 12V
Nozzle fan - This one isn't standard fan and I couldn't find a good replacement. Also it's a turbine so it's normal that it will make some noise. I suggest leaving it as it is because it's working great.
Of course I was trying different cooling ducts which were using non turbo fans. What I have tested:
https://www.thingiverse.com/thing:2577163
https://www.thingiverse.com/thing:2635522
https://www.thingiverse.com/thing:2529499
and probably some others which I couldn't find now.
Conclusions:
DO NOT use non turbo fans for material cooling! Especially the silent ones. They are silent because, they are using better bearings, but they also pump less air. When printing with PLA it was giving worse results then the original fan duct. If You are printing with PETG or ABS mainly - go for it. If your main material is PLA don't waste your time on this topic. Of course You can install non silent fan which will make wind like crazy, but it will not be silent and probably the original fan and fanduct will be still better.
What You can consider installing:
https://www.thingiverse.com/thing:2457516
or this part:
https://www.thingiverse.com/thing:2706092
(I was trying only the first one)
Original cover has a lot of holes which are making whining noise when the air is going through them. Installing this covers will get rid of this annoying sound.
2. Silencio is not enough!
Now Your 3D printer is deprived of one third of its noise. When You will start to print, You will realize that the most annoying sound that CNC machines are making - stepper sound is now in the foreground. Solution for getting rid of this is really simple - You need to swap Your cheap A4988 drivers for better ones. I'm using TMC2208 which I bought here:
http://bit.ly/TMC2208
They are easy to install. You just need to throw out old ones and put new ones in their place. Then You just need to invert your stepper motor spin direction by connecting stepper connectors upside down or by inverting it in firmware. (Firmware things later) Except that they will make Your printer deadly silent, they will improve print quality (A4988 has 1/16 microstepping, TMC2208 has 1/256) also You are able to make your 3D printer smart with them, but I will talk about it later.
EDIT: 11.2019 - Today You should choose TMC2209: http://bit.ly/TMC-2209
ATTENTION!
Before You will order them check Your motherboard. New version of I3 Mega has 32 bit motherboard and it has non swapable drivers. My friend desoldered them and soldered TMC2208. It is working fine, but unless You are familiar with hot-air soldering don't even think about it.
You can watch swapping process, and sound comparison on my video about it here:
https://www.youtube.com/watch?v=efpZR1sLH6o
It's in Polish language, but it should be easy to follow even if You don't understand a word.
3. Silencio is STILL not enough! - Optional! - Really not worth the effort
Your 3D printer should be almost silent now. The only thing which can irritate You now is rattling sound of standard linear bearings. The easiest solution? Swap standard bearings for polymer bushings! Great idea! No moving parts, self-lubricating, silent!
Unfortunately it's not that awesome as it sounds.
Most popular solution that i see very often is Igus RJ4JP-01-08 bearing probably because It's relatively cheap. I will say it straight. Don't waste Your time on them! They are all polymer and even a small tension will bend them and create friction. I was working on them for a while. I have even designed my own holders which are holding bearings by using small stripes, and not creating tension on them. You can find them here:
https://www.thingiverse.com/thing:2791727
Conclusion:
Even with proper setup (Which is really hard to achieve) they will not run as smooth as original bearings. Also they will have higher clearance (which is bad) because they need to be squished with some force in the casing which is impossible to do at home without press.
If You still want to have silent bearings here is a solution:
Use Igus RJZM-02-08. These are also polymer bushings but closed in metal case which allows them to ensure proper clerance and they will not bend under tension. You will find them here:
http://bit.ly/2GecZat
I'm using them with Igus high precision aluminum shaft:
http://bit.ly/2GendaF
Polymer bushings are working better with them, bearings should last longer and the printer is much lighter. Also it looks cool because these shafts are black! For the heated bed You need 2 x 360 mm shafts and for X carriage 2 x 330 mm. Don't use these shafts with standard linear bearings. Steel balls in bearings will ruin the shaft really quickly. It's not crucial upgrade - You can use RJZM-02-08 with original rods.
Caution! After some time I realized that these shafts are bending under the weight of the direct carriage. Aluminum shafts under the bed probably do the same which makes weird stuff with printer geometry. I highly recommend to stick with original steel shafts.
IMPORTANT THING TO CHECK
Even if You are not changing shafts, check if Your bed shafts are rotating freely in the clamps. Mine were not and this means that the clamps are not aligned properly. This can make your shafts bend a bit and it will cause problems with leveling and in critical situation even some weird things with layering. It's way more important with aluminum shafts because they are less stiff than original ones. To align them properly grab a 8 mm drill and put it in the clamp. (Use side without cutting edge) Bend it a bit in proper way, then put shaft inside and check if it's aligned better. Repeat for all the clamps.
When clamps are aligned properly, You should be able to easily rotate shafts when they are in both clamps (but without tightened screws).
The best bearing holders I found and which I'm using with RJZM-02-08 are these:
https://www.thingiverse.com/thing:1062598
I have printed mine with ABS and I can recommend them to You.
Now, if You installed properly Igus RJZM-02-08 in mentioned above holders Your Y plate should run smoothly without using too much force. You're happy now so You're installing heated bed, leveling it, and...? Probably It's not moving as freely as before installing the bed!
Why? It's because standard Y plate is made with not stiff enough material and when you compress the springs when leveling the bed it's bending a bit and it's misaligning bearings.
Solution?
Get rid of springs and use self-locking nuts with for example my nut covers:
https://www.thingiverse.com/thing:2843274
Leveling in this way may be a bit tricky, but it will not create unnecessary tension on Y plate. (If You will level it correctly) Quick leveling guide:
Level one bed corner and tighten nut under it.
Level opposite bed corner and tighten nut under it.
Level one of two last corners and tighten nut under it
Now check if three leveled corners are at proper height, and correct them if needed.
Level last corner and tighten nut under it. Do not touch the rest now.
Now Your bed should be leveled without creating unnecessary tension. There is one more advantage of leveling the bed without springs. Now when You dismount bed from the plate and install it again it will probably by leveled immediately or it will need only small correction.
If Your Y plate is bent already I suggest You to install better Y plate. I'm using this one:
http://bit.ly/2pMdqmX
It will fit Your I3 Mega, but original belt holder will not, so I have created new belt holder which You can find here:
https://www.thingiverse.com/thing:2843271
Now when everything is straight it should move properly. Theoretically these bearings are self-lubricating but I found that they are running much smoother with a bit of lithium grease.
4. No wobble please
My I3 mega was equipped with non elastic couplers for connecting Z motors with lead screw. It would be a good solution if everything were parallel and straight, but this is Chinese, cheap 3D printer and trust me it will never be machined well enough. It was giving me a bit of Z wobble effect, so I have switched from stock couplers for elastic ones:
http://bit.ly/2jNzA4U (25 mm diameter will not fit, this is just example)
It was much better, but these cheap couplers may also be not machined precise enough. For example: In one of mine couplers 5 mm hole was not on the axis with 8 mm. They are also bad for one big reason. Screw and motor axis are locked by pressing to a wall by the screw. It's not a ideal way to set two rods in one axis, so I bought better couplers for use with cnc machines:
http://bit.ly/2rAuptv
http://bit.ly/2IxDgSo
You need 5 mm to 8 mm coupler with 20 mm diameter. (I'm using the second one)
These are machined a lot better, and they are clamping on shafts which should set them in axis a lot better. I have also inserted 6.5 mm steel ball inside the couplers. (between the shafts) It makes them work even better.
5. Forget about leveling
This part is easy but it requires modifying firmware. It gives You the ability to do everything with Your printer but it requires some coding skills. Unless You are familiar with Arduino and coding skip this step for now.
I'm using dual Z endstops and BLtouch. Why? When printer is homing Z axis dual Z endstops are synchronizing Z motors, so the X axis is always at the same angle to heated bed. Then the probe is measuring the distance to bed and it's setting the nozzle always at the same height from the bed. It's also compensating for not ideally flat bed.
For Autoleveling I'm using Unified Bed Leveling system. You can read about it here:
http://bit.ly/2GdQB10
Ok so what You need? You need some probe to measure the distance between X carriage and heated bed. I'm using BLTouch which You can find here:
http://bit.ly/2Qi7GPd
You can install it to original X carriage by using my mount:
https://www.thingiverse.com/thing:2824005
Or You can read next point.
6. New X carriage
I really liked original X Carriage, but when I started to tinker with bearings etc. it started to be really painful. You need to disassemble it almost completely when You want to change the bearings or bearing holders. Also it has one big disadvantage especially when using polymer bushings. When You assemble it You need to manually set bearing holders parallel when tightening the screws. It's simply time consuming and not worth the effort, so I have remixed one of Prusa X carriages to fit our printer. I have also added place for pcb and cable holder. You can find it here:
https://www.thingiverse.com/thing:2838383
It's simply much easier to use, it has less screws and You don't need to set Your bearings parallel because it's doing it for You. When using this X carriage You will need to invert X motor spin direction, and probably make X endstop leaver a bit shorter.
Now You need to make holder for hotend, cooling etc. If you want to use bowden I suggest You to use this:
https://www.thingiverse.com/thing:2023947
I was using it for some time and it was working great. To build this You will need:
5015 Sunon Fan: http://bit.ly/2pLkG2l
40x40x10mm 12V fan: http://bit.ly/2FMJ0X3
J-Head v6 (E3D V6 clone): http://bit.ly/2uslKNx
BLTouch if You don't have it already: http://bit.ly/2p8kWYe
I have also installed this heat block and sock:
http://bit.ly/2IBMH7i
On Chinese J-Head V6 heatblock is smaller than original one from E3D, so I have ordered this. It's also Chinese but with this You can install original socks from E3D which I also recommend. They keep the heat inside so material can cool quicker and also it prevents cooling heat block by material cooling fan.
Here are original E3D socks, which I'm using:
http://bit.ly/2Gdt7sH
Does not matter if You stay with standard X carriage or You are making a new one. In both cases I suggest You to install this:
Capricornus PTFE Tube (1 meter is more than enough): http://bit.ly/2I9GUXe
This tube has smaller inner diameter than standard bowden tube, so the filament has less clearance there. It will help a bit with retraction and it will make laying the material a bit more precise.
7. We need more precision
If You are printing with 0.1 mm layer height or maybe even 0.06 mm You can encounter problems while printing really small areas. (Even with 0.4mm nozzle. If You are going to use smaller nozzles You can be sure that this will happen) It will look like under-extrusion in for example circuits of small holes while everything else will be printed well. That's because standard extruder has too small resolution and it can't dose slowly really small amounts of material.
Solution?
Install Titan extruder. I'm using this one:
Titan extruder(E3D clone): http://bit.ly/2rn4u7r
You can use it with stock motor and it will work well, but there may be a problem with retraction. Stock stepper is not high speed and max retraction speed which I was able to achieve without loosing steps was about 30 mm / s (I do not remember exactly, sorry)
This wasn't satisfying me, so I have installed better stepper motor:
http://bit.ly/2G6NE2e
This is original stepper motor from E3D designed to use with Titan extruder. With this stepper I'm using retraction speed 45 mm/s. It can go higher but I found that too high speed is also not so good. It's 400 steps per revolution, so it gives twice more resolution than standard engine. Titan extruder + this engine = six times more resolution than in stock I3 mega. I don't think that we need so high resolution here but the truth is that more is better. You can order "Set 2" of titan extruder mentioned above and it will come with pancake stepper motor.
8. Making bowden extruder more reliable
If You need to use really long retracion for example 6 mm there's obviously something wrong with Your setup. The first thing You should check are pneumatic fittings. In cheap Chinese 3D printers we have cheap Chinese pneumatic fittings. Are You surprised? xD They may work as they should but sooner or later they will get loose. Take a black marker and make a line on bowden tube close to the fittings. Now print some retraction tests and observe lines which You have made. If they are moving back and forth when retraction is going this means that Your setup is not reliable. There are two ways of fixing it:
First - temporary. If You take Your bowden out of the pressing You should see that Your tube is grinded in place which fitting was holding it. You can make Your tube a bit shorter so the pneumatic fitting will hold the tube in new non grinded place. Make new line and check if it's still moving.
Second - permanent. Use high quality pneumatic fittings or print this:
https://www.thingiverse.com/thing:1993384
I was using it for some time and it fixed my problems. Just remember to tighten it with filament inside the tube. It will squish the tube and at the beginning filament may not move as easy as it should. After some time the tube will adapt to this fitting and everything will work as it should. Still make mark on the tube and observe it. If it's moving tighten the nut more.
9. Preassure problems and Linear Advance
At this point I was happy with the results, so I started increasing some speeds. Bowden printers are ment to be fast, X carriage is much lighter than on direct extruder printers, isn't it? And here we go again it's not as good as it should be. In bowden type printers the pressure needs to build up inside the bowden tube and only after that the pressure behind the nozzle is enough for printing line as it should be printed. But there is a problem. If we stop printing this line especially if it's printed with higher speed for example 80 mm/s and next printed line is outline which in my case was printed with 30 mm/s the pressure which was builded up in the tube makes this new line much thicker than it should be. Some people are getting rid of this effect by using negative extra retraction distance, but in mine opinion it's really stupid idea... Yes it will fix it but when You will print something which needs a lot of retraction for example this:
https://www.thingiverse.com/thing:1388237
In better case You will end up with a lot of under-extrusion. In the worst case Your printer will stop to print at some point because the filament will be going more backwards than inwards. You can also use coasting but it's not complex solution in some cases it can create under-extrusion and still not fix the problem in every place which it's appearing.
The proper way to fix this problem is to use Linear Advance in Marlin. (Again You need to be able to modify your firmware and understand what You are doing) Linear Advance and problems with pressure are greatly described here:
http://bit.ly/2G6ZNEh
So i will not talk about it much here, because I can't explain it better.
In my case K value was somewhere about 0.3 - 0.5 mm. It fixed the problem but here another problem appeared. Linear Advance requires high E Jerk value to work without reducing printing acceleration if You have as high K value as me. When I was using E jerk at 10 it was almost not reducing acceleration, but the extruder was loosing steeps while retraction. So I was made to reduce it to standard value - 5. But printing acceleration was reduced so much now that whole "Great, fast bowden" experience was messed up - printing time was really high now. I will quote the Linear Advance author's words:
It’s like painting a picture: try to paint with a 1m long brush, grabbing the rear end of the handle which is made from rubber. Even if you try to compensate for the wobbly brush tip (which is basically what LIN_ADVANCE does), it will never be as good as using a usual brush.
At this point I have realized that there is only one solution to get fast and accurate prints - Direct extruder.
10. Goliathus Extruder
I was looking for good X carriage which will be as good and compact as this which I was already using but with place for Titan extruder. Unfortunately I couldn't find one so again I was made to create my own - Goliathus Extruder:
https://www.thingiverse.com/thing:2894777
I'm still using Linear Advance with this one but the K value is 0.05 mm which does not require high E jerk value and In the same time it's not limiting my acceleration.
Conclusion:
With direct extruder I'm printing faster than with bowden extruder (Which was meant to be faster...) and in the same time I'm getting more accurate prints. Also retraction is easier to set up, it's shorter and faster so also it takes less time which also means shorter printing times. Changing the filament is also easier and faster. There is only one disadvantage of this setup - ghosting in X axis is a bit more visible but it's a small price for so many advantages.
If You don't know how to calibrate Your Flowrate check this guide: http://bit.ly/2V2uXEF
11. Let's make heating faster!
Heat bed insulation is the first upgrade I'm doing on every new 3D printer that I'm going to keep. For this I'm using cotton insulation:
http://bit.ly/2z2oxyr
You need 220 x 220 for I3 Mega. Use glue for styrofoam and sponge. This simple mod will make Your heated bed more efficient and it will be possible to achieve higher temperatures.
If you are going to use PID bed control which is stressing Mosfet a bit more than standard BANG BANG system I suggest You to install Mosfet on Your printer. I'm using this one:
http://bit.ly/2gZkxnQ
You will also need a holder to install it but I have made one some time ago:
https://www.thingiverse.com/thing:2758279
It will also remove some stress from the motherboard because now most current will bypass it.
Attention!
Do next step at Your own risk! (Like every mod, but it's crucial here).
If You want Your bed to heat faster and to be able to reach even higher temps You can do really simple mod. On Your PSU You can find small potentiometer close to the connectors. You can increase output voltage a bit by turning it. Take a multimeter and measure the output. It should be around 12V. Now by turning the potentiometer set it for example at 13V (I have set mine somewhere between 13 - 14 V I don't remember) By increasing the voltage You will increase current going through heaters and as a result also power.
When it was setup for 12V the current going through bed heater were about 13,33A (I guess, but it's just an example. I assume that the bed heater resistance is 0,9 Ohm) This means about 160 Watts of power. When we increase it by 1V, current will be 14,44A so the Output power on heated bed will be around 187,7W. So by increasing the voltage by ~8,3% we have increased the output power by ~17,3%. This means of course - faster heating and higher temps easier to achieve. Our PSU has some unused power, so we can utilize it here. After adjusting the voltage don't forget to do PID tuning because old values will not work now.
More about PID tuning:
http://bit.ly/2G7oSyY
12. No more SD card!
Printing from SD card is really comfortable at the beginning, but when You start to tinker with Your printer, calibrate flow, jerks, accelerations etc it's beginning to be annoying. You can easily take Your printing to next level by making Octoprint server on Raspberry Pi.
Octoprint will allow You to control everything on Your 3D printer wirelessly from Your PC or smartphone and even from the internet if You want. You can connect web cam to raspberry and check if Your print is going on fine. If something is going wrong, You can just pause it or stop it being on the second side of the earth. Isn't that awesome? If You want to print something You simply drag and drop Your Gcode file on the page in Your browser or You can connect Cura to Octoprint and control it from there.
You can find OctoPrint download and starting guide here:
http://bit.ly/2G8V8BU
You will of course need Raspberry Pi. The best experience You will get with Raspberry Pi 3 which You can find here:
http://bit.ly/2G7uqcM
It will run fast and smooth. You can use Web cam and stream video without problems. You can even play games from PlayStation One, when You don't use it as a Server... :)
If You want to go cheaper and You are not going to use Web Cam, You can use Raspberry Pi Zero W:
http://bit.ly/2jPS5Wg
It's smaller, cheaper but it's also a bit slower - startup time is longer and plugins are installing slower. Also You can't use web cam because it will not handle - there will be problems with printing when You will try to stream video.
I wanted to close it inside my I3 Mega and power it from PSU, so I bought this 5A DC-DC Step Down module:
http://bit.ly/2Icevjl
I have connected it to PSU and set up output voltage for 5V. Then I have soldered it to GPIO pins (ground and 5V) of Raspberry. Now when I switch my I3 Mega on server is starting automatically and after a few minutes I'm able to control it from my web browser.
Unfortunately closing it inside metal case of I3 Mega limited the range of Wifi so much that it wasn't working well because my router is 2 rooms away from my printer. But It's not a big problem. I have simply added external antenna to my raspberry. You can find more about it here:
http://bit.ly/2G8YKDC
If You are not good with soldering really small things, give Your raspberry to someone who will make this mod for You.
You can find external Wifi Antenna here:
http://bit.ly/2Iuoyj9
After adding Raspberry to my printer, touch screen and SD card slot became useless for me, so I have disconnected these from the motherboard.
13. Let's play with Marlin
Now it's time for the fun part. If You just want to have the possibility of using Autoleveling and making Your TMC drivers controllable from Gcode but without losing the support for touch screen, You should flash this:
http://bit.ly/2Gc34lL
I was using it for some time, so I know that it's working. Benefits of installing it even if You are not going to use AutoLevel? You will never hear this annoying melody again when switching the printer on! :) Of course there is more technical advantages.
Disadvantage of using it? No Outage support. Also now Voltage going to material cooling fan is not limited so it will blow like crazy. Simply use 70% for maximum fan speed and it will work same as before.
14. My custom Marlin configuration
In download section You will find my custom Marlin configuration. The goal was to disable every unnecessary function and in the same time make use of every feature possible. It allows me to easily flash every new marlin version without porting for example Anycubic tft support etc. I have also disconnected filament sensor, because it was only annoying me and really it didn't help me even once.
What You can except from my configuration:
No SD card support
No filament sensor support
No beeper
No Screen support
You can adjust stepper current just by sending command through terminal
Stepper drivers are reducing current when they are only holding position - less heat, less power consumed = more efficient 3D printer.
BLtouch support
Linear Advance setup for Goliathus extruder
Jerk Controlled Motion
UBL
And some other small but important changes.
I will be updating it regularly, so look for fresh version in download section.You need to have TMC2208 library installed to be able to compile it.
Of course if You know what You are doing it's easy to turn SD card or filament sensor back on. If You want to use my setup You need to connect a few things like this:
BLTouch probe signal - D15
BLTouch control signal (Moving pin up and down) - D11
TMC2208 - X Axis PDN_UART - D21
TMC2208 - Y Axis PDN_UART - D14
TMC2208 - Z1 and Z2 stepper PDN_UART - D4
TMC2208 - E stepper PDN_UART - D20
ATTENTION!
By using D15 pin for the probe You will probably stop Your touch screen from working. If You are going to keep original screen just use another free pin. (Thanks to rronni for reporting this) You will have to change this line:
#define Z_MIN_PROBE_PIN 15
in the file pins_TRIGORILLA_13.h.
Before You will be able to connect TMC with PDN_UART to motherboard You need to prepare them. You can find short visual tutorial here:
http://bit.ly/2Gd9Yag
When You are done this will help You - Trigorilla pinout documentation:
https://www.thingiverse.com/thing:2485534
I still do not recommend flashing my config unless You are sure what You are doing. Also simply copying and pasting my config to fresh Marlin will not work because I have made there changes in pins_TRIGORILLA_13.h. It's build upon 13.05.2018 bugfix version so this config will not work with actual stable version.
The easiest way to check if TMC's are connected properly in smart mode is to send "M906 X5 Y5 Z5" command which will set X, Y and Z motors current to 5 mA. Then send commands to move each axis. For example G0 X100. (Do it for each Axis) If motor doesn't spin or it's easy to stop by hand - You are good to go. Set proper motor current for each Axis with M906 command and save the settings.
15. Slicer and printer tuning
This is probably most time consuming part. I will not be teaching You here how to do it but I can give You some tips:
Do not change X, Y, Z steps / mm values. These are calculated and it can't be better. If dimensions slightly do not match your project it's more flowrate calibration problem not the Axis steps. Also remember that small holes are often printed smaller. I'm just compensating for it, when i'm designing something.
With Goliathus extruder for PLA I use 0.5 mm retraction distance, 45 mm / s speed and 2000 acceleration. No stringing, no oozing, no loosed steps. I was using higher speeds and accelerations for some time but it was causing problems sometimes.
With bowden but also with Jhead v6 I was using retraction distance less than 3 mm. (Again I do not remember exact value. It was probably even lower)
Use slow unretract speed. I'm using 20 mm / s. High unretract speed may cause thicker lines after retraction.
Use high travel speed. I'm using only 200 mm / s (which is low) but I'm going for silence my friend. At higher speeds I was made to use Spread cycle which is louder and I didn't like it. But it was working great even with 380 mm / s and 4000 acceleration! Btw. It sounded like shooting with AK-47. (I was working with these speeds on old marlin version.)
Check your skew by printing this and measuring distances: https://www.thingiverse.com/thing:2563185
In my case it was almost ideal (That really surprised me) so I didn't have to compensate it in Marlin skew compensation.
Do not forget about calibrating Your E steps when You change something in Your extruder! :)
Here are some other settings which I'm using at the moment:
Outer shell Speed 30 mm/s, acceleration 800.
Inner shell Speed 60 mm/s, acceleration 1500.
Infill speed 80 - 100 mm/s (it depends), acceleration 3000.
Default printing speed 60 mm/s, default acceleration 3000.
Travel speed 200 mm/s, acceleration 4000.
Bottom Solid fill speed 40 mm/s, acceleration 3000.
Top Solid fill speed 30 mm/s, acceleration 3000.
These are mostly standard settings, but I didn't have time to push it more. Probably I will do it in the future but for now I'm using it like this.
I know that some of You guys will ask, so I will write it here:
I'm using IdeaMaker.
For me it's the best, free slicer ever.
(Now I'm using also Cura. It depends on the application)
16. Y Belt Tensioner
This one is really simple, just print and install this:
https://www.thingiverse.com/thing:2789837
It's plug & play and it just makes belt tensioning easier. Also the belt roller will be supported in two points which is simply a better solution from engineer's point of view. In original configuration the screw may bend in time and it will be bad for bearing life in the roller.
Using for example springs for this (What I was doing for some time, as You can see on the photos) is not the best solution. It works (kind of) but it will make Your belt a bit springy, which is not good especially with polymer bearings. Firstly it may give You more ghosting. Secondly, when using polymer bushings which has more drag than standard linear bearings, it will make positioning hysteresis more noticeable. Especially when printing circles. They may be oval or have some weird start and end printing points. (I don't know how to explain it, but You will know when You will see it)
It would be great to have also X belt tensioner. Maybe I will design it in the future, but I'm more into designing my own 3d printer now. But we will see.
You can find this guide as videos on my channel here:
http://bit.ly/2vDdefa.
Part 1: https://www.youtube.com/watch?v=aUQ81NesJEc
Part 2: https://www.youtube.com/watch?v=8NVh-e2zEmw
Videos will be in Polish language, but if there will be a good feedback from international viewers (You my friend!) I will provide English subtitles.
There is a chance, that I didn't mention some things which I have made. As You can see there were a lot of different things going on so It's possible. Don't worry I will be updating this guide if I remember something.
That was really long adventure which consumed a few months of my life. If You are just a standard I3 Mega user which just want to improve something - stick to the guide. If You are not familiar with engineering stuff and 3D printers from development side You can really easily end up with worse results then You had at the beginning, a lot of frustration and wasted time. I have learned a lot during this time and I really know the consequences of improper upgrades - trust me.
Of course there may be a better X carriage, better bearings etc. I'm writing this guide only basing on my own experience, so I'm not recommending solutions which I wasn't testing.
If You find any typos etc. let me know in private message or in the comment section. English is not my native language, so it is very possible that there is a lot of mistakes.
You can share my guide on Your website if You will share it in unchanged form and Credit me and my social medias:
Youtube: https://www.youtube.com/user/petrzmax
Facebook: https://www.facebook.com/ArtekDiy
Changelog
03.06.2018 - Added new Marlin with some fixes and Jerk Controlled Motion. With the new Jerk Controlled Motion function I'm not using jerk control in my slicer settings. More about it here: http://bit.ly/2xEyxOB
08.07.2018 - Some text bugfixes and changes. Added point 16.
11.07.2018 - Added more result photos. (Still not ideal but it's close)
25.07.2018 - Added new version of Marlin based on 24.07.2018 bugfix. Attention! There is a bug (I hope it's a bug) when using faster travel speed then 135 mm/s the movement is stuttered. Just use 135 mm/s travel speed if You want to use this version.
06.08.2018 - Added new version of Marlin based on 06.08.2018 bugfix. Bug mentioned above is fixed. Max XY feed rate is capped to 180 mm/s, tmc hybrid mode is turned off, some acceleration and feed rate changes.
22.08.2018 - First part of the video is ready: https://www.youtube.com/watch?v=aUQ81NesJEc
05.10.2018 - Added new version of Marlin based on 04.10.2018 bugfix. Some problems with TMC's, LA and s-curve acceleration turned on on the same time seem to be fixed.
12.10.2018 - Added new version of Marlin based on 10.10.2018 bugfix. I have made some parameters tweaks. Second part of the video is ready: https://www.youtube.com/watch?v=8NVh-e2zEmw
05.11.2018 - Added new version of Marlin based on 05.11.2018 bugfix.
03.12.2018 - Added new version of Marlin based on 02.12.2018 bugfix.
21.02.2019 - Added crucial information about aluminium shafts.
25.02.2019 - Added new version of Marlin based on 25.02.2019 bugfix.
(This guide contains affiliate links)
Similar models
thingiverse
free
Anycubic I3 Mega Prusa i3 X-Carriage Converter by petrzmax
...26794
which is made by endlesshunt. thanks mate!
attention!
you need to invert x motor spin direction!
you also need longer belt!
thingiverse
free
Anycubic I3 Mega Y Carriage Plate Upgrade by petrzmax
.../thing:2791727
y carriage plate: http://bit.ly/2pmdqmx
this belt mount is using m4 nuts and bolts. use zip-ties to lock the belt.
thingiverse
free
Sapphire Pro / S - Z-Wobble FIX - Anti Z Wobble
...simultaneously transmit torque to the nut. so it's doing similar job like the oldham coupler but it's more compact....
thingiverse
free
ANET A6 / A8 ULTIMATE Upgrade Guide
...on anet a6 but because anet a8 is very similar you can also read this guide - most of...
thingiverse
free

Calibration bear by Automeow_3D
..._3d
thingiverse
this is a 20/20 mm calibration bear that i have designed so that you can test your 3d printer's calibration.
thingiverse
free

Sapphire Pro - Optical Z Endstop Conversion by petrzmax
...so i don't need to use bltouch or some similar probe. also while using z offset and positive z...
thingiverse
free
RatRig V-Core CUSTOM! - Titan Aero and Enclosure
...jt
chain used with bed: http://bit.ly/2qaxu03
v-slot cable clips: http://bit.ly/2oaaltz
v-slot cable mount: http://bit.ly/2d36crz
thingiverse
free

Goliathus Extruder - Anycubic I3 Mega, Prusa I3 by petrzmax
...better fanduct, or if you made more changes to fit it, so i will be able to upload finished project. or make a remix if you want.
thingiverse
free
Case for FilaMaker Mini shredder by neovs
... here :http://www.thingiverse.com/thing:558260
you can get your mini shredder here :http://filamaker.eu/product-category/shred/
thingiverse
free
1.75 mm filament by JMBishop
...he filament you want, it's a never ending supply. give me some time, i'm working on some 3mm but it's a tricky beast!
Petrzmax
thingiverse
free
M4 Nut Knob - ANET A6 by petrzmax
...se or my paypal here.
m4 nut knob - anet a6
designed for use with this custom x axis: https://www.thingiverse.com/thing:2106854
thingiverse
free
Orange Pi Plus 2 Case by petrzmax
...nge pi plus 2 case. you will need four m3x20 screws to fix it. they should easily thread into plastic. it's a tight fit case.
thingiverse
free
Z17 Housing parts for DIY Power Supply by petrzmax
...tip on thingiverse or my paypal here.
z17 housing parts for diy power supply
video: https://www.youtube.com/watch?v=kjklw6qgomi
thingiverse
free

Z Rod Top Stabilizer - ANET A6 by petrzmax
...part fixes the rods, so the printer is more stable. (especially rods) it can be used with bearings, but it's not recommended.
thingiverse
free

Hole To Another Universe from Life is Strange by petrzmax
...e. i have used double-sided tape to stick it to the wall. it's tricky to put it straight but after all the result is great ;)
thingiverse
free

VW Golf 4 Subwoofer Fit-Box Holder by petrzmax
... and screw it in as on the pictures and it will hold fit-box very well. there is no need for making holes in metal car chassis :)
thingiverse
free

Longer Top Spool Holder Beam - ANET A6 by petrzmax
...h lcd board cover: https://www.thingiverse.com/thing:2170152
and this top spool holder: https://www.thingiverse.com/thing:2009565
thingiverse
free

Velbon QB-6RL Quick Release Plate by petrzmax
...on the photos)
but don't worry! uploaded model is straight, so you can print it and made a few low cost quick release plates!
thingiverse
free
Black Powder Gun Barrel Rod Centerer by petrzmax
...the barrel surface. so this simple part is for centering the rod while cleaning the barrel :)
diameter of my pushing rod is 7 mm.
thingiverse
free
Uberti Remington 1858 Wolf Spring Adapter by petrzmax
...my case the spring was too far away from the hammer. so this part will set the spring a bit higher, and it will work just fine :)
Anycubic
thingiverse
free

anycubic filament holder
...anycubic filament holder
thingiverse
anycubic filament holder
thingiverse
free

Cableholder Anycubic Mega
...cableholder anycubic mega
thingiverse
cableholder anycubic mega
thingiverse
free

AnyCubic Toolholder by WildManPrinting
...anycubic toolholder by wildmanprinting
thingiverse
anycubic i3 mega toolholder that clips on the side of the spool a-frame.
thingiverse
free

AnyCubic Funnel by phana007
...anycubic funnel by phana007
thingiverse
funnel for anycubic resin and also a reducer for a normal soda bottle.
thingiverse
free

Anycubic Kossel PID calibration
...ir mount:
kossel raspberry camera ir mount
extruder pid calibration.
simple extruder temperature calibration of your 3d printer.
thingiverse
free

anycubic mega i3
...anycubic mega i3
thingiverse
anycubic i3 mega/mega s led 30mm 10-14v 6500k
thingiverse
free

Handle for anycubic by cruiser7
...handle for anycubic by cruiser7
thingiverse
its easier to handle the cover of the anycubic mono x and wash&care
thingiverse
free

anycubic predator Printbed by Lihyon
...anycubic predator printbed by lihyon
thingiverse
anycubic predator printbed
thingiverse
free

Anycubic Predator Triggers by marcelcountry
...anycubic predator triggers by marcelcountry
thingiverse
anycubic predator triggers
thingiverse
free

support anycubic cable by sarpdental
...support anycubic cable by sarpdental
thingiverse
support anycubic cable
Ultimate
turbosquid
$3
Ultimate Grave
...model ultimate grave for download as blend, obj, stl, and fbx on turbosquid: 3d models for games, architecture, videos. (1636144)
turbosquid
$79

ULTIMATE GIRAFFE
... available on turbo squid, the world's leading provider of digital 3d models for visualization, films, television, and games.
turbosquid
$5
The Ultimate Bowl
... available on turbo squid, the world's leading provider of digital 3d models for visualization, films, television, and games.
turbosquid
$1

Ultimate Revolver
... available on turbo squid, the world's leading provider of digital 3d models for visualization, films, television, and games.
3ddd
$1

Kimera Ultimate DVD System
...kimera ultimate dvd system
3ddd
dvd
schneider kimera ultimate dvd system
cg_studio
$49

The Ultimate Lioness3d model
... model
cgstudio
.max .obj .fbx - the ultimate lioness 3d model, royalty free license available, instant download after purchase.
turbosquid
$5
Ultimate Brick Castle
...yalty free 3d model ultimate brick castle for download as fbx on turbosquid: 3d models for games, architecture, videos. (1335247)
turbosquid
$31

Zombie Ultimate pack
... available on turbo squid, the world's leading provider of digital 3d models for visualization, films, television, and games.
turbosquid
$8

Barrels Ultimate Pack
...ls ultimate pack for download as ma, max, obj, fbx, and blend on turbosquid: 3d models for games, architecture, videos. (1353281)
turbosquid
$25

Ultimate "F" Bomb
... available on turbo squid, the world's leading provider of digital 3d models for visualization, films, television, and games.
Mega
3ddd
$1
BoConcept / Mega
...boconcept / mega
3ddd
boconcept
boconcept mega
3ddd
free

Angelo - Mega shoin
... mega shoin , shoin
angelo - mega shoin - 3dmax 2008
3ddd
$1
Комод MEGA
...вана по фото с учетом реальных размеров.
стек не сколапсен, есть возможность регулировки уровня сглаживания.
текстуры в архиве.
3ddd
$1
Hulsta / Mega-design
...hulsta / mega-design
3ddd
hulsta
hulsta mega-design
design_connected
$18
Tolomeo Mega
...
photo-realistic 3d models of the tolomeo mega floor lamps from artemide for 3d architectural and interior design presentations.
turbosquid
$119

Mega Soldier
... free 3d model mega soldier for download as obj, c4d, and fbx on turbosquid: 3d models for games, architecture, videos. (1148568)
3ddd
$1
Massproductions Mega
... massproductions , mega
ширина: 180 см
глубина: 90 см
высота: 79 см
3d_export
$4
mega metro station
...mega metro station
3dexport
mega metro station. ready to game. thanks all downloaders!!
3ddd
$1
BAS Mega
...bas mega
3ddd
bas , ванна
ванна
turbosquid
$25
Mega tank
... available on turbo squid, the world's leading provider of digital 3d models for visualization, films, television, and games.
Upgrade
turbosquid
$15

Upgraded Glock
...e 3d model upgraded glock for download as obj, fbx, and blend on turbosquid: 3d models for games, architecture, videos. (1185950)
3ddd
$1

Calligaris / UPGRADE
...calligaris / upgrade
3ddd
calligaris
c материалом
3d_export
free

cz upgrade
...cz upgrade
3dexport
https://www.buymeacoffee.com/mestrezen3d https://linktr.ee/mestrezen3
turbosquid
$80

Custer Tank upgrade
... available on turbo squid, the world's leading provider of digital 3d models for visualization, films, television, and games.
turbosquid
$39

Domestos 1 upgrade
... available on turbo squid, the world's leading provider of digital 3d models for visualization, films, television, and games.
3d_export
$10

Upgraded tea cup
...upgraded tea cup
3dexport
a cup with an unusual design and a unique shape for a more enjoyable tea experience
3d_export
$8

dixy outlander classic style upgraded poplar wood lounge chair
...utlander classic style upgraded poplar wood lounge chair
3dexport
dixy outlander classic style upgraded poplar wood lounge chair
turbosquid
free

AK-12 + Upgrades low-poly 3D model
...ow-poly 3d model for download as fbx, blend, and unitypackage on turbosquid: 3d models for games, architecture, videos. (1501145)
evermotion
$700

Upgrade from V-ray 1.5 to 3.5 for 3ds max
...here is no need to purchase a new dongle - your current dongles will be reprogrammed to carry v-ray 3. evermotion 3d models shop.
evermotion
$300

Upgrade from V-Ray 2.0 to V-ray 3.5 for 3ds Max
... interface (gui) for editing settings on one machine and one render node for rendering on one machine. evermotion 3d models shop.
I3
3d_export
$10

suv i3
...suv i3
3dexport
suv i3 2013 series
3d_ocean
$89

BMW i3 2012
...y, in real units of measurement, qualitatively and maximally close to the original. model formats: - *.max (3ds max 2008 scanl...
cg_studio
$99

BMW i3 20143d model
...
cgstudio
.3ds .c4d .fbx .lwo .max .obj - bmw i3 2014 3d model, royalty free license available, instant download after purchase.
cg_studio
$99

BMW i3 20123d model
...tudio
.3ds .c4d .fbx .lwo .max .mb .obj - bmw i3 2012 3d model, royalty free license available, instant download after purchase.
cg_studio
$99

BMW i3 20143d model
...tudio
.3ds .c4d .fbx .lwo .max .mb .obj - bmw i3 2014 3d model, royalty free license available, instant download after purchase.
humster3d
$75

3D model of BMW i3 2014
...
buy a detailed 3d model of bmw i3 2014 in various file formats. all our 3d models were created maximally close to the original.
humster3d
$40

3D model of Kitchen Set I3
...uy a detailed 3d model of kitchen set i3 in various file formats. all our 3d models were created maximally close to the original.
3d_ocean
$30

Kitchen set i3
...ensils oven plates shelves sink table ware
kitchen set i3 include 3d models: cooker, oven, sink, cupboards, table, chair, plates.
3d_ocean
$89

BMW i3 2014
...y, in real units of measurement, qualitatively and maximally close to the original. model formats: - *.max (3ds max 2008 scanl...
cg_studio
$99

BMW i3 Concept 20113d model
...i3
.3ds .c4d .fbx .lwo .max .obj - bmw i3 concept 2011 3d model, royalty free license available, instant download after purchase.
Guide
turbosquid
$15
Guide drawer
...squid
royalty free 3d model guide drawer for download as dwg on turbosquid: 3d models for games, architecture, videos. (1261387)
turbosquid
$1
Road Guide
... available on turbo squid, the world's leading provider of digital 3d models for visualization, films, television, and games.
archive3d
free
Guide-board 3D Model
...ion sign guide sign
guide-board n170112 - 3d model (*.gsm+*.3ds) for exterior 3d visualization.
turbosquid
$2
soap cutter guide
...
royalty free 3d model soap cutter guide for download as stl on turbosquid: 3d models for games, architecture, videos. (1694030)
turbosquid
$15
Blind Guiding tiles
...free 3d model blind guiding tiles for download as 3dm and dae on turbosquid: 3d models for games, architecture, videos. (1156598)
turbosquid
$10
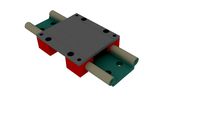
CNC Linear Guide
... available on turbo squid, the world's leading provider of digital 3d models for visualization, films, television, and games.
turbosquid
$1
Tank Model Guide
... available on turbo squid, the world's leading provider of digital 3d models for visualization, films, television, and games.
turbosquid
$1
Road Guide 2
... available on turbo squid, the world's leading provider of digital 3d models for visualization, films, television, and games.
3d_ocean
$9

Guide Books 3
...sformed separately and each have unique texture map on front and back cover. to make your work easier this model comes in thre...
3d_ocean
$9

Guide Books 2
...ransformed separately and each have unique texture map on front and back cover. to make your work easier this model comes in t...