Thingiverse
Anti oozing Dual Hotends for Rebel II 3D printer by merli
by Thingiverse
Last crawled date: 4 years, 2 months ago
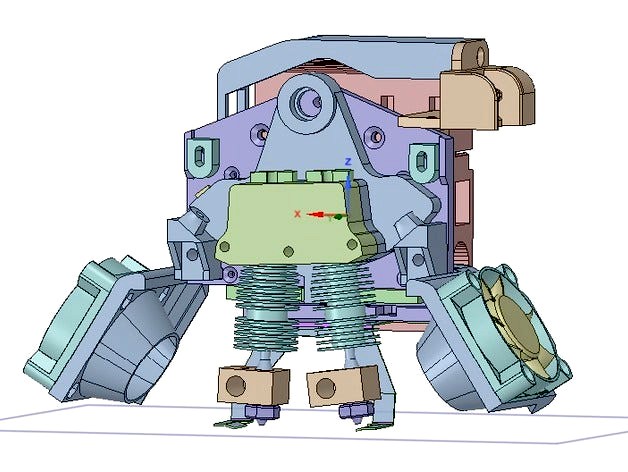
This extruder is based on one guy design from Rebel II forum. Original design used direct driven extrusion, but I did not like it, because I would need to rebuild half of printer so I have chosen to use bowdens and put extruders on construction. You can use as extruder any bowden extruder you like. These dual hot ends are basically designed for my Rebel II printer www.rebelove.org, and normal 3Draty hotends www.3draty.cz, but design can be easily altered for using other printers (for example Prusa I3) and other hotends (I will post version for e3d v6 in the future)
Idea is based on rotating inactive hot end out of bed by servo and cover it by metal sheet to prevent oozing from it.
Advantages:
1) No dirty dual prints = no more oozing from inactive hot end.
2) No need for pillars or anti oozing walls.
3) Normal hot ends can be used... No need for bowdens versions of hot ends.
4) Relativelly easy to install ... also easy to rollback if you will not like it.
5) Easy to build another CNC devices based on 3d printer
6) Every cable has connector to hot end
7) Cable chain prepared
8) Preparation for lighting hot end area by LEDs...
Disadvantages
1) Bowdens are IMHO not as good as direct driven extruders
2) You need one motor more :-)
3) A little bit smaller printing area
Servo used is EMAX ES3104 or similar, price about 6 Euro.
Nozzles cover is cut and bend from 0.5mm aluminium by attached drawing.
For fan regulation I used this circuit http://www.thingiverse.com/thing:22202, but I had to in Marlin set up software PWM to get it work... I don't know why it did not work, maybe FET is not so fast?
There are a lots of bolts and nuts as I like things to hold well. You will need M3 different sizes bolts and 4 pieces longer M2 bolts. You will also need 4 1cm diameter bearings.
Marlin firmware edit:
Marlin_main.cpp about row 3742 - numbers 25 a 160 are servo angles and you have to find right numbers by yourself. Attention: Set up servo to turn all the time to the same place!. Otherwise you will have problems around X axis.
.....
else if(code_seen('T'))
{
tmp_extruder = code_value();
// Correction for servo Tools T0 a T1 even if they are not defined
if(tmp_extruder == 0) {
SERIAL_ECHO_START;
SERIAL_ECHOLN("T0 Servo 25");
servos[0].attach(SERVO0_PIN);
servos[0].write(25);
delay(600);
servos[0].detach();
}
if(tmp_extruder == 1) {
servos[0].attach(SERVO0_PIN);
SERIAL_ECHOLN("T1 Servo 160");
servos[0].write(160);
delay(600);
servos[0].detach();
}
// End of code
Short video of printing is here https://www.youtube.com/watch?v=hTZHVi6KvII
attached is also picture of dual printed octopus