Cults

animated crocodile (action figure)
by Cults
Last crawled date: 6 years, 2 months ago
This model is the evolution of low poly crocodile posted previously.
It presents 3 (see 4) kinds of solutions for the rotation and the movement of the parts of the model.
So he became a "Croco Action".
The impression:
- the files are printable at scale or at 125%. Below 100% some parts are too small. The file (PieceJoint) must be printed at 100% filling and with support on the pieces (not only on the board). For the other file (body) I recommend a light support (angle to 70%), even if their absence is not problematic. For the thickness of the outline (of the wall or the shell ....) I recommend 2mm.
Mounting
- So there are 2 STL files:
-> [Body] groups the different members of the model (torso, arms, etc.) (see photo membres.jpg)
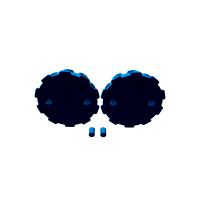
-> [PieceJoint] consists of elements that allow the rotation and assembly of members (see photo pieceJoint.jpg)
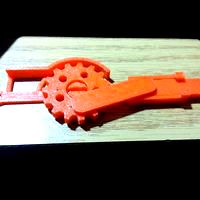
-The arms and legs are assembled to the body by the small hinge model (see photo charn_Petite.jpg). In addition these members are held in place by a small piece that is placed (with a clamp) at the beveled end of the hinge. This end goes into the torso, the other end goes into the arms and legs.
-> How to:
-Assemble the jaw with the head (see photo tete.jpg). It is useless to push the axle too far into the holes. We cut the part of the axis that exceeds.
-Assemble the hand and arms (see photo Bras.jpg). We cut the part of the axis that exceeds.
-Assemble the big hinges and the small ones (the cylinders serve as axis), then introduce them in the arms and the legs, then place the legs and the arms in the torso and finally one places the small parts to hold these members (this operation is delicate because it is necessary to clean beforehand the parts of the residues of the printing).
-finally we introduce the big hinges in the head and the tail, then in the torso (see photo Char-tete.jpg).
That's Have Fun.
Note: when the parts wear out just put on and let glue dry on the hinges.
It presents 3 (see 4) kinds of solutions for the rotation and the movement of the parts of the model.
So he became a "Croco Action".
The impression:
- the files are printable at scale or at 125%. Below 100% some parts are too small. The file (PieceJoint) must be printed at 100% filling and with support on the pieces (not only on the board). For the other file (body) I recommend a light support (angle to 70%), even if their absence is not problematic. For the thickness of the outline (of the wall or the shell ....) I recommend 2mm.
Mounting
- So there are 2 STL files:
-> [Body] groups the different members of the model (torso, arms, etc.) (see photo membres.jpg)
-> [PieceJoint] consists of elements that allow the rotation and assembly of members (see photo pieceJoint.jpg)
-The arms and legs are assembled to the body by the small hinge model (see photo charn_Petite.jpg). In addition these members are held in place by a small piece that is placed (with a clamp) at the beveled end of the hinge. This end goes into the torso, the other end goes into the arms and legs.
-> How to:
-Assemble the jaw with the head (see photo tete.jpg). It is useless to push the axle too far into the holes. We cut the part of the axis that exceeds.
-Assemble the hand and arms (see photo Bras.jpg). We cut the part of the axis that exceeds.
-Assemble the big hinges and the small ones (the cylinders serve as axis), then introduce them in the arms and the legs, then place the legs and the arms in the torso and finally one places the small parts to hold these members (this operation is delicate because it is necessary to clean beforehand the parts of the residues of the printing).
-finally we introduce the big hinges in the head and the tail, then in the torso (see photo Char-tete.jpg).
That's Have Fun.
Note: when the parts wear out just put on and let glue dry on the hinges.
Similar models
cults
free

Dragon bicolor
...to assemble the different pieces.
the tenon / mortise system is a little tight at the beginning, they must be tied with patience.
cults
free

Rotational Stand for Turboprop Engine Cutaway
...to.
- wood screws: appropriate screws can be used.
assembly points
- stl parts position will be adjusted by the model you made.
cults
free

Spinning top to ball-point / Round spinner
... ball off its axis.
layer thickness 0.2
shell thickness 1
fill rate 20
print temperature 220c °
support type everywhere
cults
free

Koenigs joint - variant of axis and fixed angle
...rse for body files.
http://www.thingiverse.com/thing:1590253
fixed axes and angles (angle 76 °)
magic rotation printing
a +
nop21
cults
$2

E.T. (Action Figure)
...me toy decoration
-the figure is composed of 9 parts:
-head
-torso
-2 arms
-2 hands
-bottom
-2 feet
cults
free

Supergirl articulated doll
...glued in place.
i added a pair of fists in case any one prefers them. (they will probably print easier than the open palmed ones)
cults
free

Crocodile, wip
... in the middle for printing.
the goal is to have a head (and tail) moving from bottom to top. the other members in mortise tenon.
cults
free

Heart Leonardo - Cuore Leonardo
...outu.be
easy to print
the body is in two parts, glue the small axis.
the game is minimal, it's up to you to settle.
a +
nop21
cults
free

Twists & bends crocodile by orangeteacher
...codile by orangeteacher
cults
crocodile twists & bends by orangeteacher
twists & bends crocodile by orangeteacher
cults
$8

Han solo
...r print.there are pins that conect arms with body.i am planing to make more characters from start wars,but we will see...enjoy
Crocodile
cults
free

Crocodile
...crocodile
cults
crocodile
crocodile
cults
free

Crocodile Skull
...crocodile skull
cults
crocodile skull
crocodile skull
cults
free

Crocodile Medallion
...crocodile medallion
cults
crocodile medallion
crocodile medallion
cults
$4

Ramiro the Crocodile
...dprin cartoon crocodile 3d 3dmodel 3dprint decor toy animal reptile
model for fun the first model first in a set of characters :)
cults
free
Crocodile, wip
... in the middle for printing.
the goal is to have a head (and tail) moving from bottom to top. the other members in mortise tenon.
cults
free

crocodile clips by orangeteacher upate
...crocodile clips by orangeteacher upate
cults
crocodile by orangeteacher upate clips
crocodile clips by orangeteacher upate
cults
$10

Pretty Crocodile
...39;t be afraid, it's a pretty crocodile with a mobile jaw.
in two part for a better adjustment.
approximately 15 cm length.
cults
free

Crocodile Head
... bad boys for the foyer. never a dull moment with the crocodile head in the room.
designed by freshfiber: https://freshfiber.com
cults
free
Twists & bends crocodile by orangeteacher
...codile by orangeteacher
cults
crocodile twists & bends by orangeteacher
twists & bends crocodile by orangeteacher
cults
free

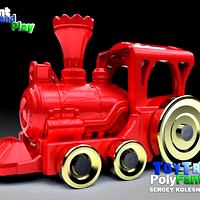
Crocodile
... download this 3d printer file and make it with 3d printing. let’s enjoy!
this 3d model was originally shared on poly by google.
Action
cults
$25

Holder action CAM
... holiday or just at the beach. it is also possible using as tripod for your action cam and make your selfies much more practical.
cults
free

Sony cam action camera
...sony cam action camera
cults
sony action cam
locking box
cults
free

Action Robot
...action robot
cults
robot toys
little friendly fully articulated robot! 3d print it in one go without supports.
cults
free

Credit Card Action Figure
...culated action figure, 3d printable and the size of a credit card?
meet oscard, the only 3d printable credit card action figure.
cults
free

Cheekymandos - Missile Action Playset
...parts list, and native fusion 360 design files at http://dragonmountaindesign.com/2017/05/14/cheekymandos-missile-action-playset/
cults
$1

Action Camera and Accessories Holder
... 2 x yi 4k cameras, 1 x gopro, and 1 x sj cam plus a couple of camera accessories in box.
serves the purpose just right for me.
cults
$2
E.T. (Action Figure)
...me toy decoration
-the figure is composed of 9 parts:
-head
-torso
-2 arms
-2 hands
-bottom
-2 feet
cults
free

Maker Faire Robot Action Figure for the car
...maker faire robot action figure for the car
cults
remix from lefabshop's figure
cults
free

Sony Action Cam Handheld Gimbal
...ted in the bom)
update: due to the lack of availability gimbal controller micro storm32 , project will by distributed for free.
cults
$14

LAST JEDI INSPIRITED OLD LUKE ACTION FIGURE
...alker complete action figure
easily customizable for other jedi figures (just put your custom head)
separated parts - obj files
Figure
cults
free

Boardgame figures
...boardgame figures
cults
boardgame figures
boardgame figures
cults
free

Luxo figure
...luxo figure
cults
luxo figure
luxo figure
cults
free

EWOK FIGURE
...ewok figure
cults
ewok figure starwars star-wars bear
ewok figure, 3dmax and meshmixer...
perfect for a xmax tree ornament
cults
free

Figure Vase
...so i made a modification on the shoulder area,
so it’s easier for the printer to close al gaps. that file is “figure vase 2.stl”
cults
free

Stork Figure
...stork figure
cults
animal figure stork
little light-weight stork figure you can stick on your baby bed or your door :)
cults
$4

Shar pei figure
...shar pei figure
cults
shar pei figure
shar pei figure
cults
free

Gingerbread Figure
...d figure for your christmas tree. if you print it with white filament i recommend to use nail polish to make it look more lively.
cults
free

Skeleton King figure
...skeleton king figure
cults
123d_design figure holloween skeleton
my 123d design portfolio - skeleton king figure
cults
$3

Low Poly Figure
...ign low poly lowpoly polygon man male figure
the low poly figure was designed by wesley millora.
more description coming soon...
cults
free

Mouse and Elefant phantasy figure
...mouse and elefant phantasy figure
cults
mouse and elefant phantasy figure
mouse and elefant phantasy figure
Animated
cults
$1

BASKETBALL ANIMATION
...basketball animation
cults
basketball animation in autodesk maya
cults
free

Animal Toys
...ts
touilleur animals cocktail cow fox rabbit drink glass
in the suite of personalized turtles, here is the collection of animals!
cults
free

Simple animals
...racteristic of each animal.
these animals can quickly print out with less material.
and it's so cute :)
simple is the best.
cults
free

Complete Animal Chess
...complete animal chess
cults
complete animal chess
complete animal chess
cults
free

Simple Animals 5
...simple animals 5
cults
simple animals 5
simple animals 5
cults
free

Simple animals 2
...simple animals 2
cults
simple animals 2
simple animals 2
cults
$2

pororo-animation character
...pororo-animation character
cults
animation character
...
cults
$3

doraemong-animation character
...doraemong-animation character
cults
animation character
cute
cults
free

Simple Animals 7
....
simple animals were designed using only lines.
these animals can quickly print out with less material.
and it's so cute :)
cults
$4

Muppets baby animal
... 3dp 3dprint 3dmodel
muppets baby animal made for my little daughter, model in modo and 3ds max, print in a makerbot replicator 2
Animal
cults
$1
BASKETBALL ANIMATION
...basketball animation
cults
basketball animation in autodesk maya
cults
free
Animal Toys
...ts
touilleur animals cocktail cow fox rabbit drink glass
in the suite of personalized turtles, here is the collection of animals!
cults
free
Simple animals
...racteristic of each animal.
these animals can quickly print out with less material.
and it's so cute :)
simple is the best.
cults
free
Complete Animal Chess
...complete animal chess
cults
complete animal chess
complete animal chess
cults
free
Simple Animals 5
...simple animals 5
cults
simple animals 5
simple animals 5
cults
free
Simple animals 2
...simple animals 2
cults
simple animals 2
simple animals 2
cults
$2
pororo-animation character
...pororo-animation character
cults
animation character
...
cults
$3
doraemong-animation character
...doraemong-animation character
cults
animation character
cute
cults
free
Simple Animals 7
....
simple animals were designed using only lines.
these animals can quickly print out with less material.
and it's so cute :)
cults
$4
Muppets baby animal
... 3dp 3dprint 3dmodel
muppets baby animal made for my little daughter, model in modo and 3ds max, print in a makerbot replicator 2
Art
cults
free

Art Vase
...art vase
cults
art vase
art vase
cults
free

Lampshade - Art
...lampshade - art
cults
lampshade - art
lampshade - art
cults
free

Art Deco Flower
...art deco flower
cults
art deco flower
art deco flower
cults
$1

Hexagon art
...hexagon art
cults
hexagon art ball design 3d football hex 6 table lamp hanging
who does'nt love hexagon?
cults
free

art nouveau lily lamp
...art nouveau lily lamp
cults
art nouveau lily lamp
art nouveau lily lamp
cults
free

art nouveau lotus lamp
...art nouveau lotus lamp
cults
art nouveau lotus lamp
art nouveau lotus lamp
cults
free

Mario pixel art
...mario pixel art
cults
mario nintendo nes pixel
it is simply a mario skipping in pixel art style.
cults
free

art nouveau Lotus lamp 2
...art nouveau lotus lamp 2
cults
art nouveau lotus lamp 2
art nouveau lotus lamp 2
cults
free

art nouveau lily lamp 2
...art nouveau lily lamp 2
cults
art nouveau lily lamp 2
art nouveau lily lamp 2
cults
free

Pre hispanic Art _ zoomorphic fish
...pre hispanic art _ zoomorphic fish
cults
pre hispanic art _ zoomorphic fish
pre hispanic art _ zoomorphic fish
Toy
cults
free
Fidget Toy
...fidget toy
cults
fidget toy
fidget toy
cults
free
Toy Piston
...toy piston
cults
toy piston
toy piston
cults
free
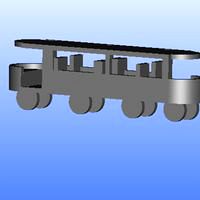
Toy Train
...toy 3d toy train toy train tains
you have a baby? print his toy train! experience your 3d printer. my author's toy. wild west
cults
free
Tramway Toy
...tramway toy
cults
toy thu streetcar
a simple old style tramway toy.
an easy old school tram toy
cults
$1
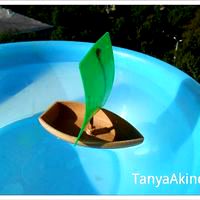
Toy boat
...toy boat
cults
toy boat 3d printing
toy boat for young captains!
cults
$1
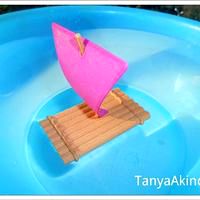
Toy raft
...toy raft
cults
toy raft 3d printing
toy raft for young travelers!
cults
free
Miniature toy
...miniature toy
cults
toy mignion schtrumph dragon thu
objects, toy, souvenir
cults
free

Toy Tools
...toy tools
cults
hammer screwdriver pliers toy
toy tools: hammer, screwdriver, pliers.
cults
$6
Drift Toy
...drift toy
cults
drift cute toy
cults
$1
Robot toy
...robot toy
cults
toy robot
enjoy