Thingiverse
Angle adjustable polariser and Lambda/4-plate - Polarisator mit Winkelskale by Ce-ha
by Thingiverse
Last crawled date: 3 years ago
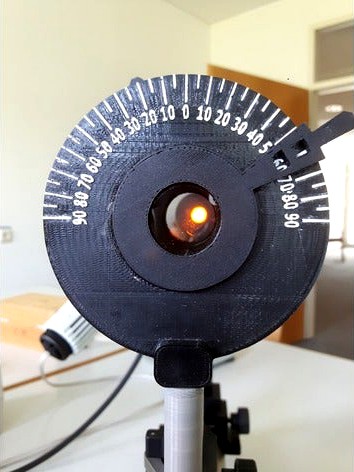
Polarizer with angle scale for experiments on the optical bench. An M5 nut is attached to the base of the bracket.
Additionally required:
12x 3mm bearing balls
1x M5 hexagon nut
Polarisation film and/or lambda quarter film
The installation is carried out as shown in the second picture. It is important to lock part 4 with part 8 to prevent loosening of the screw connection during use. The numbers were painted with a touch-up pencil and the angle marks filled with model filler. There is a version of part 1 (2c) for dual extruders. The dual color version is not tested, so please share your results or problems.
The foil can be cut out with the template "zuschnitt" and is then fixed in part 2 with part 7 and part 3. The alignment is carried out via the recess on the reading arm. Part 3 is designed to be "student / pupil-proof", as it can only be screwed in and out with the assembly wrench.
Polarisator mit Winkelskale für Experimente auf der optischen Bank. An der Basis der Halterung ist zur Befestigung eine M5 Mutter eingebracht.
Zusätzlich benötigt werden:
12x 3mm Kugellagerkugeln
1x M5 Sechskantmutter
Polarisationsfolie und/oder Lambdaviertel Folie
Die Montage erfolgt wie im zweitem Bild dargestellt. Wichtig ist es Teil 4 mit Teil 8 zu kontern, um ein lösen der Verschraubung bei Benutzung zu verhindern. Die Zahlen wurden mit Lackstift bemalt und die Winkelmarken mit Modellbauspachtel gefüllt. Die zweifarbige Version von Teil 1 (2c) ist ungetestet, bitte teilt eure Erfahrung mit.
Die Folie kann mit der Schablone "zuschnitt" ausgeschnitten werden und wird dann in Teil 2 mit Teil 7 und Teil 3 fixiert. Die Ausrichtung erfolgt über die Aussparung am Ablesearm. Teil 3 ist "Studenten- / Schülersicher" gestaltet, da es sich nur mit dem Montageschlüssel ein- und herausschrauben lässt.
Similar models
thingiverse
free

CTC Druckbett Nivellieren Messuhraufnahme by DerRobert85
...nach links versetzt da ich längere m5 kunststoffschrauben vorgesehen hatte...
gedruckt wurde mit 20% infill und 0,25 schichtdicke
thingiverse
free

Düsenbox für VulcanoDüsen by donremi
... magnetisch. die magnete(6x d2x2) werden eigepresst
die achse ist ein stück filament (d1.75), dass mit einem lötstab fixiert wird
3dwarehouse
free

Haustür schlüsel und wasserglas
... mit der programm fertrauter zu werden und bis auf die massstebe denke ich ist es gans gut geworden #glas #home #schlüsel #wasser
thingiverse
free

Artillery Evnovo Sidewinder X1, Z, Achse, Verstrebung, Arretierung, Justierung by Hans-G
...se ausgerichtet.
hier noch weitere hilfreiche ergänzungen zum 3d-druck.https://www.thingiverse.com/hans-g/collections/3d-printer
grabcad
free

Filamentständer für >2KG Spulen
... lässt sich das model drucken !
filament ist egal. ich habe es mit pla und die "wand spulenaufnahmen" mit asa gedruckt.
3dwarehouse
free

Gesamtschule Fröndenberg
... auch ein ziel des schüleraustausches mit partnerschulen in england und der ukraine. #fröndenberg #gesammtschule_fröndenberg #gsf
thingiverse
free

Bruder Förderband Bauteile für Elektro Antrieb mit Motor RB350 100 by zorro57
...werden kann.
das original grundgerüst muss an einigen stellenbearbeitet werden. siehe diverse bauberichte im modelltruck forum...
thingiverse
free

Herzbox by ESchubi
...passung/änderung leicht durchführbar ist, habe ich die fusion360-konstruktion mit freigegeben.
viel spass und freude mit der box!
thingiverse
free

Glas Milchflaschen Deckel Deutschland - Milk bottle lids Germany. V2 by Watonka
...n.
die version 2.0 ist ein deutlich kleinerer deckel wodurch der material verbrauch und die druckzeit deutlich geringer ausfällt.
thingiverse
free

Glas Milchflaschen Deckel Deutschland - Milk bottle lids Germany by Watonka
... nicht in der lage kohlensäure in der glasflasche zu halten kann der deckel innen mit kunstharz oder mit lack abgedichtet werden.
Polarisator
thingiverse
free

Polarising Filter Holder by davemason
...t holds the 32mm diameter filter which can then be rotated to cross polarise light.
remove an existing filter holder and replace.
thingiverse
free

Lee Polarising Filter Case by rogerighmc
... and i have manage to break 3 so far. the case is designed to hold a polariser and my big stopper which i generally use together.
thingiverse
free

Leica polariser insert by edward_n_ward
... for leica dmi series microscope. holds 25mm filter or analyser. snug fit so depending on your printer the print may need sanding
thingiverse
free

pare soleil camera 1/3 ccd + support verre polarisant by alex12150
...aissez-moi vos commentaires et j'adapterai la pièce un peu plus grossièrement au besoin...
salutations aux modelistes,
alex
thingiverse
free

K1S Dashcam Polarising Lens Adapter by peaberry
...gle, most of the reflections should be eliminated, then you can tighten the screw to secure it (taking care not to over tighten).
thingiverse
free

SJ1000 in-car camera polarising filter attachment by Extrudo
...odel
-arm clips added
-stl should be printable now
v1.38 (not pictured in photos)
-better fit with camera
v1.39
-even tighter fit
thingiverse
free

Polariscope by Gav
...circular polarising filters)
info on calibrating it here:http://tinkerings.org/2014/11/15/quick-and-dirty-lasercut-polariscope/
thingiverse
free

Support lame de roche by LABOMALIN
...support lame de roche by labomalin
thingiverse
support pour lame de roche
adapté aux microscopes polarisants
sketchfab
$4

Deer Antler
...deer antler
sketchfab
photogrammetry scan using polarisation filters - deer antler - buy royalty free 3d model by blackfirefilms
Polariser
thingiverse
free
Polarising Filter Holder by davemason
...t holds the 32mm diameter filter which can then be rotated to cross polarise light.
remove an existing filter holder and replace.
thingiverse
free
Lee Polarising Filter Case by rogerighmc
...so far. the case is designed to hold a polariser and my big stopper which i generally use...
thingiverse
free
Leica polariser insert by edward_n_ward
... for leica dmi series microscope. holds 25mm filter or analyser. snug fit so depending on your printer the print may need sanding
thingiverse
free
pare soleil camera 1/3 ccd + support verre polarisant by alex12150
...aissez-moi vos commentaires et j'adapterai la pièce un peu plus grossièrement au besoin...
salutations aux modelistes,
alex
thingiverse
free
K1S Dashcam Polarising Lens Adapter by peaberry
...gle, most of the reflections should be eliminated, then you can tighten the screw to secure it (taking care not to over tighten).
thingiverse
free
SJ1000 in-car camera polarising filter attachment by Extrudo
...odel
-arm clips added
-stl should be printable now
v1.38 (not pictured in photos)
-better fit with camera
v1.39
-even tighter fit
thingiverse
free
Polariscope by Gav
...circular polarising filters)
info on calibrating it here:http://tinkerings.org/2014/11/15/quick-and-dirty-lasercut-polariscope/
thingiverse
free
Support lame de roche by LABOMALIN
...support lame de roche by labomalin
thingiverse
support pour lame de roche
adapté aux microscopes polarisants
sketchfab
$4
Deer Antler
...deer antler
sketchfab
photogrammetry scan using polarisation filters - deer antler - buy royalty free 3d model by blackfirefilms
Lambda
turbosquid
$9

lambda black coin
...
royalty free 3d model lambda black coin for download as max on turbosquid: 3d models for games, architecture, videos. (1458082)
turbosquid
$9

lambda gold coin
...d
royalty free 3d model lambda gold coin for download as max on turbosquid: 3d models for games, architecture, videos. (1458078)
turbosquid
$5

Pillow - Orange Lambda
...ty free 3d model pillow - orange lambda for download as blend on turbosquid: 3d models for games, architecture, videos. (1179921)
cg_studio
$65

Lambda Watch3d model
...atch wrist timekeeper high quality
.obj - lambda watch 3d model, royalty free license available, instant download after purchase.
3d_export
$169

lambda shuttle
.... i will eventually upload other formats too but you're on a tight schedule, please contact me and we can work something out.
thingiverse
free

Lambda Phone Holder by YourBuddyMiles
...lambda phone holder by yourbuddymiles
thingiverse
fun little lambda phone holder.
thingiverse
free

Lambda Coaster by Mizunoslove
...e
a coaster made for a co-worker who loves half-life, a lambda coaster. two versions available, a dual color and a single color.
thingiverse
free

Half-Life Lambda Logo by verbatimt
...half-life lambda logo by verbatimt
thingiverse
half-life lambda logo
modeled with freecad
sketchfab
$15

Lambda Factor Recorder
... file contains original 3dm, and obj, dae, fbx exported file. - lambda factor recorder - buy royalty free 3d model by cosedimarco
thingiverse
free

Lambda Key Chain by LambdaPrints
...rints
thingiverse
introducing the lambda key chain! based off of the greek letter, this key chain is able to fit on a carabiner.
Ce
turbosquid
free

Planeta ce explodeaza
... available on turbo squid, the world's leading provider of digital 3d models for visualization, films, television, and games.
3d_export
$99

IC CE Series Schoolbus 2015 3D Model
...6 passenger 2017 series bus 2018 yellow coach ic ce schoolbus shoolbus
ic ce series schoolbus 2015 3d model squir 101606 3dexport
3d_export
$5

3d classic pouf ce coffee table
...ouf ce coffee table can be an impressive element for your projects. easy to use, realistic image, low polygon, quality materials.
3ddd
$1

MELANIE DIA 550x1000 CE
... polished brass-полированная латунь
вес, kg: 12
диаметр и высота, mm: Ø 550x1000
количество ламп и мощность w: 15x40w
cg_studio
$99

IC CE Series Schoolbus 20153d model
....lwo .fbx .c4d .3ds .obj - ic ce series schoolbus 2015 3d model, royalty free license available, instant download after purchase.
3ddd
$1

Grohe Eurosmart CE IR electronic
...t ce ir electronic
3ddd
grohe , смеситель
смеситель для раковины с инфракрасным сенсором
turbosquid
$9

Second Empress Coffee Table CE 35
...offee table ce 35 for download as max, max, 3ds, fbx, and obj on turbosquid: 3d models for games, architecture, videos. (1566343)
3ddd
$1

Люстра Kléber L CE от Mis en demeure
...misendemeure
materials: antique bronze and crystal rock
bulb 4xe14f
height: 100 cm
width: 103 cm
depth: 103 cm
item lkle5020-ce
3ddd
$1

Люстра Languedoc Black L CE от Mis en demeure
... ce от mis en demeure
3ddd
misendemeure
materials: iron, glass
bulb 10xe14f
height: 90 cm
width: 85 cm
depth: 85 cm
llan5020-ce
cg_studio
$99

HQ LowPoly IC CE Series Schoolbus 20153d model
...fbx .c4d .3ds - hq lowpoly ic ce series schoolbus 2015 3d model, royalty free license available, instant download after purchase.
Angle
design_connected
$25
Angle
...angle
designconnected
flou angle sleep furniture computer generated 3d model. designed by rodolfo dordoni.
3ddd
$1
FLOU / Angle
...flou / angle
3ddd
flou
кровать flou angle. все карты процедурные.
3ddd
free
Кровать ANGLE flou
...le , flou , постельное белье
кровать angle flou
design_connected
$16
Calin Angle
...calin angle
designconnected
ligne roset calin angle computer generated 3d model. designed by mourgue, pascal.
3d_export
$5
angle grease nipple
...angle grease nipple
3dexport
angle grease nipple
3ddd
$1

Двуспальная кровать Angle
...ngle. двуспальную кровать с подъемным механизмом angle оценят и те, кто любит практичность: кровать имеет объемый ящик для белья.
turbosquid
$10

Angle Wardrobe
...e 3d model angle wardrobe for download as obj, fbx, and blend on turbosquid: 3d models for games, architecture, videos. (1301544)
turbosquid
$9

Angle Stool
...y free 3d model angle stool for download as max, skp, and skp on turbosquid: 3d models for games, architecture, videos. (1694318)
3d_export
free

angle bracket
...t 3d model part. it is the combination of a bra and ket (bra+ket = bracket) which represents the inner product of two functions.
turbosquid
$6

Angles Pouf
...e 3d model angles pouf for download as max, max, fbx, and obj on turbosquid: 3d models for games, architecture, videos. (1577097)
Mit
turbosquid
$20

MIT stool
... available on turbo squid, the world's leading provider of digital 3d models for visualization, films, television, and games.
turbosquid
$99
NASA MIT Wing
...oyalty free 3d model nasa mit wing for download as ma and max on turbosquid: 3d models for games, architecture, videos. (1510099)
turbosquid
$40

Haus mit beleuchtung
... available on turbo squid, the world's leading provider of digital 3d models for visualization, films, television, and games.
turbosquid
$25

MKN - Elektroherd mit 4 Platten
... 3d model mkn - elektroherd mit 4 platten for download as skp on turbosquid: 3d models for games, architecture, videos. (1192212)
3d_export
$10

sprinter vrw mit gertefcher vorrichtung uv map
...sprinter vrw mit gertefcher vorrichtung uv map
3dexport
turbosquid
free

Bursche im Sakko mit der linken Hand in der Hosentasche (Photosculpture)
... available on turbo squid, the world's leading provider of digital 3d models for visualization, films, television, and games.
3ddd
$1

Blumenvase
...blumenvase 3ddd blumenvase mit ...
3d_export
$5

patrick star
...patrick star 3dexport patrick star mit ...
3ddd
$1

tree summer
...tree summer 3ddd дерево tree summer mit ...
3ddd
free

tree fall
...tree fall 3ddd дерево tree fall mit ...
Plate
archibase_planet
free
Plates
...plates
archibase planet
plates and dishes plate
plates - 3d model (*.gsm+*.3ds) for interior 3d visualization.
3d_export
$5

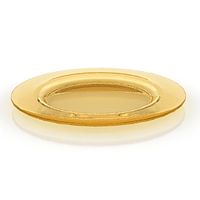
plate
...plate
3dexport
plate
archibase_planet
free
Plates
...plates
archibase planet
plates and dishes plate kitchen ware
plates - 3d model (*.gsm+*.3ds) for interior 3d visualization.
archibase_planet
free
Plates
...plates
archibase planet
plate plates and dishes crockery
plates 2 - 3d model (*.gsm+*.3ds) for interior 3d visualization.
archibase_planet
free
Plate
...plate
archibase planet
dinner-plate plate kitchen ware
plate n070808 - 3d model (*.gsm+*.3ds) for interior 3d visualization.
3d_export
$6

plate
...plate
3dexport
design of plate
3d_export
$5

plate
...plate
3dexport
plate lowpoly
archibase_planet
free
Plates
...plates
archibase planet
plate dish kitchen-ware
plate - 3d model for interior 3d visualization.
3ddd
$1
Plates
...plates
3ddd
полка , тарелка
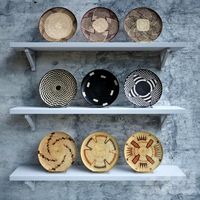
african plates
archibase_planet
free
Plate
...plate
archibase planet
plate kitchen ware
plate - 3d model (*.gsm+*.3ds) for interior 3d visualization.
Adjustable
3d_ocean
$7
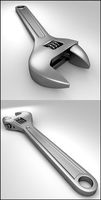
Adjustable Wrench
...adjustable wrench
3docean
adjustable wrench highly detailed wrench
highly detailed adjustable wrench.
3ddd
$1
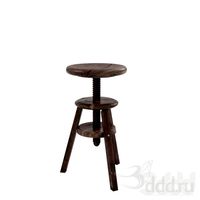
Adjustable Stool
...adjustable stool
3ddd
табурет
wooden adjustable stool.
3d_ocean
$20

Adjustable Gym Bench
...st adjustable bench black equipement gym gymnastic indoor silver sport workout
3d model of black and silver adjustable gym bench.
3d_ocean
$20
Adjustable Gym Bench
...st adjustable bench black equipement gym gymnastic indoor silver sport workout
3d model of black and silver adjustable gym bench.
3d_ocean
$16

Adjustable Weight Bench
...arbell bench black equipement gym gymnastic indoor sport weight workout
3d model of black adjustable weight bench with a barbell.
turbosquid
$5

Adjustable wrench
...
royalty free 3d model adjustable wrench for download as fbx on turbosquid: 3d models for games, architecture, videos. (1313414)
3d_export
$5

adjustable tension lock
...adjustable tension lock
3dexport
adjustable tension lock
turbosquid
$1

Adjustable Wrench
...free 3d model adjustable wrench for download as obj and blend on turbosquid: 3d models for games, architecture, videos. (1446736)
turbosquid
$1

Adjustable Wrench
...y free 3d model adjustable wrench for download as c4d and fbx on turbosquid: 3d models for games, architecture, videos. (1379022)
3d_export
$5

Adjustable key
...adjustable key
3dexport
4
turbosquid
$9

Office Chair 4-4
... available on turbo squid, the world's leading provider of digital 3d models for visualization, films, television, and games.
3d_export
$5

doors- 4
...doors- 4
3dexport
doors 4
3d_export
$5

hinge 4
...hinge 4
3dexport
hinge 4
3ddd
$1

Штора №4
...штора №4
3ddd
штора №4
3d_export
free

playstation 4
...playstation 4
3dexport
playstation 4
turbosquid
$1

re 4-4 electric locomotive
... free 3d model re 4 4 electric locomotive for download as obj on turbosquid: 3d models for games, architecture, videos. (1707845)
3ddd
$1

nexus 4
...nexus 4
3ddd
lg , телефон
nexus 4
3ddd
$1

4 Poufs
...4 poufs
3ddd
пуф
4 soft poufs
turbosquid
$12

Calligraphic Digit 4 Number 4
...hic digit 4 number 4 for download as max, obj, fbx, and blend on turbosquid: 3d models for games, architecture, videos. (1389332)
3ddd
$1

Dauphin 4+
...dauphin 4+
3ddd
кресло
dauphin 4+ конференц кресло
Ha
3d_export
$50

ha
... addition to the model there are textures the model includes 11 objects 13239 vertices 26077 edges 12871 faces and 25932 polygons
turbosquid
free

Ha"tak
... available on turbo squid, the world's leading provider of digital 3d models for visualization, films, television, and games.
3ddd
$1

Jotul I 400 HA
...jotul i 400 ha
3ddd
jotul , камин
jotul i 400 ha
jotul.com
3ddd
$1

Домофон Hyundai HA-201
...домофон hyundai ha-201
3ddd
hyundai , домофон
модель домофона hyundai ha-201
turbosquid
$1

The flour has been mixed
...ty free 3d model the flour has been mixed for download as max on turbosquid: 3d models for games, architecture, videos. (1448377)
turbosquid
$149

YOKOSUKA B4Y ha-327
... yokosuka b4y ha-327 for download as lwo, blend, fbx, and obj on turbosquid: 3d models for games, architecture, videos. (1659010)
turbosquid
$5

Oncoming Traffic Has Priority
... available on turbo squid, the world's leading provider of digital 3d models for visualization, films, television, and games.
turbosquid
free

Type 95 Ha-Go
... available on turbo squid, the world's leading provider of digital 3d models for visualization, films, television, and games.
turbosquid
free

Type 97 Chi-Ha
... available on turbo squid, the world's leading provider of digital 3d models for visualization, films, television, and games.
3ddd
$1

Hotpoint Ariston MSK 103X HA
...103x ha
3ddd
ariston , микроволновка
microwave oven - hotpoint-ariston msk 103x ha 60sm.