Thingiverse

Anet A8 Optical Sensor Mount for Omron Spy 412 Auto Bed Leveling by chertle
by Thingiverse
Last crawled date: 3 years ago
Somewhere in the deep of the web , i've found a user, he experimented with the OMRON EE SPY 402. After reading the manual i decided quickly to buy one ( and two more for friends).
Please read the manual and technical details from here.
(https://www.ia.omron.com/products/family/440/specification.html)
The main feature are: Modulated active IR-Sensor. short distance. 5V and NPN that means it could be direct wired to original z-switch connectors
Accidentally i orderd a used one (look@ebay from 5-50€), but a little bit diffrent type EE SPY 412. I got mine for 8Euros on ebay.
Please read the manual and technical details from here.
(https://www.ia.omron.com/products/family/443/specification.html)
The main feature are also : modulated avtive IR-Sensor. short Distance. 5V and NPN and very light weighted.
This is for users with autolevel enabled firmware (I'm a skynet user) . Do all the steps that described in Web to enable autolevel.
(https://3dprint.wiki/reprap/anet/a8/improvement/autobedleveling)
If you use M119 to test the triggering use white paper and look to the buildin LED!!! Triggering on glass bed results in a short flash around a hotspot.
You need one plug from type: JST XHP-3
(https://www.amazon.de/S%C3%A4tze-2-5-3-Pin-Stecker-Stecker-Draht-Buchse/dp/B01DU9OS5K/ref=sr_1_fkmr0_1?s=toys&ie=UTF8&qid=1491909206&sr=1-1-fkmr0&keywords=JST+XH+2.5+3-P
orhttps://www.amazon.de/gp/product/B01DU87NT4/ref=oh_aui_detailpage_o00_s00?ie=UTF8&psc=1
)
Instead of use a capazitive,induktive, mechanical sensor like BLTouch you can plug this sensor direct to the ( all the three wires) board.
You didn't need a octocoupler or the two resitors and no additonal 12V needed. Almost just Plug&Play.
Wiring is very easy. Solder 3 small wire (lenght each arround 1m) to the sensor and be careful with temperature (quick with a small solder iron).
Ground to Ground(-); 5V to VCC(+); and Out to Signal. Look here for wiring:https://3dprint.wiki/reprap/anet/a8/improvement/autobedleveling)
I designed a very easy sensor mount. It's equipped with plasic dowels, which fit in the (non-threaded) holes on the lower rear of the slides without screws.
You only need 2x M3 screws and nuts for the sensor to mount .
The nozzle should to be below (1-3mm) the sensor.
I attach my configuration.h from "skynet" . The offset of sensor is X 18mm & Y 45mm
Use at your own risk, be careful and keep hands on the powerswitch while testing :-)
I use the sensor with glass, buildtak, fr4 and carbon bed. No problem at all yet.
Skynet Configuration:
define X_PROBE_OFFSET_FROM_EXTRUDER 18
define Y_PROBE_OFFSET_FROM_EXTRUDER 45
Testresults with Glass Bed:
define Z_MIN_PROBE_REPEATABILITY_TEST
M48 P10 X100 Y100
ecv: Mean: 2.514750 Min: 2.503 Max: 2.520 Range: 0.017
Recv: Standard Deviation: 0.005640
M48 P10 X50 Y50
Mean: 2.431000 Min: 2.425 Max: 2.437 Range: 0.013
Recv: Standard Deviation: 0.003905
M48 P10 X150 Y150
Recv: Finished!
Recv: Mean: 2.454750 Min: 2.450 Max: 2.460 Range: 0.010
Recv: Standard Deviation: 0.003052
Results with 100Celcius Hotbed:
Send: M105
Recv: ok T:150.1 /150.0 B:101.5 /100.0 @:29 B@:127
M48 P10 X100 Y100
Recv: Mean: 1.705250 Min: 1.697 Max: 1.712 Range: 0.015
Recv: Standard Deviation: 0.004931
M48 P10 X50 Y50
Recv: Mean: 1.641500 Min: 1.635 Max: 1.647 Range: 0.012
Recv: Standard Deviation: 0.004213
M48 P10 X150 Y150
Recv: Mean: 1.637250 Min: 1.632 Max: 1.642 Range: 0.010
Recv: Standard Deviation: 0.004100
Edit 2018-11-13
if plasic dowels are broken ( that happens to me) use hot glue to fix the plate
Please read the manual and technical details from here.
(https://www.ia.omron.com/products/family/440/specification.html)
The main feature are: Modulated active IR-Sensor. short distance. 5V and NPN that means it could be direct wired to original z-switch connectors
Accidentally i orderd a used one (look@ebay from 5-50€), but a little bit diffrent type EE SPY 412. I got mine for 8Euros on ebay.
Please read the manual and technical details from here.
(https://www.ia.omron.com/products/family/443/specification.html)
The main feature are also : modulated avtive IR-Sensor. short Distance. 5V and NPN and very light weighted.
This is for users with autolevel enabled firmware (I'm a skynet user) . Do all the steps that described in Web to enable autolevel.
(https://3dprint.wiki/reprap/anet/a8/improvement/autobedleveling)
If you use M119 to test the triggering use white paper and look to the buildin LED!!! Triggering on glass bed results in a short flash around a hotspot.
You need one plug from type: JST XHP-3
(https://www.amazon.de/S%C3%A4tze-2-5-3-Pin-Stecker-Stecker-Draht-Buchse/dp/B01DU9OS5K/ref=sr_1_fkmr0_1?s=toys&ie=UTF8&qid=1491909206&sr=1-1-fkmr0&keywords=JST+XH+2.5+3-P
orhttps://www.amazon.de/gp/product/B01DU87NT4/ref=oh_aui_detailpage_o00_s00?ie=UTF8&psc=1
)
Instead of use a capazitive,induktive, mechanical sensor like BLTouch you can plug this sensor direct to the ( all the three wires) board.
You didn't need a octocoupler or the two resitors and no additonal 12V needed. Almost just Plug&Play.
Wiring is very easy. Solder 3 small wire (lenght each arround 1m) to the sensor and be careful with temperature (quick with a small solder iron).
Ground to Ground(-); 5V to VCC(+); and Out to Signal. Look here for wiring:https://3dprint.wiki/reprap/anet/a8/improvement/autobedleveling)
I designed a very easy sensor mount. It's equipped with plasic dowels, which fit in the (non-threaded) holes on the lower rear of the slides without screws.
You only need 2x M3 screws and nuts for the sensor to mount .
The nozzle should to be below (1-3mm) the sensor.
I attach my configuration.h from "skynet" . The offset of sensor is X 18mm & Y 45mm
Use at your own risk, be careful and keep hands on the powerswitch while testing :-)
I use the sensor with glass, buildtak, fr4 and carbon bed. No problem at all yet.
Skynet Configuration:
define X_PROBE_OFFSET_FROM_EXTRUDER 18
define Y_PROBE_OFFSET_FROM_EXTRUDER 45
Testresults with Glass Bed:
define Z_MIN_PROBE_REPEATABILITY_TEST
M48 P10 X100 Y100
ecv: Mean: 2.514750 Min: 2.503 Max: 2.520 Range: 0.017
Recv: Standard Deviation: 0.005640
M48 P10 X50 Y50
Mean: 2.431000 Min: 2.425 Max: 2.437 Range: 0.013
Recv: Standard Deviation: 0.003905
M48 P10 X150 Y150
Recv: Finished!
Recv: Mean: 2.454750 Min: 2.450 Max: 2.460 Range: 0.010
Recv: Standard Deviation: 0.003052
Results with 100Celcius Hotbed:
Send: M105
Recv: ok T:150.1 /150.0 B:101.5 /100.0 @:29 B@:127
M48 P10 X100 Y100
Recv: Mean: 1.705250 Min: 1.697 Max: 1.712 Range: 0.015
Recv: Standard Deviation: 0.004931
M48 P10 X50 Y50
Recv: Mean: 1.641500 Min: 1.635 Max: 1.647 Range: 0.012
Recv: Standard Deviation: 0.004213
M48 P10 X150 Y150
Recv: Mean: 1.637250 Min: 1.632 Max: 1.642 Range: 0.010
Recv: Standard Deviation: 0.004100
Edit 2018-11-13
if plasic dowels are broken ( that happens to me) use hot glue to fix the plate
Similar models
thingiverse
free

SCORPIO Metal Gear Version by klauscon
...o.uk/micro-compatible-towerpro-metalico-arduino/dp/b073wzd36h/ref=sr_1_3?ie=utf8&qid=1517642668&sr=8-3&keywords=mg90s
thingiverse
free

18mm auto level sensor support for Anet A8 left side by stonedigger
...ts of repeatability test:
recv: mean: -0.178250 min: -0.197 max: -0.160 range: 0.038
recv: standard deviation: 0.010550
have fun!
thingiverse
free

universal/safe way for NPN-Sensor. With Optocoupler
...t.wiki/reprap/anet/a8/improvement/autobedleveling
soon i will be uploading a file in youtube to show you the circuit been tested.
thingiverse
free

E3DMount with fixed 18mm or 12mm probe holder for Hypercube by mbruehl
...d deviation: 0.004670.
the sensor has a screw to adjust the detecting distance.
the original clamp for the e3d can still be used.
thingiverse
free

18mm auto level sensor support for Anet A8 right side by lukeskymuh
...6 // y offset: -front +behind [the nozzle]
#define z_probe_offset_from_extruder -2.90 // z offset: -below +above [the nozzle]
thingiverse
free

Anycubic i3 Mega MK4 - Piezo Z probe carriage by Racoon2020
...carriage by racoon2020 thingiverse precision piezo z probe (or similar carriage option for anycubic mega i3 mk4 carriage system...
thingiverse
free

Anet A6 Fan+Sensor (XY-08N) Mount by motey1
...ensional)
less material
!not yet tested, as iam using a different setup for now. please confirm accuracy of fit if you print one!
thingiverse
free

E3D Anet Sensor Extruder by cfresh
...robe_bed_position 20
#define right_probe_bed_position 195
#define front_probe_bed_position 20
#define back_probe_bed_position 170
thingiverse
free

Autolevel Optical Servo by hidius
...1.282 : finished!
18:52:01.282 : mean: -0.042714 min: -0.043 max: -0.043 range: 0.000
18:52:01.282 : standard deviation: 0.000000
thingiverse
free

Calibration X150 Y150 Z50 by DeathmannX
...est the accuracy for longer parts.
warning:
most calipers can not measure this object because this object is in x and y too long.
Chertle
thingiverse
free

Line6 strap holder by chertle
...o fix was a fail. now i'm happy with this solution. the clamp is easy to mount.
edit
universal can be used with velcro straps
thingiverse
free

Universal IKEA Samla Tube Mount by chertle
...ube mount for ikea samla box, but you have to drill holes
for better version look here:
https://www.thingiverse.com/thing:2873244
thingiverse
free

Soundcraft Ui24 Rack Ears by chertle
... small version with a new deepth with 15mm and a bigger with 25mm. the second advantage is a larger slot that reduce overheating.
thingiverse
free

Nozzle Light by chertle
...xtruder fan and to 12v from the board: red2red black2black - use at your risk)
many thanks to my son for preparing this file !!!
thingiverse
free

Hotbed Corner with Cork and Springs Support by chertle
...e damaged
or you have to cut of the cork in the shape of the y-motor. after install use your hand to slide the bed on the y-axis.
thingiverse
free

IKEA Samla Quick Change by chertle
...ess material)
edit 2018-11-13
bearing_holder_single_v3 and bearing_double_single_v3
redesign based on ideas from zedaxis andx_y_z
thingiverse
free

IKEA Samla Quick Change for 608RS bearings by noirvent
...is a remix from ikea samla quick change by chertle to use for 608rs bearings should fit 8x22x7mm...
thingiverse
free

IKEA Samla 45l box filament storage by Dreamcazman
...i'm not sure of the size of the spools chertle was using in his make https://www.thingiverse.com/thing:2873244 but mine are...
thingiverse
free

IKEA Samla 22l Drybox by j-men
...gut gefällt wie mir, dann gebt doch bitte christian (chertle auch ein like. ich habe folgendes gegenüber dem original...
Omron
turbosquid
$15

Omron E4 Nerve Stimulator
... available on turbo squid, the world's leading provider of digital 3d models for visualization, films, television, and games.
thingiverse
free

Omron touch sensor plate by timbiker
...omron touch sensor plate by timbiker
thingiverse
this plate will replace the bearing well on the omron touch sensor
thingiverse
free

Omron touch sensor holder by timbiker
...omron touch sensor holder by timbiker
thingiverse
here is an omron touch sensor holder with the wire hole at the back.
thingiverse
free

OMRON HEM-8713 battery unit by 6c33foxbat
...omron hem-8713 battery unit by 6c33foxbat
thingiverse
omron hem-8713用 18650バッテリーユニット
thingiverse
free

Omron T2007 bypass key
...omron t2007 bypass key
thingiverse
interlocks exist to be defeated
thingiverse
free

Mechanical Endstop Mount (Omron D2F) by asbestospiping
...ical endstop mount (omron d2f) by asbestospiping
thingiverse
part to hold an omron d2f switch in position, mounted to a 8mm rod.
thingiverse
free

OMRON Schlüssel, Serie: D4GL by bevaa
...giverse
vertikalen betrieb schlüssel, sicherheit tür sw
zur verwendung mit: omron d4sl-n serie guard lock sicherheit türschalter
thingiverse
free

Omron Gentle Temp 520 wall mount by mimyllyv
...omron gentle temp 520 wall mount by mimyllyv
thingiverse
simple and clean design of omron gt 520 wall mount
thingiverse
free

Omron electric toothbrush stand
... electric toothbrush stand
thingiverse
a toothbrush stand for ht-b213 (https://store.healthcare.omron.co.jp/item/ht_b213_w.html)
thingiverse
free

Encoder flange Yaskawa omron mount adapter by brooin8
...ron encoders. save on cost but keep reliability and precision.
cnc machine\
lathe
pla 210
bed 60
green kapton tape
prints perfect
412
design_connected
$16

Cab 412
...cab 412
designconnected
cab 412 computer generated 3d model. designed by bellini, mario.
3ddd
$1

Cassina 412 CAB
...cassina 412 cab
3ddd
cassina
cassina 412 cab
turbosquid
$19

Gispen 412
...ee 3d model gispen 412 for download as max, obj, 3ds, and fbx on turbosquid: 3d models for games, architecture, videos. (1698105)
3ddd
$1

Komfort 412
...komfort 412
3ddd
om , стул
bnos ukraine
3ddd
$1

Gispen 412
...937 году и до сих пор производится голландской компанией gispen.http://www.goodmax.ru/producers/gispen/art/ngispen.html
evermotion
$24

Bell 412 am73
... helicopter with all textures, shaders and materials. it is ready to use, just put it into your scene. evermotion 3d models shop.
3d_export
$40

Bell 412 helicopter 3D Model
...bell 412 helicopter 3d model
3dexport
bell 412 helicopter
bell 412 helicopter 3d model evermotion 92774 3dexport
turbosquid
$48

Handgun MP-412
...ree 3d model handgun mp-412 for download as max, obj, and fbx on turbosquid: 3d models for games, architecture, videos. (1279657)
turbosquid
$48

AZLK 412 Moskvitch
... available on turbo squid, the world's leading provider of digital 3d models for visualization, films, television, and games.
turbosquid
$28

MP-412 Rex
... available on turbo squid, the world's leading provider of digital 3d models for visualization, films, television, and games.
Spy
3ddd
$1

Billiani spy
...billiani spy
3ddd
billiani , spy
кресло billiani spy
turbosquid
$29

Spy
...
royalty free 3d model spy for download as max, obj, and fbx on turbosquid: 3d models for games, architecture, videos. (1310859)
turbosquid
free

Spy
... available on turbo squid, the world's leading provider of digital 3d models for visualization, films, television, and games.
design_connected
$7
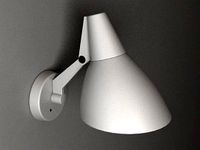
Spy Faretto
...spy faretto
designconnected
manufacturer spy faretto wall lights computer generated 3d model. designed by hannes wettstein.
3ddd
$1
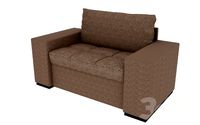
Кресло SPY GAY
...кресло spy gay
3ddd
spy gay
по фотографии
turbosquid
$50

Spy Drone
...osquid
royalty free 3d model spy drone for download as blend on turbosquid: 3d models for games, architecture, videos. (1351381)
3d_export
free
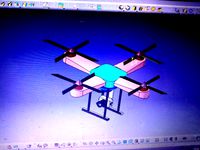
spy drone
...spy drone
3dexport
turbosquid
$3

SPY FOCUS
...lty free 3d model spy focus for download as max, fbx, and obj on turbosquid: 3d models for games, architecture, videos. (1659281)
3d_ocean
$25

Bodyguard Spy
...that will enhance detail and realism to any of your rendering/animation projects. -the model was made in maya 2014. -4k resolu...
turbosquid
$20

Spy Cat
...ree 3d model spy cat for download as blend, fbx, obj, and stl on turbosquid: 3d models for games, architecture, videos. (1563397)
Optical
design_connected
$9
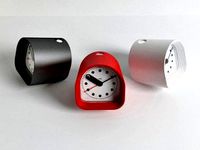
Optic
...optic
designconnected
alessi optic computer generated 3d model. designed by colombo, joe.
3ddd
$1
обои OPTIC
...обои optic
3ddd
в архиве текстуры и фото обоев из коллекции optic.
archive3d
free
Optics 3D Model
...optics 3d model
archive3d
optics
optics - 3d model (*.gsm+*.3ds) for interior 3d visualization.
turbosquid
$49

optical eyewear
...id
royalty free 3d model optical eyewear for download as max on turbosquid: 3d models for games, architecture, videos. (1592243)
3d_ocean
$5
optical mouses
...al mouses
3docean
3d models computer electronics mouse
optical mouses 3d models. realistic mouse model. custom and unique design.
turbosquid
$10
Optic cross
...yalty free 3d model optic cross for download as sldas and ige on turbosquid: 3d models for games, architecture, videos. (1683403)
turbosquid
$7

OPTIC Mirror
... free 3d model optic mirror for download as max, obj, and fbx on turbosquid: 3d models for games, architecture, videos. (1223927)
turbosquid
free

Fiber optics
...d model fiber optics for download as 3ds, obj, fbx, and blend on turbosquid: 3d models for games, architecture, videos. (1211912)
turbosquid
$8
Mouse optical
...3d model mouse optical for download as 3ds, obj, c4d, and fbx on turbosquid: 3d models for games, architecture, videos. (1504476)
turbosquid
free

Optical puzzle
... optical puzzle for download as max, ige, fbx, stl, and sldas on turbosquid: 3d models for games, architecture, videos. (1405925)
A8
turbosquid
$47
Car A8
...
turbosquid
royalty free 3d model car a8 for download as max on turbosquid: 3d models for games, architecture, videos. (1196060)
turbosquid
$50

Audi A8
...yalty free 3d model audi a8 for download as 3dm, obj, and fbx on turbosquid: 3d models for games, architecture, videos. (1580187)
turbosquid
$15

Audi A8
...lty free 3d model audi a8 for download as obj, fbx, and blend on turbosquid: 3d models for games, architecture, videos. (1387519)
turbosquid
$500

Audi A8
... available on turbo squid, the world's leading provider of digital 3d models for visualization, films, television, and games.
3d_export
$5

Audi A8 3D Model
...audi a8 3d model
3dexport
audi a8 cars car
audi a8 3d model ma 20351 3dexport
3d_export
$5

Audi A8 3D Model
...audi a8 3d model
3dexport
3d model of audi a8
audi a8 3d model badyaka 12136 3dexport
3d_ocean
$89

Audi A8 2010
...usiness car car class class f f german german luxury luxury s s s8 s8 sedan sedan vehicle vehicle
new audi a8 2010 detaled model.
turbosquid
$39

A8 2018
...a8 2018 for download as 3ds, obj, wrl, c4d, fbx, dae, and stl on turbosquid: 3d models for games, architecture, videos. (1345349)
turbosquid
free
audi a8 l
...rbosquid
royalty free 3d model audi a8 l for download as obj on turbosquid: 3d models for games, architecture, videos. (1663016)
3d_ocean
$45

Audi A8 restyled
...our door vehicle was created in blender3d 2.62.realistic renderings were created with yafaray 0.1.2 realistic plugin.rendering...
Anet
thingiverse
free

Anet by derbodesign
...anet by derbodesign
thingiverse
logo anet
thingiverse
free
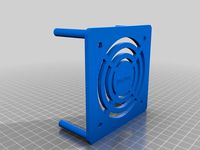
Anet e10 , Anet v1.0 by jonathan_943D
...anet e10 , anet v1.0 by jonathan_943d
thingiverse
soporte de ventilador de 80mm, para controladora anet v1.0
thingiverse
free
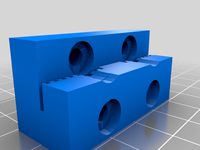
Anet A8 Anet AM8 Y belt holder
...anet a8 anet am8 y belt holder
thingiverse
anet a8 anet am8 y belt holder
thingiverse
free
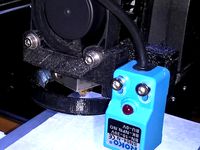
Anet A8 Probe Bracket for anet sensor by chelrix
...anet a8 probe bracket for anet sensor by chelrix
thingiverse
anet a8 probe bracket for anet official sensor and marlin firmware
thingiverse
free
Anet logo by JUST3D_PRNTNG
...anet logo by just3d_prntng
thingiverse
anet logo
thingiverse
free
Fan nozzle for Anet A8 with original Anet levelsensor by peteruhlmann
...et levelsensor by peteruhlmann
thingiverse
here is an improved fan nozzle for the anet a8 with original level sensor from anet.
thingiverse
free
Anet Et4 Box
...anet et4 box
thingiverse
tool box for anet et4
thingiverse
free
Anet Logo by Superflex_Plastic_Fantastic
...anet logo by superflex_plastic_fantastic
thingiverse
anet logo to incorporate into designs.
thingiverse
free
Box for Anet ET4
...box for anet et4
thingiverse
this is a simple box for tool of anet et4
thingiverse
free

Anet V1.0 Board Kühlung (80mm Lüfter) / Anet A8 by MadCre8
...anet v1.0 board kühlung (80mm lüfter) / anet a8 by madcre8
thingiverse
anet v1.0 board kühlung (80mm lüfter) / anet a8
Sensor
3d_export
free

parking sensor
...parking sensor
3dexport
car parking sensor
turbosquid
$1
Sensor
... available on turbo squid, the world's leading provider of digital 3d models for visualization, films, television, and games.
3d_export
$5
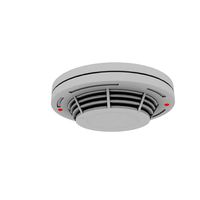
Smoke sensor
...port
smoke sensor, can be an impressive element for your projects. easy to use, realistic image, low polygon, quality materials.
3d_export
$5
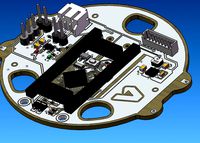
Air Quality Sensor v1
...air quality sensor v1
3dexport
air quality sensor v1
3d_export
$15
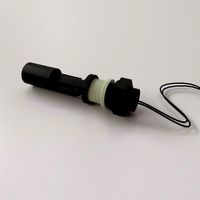
float sensor
...e up render. - all parts and materials are logically named. other formats ================= - collada (.dae) - autodesk fbx - obj
turbosquid
$26
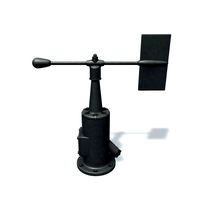
Wind sensor C
...free 3d model wind sensor c for download as 3ds, obj, and fbx on turbosquid: 3d models for games, architecture, videos. (1328943)
turbosquid
$26
Wind sensor B
...free 3d model wind sensor b for download as 3ds, obj, and fbx on turbosquid: 3d models for games, architecture, videos. (1328168)
3d_export
$5
ultrasound sensor
...ivers convert ultrasound into electrical signals, and transceivers can both transmit and receive ultrasound. export in: -obj -fbx
3ddd
free
Вытяжка Shindo pallada sensor
... вытяжка
вытяжка shindo pallada sensor. в двух размерах - 600 и 900. текстуры в комплекте.
turbosquid
$52
Wind sensor A B C
...
royalty free 3d model wind sensor a b c for download as fbx on turbosquid: 3d models for games, architecture, videos. (1408406)
Auto
3d_export
$5

auto
...auto
3dexport
auto
3ddd
$1

auto
...auto
3ddd
max7
turbosquid
$69
AUTO
...to
turbosquid
royalty free 3d model auto for download as obj on turbosquid: 3d models for games, architecture, videos. (1453538)
3d_export
$10

Auto
...auto
3dexport
3d_export
free

auto
...auto
3dexport
3ddd
$1

Auto posters
...auto posters
3ddd
машина
auto posters
turbosquid
$50

auto
... available on turbo squid, the world's leading provider of digital 3d models for visualization, films, television, and games.
turbosquid
$28

Auto
... available on turbo squid, the world's leading provider of digital 3d models for visualization, films, television, and games.
turbosquid
$20
auto
... available on turbo squid, the world's leading provider of digital 3d models for visualization, films, television, and games.
turbosquid
$5
auto
... available on turbo squid, the world's leading provider of digital 3d models for visualization, films, television, and games.
Leveling
design_connected
$11

Levels
...levels
designconnected
one nordic levels computer generated 3d model. designed by form us with love.
design_connected
$7
Level
...level
designconnected
zanotta level shelves and storage computer generated 3d model. designed by arik levy.
turbosquid
$29
level
...ty free 3d model level for download as 3ds, obj, c4d, and fbx on turbosquid: 3d models for games, architecture, videos. (1272856)
turbosquid
$1
level
... available on turbo squid, the world's leading provider of digital 3d models for visualization, films, television, and games.
3d_export
$5
Mario level
...mario level
3dexport
mario level low quality for fun videos
3ddd
$1
LEVELS OF DISCOVERY
...етская мебель "levels of discovery". rab10003 princess mini rocker
кресло-качалка (мини) "принцесса навсегда"
3d_export
$19
level design
...level design
3dexport
you can use this design (level design) in your own game.
turbosquid
$60

Desert level
...squid
royalty free 3d model desert level for download as fbx on turbosquid: 3d models for games, architecture, videos. (1208131)
turbosquid
$15
Transit Level
...quid
royalty free 3d model transit level for download as max on turbosquid: 3d models for games, architecture, videos. (1158112)
turbosquid
$14

Districts Level
...id
royalty free 3d model districts level for download as max on turbosquid: 3d models for games, architecture, videos. (1408410)
Bed
3ddd
$1
bed
...bed
3ddd
bed , постельное белье
bed
3ddd
$1
bed
...bed
3ddd
bed , постельное белье
bed
3ddd
$1
bed
...bed
3ddd
bed , постельное белье
bed
3ddd
$1
bed
...bed
3ddd
bed , постельное белье
bed
3ddd
$1
bed
...bed
3ddd
bed , постельное белье
bed
3ddd
$1

bed
...bed
3ddd
bed , постельное белье
bed
3ddd
free
bed
...bed
3ddd
bed , постельное белье
bed
3ddd
free
bed
...bed
3ddd
bed , постельное белье
bed
3ddd
$1
Bed
...bed
3ddd
bed , постельное белье , постель
bed
3d_export
$7
bed adairs bed
...rs bed
3dexport
bed adairs bed in modern style. if you want a smoother surface, please turn on turbosmooth in the modifier list.
Mount
3d_export
free

mounting bracket
...mounting plate is the portion of a hinge that attaches to the wood. mounting plates can be used indoors, cabinetry and furniture.
turbosquid
$2

MOUNTING
... available on turbo squid, the world's leading provider of digital 3d models for visualization, films, television, and games.
turbosquid
free

Mounts
... available on turbo squid, the world's leading provider of digital 3d models for visualization, films, television, and games.
turbosquid
free

Mount Fuji
...fuji
turbosquid
free 3d model mount fuji for download as obj on turbosquid: 3d models for games, architecture, videos. (1579977)
3d_export
$5

Headphone mount LR
...headphone mount lr
3dexport
headphone mount l+r
turbosquid
$39

Mount rainier
...quid
royalty free 3d model mount rainier for download as fbx on turbosquid: 3d models for games, architecture, videos. (1492586)
turbosquid
$5

pipe mounting
...quid
royalty free 3d model pipe mounting for download as obj on turbosquid: 3d models for games, architecture, videos. (1293744)
turbosquid
$3

Mounting Tires
...uid
royalty free 3d model mounting tires for download as fbx on turbosquid: 3d models for games, architecture, videos. (1708511)
3d_export
$5

Magnetic GoPro Mount
...pro mount
3dexport
cool magnetic mount for gopro. allows you to mount the camera on flat metal surfaces and get exclusive shots.
turbosquid
$5

Stone Mount
...ty free 3d model stone mount for download as ma, obj, and fbx on turbosquid: 3d models for games, architecture, videos. (1370306)
