Thingiverse
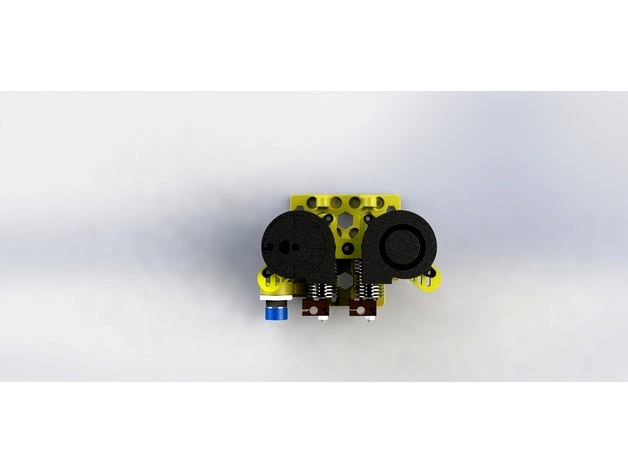
Anet A8 E3D V6 Bowden Dual Extruder Mount Pruisa i3 Clone X Carriage by morganlowe
by Thingiverse
Last crawled date: 4 years, 6 months ago
Please see the newer version Here
It features a much better design with more compatibility and better cooling!
Updated 1-18-18 READY TO GO!
See it run here: https://youtu.be/Nrn9100MQbY
See my Rear Sensor Mount version here https://www.thingiverse.com/thing:2763157
All instructions are for the Anet A8.
Reduced some sizes, moved some things and cleaned it up. I added some zip tie holes in the sides and improved tolerances. I made slotted holes because my printed X mounts changed the dimensions a bit.
I have printed, installed and now used this part. Below are instructions on how to set it up.
I printed them with 1.8mm wall and 30% fill. I also made a set at 1.2mm wall and 15% fill that worked perfectly. Both in PLA.
This includes guides like my thing https://www.thingiverse.com/thing:2732685 built into the mount.
Get the latest Skynet3D firmware from https://github.com/thijsk/Skynet3d and please update your firmware as follows:
Enable RAMPS boards, this is for the common ones like https://goo.gl/XW91zh [Amazon.com link] PLEASE pay attention and be sure to choose the correct code for your motherboards. See boards.h in the Skynet firmware for a list.
define MOTHERBOARD BOARD_RAMPS_14_EEB
Enable dual extruders:
define EXTRUDERS 2
Offsets for the extruders:
define HOTEND_OFFSET_X {0.0, 35.00}
define HOTEND_OFFSET_Y {0.0, 0.00}
For the probe it's :
define X_PROBE_OFFSET_FROM_EXTRUDER -35 // X offset: -left +right [of the nozzle]
define Y_PROBE_OFFSET_FROM_EXTRUDER 4 // Y offset: -front +behind [the nozzle]
define Z_PROBE_OFFSET_FROM_EXTRUDER -0.5 // Z offset: -below +above [the nozzle Set this to your machine. I used a .5mm thick print put between the bed and probe with the nozzle touching the bed to start.]
You also need to set travel limits:
// Travel limits after homing (units are in mm)
define X_MAX_POS 240
define X_MIN_POS -15
define Y_MAX_POS 230
define Y_MIN_POS -13
define Z_MAX_POS 230
define Z_MIN_POS 0
And probe point offsets:
// Set the boundaries for probing (where the probe can reach).
define LEFT_PROBE_BED_POSITION 27
define RIGHT_PROBE_BED_POSITION 200
define BACK_PROBE_BED_POSITION 200
define FRONT_PROBE_BED_POSITION 20
See https://goo.gl/NkkGsb [3D print wiki] for the best instructions I have found so far on how to set your probe Z offset. I did this using the terminal in Octoprint via to Raspberry Pi on the printer.
I am running RAMPS 1.4 with Skynet firmware.
Anyways, this is getting out of hand so here's the important stuff:
Many models to choose from!
No sensor mount
18mm sensor
12mm sensor
8mm sensor
Then choose you cap:
2 stock fans with chain mount
2 stock fans no chain mount
No fans no chain mount
No fans with chain mount
if you need them there's fan spacers too. I found my duct hit the extruder.
If you go with one with a chain mount I have included the X axis chain links from https://www.thingiverse.com/thing:2193695 This is what I remixed from. You may get the other end mount from here or use mine at https://www.thingiverse.com/thing:2762145
Then choose you print settings:
Choose .AMF or .STL. I found .AMF more accurate and works in Cura.
Made one at .4mm Nozzle, .2mm step, 1.6mm wall and 30% fill worked great
Made a second at .4mm nozzle, .2mm step, 1.2mm wall and 15% fill, worked just as good.
Do your own of course! You guys know what's what.
You will need:
1) E3D style extruders
2) RAMPS 1.4 or 1.5
3) Marlin/Skynet firmware
4) 40mm M4 Screws and Nuts for the cap, 3 of them
5) 50mm blower fan
6) Wires, connectors, crimpers, and a soldering iron helps.
I have made a guide in PDF form available here https://goo.gl/1s8jSR for setting the offsets. You will need a serial connection to your printer and I found using Octoprint is really easy.
Here's a crapCAD schematic of the optocoupler board I made to run the 12v probe completely isolated from the RAMPS board.
Thank you! Enjoy and please like, comment and share!