Thingiverse
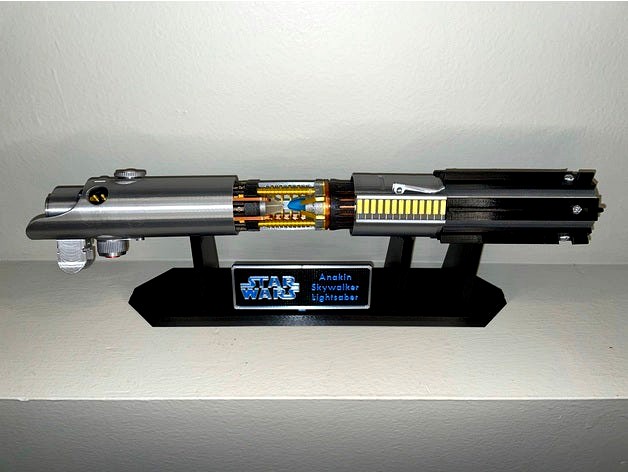
Anakin Skywalker Lightsaber Crystal Reveal by UnimatrixRed
by Thingiverse
Last crawled date: 3 years, 3 months ago
Here are all of the many parts I used to make yet another version of the great Anakin Skywalker lightsaber by CaseStudyno8 here https://www.thingiverse.com/thing:1538383. Also remixed parts from Dogbert's emitter remix here https://www.thingiverse.com/thing:3394892 and timmy_d3's remix here https://www.thingiverse.com/thing:3490259/files.
I've wanted to make a 'crystal reveal' lightsaber for some time, so while working on mods for the Anakin saber, I came up with a crystal chamber design that's revealed when the saber is pulled open. I'm no engineer so I did my best to make a sliding rail type system to let the hilt ends pull far enough apart for a wide enough reveal while securing the ends from coming off. Probably could have been simpler but oh well. I used 8x3mm magnets that let the whole piece stay closed. It actually works nicely.
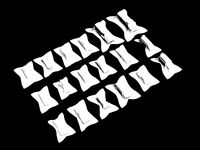
The internals are optional so there are solid versions of the modified hilt parts too. The crystal chamber is reinforced by 5 spines that are printed laying down for good sturdiness. The 2 tubes are just for asthetics since they're fragile.
Here's a breakdown of the main hilt changes:
Upper chamber - The emitter clamp now fits into the same slot that the bunny ears do for a more secure fit. Added raised platforms for the glass eye and red button. Added cutouts and screw above glass eye. Separated emitter charging ports.
Emitter ports - separated for easier painting or color swap. Works with the emitter port casing. Glue in place after inserting casing.
Glass eye - eye and bevel separated for color options. Use supports.
Clamp lever - designed to actually move, it prints standing upright. Use supports.
Midsection - Made the top and bottom recessed to hide gaps between hilt pieces when connected (hilt parts were lengthened to reflect the change). Use supports.
Pommel - Flattened bottom. Added version with rivets instead of + screws. Use supports.
Pommel blocks - I needed the inserted portion to be shorter to allow enough room inside the pommel body. Also added a split version that allows you to print them easier in Flex TPU filament, which is what I did.
All the rest of the parts included are simply to complete this model. Use supports as needed.
Internal assembly:
Assembly can be tedious, so be patient.
Magnets are optional if you simply want to display this.
Use brims and support for small parts.
Test fit everything before committing to any gluing.
Print the slider cores with their slots horizontal and use supports. Make sure to remove supports completely for the rails to move freely.
Electronic lighting would make this look fantastic, but I'm no good at it. That's why there are no options for it at this time. Unless someone wants to remix...
Display stand is included. Base is very long so if it doesn't fit on your bed diagonally, you can cut it in half in your slicer then glue together later.
Here is an excellent guide for anyone looking for details about the movie props: http://wannawanga.com/wp-content/uploads/2018/01/SW_Lightsaber_Guide.pdf
Video of it closing: Anakin Skywalker Lightsaber Crystal Reveal Custom 3D Print
I've wanted to make a 'crystal reveal' lightsaber for some time, so while working on mods for the Anakin saber, I came up with a crystal chamber design that's revealed when the saber is pulled open. I'm no engineer so I did my best to make a sliding rail type system to let the hilt ends pull far enough apart for a wide enough reveal while securing the ends from coming off. Probably could have been simpler but oh well. I used 8x3mm magnets that let the whole piece stay closed. It actually works nicely.
The internals are optional so there are solid versions of the modified hilt parts too. The crystal chamber is reinforced by 5 spines that are printed laying down for good sturdiness. The 2 tubes are just for asthetics since they're fragile.
Here's a breakdown of the main hilt changes:
Upper chamber - The emitter clamp now fits into the same slot that the bunny ears do for a more secure fit. Added raised platforms for the glass eye and red button. Added cutouts and screw above glass eye. Separated emitter charging ports.
Emitter ports - separated for easier painting or color swap. Works with the emitter port casing. Glue in place after inserting casing.
Glass eye - eye and bevel separated for color options. Use supports.
Clamp lever - designed to actually move, it prints standing upright. Use supports.
Midsection - Made the top and bottom recessed to hide gaps between hilt pieces when connected (hilt parts were lengthened to reflect the change). Use supports.
Pommel - Flattened bottom. Added version with rivets instead of + screws. Use supports.
Pommel blocks - I needed the inserted portion to be shorter to allow enough room inside the pommel body. Also added a split version that allows you to print them easier in Flex TPU filament, which is what I did.
All the rest of the parts included are simply to complete this model. Use supports as needed.
Internal assembly:
Assembly can be tedious, so be patient.
Magnets are optional if you simply want to display this.
Use brims and support for small parts.
Test fit everything before committing to any gluing.
Print the slider cores with their slots horizontal and use supports. Make sure to remove supports completely for the rails to move freely.
Electronic lighting would make this look fantastic, but I'm no good at it. That's why there are no options for it at this time. Unless someone wants to remix...
Display stand is included. Base is very long so if it doesn't fit on your bed diagonally, you can cut it in half in your slicer then glue together later.
Here is an excellent guide for anyone looking for details about the movie props: http://wannawanga.com/wp-content/uploads/2018/01/SW_Lightsaber_Guide.pdf
Video of it closing: Anakin Skywalker Lightsaber Crystal Reveal Custom 3D Print
Similar models
thingiverse
free

Anakin Skywalker's Lightsaber (Episode II) by CaseStudyno8
... small part, i'd suggest printing that alongside other parts so that the layers have time to cool in between.
happy printing!
cg_trader
$2

Anakin Skywalker Lightsaber Hilt
...er hilt
cg trader
3d model anakin skywalker lightsaber hilt lightsaber starwars, available in fbx, ready for 3d animation and ot
thingiverse
free

Skywalker Lightsaber Keychain by sjhnsn53
...stick it into cura it is super easy to adjust the length/size depending on your wants/needs. takes about 20 mins to print.
enjoy!
cg_trader
free

Anakins Lightsaber hilt
...kywalker's lightsaber hilt from anh (1977) with a removable blade starwars space lightsaber anakin weapon blade science other
thingiverse
free

Emitter Remix For Luke Skywalker Hilt by Xcalibur76
... by xcalibur76
thingiverse
i wanted a cleaner print and without the need to use supports. should print fine in this orientation.
thingiverse
free

Anakin Skywalker's Lightsaber by CaseStudyno8
...ve meshed together my favorite parts, mostly from episodes 3,5 and 7, for this model.
be sure to print six of the pommel inserts!
cg_trader
$10

Anakin Skywalker Lightsaber | 3D
...pe you enjoy it! star wars sci fi skywalker anakin jedi revenge of the sith lightsaber prop movie laser scifi hilt art sculptures
thingiverse
free

Kylo Ren / Crossguard Lightsaber with Crystal Chamber / suitable for electronics by AlcatrazSkywalker
... your local hardware store.
"a quartz crystal you also need" . a true jedi finds its own crystal ;)
greetings
alcatraz
thingiverse
free

Darth Vader's Lightsaber Modified
...casestudyno8's design.
the parts do not all open in the orientation they should be printed in, so please rotate accordingly.
cg_trader
$3

Anakin Skywalker lightsaber keychain | 3D
...hat fits well on keychains with included ring on the hilt.
due to its size it lacks minor details while retaining major features
Unimatrixred
thingiverse
free

Mandalorian Refrigerator Magnets by UnimatrixRed
...ferent magnet sizes but let me know if you need a size that's not there.
32x2mm
18x4mm
15x2mm
12x2mm
8x3mm
8x2mm
6x2mm
3x3mm
thingiverse
free

Stand for boomerang phaser by Hydrate_or_Diedrate by UnimatrixRed
...ded by hydrate_or_diedrate.
you'll likely need to glue the 'rest' part to the leg.
10/12/20 added more tag options.
thingiverse
free

Display Stand for TOS Phaser by Shipbrook by UnimatrixRed
...brook here: https://www.thingiverse.com/thing:3322199
the small tag is like the one in the photo which i used a .25mm nozzle for.
thingiverse
free

Ahsoka Tano Clone Wars Lightsabers Stand by UnimatrixRed
... dual sabers from the clone wars, specifically fitting the design by casestudyno8 here: https://www.thingiverse.com/thing:1121939
thingiverse
free

Star Trek Nemesis 'Dolphin' Phaser Kit by UnimatrixRed
... in the proper print orientation. use supports on body and upper grip.
printed it using overture space gray and matte black pla.
thingiverse
free

The mandalorian Blaster Stand by orelien
...to look like all the stand of @unimatrixred ( https://www.thingiverse.com/unimatrixreddesigns ) thanks for your feedback...
thingiverse
free

Display stand for Ahsoka Tano (Rebels) Lightsabers by UnimatrixRed
...ename in the rebel alliance.
this stand will only fit casestudyno8's version here: https://www.thingiverse.com/thing:1695805
thingiverse
free

Star Trek TOS Wall Intercom Kit by UnimatrixRed
... intercom box.
haven't printed it yet so let me know if tolerances are off and if you want any mounting options on the back.
thingiverse
free

Modified 'Boomerang' Phaser by UnimatrixRed
...rse.com/thing:4617573
used cc3d silver petg
10/24/20 added the original version of the button plate but with the alignment notch.
thingiverse
free

Modified Parts and Stand for Varon-T Disruptor by Shipbrook by UnimatrixRed
...odified parts--the rest of the model's parts can be downloaded from shipbrook here: https://www.thingiverse.com/thing:2628536
Anakin
archibase_planet
free

Anakin head
...anakin head
archibase planet
head anakin little anakin
anakin head - 3d model (*.gsm+*.3ds) for interior 3d visualization.
turbosquid
$1

Pod anakin
...squid
royalty free 3d model pod anakin for download as blend on turbosquid: 3d models for games, architecture, videos. (1575955)
archive3d
free

Anakin head 3D Model
...d
head anakin little anakin
anakin head - 3d model (*.gsm+*.3ds) for interior 3d visualization.
3d_export
$5

Anakins lightsaber
...anakins lightsaber
3dexport
turbosquid
$20

Anakin Skywalker
...nakin skywalker for download as obj, fbx, blend, dae, and stl on turbosquid: 3d models for games, architecture, videos. (1192000)
turbosquid
$19

Pod Racer Anakin
...model pod racer anakin for download as max, 3ds, fbx, and obj on turbosquid: 3d models for games, architecture, videos. (1626426)
3d_ocean
$10
Star Wars: Anakin Skywalker Lightsaber
...tsaber of anakin skywalker. it contains a fairly high amount of polygons, suitable for semi-close up renders. main focus is it...
3d_export
$19

Anakin Corrupt Lego 3D Model
...star wars starwars
anakin corrupt lego 3d model download .c4d .max .obj .fbx .ma .lwo .3ds .3dm .stl digitallab3d 104321 3dexport
3d_export
$19

Anakin Apprentice Lego 3D Model
...anakinskywalker
anakin apprentice lego 3d model download .c4d .max .obj .fbx .ma .lwo .3ds .3dm .stl digitallab3d 104320 3dexport
3d_export
$149

Star Wars Anakin pod racer 3D Model
...vechicle future movie flying star wars sci fi scifi skywalker anakin pod
star wars anakin pod racer 3d model squir 82894 3dexport
Skywalker
turbosquid
$5

Skywalk
...turbosquid
royalty free 3d model skywalk for download as skp on turbosquid: 3d models for games, architecture, videos. (1379543)
turbosquid
$5
Skywalk Piece
...quid
royalty free 3d model skywalk piece for download as max on turbosquid: 3d models for games, architecture, videos. (1422588)
turbosquid
$20
Anakin Skywalker
...nakin skywalker for download as obj, fbx, blend, dae, and stl on turbosquid: 3d models for games, architecture, videos. (1192000)
3d_export
free

luke skywalkers lightsaber
...luke skywalkers lightsaber
3dexport
luke skywalker's lightsaber (no beam, with blue and green beam)
turbosquid
$6

Lightsaber - Luke Skywalker
... skywalker for download as 3ds, max, obj, fbx, blend, and dae on turbosquid: 3d models for games, architecture, videos. (1400911)
turbosquid
$11

Luke Skywalker's Lightsaber
...alker's lightsaber for download as max, obj, 3ds, and fbx on turbosquid: 3d models for games, architecture, videos. (1580584)
turbosquid
$20

Lightsaber Luke Skywalker ROTJ
...del lightsaber luke skywalker rotj for download as and sldpr on turbosquid: 3d models for games, architecture, videos. (1352665)
3d_ocean
$10
Star Wars: Anakin Skywalker Lightsaber
...tsaber of anakin skywalker. it contains a fairly high amount of polygons, suitable for semi-close up renders. main focus is it...
3d_export
$10

Luke Skywalkers LightSaber 3D Model
...arwars darth vader luke skywalker yoda anakin storm trooper sith
luke skywalkers lightsaber 3d model carbonmonster 22483 3dexport
3d_export
$10

Luke Skywalkers ESB lightsaber 3D Model
...wars starwars
luke skywalkers esb lightsaber 3d model download .c4d .max .obj .fbx .ma .lwo .3ds .3dm .stl boroda 108375 3dexport
Reveal
turbosquid
$29

Fire Reveal
...osquid
royalty free 3d model fire reveal for download as max on turbosquid: 3d models for games, architecture, videos. (1273880)
turbosquid
$100

Butterflies Reveal Object
... available on turbo squid, the world's leading provider of digital 3d models for visualization, films, television, and games.
turbosquid
$20

Girl in revealing dress 0329
...n revealing dress 0329 for download as fbx, obj, stl, and wrl on turbosquid: 3d models for games, architecture, videos. (1605980)
3d_export
$20

girl in revealing dress 0328
...gt;- cjp technology suitable<br>- source file (.wrl) is included<br>suitable for 3d-systems projet 3d printer series.
3d_export
$20

girl in revealing dress 0329
...gt;- cjp technology suitable<br>- source file (.wrl) is included<br>suitable for 3d-systems projet 3d printer series.
3d_export
$20

woman in revealing pose 0336
...gt;- cjp technology suitable<br>- source file (.wrl) is included<br>suitable for 3d-systems projet 3d printer series.
3d_export
$20
present car cloth presentation transport transportation shape concepts show celebration cover showro
...shrouded cover covering tarp draped fabric cloth showroom reveal revealng clothed clothing material covered auto realistic 3d model car...
3d_ocean
$5

Puzzle Animation (Solving)
...animation intro puzzle video the animated puzzle solves & reveal the logo (image, text, website address, facebook page) or...
3ddd
$1

Empty Hand Pillow
...absence, shadowing the contours of a vanished presence, empreinte reveal the imprinted sensations of a missing...
3d_export
$90

nostromo engineering corridor
...the panel on the front can be hidden to reveal an emergency release handle. the corridor can be cloned...
Lightsaber
3d_export
free

lightsaber
...lightsaber
3dexport
the best lightsabers in the galaxy:)
3d_export
$6

lightsaber
...lightsaber
3dexport
lightsaber belonging to an unknown jedi of the old republic.
3d_export
$5

Lightsabers
...lightsabers
3dexport
rusty and clean lightsabers like in star wars
3d_export
$5

lightsaber
...lightsaber
3dexport
i fan star wars and i do my lightsaber
3d_ocean
$4

Simple Lightsaber
...simple lightsaber
3docean
jedi lightsaber starwars
lightsaber model that is ready to be rigged and animated.
turbosquid
$4

Lightsaber
...squid
royalty free 3d model lightsaber for download as blend on turbosquid: 3d models for games, architecture, videos. (1691034)
3d_export
free

lightsaber 3d
...lightsaber 3d
3dexport
the best lightsabers in the galaxy:)
3d_ocean
$10

Lightsaber
...er multi format multiformat skywalker star wars
made a high poly lightsaber from the star wars franchise. this is my own version.
turbosquid
$15

lightsaber
...
royalty free 3d model lightsaber for download as max and obj on turbosquid: 3d models for games, architecture, videos. (1165564)
3d_export
$5

lightsaber
...lightsaber
3dexport
Crystal
3d_ocean
$5
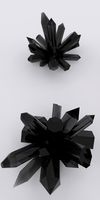
Crystals
...formations crystals formation formations
few models of separate crystals and two crystal formations. low poly but photorealistic.
3d_ocean
$5
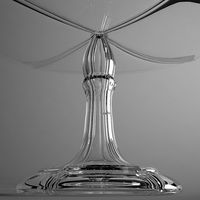
Crystal
...crystal
3docean
crystal glass
crystal,glass
3ddd
$1

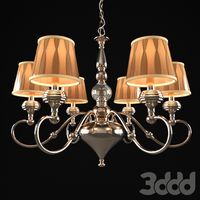
Crystal chandelier
...crystal chandelier
3ddd
crystal chandelier , crystal
crystal chandelier
3d_ocean
$4
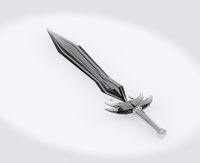
Crystal Sword
...ystal blade crystal sword floating floating blade glass glass sword sword
an animated low poly sword with floating crystal blade.
3ddd
$1

Crystal Lux
...crystal lux
3ddd
crystal lux
страна-производитель: италия
бренд: crystal lux
3ddd
$1
Crystal Lux
...crystal lux
3ddd
crystal lux
страна-производитель: италия
бренд: crystal lux
turbosquid
free

Crystal
...crystal
turbosquid
free 3d model crystal for download as obj on turbosquid: 3d models for games, architecture, videos. (1312776)
3d_export
$5

desert with crystals
...desert with crystals
3dexport
desert with crystals
turbosquid
$30

Crystal
...turbosquid
royalty free 3d model crystal for download as fbx on turbosquid: 3d models for games, architecture, videos. (1450556)
turbosquid
$8

Crystalls
...rbosquid
royalty free 3d model crystalls for download as fbx on turbosquid: 3d models for games, architecture, videos. (1469917)