Thingiverse

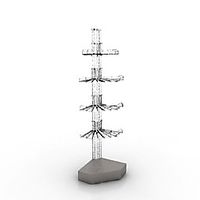
Amiibo Stand System - No Connectors by amarand
by Thingiverse
Last crawled date: 3 years, 1 month ago
Edit 11/17/2017: I can't believe I didn't mention this sooner! If you're into the idea of the Amiibo stand system WITH connectors, I have a new Thing posted you'll want to check out:
https://www.thingiverse.com/thing:2629107
I have a lot of Amiibo, and I think it's safe to say that they end up taking over if you let them.
So I went and did a search on the Internet, and found this fantastic guide to making an Amiibo stand out of wood:
https://imgur.com/gallery/P68cT
I took the general design, tweaked the sizes, and made this thing:
https://www.thingiverse.com/thing:2613221
It was perfect, ready to go, and it even had space at the top for the larger Amiibo!
Sadly, it wouldn't print on my FFCP 2016, because it was huge!
So I did what any self-respecting designer and engineer would do: I brainstormed.
First, I did a search, and found that a lot of folks have Amiibo holders, but they're generally flat, and not a stand like this. I like the multi-level stands. But how could I print multi-level stands, if the maximum my printer would allow is 4x3? That's too small.
Then the answer came to me: modularization.
I decided that all I really needed were building blocks, and I could then stick them together however I wanted! Plus, printing a single module takes (on my printer) anywhere from 3 hours for the small one, to ten hours for the tall one. I don't like prints that have to run overnight or for multiple days. So can you imagine how long it would take to print a whole stand all at once? Simplify3D claims it would take over 24 hours.
So the module system is perfect! You can print as many of the low, medium and high platforms as you'd like, stick them together using PLA-friendly double-sided tape, you could stick them together at the bottom using something like Con-Tact paper:
http://contactbrand.com/
Or if you wanted to be extra bold, you could use Cyanoacrylate (Super Glue) for that never-coming-apart-ever bond:
https://en.wikipedia.org/wiki/Cyanoacrylate
This is the first iteration, and I think some folks will enjoy this project as it is. It's done, ready to download and use however you'd like to use it. If you make something with this, or remix it, please let me know, and share a Make or Remix here.
If you'd like different heights, sizes, margins, just let me know. I've designed these in Fusion 360 using 100% parameterization, so changing a specific diameter and posting a special item would be trivial. If you want to sketch something out, you can do a Make here, or leave comments with links to Imgur. I'm fairly responsive.
The next version is going to be a little more fun, though. I sketched out the system on my iPad, and these building blocks were the first stage. I wanted to make sure I could design something modular, that would print well. I've done that.
I believe the next version is going to have pins-and-holes, with different hole placements, so you can have all the varying hole placements you should need/want. Front, middle, back, left, center, right. That way, if you want to have low, medium, high like in the standard stand I shared earlier, you will be able to arrange them in that way. But if you wanted to do something like low, medium, low, high or something, I'll have a version for each, so it can sit in the front, middle or back, whether low, medium or high.
That's going to take a little more planning, but it's on the horizon.
Questions, comments? I love to hear them!
Similar models
thingiverse
free

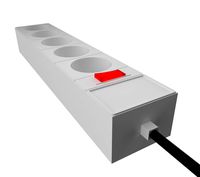
Amiibo Stand System - With Connectors by amarand
...some point, when you get out to eight or nine wide, a fourth layer might make it look better than just the three. we'll see.
thingiverse
free

Paint Bottle Holder Rack by woodenparrot
...so there you go. if i had a metal printer i would totally make them!
if you make this or remix please post so i can see. thanks!!
thingiverse
free

BAMBUILDI Modular Bamboo Stick Construction Play Set by baschz
...m into longer bamboo poles you can further build with. using small elastic hair bands you can connect and build with them.
enjoy!
thingiverse
free

Wii U Kiosk Amiibo Stand by SNESNESCUBE64
...o make more of them.
future plans:
multi amiibo stands (2 and 3 amiibos each)
amiibo card stands
more designs for the single ones
thingiverse
free

Amiibo Stand by amarand
... a make, and let's talk about ways to make an amiibo display stand more practical for folks with reasonable-sized print beds!
thingiverse
free

Amiibo Stand by micbro
...rinting!
also i do take feedback on print settings and what to fix in the model so, if you print it, please tell me your results!
thingiverse
free

Spider ring topper by GrayGhost79
...een first, then moving on to a marvel theme, then dc, and where ever else it takes me :p
https://www.thingiverse.com/thing:19154
thingiverse
free

desktop organizer by neosho3d
...strengthen my design by backing it more interesting on how it fits your likings with all of the different colors you can make it.
thingiverse
free

The Ultimate amiibo Display System by BlitzTachaano
...ds and probably the pins to get them to print properly, and use supports on the stands to print the slots for the pins correctly.
thingiverse
free

Amiibo Figure Stands with Logos by dfoles
...e of the stand. i also created a small opening on the bottom so that they are stackable when not in use (if you want to do that).
Amarand
thingiverse
free

Coffee Stencil - H Cursive by amarand
...coffee stencil - h cursive by amarand
thingiverse
a simple coffee mug stencil with the initial h in the center.
thingiverse
free

Shower Ant Trap Shelf by amarand
...e
this is a cute little shelf i designed to hold an ant trap on the top of my shower where the ants were crawling. super simple!
thingiverse
free

Window Ledge Wedge by amarand
...ed in fusion 360, prepared with simplify3d for 3d printing. there's a lot of math involved.
i'm thinking of patenting it.
thingiverse
free

Basic Oval Bowl v1 by amarand
...raffe?) bowl that has no (consistent) artifacts or issues after printing.
yay learning and i hope you enjoy this very basic bowl!
thingiverse
free

Plant Pot Riser...OF DOOM! by amarand
... with the following. i looked into the darkness, and the darkness looked back.
i may have gone crazy, but i returned with genius.
thingiverse
free
Amiibo Stand by amarand
... a make, and let's talk about ways to make an amiibo display stand more practical for folks with reasonable-sized print beds!
thingiverse
free

Money Holder Card by amarand
...to dig them out of the corners and sides really well. the bills wouldn't fit until i got all the little support pieces out.
thingiverse
free

Not-a-Raccoon Bowl (Cat!) by amarand
... a raccoon, raccoon ears and whiskers look like this!" then i will maybe redesign it to a more raccoony standard. who knows?
thingiverse
free

Super-Secret High-Security Key by amarand
...//www.thingiverse.com/thing:2295821
if you have any ideas or modifications, please feel free to share them in the comments below!
thingiverse
free

Doorstop Exploration by amarand
... things. if you'd like a custom monogram on the side, please let me know. it's fairly trivial to add in using fusion 360.
Amiibo
thingiverse
free

Amiibo stand
...amiibo stand
thingiverse
simple stand for 16 amiibo tokens
thingiverse
free

Amiibo Base
...amiibo base
thingiverse
an amiibo base with very close measurements to those of the smash bros line.
thingiverse
free

Lulu Amiibo
...lulu amiibo
thingiverse
this is an amiibo-like figure of lulu from dragon quest builders 2. enjoy!
thingiverse
free

Anessa Amiibo
...anessa amiibo
thingiverse
this is an amiibo-like figure of anessa from dragon quest builders 2. enjoy!
thingiverse
free

Babs Amiibo
...babs amiibo
thingiverse
this is an amiibo-like figure of babs from dragon quest builders 2. enjoy!
thingiverse
free

Amiibo Logo by AwesomeA
...amiibo logo by awesomea
thingiverse
amiibo logo
thingiverse
free

Amiibo Logo by Allegro
...amiibo logo by allegro
thingiverse
amiibo logo
thingiverse
free

Kirby Amiibo by TommyRyan
...kirby amiibo by tommyryan
thingiverse
replica of kirby amiibo
thingiverse
free

Custom amiibo - Uncle Amiibo by Nintendrew
...custom amiibo - uncle amiibo by nintendrew
thingiverse
printed on anet a8 with 0.1 mm layer height and no supports. have fun!
thingiverse
free

Kirby (amiibo) by ATrottier87
...kirby (amiibo) by atrottier87
thingiverse
here is a model of one of my kirby amiibos.
Connectors
turbosquid
$5
Connector
... available on turbo squid, the world's leading provider of digital 3d models for visualization, films, television, and games.
turbosquid
$2
Connector
... available on turbo squid, the world's leading provider of digital 3d models for visualization, films, television, and games.
3d_export
$5
Connector 3D Model
...connector 3d model
3dexport
connector штекер 3d
connector 3d model manch111 83121 3dexport
3d_export
$14
connector production equipment
...connector production equipment
3dexport
connector production equipment
3d_export
$10

connector xt60
...e designing, and will help save your precious time. the scale of the model is 1:1. the dimensions are for reference in the image.
turbosquid
free
Audio connectors
...del audio connectors for download as obj, fbx, blend, and dae on turbosquid: 3d models for games, architecture, videos. (1424706)
3d_export
$20
car connectors dj70
...quot; connector 9-pin "dj7091a-2.8-11/21" terminal (male) "dj611-2.8" terminal (female) "dj622-2.8"
turbosquid
$30

Cinch connector
... available on turbo squid, the world's leading provider of digital 3d models for visualization, films, television, and games.
turbosquid
$15
Jumper Connector
...umper connector for download as 3ds, obj, fbx, blend, and dae on turbosquid: 3d models for games, architecture, videos. (1494917)
turbosquid
$15
RCA Connector
...l rca connector for download as 3ds, obj, fbx, blend, and dae on turbosquid: 3d models for games, architecture, videos. (1376648)
Stand
turbosquid
$50
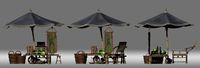
stand watermelon stand
...yalty free 3d model stand watermelon stand for download as ma on turbosquid: 3d models for games, architecture, videos. (1528284)
archibase_planet
free
Stand
...stand
archibase planet
stand post pole
stand - 3d model for interior 3d visualization.
archibase_planet
free
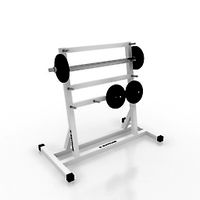
Stand
...stand
archibase planet
stand sport barbell
stand kettler - 3d model for interior 3d visualization.
archibase_planet
free
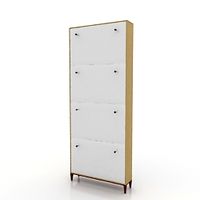
Stand
...stand
archibase planet
locker drawer stand
stand 897810 - 3d model for interior 3d visualization.
archibase_planet
free
Stand
...stand
archibase planet
stand rack post
stand 2 - 3d model for interior 3d visualization.
archibase_planet
free
Stand
...stand
archibase planet
stand storefront shelving
stand 3 - 3d model for interior 3d visualization.
archibase_planet
free
Stand
...stand
archibase planet
stand shelf shelving
stand 4 - 3d model for interior 3d visualization.
archibase_planet
free
Stand
...stand
archibase planet
stand post stall
stand 5 - 3d model for interior 3d visualization.
archibase_planet
free
Stand
...stand
archibase planet
stand post stall
stand 6 - 3d model for interior 3d visualization.
archibase_planet
free
Stand
...stand
archibase planet
stand post shelving
stand 7 - 3d model for interior 3d visualization.
System
archibase_planet
free

System
...m
archibase planet
fire alarm system fire alarm box
security light system - 3d model (*.gsm+*.3ds) for interior 3d visualization.
archibase_planet
free

Spider system
...stem spider glass system
spider system to fix glass stefano galli n050912 - 3d model (*.gsm+*.3ds) for interior 3d visualization.
3ddd
$1

Euforia System
...euforia system
3ddd
euforia
euforia system
3d_export
$50

Roof system Truss system 3D Model
...oof system truss system 3d model
3dexport
roof system truss truss stage
roof system truss system 3d model aleksbel 38970 3dexport
3ddd
$1

DVD System
...dvd system
3ddd
dvd , schneider
dvd system
design_connected
free

Seating system
...seating system
designconnected
free 3d model of seating system
3d_export
$5

solar system
...solar system
3dexport
solar system in c4d, with 8k nasa textures
3ddd
$1

Quanta System
...quanta system
3ddd
медицина
quanta system.
лазерное оборудование для медицинских центров
3d_export
$15

solar system
...nd the other the sun, the earth and the moon, the latter has an animation with camera movement included, the files are in spanish
3d_export
$14

missile system
...missile system
3dexport