Thingiverse

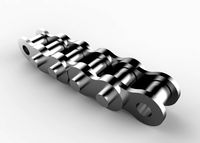
AM8 Right Side Y Chain by Thorinair
by Thingiverse
Last crawled date: 3 years, 1 month ago
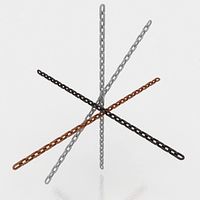
A right side cable chain for your AM8 hotbed!
UPDATE 2020-03-01:
Added the new Hotbed_Custom_Carriage.stl model! This one should be used if you have the Gulfcoast Robotics Anet A8 A6 3D Printers Upgrade Y Carriage Anodized Aluminum Plate.
File renaming.
Massive overhaul of this description.
UPDATE 2020-05-05:
Remodelled both Hotbed.stl and Hotbed_Custom_Carriage.stl chain anchors. Both have a more unified design now, prevent the connector from crashing into them and have an anchor for a zip tie.
Features:
Designed for the right side. This helps to prevent the hot end from running into the chain.
Drop in replacement of the original AM8 T underside bracket.
Compatible with both the original Anet A8 Y carriage, and the custom Gulfcoast Robotics Anet A8 A6 3D Printers Upgrade Y Carriage Anodized Aluminum Plate.
Required Components
3x M4x10 screw, button head - Required for mounting the hotbed side.
3x M4 nut, hex shaped - Required for mounting the hotbed side.
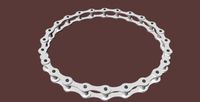
1x L Shaped Metal Profile Bracket - Some people have reported that their chain hits the front end of their frame. Most likely because of the different shaped brackets. You need to have a bracket shaped like on the 2nd picture.
Optional 1x M4x10 screw, button head - If you are using the custom carriage, you will need an extra screw (four in total).
Optional 1x M4 nut, hex shaped - If you are using the custom carriage, you will need an extra nut (four in total).
Parts To Print:
1x Frame.stl or Frame_11mm_Offset.stl - The frame side of the chain is mounted by replacing the original right side AM8 T underside bracket. If you have a regular AM8, use the regular one. If you are using my Anet A8 Ultimate Direct E3D v6 & Titan Extruder Carriage With Chain or my Ultimate Hemera Anet A8 / AM8 Carriage For LM8LUU With Chain, use the 11 mm one to compensate for the required hotbed offset.
16x+ Link.stl - The chain needs a total of 16 links, but print more to have a bit extra. Your link count might differ if you have a different AM8 setup than myself (mine is offset further backwards).
1x Hotbed.stl or Hotbed_Custom_Carriage.stl - The chain is mounted to the hotbed by securing it using M4 screws to the Y carriage. If you have the stock AnetA8 carriage, print the normal one and use 3 screws and nuts. If you have the custom Gulfcoast Robotics Anet A8 A6 3D Printers Upgrade Y Carriage Anodized Aluminum Plate carriage, use the Hotbed_Custom_Carriage.stl and 4 screws and nuts instead.
Printing Instructions
No supports are needed.
Print all parts exactly as already oriented to maximize quality, strength and ease of printing.
Use 80% infill for all parts.
You may print all parts at 0.2mm layer height.
Assembly Instructions
Print all of the necessary parts. Decide which ones you want to use by reading the explanations above.
Assemble the chain by snapping the links together.
Snap on the frame side and hotbed side to the chain.
Remove the original right side AM8 T underside bracket.
Remove the hotbed for easier installation. There is probably no need to remove the carriage however.
Swap out the front right bracket if needed. Please refer to the 2nd picture to see how the bracket needs to look like.
Mount the chain. Attach the frame side where the original underside bracket was, attach the hotbed side to the carriage. Use 3 M4 screws with nuts if you have the original carriage, 4 if you have the custom carriage.
Thread the wires through. Zip tie them to the side of the chain at the hotbed to reduce strain.
Restore the hotebed and plug everything in!
If you have any questions or found some issues, be sure to comment! I will see what I can do!
As usual, I am including the Blender source file in case you want to edit it.
UPDATE 2020-03-01:
Added the new Hotbed_Custom_Carriage.stl model! This one should be used if you have the Gulfcoast Robotics Anet A8 A6 3D Printers Upgrade Y Carriage Anodized Aluminum Plate.
File renaming.
Massive overhaul of this description.
UPDATE 2020-05-05:
Remodelled both Hotbed.stl and Hotbed_Custom_Carriage.stl chain anchors. Both have a more unified design now, prevent the connector from crashing into them and have an anchor for a zip tie.
Features:
Designed for the right side. This helps to prevent the hot end from running into the chain.
Drop in replacement of the original AM8 T underside bracket.
Compatible with both the original Anet A8 Y carriage, and the custom Gulfcoast Robotics Anet A8 A6 3D Printers Upgrade Y Carriage Anodized Aluminum Plate.
Required Components
3x M4x10 screw, button head - Required for mounting the hotbed side.
3x M4 nut, hex shaped - Required for mounting the hotbed side.
1x L Shaped Metal Profile Bracket - Some people have reported that their chain hits the front end of their frame. Most likely because of the different shaped brackets. You need to have a bracket shaped like on the 2nd picture.
Optional 1x M4x10 screw, button head - If you are using the custom carriage, you will need an extra screw (four in total).
Optional 1x M4 nut, hex shaped - If you are using the custom carriage, you will need an extra nut (four in total).
Parts To Print:
1x Frame.stl or Frame_11mm_Offset.stl - The frame side of the chain is mounted by replacing the original right side AM8 T underside bracket. If you have a regular AM8, use the regular one. If you are using my Anet A8 Ultimate Direct E3D v6 & Titan Extruder Carriage With Chain or my Ultimate Hemera Anet A8 / AM8 Carriage For LM8LUU With Chain, use the 11 mm one to compensate for the required hotbed offset.
16x+ Link.stl - The chain needs a total of 16 links, but print more to have a bit extra. Your link count might differ if you have a different AM8 setup than myself (mine is offset further backwards).
1x Hotbed.stl or Hotbed_Custom_Carriage.stl - The chain is mounted to the hotbed by securing it using M4 screws to the Y carriage. If you have the stock AnetA8 carriage, print the normal one and use 3 screws and nuts. If you have the custom Gulfcoast Robotics Anet A8 A6 3D Printers Upgrade Y Carriage Anodized Aluminum Plate carriage, use the Hotbed_Custom_Carriage.stl and 4 screws and nuts instead.
Printing Instructions
No supports are needed.
Print all parts exactly as already oriented to maximize quality, strength and ease of printing.
Use 80% infill for all parts.
You may print all parts at 0.2mm layer height.
Assembly Instructions
Print all of the necessary parts. Decide which ones you want to use by reading the explanations above.
Assemble the chain by snapping the links together.
Snap on the frame side and hotbed side to the chain.
Remove the original right side AM8 T underside bracket.
Remove the hotbed for easier installation. There is probably no need to remove the carriage however.
Swap out the front right bracket if needed. Please refer to the 2nd picture to see how the bracket needs to look like.
Mount the chain. Attach the frame side where the original underside bracket was, attach the hotbed side to the carriage. Use 3 M4 screws with nuts if you have the original carriage, 4 if you have the custom carriage.
Thread the wires through. Zip tie them to the side of the chain at the hotbed to reduce strain.
Restore the hotebed and plug everything in!
If you have any questions or found some issues, be sure to comment! I will see what I can do!
As usual, I am including the Blender source file in case you want to edit it.
Similar models
thingiverse
free

Anet A8 cable chain hotbed end remixed for Gulfcoast Robotics Y carriage by nzle
...nect to the y carriage plate from gulf coast robotics https://www.thingiverse.com/thing:2848096 . bolt spacing was a few mm off.
thingiverse
free

ANET A8 or AM8 Y Belt Holder - M3 Screws for Aftermarket Carriage
...the aftermarket y carriage plate by gulfcoast robotics and similar imitations.this design takes up very little space and can...
thingiverse
free

Anet A8 Y Chain Hotbed Mount V3 (thinner version) by snellejelle99
...the anet a8 y drag chain.
this version has a thinner mounting plate wich allows you to use the screws that came with the printer
thingiverse
free

Improved Anet A8 / AM8 X Tensioner
...e sure to comment! i will see what i can do!
as usual, i have also included the blender file in case you want to edit it further.
thingiverse
free

Anet A2 - X-Axis Cable Chain by OverEngineeredByDefault
... print m4 t-nuts for use with standard m4 nuts.
find the anet a2 modular a project here:https://www.thingiverse.com/thing:3133092
thingiverse
free

Anet A8 Y cable chain Hotbed mount remix by Xenyo
... the anet a8 y chain hotbed mount. due to the fact that i changed the hotbed plug to clamps, i needed more space for the cables.
thingiverse
free

Anet A8 lamp by adriantbg
...ngiverse
this is my simply anet a8 lamp. you will need a double-sided tape to glue it into the frame, and m4 screws and nuts :)
thingiverse
free

AM8 Y Endstop Clone Carriage Fix
...e sure to comment! i will see what i can do!
as usual, i have also included the blender file in case you want to edit it further.
thingiverse
free

Ultimate Hemera AnetA8 / AM8 Carriage For LM8LUU With Chain
...e sure to comment! i will see what i can do!
as usual, i have also included the blender file in case you want to edit it further.
thingiverse
free

Anet A8 Y-Axis Cable Chain - Right Side by lokster
...u need to print 14 chain segments and rotate your heated bed 90 degrees clockwise (so that the connectors are on the right side).
Thorinair
thingiverse
free

Quick Surface Test by Thorinair
... wedge which you can use to easily pry it off the bed.
i have also included the blender file in case you want to edit it further.
thingiverse
free

Twilight Sparkle Fidget Spinner Cap by Thorinair
... first layer to compensate for the first layer squish.
i have also included the blender file in case you want to edit it further.
thingiverse
free

Quick Z-Wobble Test by Thorinair
...ive x and y (it will point towards your printer home).
i have also included the blender file in case you want to edit it further.
thingiverse
free

Anet A8 Mainboard Spacer by Thorinair
...nt! the dimensions are identical to the original ones.
i have also included the blender file in case you want to edit it further.
thingiverse
free

Shopping Bag Handle (Shorter) by Thorinair
...e stl and use a rather large brim to prevent toppling.
i have also included the blender file in case you want to edit it further.
thingiverse
free

AM8 Aluminium Extrusion Cap by Thorinair
... you will need to use a bit of supports for the clips.
i have also included the blender file in case you want to edit it further.
thingiverse
free

AM8 Logitech 270 310 Mount by Thorinair
...riented and with supports. this maximizes strength.
as usual, i am including the blender source file in case you want to edit it.
thingiverse
free

AM8 Cable Anchor by Thorinair
...ng. they may be fragile because of their small size.
i have also included the blender file in case you want to edit them further.
thingiverse
free

AM8 Power Supply Backside Cover by Thorinair
...has a hole in the middle for easy cable management.
as usual, i am including the blender source file in case you want to edit it.
thingiverse
free

Fidget Spinner Bearing Removal Kit by Thorinair
... vice and keep tightening it until the bearing is out.
i have also included the blender file in case you want to edit it further.
Am8
evermotion
$12
armchair 055 am8
...f armchair with all textures, shaders and materials. it is ready to use, just put it into your scene.. evermotion 3d models shop.
evermotion
$12

armchair 051 am8
...f armchair with all textures, shaders and materials. it is ready to use, just put it into your scene.. evermotion 3d models shop.
evermotion
$10
chair 012 am8
...l of chair with all textures, shaders and materials. it is ready to use, just put it into your scene.. evermotion 3d models shop.
evermotion
$10
chair 011 am8
...l of chair with all textures, shaders and materials. it is ready to use, just put it into your scene.. evermotion 3d models shop.
evermotion
$10
chair 017 am8
...l of chair with all textures, shaders and materials. it is ready to use, just put it into your scene.. evermotion 3d models shop.
evermotion
$10
desk 079 am8
...el of desk with all textures, shaders and materials. it is ready to use, just put it into your scene.. evermotion 3d models shop.
evermotion
$10

chair 027 am8
...l of chair with all textures, shaders and materials. it is ready to use, just put it into your scene.. evermotion 3d models shop.
evermotion
$10

chair 015 am8
...l of chair with all textures, shaders and materials. it is ready to use, just put it into your scene.. evermotion 3d models shop.
evermotion
$10

chair 037 am8
...l of chair with all textures, shaders and materials. it is ready to use, just put it into your scene.. evermotion 3d models shop.
evermotion
$10

chair 013 am8
...l of chair with all textures, shaders and materials. it is ready to use, just put it into your scene.. evermotion 3d models shop.
Chain
archibase_planet
free
Chain
...chain
archibase planet
chain chain link chain loop
chain n020708 - 3d model (*.gsm+*.3ds) for interior 3d visualization.
3d_export
$5
chain
...chain
3dexport
3d model chain
3d_export
$5
chain
...chain
3dexport
chain. obj,fbx,blend
archibase_planet
free

Chain
...se planet
chain circuit catena
chain - archicad parametrical gdl 3d model (*.gsm). regulation of the length, curvature and angle.
archibase_planet
free
Chain
...n
archibase planet
chain circuit catena
chain - archicad parametrical gdl 3d model(*.gsm). regulation of the length and angle xyz
3d_ocean
$5
Chain
...chain
3docean
3d models chain design elements
3d models, design elements
3d_ocean
$5

Chain
...chain
3docean
3d models chain design elements
3d models, design elements
turbosquid
$10
Chain
...hain
turbosquid
royalty free 3d model chain for download as on turbosquid: 3d models for games, architecture, videos. (1329200)
turbosquid
$9
chain
...hain
turbosquid
royalty free 3d model chain for download as on turbosquid: 3d models for games, architecture, videos. (1549461)
turbosquid
$2
Chain
...hain
turbosquid
royalty free 3d model chain for download as on turbosquid: 3d models for games, architecture, videos. (1148668)
Right
turbosquid
$6

To the right
...squid
royalty free 3d model to the right for download as max on turbosquid: 3d models for games, architecture, videos. (1200265)
turbosquid
$5

Pass Right
... available on turbo squid, the world's leading provider of digital 3d models for visualization, films, television, and games.
3d_export
$14

southern right whale
...southern right whale
3dexport
detailed model of southern right whale
3d_export
$10

Tibet right
...tibet right
3dexport
dimensions of the pencil case 404/1982/380 mm
3d_export
free
right arrow
...e <br> file contains the <br> and <br> formats.<br>you can use it for presentation slides or 3d printing.
design_connected
$16

Feng Chaise Right
... chaise right
designconnected
ligne roset feng chaise right lounge chairs computer generated 3d model. designed by didier gomez.
3d_export
$5

Right arrow 3D Model
...right arrow 3d model
3dexport
right turn sign signal signage direction
right arrow 3d model ryisnelly100 88745 3dexport
turbosquid
free

Keep Right Sign
...rbosquid
free 3d model keep right sign for download as blend on turbosquid: 3d models for games, architecture, videos. (1522189)
turbosquid
$55

Anatomical right Skeleton
... available on turbo squid, the world's leading provider of digital 3d models for visualization, films, television, and games.
turbosquid
$5

No Right/Left Turn
... available on turbo squid, the world's leading provider of digital 3d models for visualization, films, television, and games.
Y
turbosquid
$1

Tetera y Galletas y Caf
... available on turbo squid, the world's leading provider of digital 3d models for visualization, films, television, and games.
3ddd
$1

Смеситель Y-CON
...смеситель y-con
3ddd
смеситель , y-con
смеситель y-con
3ddd
$1

Y-Chair
...y-chair
3ddd
tom dixon
y-chair designed by tom dixon,
3ds max + obj, corona
3ddd
$1

Y Chair compilation
....net/products/us/y-chair-sled-base
y chair swivel basehttp://www.tomdixon.net/products/us/y-chair-swivel-base
turbosquid
$190

Y-8
...y-8
turbosquid
royalty free 3d model y-8 for download as max on turbosquid: 3d models for games, architecture, videos. (1658891)
turbosquid
$7

Bench Y
...turbosquid
royalty free 3d model bench y for download as obj on turbosquid: 3d models for games, architecture, videos. (1488746)
turbosquid
$15

bonePile Y
...oyalty free 3d model bonepile y for download as blend and obj on turbosquid: 3d models for games, architecture, videos. (1546374)
turbosquid
$7

Y for Yarn
...d
royalty free 3d model y for yarn model for download as max on turbosquid: 3d models for games, architecture, videos. (1699732)
turbosquid
$2

FONT Y
...quid
royalty free 3d model font y for download as ma and obj on turbosquid: 3d models for games, architecture, videos. (1549457)
3ddd
$1

WOOD-y
...wood-y
3ddd
wooden guy
Side
3ddd
free
Side-by-side холодильник
...side-by-side холодильник
3ddd
холодильник
side-by-side холодильник samsung
turbosquid
free

siding
... available on turbo squid, the world's leading provider of digital 3d models for visualization, films, television, and games.
3ddd
$1
Кресло Side
...ресло side
3ddd
side , eero saarinen
eero saarinen кресло side.
материалы corona render.
turbosquid
$15
Mausoleum Entrances Lined Side By Side
...model mausoleum entrances lined side by side for download as on turbosquid: 3d models for games, architecture, videos. (1696515)
3ddd
$1

Side-by-Side SHARP SJ-F78PEBE
... холодильник
холодильник side-by-side sharp sj-f78pebe, габариты (шxгxв) 89x77x183 см, с материалами
3ddd
$1

Liebherr Refrigerator Side By Side Sbes 7165
... side sbes 7165
3ddd
liebherr , холодильник
liebherr refrigerator side by side sbes 7165
3ddd
$1
Side table
...side table
3ddd
журнальный
classic side table
3ddd
$1

Зеркало Side
...зеркало side
3ddd
винтаж , зеркало
зеркало side
3ddd
$1
Side Table
...side table
3ddd
кофейный , круглый
side table
3ddd
$1
Side table
...side table
3ddd
приставной
bed side table, coffee table