Thingiverse
Ah TENSHUN! belt tension guage by Pops668
by Thingiverse
Last crawled date: 2 years, 10 months ago
Tired of educated guesses for the tension on your printer belt?
Pluck the belt, listen to tone, measure the length, do the math.
Deflect the belt, measure the length, do the math.
Use custom tool of certain material, trust the result.
Cut belt to set length, engage tooth #3 from one end, tooth #4 on the other. Ooops, belt too short, cut another...
Or make a direct reading of force acting on the belt in Newtons.
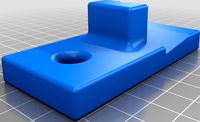
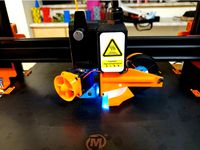
If your printer can use a screw-type tension adjuster, it can use this tool!
Premise:
Idler pulley is subjected to belt tension x2; the belt makes a 180 at the idler (trig required for non-180 belt engagements!) so the tension for one belt is doubled on the idler.
Put a scale of some sort on the idler, divide the result by two.
Robert is your parents sibling.
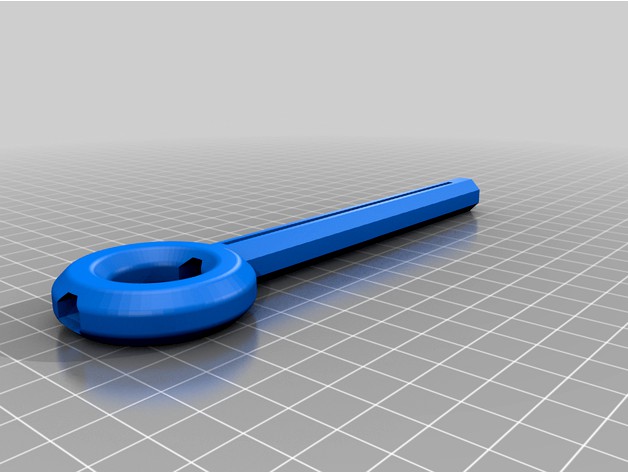
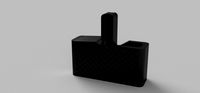
The tool:
Spring loaded plunger, very basic 'Bass Scale' sort of thing.
In fact, stop now, buy a 'fish scale' (snicker, fish scale, fish-scale, puns) and do your own thing! Go nuts, I'll wait. Or not. Not your Dad. Could take him in a fight, probably. Will it rain later? What was I doing? Oh, yeah....
Springs harvested from printer bed. Don't know why printers ship with springs installed there, but hey, free springs.
Calibration is a breeze; 510 grams = 5 Newtons.
Hang increasing weights from the Adapter, mark on the Body where the Indicator lands.
Do this several times to make sure that gravity isn't fluctuating in your area.
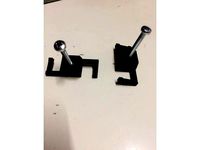
The Indicator has two offset 'teeth' to better engage with the Springs...fiddle with the alignment when assembling the tool until it sits in the track right. Experience teaches.
The Indicator should be made from PETG or other tough plastic, as it acts like a safety device.
If your finger is in the Doughnut Region and the Adapter fails when the Shaft is snapping back, the Shaft could drive back into your bones.
Use:
Attach the tool to the tension adjust screw of the printer, and haul back on it to a value higher than what you want; this will free the adjustment nut. Loosen said nut.
Slack off on the tension to the desired amount, then carefully advance the nut to take up the free-play.
Don't tighten it! Just take up the slack.
Remove the tool, belt should now be very close to the desired tension, likely a little bit under due to the vagaries of taking up nut-slack.
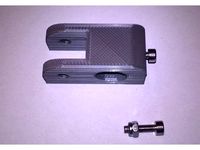
The parts:
Body and Adapter are PLA, no supports.
Indicator is PETG.
Of flat M3 washers, two are needed. One at either end of the Spring stack.
One M3 nut, Acorn by name, Nylok by nature, is required on the Shaft.
4 Springs from [insert printer name here]...I used Mingda D3 Springs.
The Body is designed around 8mm Springs, you may want to modify it for other diameters.
Brass rod for shaft, 3mm or 1/8", M3 threads cut.
Buy a metric tap and die set; costs less than a roll of fancy printer-fodder, makes mechanical prints much more usable.
The Adapters are M3/M4, you may need M3/M3, I didn't need them, didn't model them, so I am not including them!
Can't think of anything else, signing off!
Pops668
Pluck the belt, listen to tone, measure the length, do the math.
Deflect the belt, measure the length, do the math.
Use custom tool of certain material, trust the result.
Cut belt to set length, engage tooth #3 from one end, tooth #4 on the other. Ooops, belt too short, cut another...
Or make a direct reading of force acting on the belt in Newtons.
If your printer can use a screw-type tension adjuster, it can use this tool!
Premise:
Idler pulley is subjected to belt tension x2; the belt makes a 180 at the idler (trig required for non-180 belt engagements!) so the tension for one belt is doubled on the idler.
Put a scale of some sort on the idler, divide the result by two.
Robert is your parents sibling.
The tool:
Spring loaded plunger, very basic 'Bass Scale' sort of thing.
In fact, stop now, buy a 'fish scale' (snicker, fish scale, fish-scale, puns) and do your own thing! Go nuts, I'll wait. Or not. Not your Dad. Could take him in a fight, probably. Will it rain later? What was I doing? Oh, yeah....
Springs harvested from printer bed. Don't know why printers ship with springs installed there, but hey, free springs.
Calibration is a breeze; 510 grams = 5 Newtons.
Hang increasing weights from the Adapter, mark on the Body where the Indicator lands.
Do this several times to make sure that gravity isn't fluctuating in your area.
The Indicator has two offset 'teeth' to better engage with the Springs...fiddle with the alignment when assembling the tool until it sits in the track right. Experience teaches.
The Indicator should be made from PETG or other tough plastic, as it acts like a safety device.
If your finger is in the Doughnut Region and the Adapter fails when the Shaft is snapping back, the Shaft could drive back into your bones.
Use:
Attach the tool to the tension adjust screw of the printer, and haul back on it to a value higher than what you want; this will free the adjustment nut. Loosen said nut.
Slack off on the tension to the desired amount, then carefully advance the nut to take up the free-play.
Don't tighten it! Just take up the slack.
Remove the tool, belt should now be very close to the desired tension, likely a little bit under due to the vagaries of taking up nut-slack.
The parts:
Body and Adapter are PLA, no supports.
Indicator is PETG.
Of flat M3 washers, two are needed. One at either end of the Spring stack.
One M3 nut, Acorn by name, Nylok by nature, is required on the Shaft.
4 Springs from [insert printer name here]...I used Mingda D3 Springs.
The Body is designed around 8mm Springs, you may want to modify it for other diameters.
Brass rod for shaft, 3mm or 1/8", M3 threads cut.
Buy a metric tap and die set; costs less than a roll of fancy printer-fodder, makes mechanical prints much more usable.
The Adapters are M3/M4, you may need M3/M3, I didn't need them, didn't model them, so I am not including them!
Can't think of anything else, signing off!
Pops668
Similar models
thingiverse
free

3d printer belt tensioner by ElectWand6
...int it, take your current idler, put it together and done.
[update]: added more pictures explaining how to assemble the tensioner
thingiverse
free

Hypercube Evolution Timingbelt Loop Tensioner by transwarp2010
...ual-shaft-stepper-motors. sometimes, a scale in y is practical.
to make designchanges, i add the original freecad-file.
have fun.
thingiverse
free

101hero tower tensioner by workshoptinkerers
...w and an m3 nut to allow upgrade. optional a t2 idler bearing instead of reusing stock bearings.
video on installation up shortly
thingiverse
free

Z-Sync Belt Tensioner
...'ve included my fusion 360 file which you can use to more easily modify the design if desired.
you can see it installed here.
thingiverse
free
Prusa_I3_MK2_Y_Belt_Idler_Tensioner by Andison
... and washers.
the idler is designed in a way that it does not impact heat bed movement or minimize printing area respectively.
thingiverse
free
Belt tensioner for GT2 belts by Endlesscnc
...oner little different.
after print you will need a:
m3 nut
m3 x10+ (screw length your choice)
is for the gt2 belt with 6mm width
thingiverse
free

Anet A8 x belt tensioner for toothed idler by GonzoG
... tensioner for anet a8 and toother idler.
it uses m3 screws with m3 5.5mm nuts. screws should have at least 20-25mm long thread.
thingiverse
free

Belt Tension Meter by calviniba
...cator grooves to make them much easier to read. use a rag to wipe off the excess paint on the surface.
measure your belt tension!
thingiverse
free

Prusa I3 X-end Idler w/ tensioner by rball716
...lide in place
no support necessary. print out my 25mm bridge test and as long as you can print that this will print no problem
thingiverse
free

CR-10 S5 Low Profile Y-Axis Belt Tensioner by Pampinho
...full extent of my printer therefore i designed a similar mount for the idler, but with a lower profile...
Pops668
thingiverse
free
Ruby Laser Rod burnisher by Pops668
...ue it in, but why not?
printed on an anycubic mega x using filaments.ca silver eco-tough pla.
not much more than that for now...
thingiverse
free
MINGDA Rock 3 Pro Parts Cooler by Pops668
...t-end nozzle is touching the build-plate!
7) it is whisper quiet when at 100% cooling effort! you hardly know the thing is on!!!
thingiverse
free

Anycubic Mega X Direct Drive conversion kit by Pops668
...ad to set x width to 290mm; i will make a rear-mount cooling fan soon!
not ideal, but the difference in print quality is amazing!
thingiverse
free

Mingda D2/D3 Service Bulletin #1 by Pops668
...ering and spade. star may need minor sanding but should push fit into the space tightly and not need anything else to secure it.
Guage
turbosquid
$5

Aircraft pressure guage
... available on turbo squid, the world's leading provider of digital 3d models for visualization, films, television, and games.
turbosquid
free

Remington 870 12 Guage Shotgun
... available on turbo squid, the world's leading provider of digital 3d models for visualization, films, television, and games.
3d_export
$20

Air refreshener 3D Model
...other interior equipment decor design furniture collection smell max guage refreshment refreshener air refreshener 3d model lightstudio 58884...
3d_ocean
$8

Air refreshener diffuser
...air architectural collection decor design details diffuser equipment furniture guage interior max other refreshener refreshment smell accurate model of...
thingiverse
free

guage mounting bracket by jcen517
...guage mounting bracket by jcen517
thingiverse
guage mounting bracket
thingiverse
free

Hole Guage
...position. all holes will be connected by the edges and placed in a line. print and drop your screw in to find the correct size.
thingiverse
free

HO Guage Buffer by dbjherbert
...ho guage buffer by dbjherbert
thingiverse
ho guage buffer - fits perfectly
thingiverse
free

dillon case guage holder
...dillon case guage holder
thingiverse
this is a holder for your dillon case guages
thingiverse
free

Rotary guage earring by DGA
...rotary guage earring by dga
thingiverse
for mazda rotary fans with guage ears.
thingiverse
free

Tire guage box by 3dprintedcat2
...tire guage box by 3dprintedcat2
thingiverse
made it so i don't lose my tire guage
Ah
3ddd
$1

AH
...ah
3ddd
вертолет
3d модель ah64a_apache
3d_ocean
$15

AH-1 Cobra
...ter heli helicopter one rotor soar super transport
low polygon and well detailed ah-1 cobra. check out my account for more items!
turbosquid
$80

AH-1W
...w
turbosquid
royalty free 3d model ah-1w for download as max on turbosquid: 3d models for games, architecture, videos. (1662420)
turbosquid
$10

SOFA AH
...yalty free 3d model sofa ah for download as skp, 3ds, and obj on turbosquid: 3d models for games, architecture, videos. (1686294)
3d_ocean
$15

AH-64 Apache
...er copter d heli helicopter rotor soar transport
low polygon and well detailed ah-64 apache. check out my account for more items!
turbosquid
$43

AH-1Zreconition
... available on turbo squid, the world's leading provider of digital 3d models for visualization, films, television, and games.
turbosquid
$30

ah-256.3ds
... available on turbo squid, the world's leading provider of digital 3d models for visualization, films, television, and games.
turbosquid
$6

AH-21
... available on turbo squid, the world's leading provider of digital 3d models for visualization, films, television, and games.
cg_studio
$70

ah 643d model
...e machine gun mcdonnell douglas
.3ds .max .obj - ah 64 3d model, royalty free license available, instant download after purchase.
3d_export
$17

Boeing AH-64 Apache
...boeing ah-64 apache
3dexport
boeing ah-64 apache
Tension
3d_export
$5

adjustable tension lock
...adjustable tension lock
3dexport
adjustable tension lock
turbosquid
$5
tension ring
...oyalty free 3d model tension ring for download as fbx and stl on turbosquid: 3d models for games, architecture, videos. (1553452)
turbosquid
$3

Tension Chair
...free 3d model tension chair for download as obj, c4d, and fbx on turbosquid: 3d models for games, architecture, videos. (1251503)
3d_export
$5
transformador de tension
...transformador de tension
3dexport
transformador de tension entrada 460vac salida 220vac marca audax
turbosquid
$20
Motorbike Chain Tensioner
...y free 3d model motorbike chain tensioner for download as stl on turbosquid: 3d models for games, architecture, videos. (1428322)
turbosquid
$25
TENSION-WOOD-CHAIR
... available on turbo squid, the world's leading provider of digital 3d models for visualization, films, television, and games.
turbosquid
$25

tension-bentwood-chair
... available on turbo squid, the world's leading provider of digital 3d models for visualization, films, television, and games.
turbosquid
$19

Tension engagement ring
...n engagement ring for download as obj, fbx, 3dm, dwg, and stl on turbosquid: 3d models for games, architecture, videos. (1491631)
3d_export
$10

Ruby Tension set Ring 3D Model
...ruby tension set ring 3d model
3dexport
tension set ruby ring in 18k
ruby tension set ring 3d model rehansheikh 25254 3dexport
turbosquid
$20
Superficial Tension Exp. Image.max
... available on turbo squid, the world's leading provider of digital 3d models for visualization, films, television, and games.
Belt
turbosquid
$9
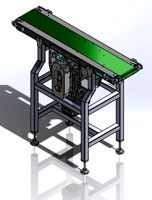
Belt conveyor belt
...t conveyor belt for download as 3ds, ige, obj, stl, and sldas on turbosquid: 3d models for games, architecture, videos. (1226546)
3d_export
$6
belt
...d then comes off and fastens at the front of the seat. version: 2015 units: millimetres x-form: yes polys: 120 950 verts: 163 944
3d_export
$7
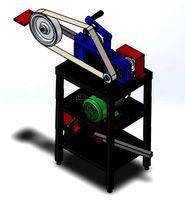
belt grinder
...belt grinder
3dexport
belt grinder
3d_export
$5
Belt conveyor
...belt conveyor
3dexport
belt conveyor
3ddd
$1
column belt
...column belt
3ddd
колонна
column belt
turbosquid
$5
Belt
... available on turbo squid, the world's leading provider of digital 3d models for visualization, films, television, and games.
3d_ocean
$5
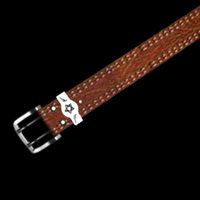
Leather Belt
...ather belt is created in 3dsmax 2011 and rendered with vray 1.5 and it has all the texture included with the multiple obj format.
3d_ocean
$5

Belt Ring
...belt ring
3docean
belt jewelry ring
belt ring 3d model. total weight 3.5 gram & 1.1 stone size. 3dm and obj file format.
design_connected
$11
Belt Round
...belt round
designconnected
meridiani belt round computer generated 3d model. designed by parisio, andrea.
design_connected
$11
Belt Oval
...belt oval
designconnected
meridiani belt oval computer generated 3d model. designed by parisio, andrea.