Thingiverse
Adjustable Camera Pedestal w/75mm bowl. by godsalvage
by Thingiverse
Last crawled date: 2 years, 11 months ago
What is this?
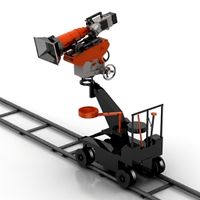
This collection of prints can be used to make a camera pedestal with 75mm bowl from commonly available Schedule 40 black pipe.
This thing is a work in progress with additional parts planned.
A build tutorial video is planned but not yet complete.
Bowl
The bowl assembly consists of 2 printed parts. A 75mm bowl top and a bowl bottom.
There are two versions of 75mm bowl top. A tall one and a shorter one. If you have big hands or want the most flexibility in choosing a half ball adapter the taller bowl may be the better choice. The shorter bowl does fit the above mentioned Manfrotto half ball, but is a bit trickier to work with initially.
The same bowl bottom is used for both versions of bowl tops, and you'll need to use an epoxy (or other appropriate adhesive) to join the two parts of the print.
I used PETG for these parts because they'll be exposed to higher temperatures while traveling in my vehicle and I needed the resistance to deformation. PLA would likely be acceptable if you'll be using this in a climate controlled environment.
I used the Manfrotto 520BALLSH for the half ball adapter to my tripod head. Other 75mm half ball adapters should also work.
Adjustable Pedestal
The pedestal assembly consists of 2 printed objects. A collar and a sleeve.
You'll need one section of 2" Schedule 40 black pipe, one section of 1.5" Schedule 40 black pipe, a 2" coupler, a 2" floor flange, and a 1.5" floor flange.
A 5/16 tap set and a 5/16 threaded wing-bolt will be needed.
(4) 1/4-20 x 3/4" carriage bolts with nuts or wingnuts
A pipe wrench may be used but is optional if you have good grip strength.
Assembly
Attach 2" flange to floor or other base. (I used a piece of 2'x'2x3/4" plywood.)
Attach 2" pipe to floor flange. Tighten.
Attach 2" pipe coupler to the 2" pipe. Tighten.
Insert the bottom sleeve on the 1.5" pipe over the pipe threads. This is press fit.
Insert the other side of the 1.5" pipe into the 2" inch collar.
Install 1.5" floor flange on 1.5" pipe.
Insert 1.5" pipe with sleeve downward into 2" pipe.
Seat printed collar into 2" coupler.
Drill and tap 5/16 threads into 2" coupler.
Install 5/16 wingbolt
Install bowl assembly to 1.5" floor flange using appropriate fasteners.
Check and tighten all connections.
Final Notes
Use at your own risk. I am using this project with Canon 5dMKIII's mounted on Manfrotto 502AH heads but you shouldn't put any camera on them without evaluating the strength of the final print and assembly. If it breaks, you get to keep all of the parts.
Planned updates and additions
-Stability collar for lower section of pedestal.
-Drink Holder
-Accessory Mount
Similar models
thingiverse
free

5-Way Inner Coupler by Cbonsig
...n raft-like flange around the perimeter to minimize warping. dimensions are easily adjusted using variables in the openscad file.
thingiverse
free

4-Way Inner Coupler by Cbonsig
...n raft-like flange around the perimeter to minimize warping. dimensions are easily adjusted using variables in the openscad file.
thingiverse
free

ABS Pipe Coupler 1.5" by WindTrackMind
... this is not designed for plumbing purposes, it is intended for use when abs pipe for is used for decoration or display purposes.
thingiverse
free

Schedule 40 2" drain pipe repair clamp by CleanO2
...he mating surface. i used pla. if you print this with abs, use transition cement for better adhesion. nothing fancy but it works.
grabcad
free

2-5/16" Ball Gooseneck Coupler w/ pin
...eneck coupler w/ pin
grabcad
2-5/16" ball coupler measured with a standard tape measure.
1/2" pin pulled from mcmaster
thingiverse
free

Camera tripod to PVC 1/2" pipe bracket by teamwija
...the coupler in place with some hot glue or similar screw tripod into open end of coupler. ???...
grabcad
free

Small Knockout Pot
...aded half coupling
side nozzle 2 - 1" 150# threaded half coupling
side nozzle 3 - .75" 150# threaded half coupling
thingiverse
free

2 inch schedule 40 pipe flange by CleanO2
...for a pipe flange. you can glue 2" abs into the flange with transition cement. obviously not rated for any kind of pressure.
3dwarehouse
free

MT-AC-HC-ELT-F-0150
...mt-ac-hc-elt-f-0150
3dwarehouse
modtruss 1.5' schedule 40 pipe coupler. corner with through hole. fits 1.9' od pipe.
3dwarehouse
free

1/2' Black Pipe Coupler
...ssumption is that you'll lose about 1/2' on each end of a piple/nipple when you screw it into the coupler. #coupler #pipe
75Mm
cg_studio
$79

75mm Pak 97/383d model
...rld ww2 wwii
.obj .jpg .max .fbx .3ds - 75mm pak 97/38 3d model, royalty free license available, instant download after purchase.
3d_export
$79
75mm Pak 97-38 3D Model
... pak tank war weapon world
75mm pak 97-38 3d model download .c4d .max .obj .fbx .ma .lwo .3ds .3dm .stl graverino 108478 3dexport
3d_ocean
$79
75mm Pak 97/38
...el originally created with 3ds max and rendered with vray the model is easy to modify, the main parts can be easily moved as i...
cg_studio
$149
M4A3 Sherman - 75mm - Mid production3d model
... .c4d .lwo .obj - m4a3 sherman - 75mm - mid production 3d model, royalty free license available, instant download after purchase.
cg_studio
$139
M4A2 Sherman - Colorado3d model
...m4a2 sherman colorado tank us marine corps pacific theatre 75mm m3 l/40 gun .c4d .obj .lwo .fbx .3ds -...
cg_studio
$139

M4A2 Sherman - Destroyer3d model
...m4a2 sherman destroyer tank us marine corps pacific theatre 75mm m3 l/40 gun .c4d .obj .lwo .fbx .3ds -...
cg_studio
$65

Pak 403d model
...pak 403d model cgstudio gun ww2 75mm artillery world war wwii 1943 army 1945 anti tank...
cg_studio
$125
Anti tank guns ww23d model
...anti tank guns ww23d model cgstudio gun ww2 75mm artillery wwii army 1945 antitank projectile weapon shell case...
3ddd
free
Indian vase
...311742 размеры: длинна маленькой вазы - 460mm, ширина - 75mm высота - 130mm длинна большой вазы - 600mm, ширина...
3d_export
$7
facemaskearloopweldingmachine
...the welding of one-time plane mask ear belt with 75mm standard ear band spacing. if you want to weld...
Pedestal
3d_export
$5

Pedestal
...pedestal
3dexport
pedestal 60x40x60 cm . made in different colors polys: 34 405 verts: 19160
turbosquid
$9

pedestal
...l
turbosquid
royalty free 3d model pedestal for download as on turbosquid: 3d models for games, architecture, videos. (1711227)
3d_export
$5

pedestal
...pedestal
3dexport
3ddd
free

Pedestal
... jonthan charles
pedestal, jonthan charles fine furniture, art. 492454, fin-mah-02-1 (antique mahogany medium)
turbosquid
$13

Pedestal
... available on turbo squid, the world's leading provider of digital 3d models for visualization, films, television, and games.
turbosquid
$10

Pedestal
... available on turbo squid, the world's leading provider of digital 3d models for visualization, films, television, and games.
turbosquid
$10

Pedestal
... available on turbo squid, the world's leading provider of digital 3d models for visualization, films, television, and games.
turbosquid
free

Pedestal
... available on turbo squid, the world's leading provider of digital 3d models for visualization, films, television, and games.
turbosquid
free

Pedestal
... available on turbo squid, the world's leading provider of digital 3d models for visualization, films, television, and games.
turbosquid
$3

Pedestal
...l for download as skp, dae, gltf, dwg, dxf, ige, fbx, and obj on turbosquid: 3d models for games, architecture, videos. (1685082)
Bowl
3d_export
$10

pet bowl dog bowl cat bowl
...pet bowl dog bowl cat bowl
3dexport
pet bowl dog bowl cat bowl
3d_ocean
$2

Bowl
...bowl
3docean
ceramic bowl
archibase_planet
free

Bowl
...bowl
archibase planet
bowl jug pitcher
bowl - 3d model for interior 3d visualization.
archibase_planet
free

Bowl
...bowl
archibase planet
bowl
bowl - 3d model (*.gsm+*.3ds) for interior 3d visualization.
3d_ocean
$2

bowl
...bowl
3docean
white bowl by 3dmax
design_connected
$16

Bowl
...bowl
designconnected
bowl computer generated 3d model.
3d_export
$5

bowl
...bowl
3dexport
bowl make of ceramic with a print of leaves
3d_export
free

bowl
...bowl
3dexport
bowl<br>here you are
turbosquid
$5

Bowling Ball + Bowling Pins
...free 3d model bowling ball + bowling pins for download as fbx on turbosquid: 3d models for games, architecture, videos. (1357551)
3d_ocean
$2

Bowl
... is modelled in vrayforc4d. cinema 4d contains vray material for use. rendered and checked. available formats; cinema 4d vray,obj
Adjustable
3d_ocean
$7
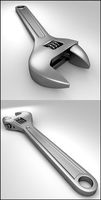
Adjustable Wrench
...adjustable wrench
3docean
adjustable wrench highly detailed wrench
highly detailed adjustable wrench.
3ddd
$1
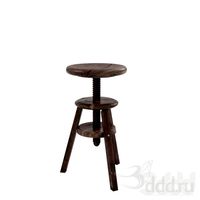
Adjustable Stool
...adjustable stool
3ddd
табурет
wooden adjustable stool.
3d_ocean
$20

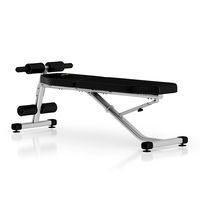
Adjustable Gym Bench
...st adjustable bench black equipement gym gymnastic indoor silver sport workout
3d model of black and silver adjustable gym bench.
3d_ocean
$20
Adjustable Gym Bench
...st adjustable bench black equipement gym gymnastic indoor silver sport workout
3d model of black and silver adjustable gym bench.
3d_ocean
$16

Adjustable Weight Bench
...arbell bench black equipement gym gymnastic indoor sport weight workout
3d model of black adjustable weight bench with a barbell.
turbosquid
$5

Adjustable wrench
...
royalty free 3d model adjustable wrench for download as fbx on turbosquid: 3d models for games, architecture, videos. (1313414)
3d_export
$5

adjustable tension lock
...adjustable tension lock
3dexport
adjustable tension lock
turbosquid
$1
Adjustable Wrench
...free 3d model adjustable wrench for download as obj and blend on turbosquid: 3d models for games, architecture, videos. (1446736)
turbosquid
$1

Adjustable Wrench
...y free 3d model adjustable wrench for download as c4d and fbx on turbosquid: 3d models for games, architecture, videos. (1379022)
3d_export
$5

Adjustable key
...adjustable key
3dexport
Camera
archibase_planet
free
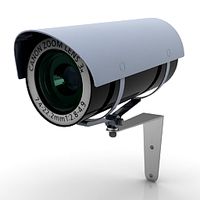
Camera
...base planet
camera surveillance camera video camera
camera surveillance n090211 - 3d model (*.3ds) for interior 3d visualization.
archibase_planet
free
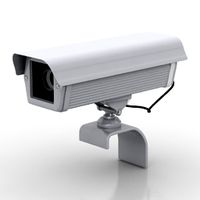
Camera
...hibase planet
camera security camera video camera
camera security n210515 - 3d model (*.gsm+*.3ds) for exterior 3d visualization.
archibase_planet
free
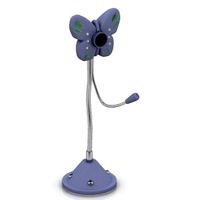
Camera
...se planet
camera web camera webcam
camera butterfly usb pc camera n090713 - 3d model (*.gsm+*.3ds) for interior 3d visualization.
archibase_planet
free
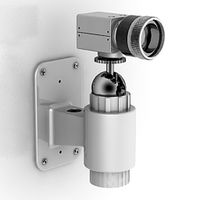
Camera
...mera
archibase planet
surveillance camera video camera camcorder
camera n011211 - 3d model (*.3ds) for exterior 3d visualization.
archibase_planet
free
Camera
...camera
archibase planet
camera digital camera
camera canon digital n041211 - 3d model (*.3ds) for interior 3d visualization.
archibase_planet
free
Camera
...camera
archibase planet
camera film camera phototechnique
camera n100214 - 3d model (*.gsm+*.3ds) for interior 3d visualization.
archibase_planet
free

Camera
...amera
archibase planet
camera video camera camcorder
camera video n070315 - 3d model (*.gsm+*.3ds) for interior 3d visualization.
archibase_planet
free
Camera
...rchibase planet
camera video camera camcorder
camera studio n101213 - 3d model (*.gsm+*.3ds+*.max) for interior 3d visualization.
archibase_planet
free
Camera
...ibase planet
digital camera camera phototechnique
camera canon ixus 400 n310311 - 3d model (*.3ds) for interior 3d visualization.
archibase_planet
free
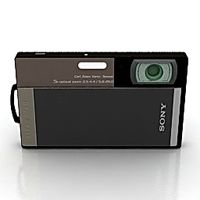
Camera
...ase planet
photocamera video camera camera
camera sony t300 black n291010 - 3d model (*.gsm+*.3ds) for interior 3d visualization.
W
3ddd
$1
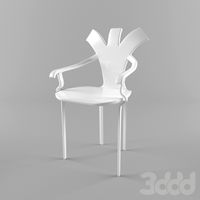
chair W
...chair w
3ddd
chair w
3ddd
$1

кресло w
...кресло w
3ddd
капитоне
кресло w
3ddd
$1
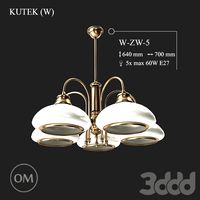
KUTEK (W) W-ZW-5
...kutek (w) w-zw-5
3ddd
kutek
3d модель люстри (w) w-zw-5 фабрики kutek. в архиве: max2012, obj, fbx, mat.(два варианта металла)
3ddd
$1
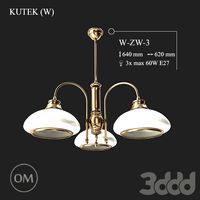
KUTEK (W) W-ZW-3
...kutek (w) w-zw-3
3ddd
kutek
3d модель люстри (w) w-zw-3 фабрики kutek. в архиве: max2012, obj, fbx, mat. (два варианта металла)
3ddd
$1
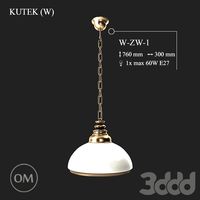
KUTEK (W) W-ZW-1
...kutek (w) w-zw-1
3ddd
kutek
3d модель люстри (w) w-zw-1 фабрики kutek. в архиве: max2012, obj, fbx, mat (два варианта металла).
3ddd
free
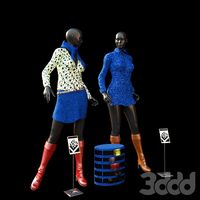
aneken W&W
...aneken w&w
3ddd
2 женских манекена, ценники и фолио. материалы и текстуры прилагаются.
design_connected
$9
KTribe W
...ktribe w
designconnected
ktribe w computer generated 3d model. designed by starck, philippe.
design_connected
$16

Troy W
...troy w
designconnected
magis troy w computer generated 3d model. designed by wanders, marcel.
turbosquid
$9
Menu - Benjamin Hubert - W W Carafe
... available on turbo squid, the world's leading provider of digital 3d models for visualization, films, television, and games.
turbosquid
$9
Menu - Benjamin Hubert - W W Carafe
... available on turbo squid, the world's leading provider of digital 3d models for visualization, films, television, and games.