Thingiverse

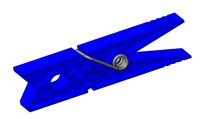
Adjustable ^2 Plastic Wrap Pantry Door Shelf by MyStoopidStuff
by Thingiverse
Last crawled date: 3 years, 1 month ago
This is a remix of the Adjustable Plastic Wrap Pantry Door Shelf by Iceytee:https://www.thingiverse.com/thing:2857706
Unfortunately my saran wrap boxes were too deep to fit it, so I remixed it.
This remix allows some flexibility in the depth of the bracket and uses a rubber band to provide some tension to hold the boxes in place. The pics are of an earlier version and I will update them when I have the final version printed.
Parts required:
2 x M4x16mm Socket Head Screws (M4x12 would probably work as well)
2 x M4 lock nut
2 x rubber bands (regular size)
It will also require some screws to mount. I used some small 3M command strips on mine, but that is only temporary until I see where the best location is for this.
The nut and bolt are used to keep the whole thing from flying apart if the top and bottom are pulled apart and separated with the rubber band installed, so don't skimp and leave them out. The standard disclaimers apply. if you make this, you take full responsibility for making and using it, and keeping kids and pets from messing with it. There is a rubber band or two involved so don't shoot your eye out (either or them), and be careful not to get pinched when putting it together or using it. Look both ways before crossing the street, don't feed the wildlife, and stay off my yard.
Assembly instructions:
First, install the rubber band, doubled over place it over the round post at the back of the base part.
Then install the tool in the hex opening on the bottom of the base, the tool will help with installing the rubber band.
Loop the lose ends of the rubber band around the posts of the tool and make sure the band is sitting nicely in the center channel.
Next install the top part, which will slide into the channel of the base, with it about half way installed, take one end of the rubber band at a time, and loop them over the post for the top part. Watch your fingers and let the rubber band retract the top part,
Finally, remove the tool, and install the M4 locknut in the base (in the hexagonal opening), and install the M4 socket head screw into it from the top, the screw head will ride in the channel.
Repeat for the 2nd mount and that's it.
The rest of these mounts work the same way as the original.
Similar models
thingiverse
free

Don't forget your Towel - Kitchen Towel Holder (Version C) by MyStoopidStuff
...t it from the other end. the m4 nut and bolt are there to hold the parts together, and keep them from getting slid apart easily.
thingiverse
free

Don't forget your Towel - Kitchen Towel Holder (version B) by MyStoopidStuff
...t it from the other end. the m4 nut and bolt are there to hold the parts together, and keep them from getting slid apart easily.
thingiverse
free

Phone holder with rubber band by royshilkrot
...that i can't grab a pic with the phone in it, that's because i use the photo to take the picture. but you get the idea :)
thingiverse
free

DIN Rail Mount and Plate for Mesa Card 7i76e by EisbaerLars
... the countersunk screws to fix it on the clamps and to be able to cut m3 threads directly into the print instead of using inserts
thingiverse
free

Wall hooks - Fixed with two M4 screws (philips head) by DaveBZH
...em for bike helmet, tools, etc.
no support are needed.
if you want another size, feel free to post a request in the comment part.
thingiverse
free
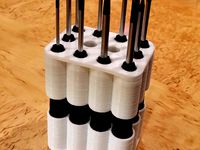
Customizable screwdriver stand (top part) by Dvogonen
...bber band. in this way you can store your precision screw drivers as a convenient package and have them ready for use in seconds.
thingiverse
free

PSVR stand remix - cleaned top part by dsko
...d removed the countersink in the screw holes because i wanted to use regular screws.
you'll need 2 m4x10 screws and 2 m4 nuts
thingiverse
free

ZTE Speed USB Strain Relief by cheer4ftc
...of rubber bands around the phone. if you're using a pigtail, you can semi-permanently connect the cable.
print with support.
thingiverse
free

Hidden wall outlet safe by Jwill76524
...made two holes in the box to screw the box onto a wall stud.
i made this very simple but it is very effective and kinda cool too!
thingiverse
free

Shock Mount for Zoom H1/H1n by dout3
...al tape pieces to the plate and add the tripod screw
5.add the rubber bands and if they are too loose, add a knot to them.
bravo!
Mystoopidstuff
thingiverse
free

Eye Roll Emoticon by MyStoopidStuff
... the person who is just sooo cool they can't be bothered with a discussion of the finer points of 3d fused filament printing.
thingiverse
free

Pegboard webcamera holder 41mm x 7mm by MyStoopidStuff
... of strange for a webcam holder but it works for mine. the inside dimensions are:
41mm x 7mm and it is about 41mm tall (inside).
thingiverse
free

Modular Mounting System - 2020 mount by MyStoopidStuff
...his for m4 and use it with another thing i am working on (a filament runout sensor mount), but thought this could be useful also.
thingiverse
free

spacer for ender 2 ender 3 cr10 - 2.5mm (remix) by MyStoopidStuff
... 2.5mm spacer remixed from the "spacer for ender 2 ender 3 cr10" by raffosan:
https://www.thingiverse.com/thing:2526607
thingiverse
free

Dog paw imprint and heart by MyStoopidStuff
... on them. i've uploaded the step files so these can be re-mixed if you want to add a name or add them to some other project.
thingiverse
free

Pegboard remote control holder 60mm x 30mm (with STEP file) by MyStoopidStuff
...tall (inside)
this was made for a whirlpool ac unit but will probably work with others.
uploaded the step file for easy remixing.
thingiverse
free

LoD (Look of Disapproval) by MyStoopidStuff
...characters" pop from the background color.
update 2/22/2020: see the remix of this thing which is split for easier printing.
thingiverse
free

Shruggie Desk Thing by MyStoopidStuff
... keyed to be printed a bit easier and then glued together. it can be found here:
https://www.thingiverse.com/thing:4130898/files
thingiverse
free

BOITIER TL SMOOTHER HelloBeePrusa SFX (remix) - Heatsink Lid by MyStoopidStuff
...w.amazon.com/easycargo-heatsink-anodized-25x25x10mm-25mmx25mmx10mm/dp/b07b642856
update jan 18, 2019 - step file is now uploaded.
thingiverse
free

Gazebo Cover End Point by MyStoopidStuff
...nd printing the small one first to test and then you can scale up or down from there to get the right fit with your gazebo frame.
Pantry
turbosquid
$5

Pantry
...free 3d model pantry for download as obj, fbx, blend, and stl on turbosquid: 3d models for games, architecture, videos. (1386154)
3ddd
free

KITCHEN,PANTRY
...kitchen,pantry
3ddd
small kitchen,pantry area done in max2015 saved with fbx and loweer version max 2012
turbosquid
$1

Pantry closet
...quid
royalty free 3d model pantry closet for download as max on turbosquid: 3d models for games, architecture, videos. (1161312)
turbosquid
$4

Pantry chairs
...yalty free 3d model pantry chairs for download as fbx and obj on turbosquid: 3d models for games, architecture, videos. (1551227)
turbosquid
$45

Modern Classic Pantry
...yalty free 3d model modern classic pantry for download as skp on turbosquid: 3d models for games, architecture, videos. (1618126)
turbosquid
$25

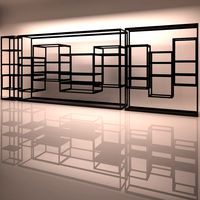
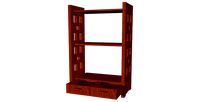
Open Rack Pantry
...d
royalty free 3d model open rack pantry for download as skp on turbosquid: 3d models for games, architecture, videos. (1650701)
3d_export
$12

dining room with pantry
...dining room with pantry
3dexport
3d_export
$9

staircase with pantry
...e on the kosoura. step - 270mm riser - 170mm width - 3650mm depth - 1780mm height - 2950mm<br>3ds max vray/corona, obj, fbx
turbosquid
$1

Pantry Door Game Ready
... available on turbo squid, the world's leading provider of digital 3d models for visualization, films, television, and games.
3ddd
$1

Table+Chairs
...table+chairs 3ddd table+chairs for pantry ...
Wrap
design_connected
$16

Wrap
...wrap
designconnected
modus furniture wrap computer generated 3d model. designed by pengelly, simon.
archibase_planet
free

Chicken wrap
...ase planet
chicken wrap fast food sandwich wrap food
chicken wrap n180614 - 3d model (*.gsm+*.3ds) for interior 3d visualization.
3ddd
$1

Wrap Tables
... круглый , прикроватный
wrap tables by lucie koldova for lugi
3ddd
$1

Wrapped box
... осылка , почта.веревка
wrapped box with roll of twine and a pair of siccors
3d_ocean
$5

Wrapped Gift Box
...bration christmas cover gift box holiday present box ribbon shopping store wrap wrapped xmas
wrapped gift box correctly uv-mapped
turbosquid
free

Cash Wrap
...ree 3d model cash wrap for download as 3ds, obj, c4d, and fbx on turbosquid: 3d models for games, architecture, videos. (1269084)
turbosquid
$49

Wrap dress
... available on turbo squid, the world's leading provider of digital 3d models for visualization, films, television, and games.
archive3d
free

Chicken wrap 3D Model
...sandwich wrap food
chicken wrap n180614 - 3d model (*.gsm+*.3ds) for interior 3d visualization.
evermotion
$15

wrap 38 AM150
...f food product with textures, shaders and materials. it is ready to use, just put it into your scene.. evermotion 3d models shop.
evermotion
$15

wrap 41 AM151
...f food product with textures, shaders and materials. it is ready to use, just put it into your scene.. evermotion 3d models shop.
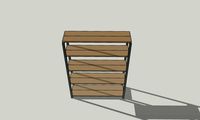
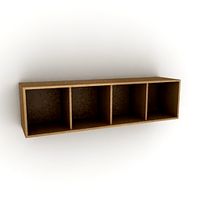
Shelf
3d_ocean
$6

Shelf
...shelf
3docean
furniture shelf
a lowpoly shelf .
turbosquid
$7
Shelf
...helf, bookshelf,cafe shelf,decor, for download as max and ige on turbosquid: 3d models for games, architecture, videos. (1427685)
archibase_planet
free
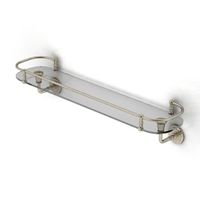
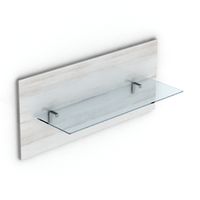
Shelf
...shelf
archibase planet
shelf rack glass shelf
shelf - 3d model (*.gsm+*.3ds) for interior 3d visualization.
archibase_planet
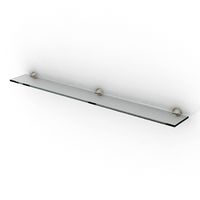
free
Shelf
...shelf
archibase planet
shelf rack glass shelf
shelf - 3d model (*.gsm+*.3ds) for interior 3d visualization.
3d_ocean
$3
Shelf
...shelf
3docean
shelf
a high quality shelf with high resolution texture
3d_export
$5
shelf
...shelf
3dexport
shelf
3d_export
$5

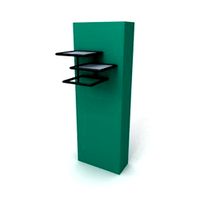
Shelf
...shelf
3dexport
shelf
archibase_planet
free
Shelf
...shelf
archibase planet
shelf shelving glass shelf
shelf 1 - 3d model (*.gsm+*.3ds) for interior 3d visualization.
archibase_planet
free
Shelf
...shelf
archibase planet
shelfs shelving bookshelf
shelf - 3d model for interior 3d visualization.
archibase_planet
free
Shelf
...shelf
archibase planet
shelf shelving bookcase
shelf - 3d model for interior 3d visualization.
Plastic
archibase_planet
free
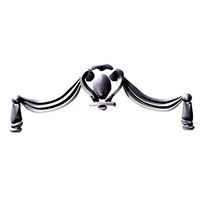
Plastic
...plastic
archibase planet
moulding friezes moldings border pilaster
deco plastic dw - 3d model for interior 3d visualization.
turbosquid
$1
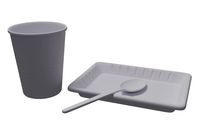
Plastics
...
royalty free 3d model plastics for download as blend and fbx on turbosquid: 3d models for games, architecture, videos. (1581776)
archibase_planet
free

Plastic
...lastic
archibase planet
moulding friezes moldings border pilaster decor
deco plastic rz - 3d model for interior 3d visualization.
3ddd
$1

Plastic Playground
... kids , toy , child
plastic playground
3d_export
$5
plastic lid
...plastic lid
3dexport
plastic lid
3d_export
$5
plastic clothespin
...plastic clothespin
3dexport
plastic clothespin
turbosquid
$39
Plastics
... available on turbo squid, the world's leading provider of digital 3d models for visualization, films, television, and games.
3d_ocean
$3

Plastic Packaging
...ging plastic
intended for blender, cycles: plastic packaging to place your product in. subdivision modifier has not been applied.
3ddd
$1

plastic box
... ящик
model of plastic box for fruits in 3 levels of detail. highpoly - 23,6k, midpoly - 7,3k and lowpoly - 2,6k polygons.
3d_ocean
$12
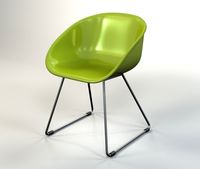
Plastic Chair
...furniture plastic chair side chair
3d model of plastic chair. 3ds and obj multi format files included. scanline renderer version.
Adjustable
3d_ocean
$7

Adjustable Wrench
...adjustable wrench
3docean
adjustable wrench highly detailed wrench
highly detailed adjustable wrench.
3ddd
$1
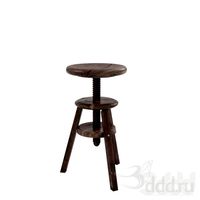
Adjustable Stool
...adjustable stool
3ddd
табурет
wooden adjustable stool.
3d_ocean
$20

Adjustable Gym Bench
...st adjustable bench black equipement gym gymnastic indoor silver sport workout
3d model of black and silver adjustable gym bench.
3d_ocean
$20
Adjustable Gym Bench
...st adjustable bench black equipement gym gymnastic indoor silver sport workout
3d model of black and silver adjustable gym bench.
3d_ocean
$16

Adjustable Weight Bench
...arbell bench black equipement gym gymnastic indoor sport weight workout
3d model of black adjustable weight bench with a barbell.
turbosquid
$5

Adjustable wrench
...
royalty free 3d model adjustable wrench for download as fbx on turbosquid: 3d models for games, architecture, videos. (1313414)
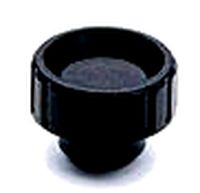
3d_export
$5

adjustable tension lock
...adjustable tension lock
3dexport
adjustable tension lock
turbosquid
$1

Adjustable Wrench
...free 3d model adjustable wrench for download as obj and blend on turbosquid: 3d models for games, architecture, videos. (1446736)
turbosquid
$1

Adjustable Wrench
...y free 3d model adjustable wrench for download as c4d and fbx on turbosquid: 3d models for games, architecture, videos. (1379022)
3d_export
$5

Adjustable key
...adjustable key
3dexport
Door
3d_export
$5
door handle of doors
...door handle of doors
3dexport
door handle of doors
3d_ocean
$4

Door
...3docean
architecture door gate gothic door old style door
door, 3d door, gothic door, architecture, old style door, gate, 3d gate
3d_ocean
$10

Door
...door
3docean
design door doors home house indoor interior opening doors
door design
archibase_planet
free
Door
...r
archibase planet
door sliding door interior door rail door
door n250515 - 3d model (*.gsm+*.3ds) for interior 3d visualization.
archibase_planet
free
Door
...door
archibase planet
door sash door sash-door interior door
door 900 - 3d model (*.gsm+*.3ds) for interior 3d visualization.
archibase_planet
free
Door
...door
archibase planet
door sash door sash-door interior door
door 600 - 3d model (*.gsm+*.3ds) for interior 3d visualization.
archibase_planet
free
Door
...door
archibase planet
door sash door sash-door interior door
door 800 - 3d model (*.gsm+*.3ds) for interior 3d visualization.
archibase_planet
free
Door
...door
archibase planet
door sash door sash-door interior door
door 800 - 3d model (*.gsm+*.3ds) for interior 3d visualization.
archibase_planet
free
Door
...door
archibase planet
door sash door sash-door interior door
door 700 - 3d model (*.gsm+*.3ds) for interior 3d visualization.
archibase_planet
free
Door
...door
archibase planet
door sash door sash-door interior door
door 600 - 3d model (*.gsm+*.3ds) for interior 3d visualization.
2
design_connected
$11

No 2
...no 2
designconnected
sibast no 2 computer generated 3d model. designed by sibast, helge.
turbosquid
$6

Cliff Rock 2-2
...uid
royalty free 3d model cliff rock 2-2 for download as obj on turbosquid: 3d models for games, architecture, videos. (1619161)
turbosquid
$29

Book variation 2 2
...3d model book variation 2 2 for download as max, obj, and fbx on turbosquid: 3d models for games, architecture, videos. (1366868)
turbosquid
$22

Classic baluster (2) (2)
...assic baluster (2) (2) for download as max, obj, fbx, and stl on turbosquid: 3d models for games, architecture, videos. (1483789)
turbosquid
$99

Smilodon 2 Pose 2
... available on turbo squid, the world's leading provider of digital 3d models for visualization, films, television, and games.
turbosquid
$20

Barrel Barricade 2-2
... available on turbo squid, the world's leading provider of digital 3d models for visualization, films, television, and games.
turbosquid
$6

Wall Trophy (2) (2)
... available on turbo squid, the world's leading provider of digital 3d models for visualization, films, television, and games.
turbosquid
free

Tire label 2 of 2
... available on turbo squid, the world's leading provider of digital 3d models for visualization, films, television, and games.
3ddd
$1

Кровать, 2 тумбочки, 2 светильника
...кровать, 2 тумбочки, 2 светильника
3ddd
кровать, 2 тумбочки, 2 светильника
нормальное качество
формат 3ds max
без текстур
3ddd
free

Кровать, 2 тумбочки, 2 светильника
...кровать, 2 тумбочки, 2 светильника
3ddd
кровать, 2 тумбочки, 2 светильника
нормальное качество
формат 3ds max
без текстур