Thingiverse

ACRO Laser Cable Chains by 3boysdad
by Thingiverse
Last crawled date: 3 years, 1 month ago
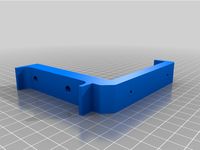
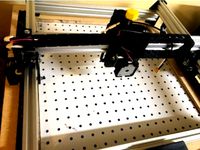
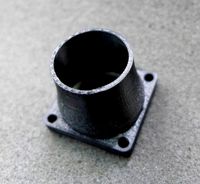
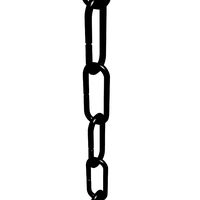
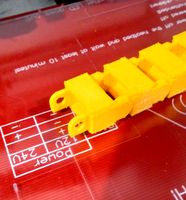
A simple, but effective cable chain setup.
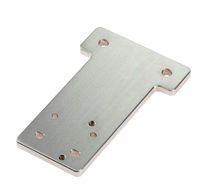
Print one X-AxisCableChainMount which can be attached directly to the top of x-axis plates that move the laser head around. For the other end of the chain you will have to drill a couple of holes to tie off the end of the cable chain. Use can use a 1/8" or 3.5 mm drill bit to cut these holes.
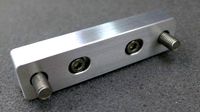
For the Y-AxisCableChainMount and Y-AxisCableChainMount-Leg print one of each normally, these will go on the left side of the frame. Then use your slicer to mirror these parts on one of the axis (as they are laid out, this would be on the x-axis) so that they can be installed on the right side of the machine.
You will need eight M3 nuts, eight 6 or 8mm M3 bolt/screws to install the cable chains end pieces. Additionally you'll need ten M4x12mm screws and nuts to install the mounts to the ACRO laser. You won't need to drill any M4 holes anyplace - I used existing holes for these.
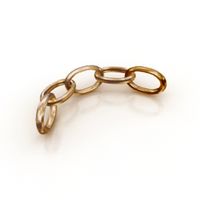
You will need about 28 or 29 chains in your links for each side of the y-axis as well as the x-axis. Print two sets of the end pieces for one side of the y-axis as well as the x-axis. Then print another set using the mirror tool in your slicer for the right side of the y-axis.
Print one X-AxisCableChainMount which can be attached directly to the top of x-axis plates that move the laser head around. For the other end of the chain you will have to drill a couple of holes to tie off the end of the cable chain. Use can use a 1/8" or 3.5 mm drill bit to cut these holes.
For the Y-AxisCableChainMount and Y-AxisCableChainMount-Leg print one of each normally, these will go on the left side of the frame. Then use your slicer to mirror these parts on one of the axis (as they are laid out, this would be on the x-axis) so that they can be installed on the right side of the machine.
You will need eight M3 nuts, eight 6 or 8mm M3 bolt/screws to install the cable chains end pieces. Additionally you'll need ten M4x12mm screws and nuts to install the mounts to the ACRO laser. You won't need to drill any M4 holes anyplace - I used existing holes for these.
You will need about 28 or 29 chains in your links for each side of the y-axis as well as the x-axis. Print two sets of the end pieces for one side of the y-axis as well as the x-axis. Then print another set using the mirror tool in your slicer for the right side of the y-axis.
Similar models
grabcad
free

CNC 3018 Full metal upgrades
...for m3 bolts and nuts. please use washers and spring washers to stop the bolts from loosening from the vibrations of the spindle.
thingiverse
free

Cable Chain mounts for laser engraver
...x left are attached with t-nuts
x right with longer m3 screws (i used 16mm i believe)
chain attached with m3x12mm screws and nuts
thingiverse
free

End Stop Bracket by Maglin
...e. this will allow you to drill 2 holes in the carriage to install this and maintain your stock x axis end stop and cable chain.
thingiverse
free

Anet A8 Y-Axis Cable Chain - Right Side by lokster
...u need to print 14 chain segments and rotate your heated bed 90 degrees clockwise (so that the connectors are on the right side).
thingiverse
free

Cable Chain for Anycubic i3 Mega X by Binguin
...axis:
not yet designed and probably won't be in the near future since i don't see a quick and convenient way to mount it.
thingiverse
free
PrintNC - Cable Chain supports by evil_k
...5 machine screws.
printed everything in petg, 60% infill, 0.6mm nozzle.
solidworks files included if you need to change anything.
thingiverse
free

Cable chain attachment-ender 3 Direct drive
...m3 nuts
use the m3*30 to attach the bottom bracket the attachment end of the cable chain(thing 11978).
m3*8 bolts everywhere else
thingiverse
free

Genmitsu 3018 CNC Endstops X, Y, and Z (No drilling into CNC required) by ab2tech
...econds
$27=2.000
homing pull-off, mm
$130=285.000
x max travel, mm
$131=177.000
y max travel, mm
$132=41.000
z max travel, mm
thingiverse
free

Prusa i3 Y axis belt joint by ivanbar
...
axis belt joint. only one side mounted in picture.
use 4 x m3x10 screw
4 x m3 washer (better if extrawide).
4 x m3 nut
thingiverse
free

Cable restraint
...ed a few m4 bolts and nuts. the nuts will fit into the backside. may need longer m3's as well if yours are not long enough.
3Boysdad
thingiverse
free

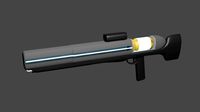
Robot Warrior Laser Tube by 3boysdad
...robot warrior laser tube by 3boysdad
thingiverse
probably will only work well for you on a sla printer.
thingiverse
free

Stackable Bits Holder by 3boysdad
...s holder by 3boysdad
thingiverse
designed a stackable and magnetized bits holder for my wh40k bits. requires 3mm x 1mm magnets.
thingiverse
free

Cubicle Coat Hanger by 3boysdad
...
got tired of the boring coat hangers in the cube farm. took one home, measured it, made a better looking and more colorful one.
thingiverse
free

V-Slot Circular Cable Holder by 3boysdad
...t circular cable holder by 3boysdad
thingiverse
a 90 degree cable holder with a larger holding capacity by adding a half circle.
thingiverse
free

Interlocking Card Holder by 3boysdad
...smonster, however can be used with pretty much any other game that requires several piles of cards to be adjacent to one another.
thingiverse
free

MakerBot V-Slot End Stop Holder by 3boysdad
... holder by 3boysdad
thingiverse
needed a mount that fit on a 2020 v-slot extrusion for the makerbot 'standard' end stop.
thingiverse
free

V-Slot 90 Degree Cable Holder by 3boysdad
...older by 3boysdad
thingiverse
v-slot 90 degree cable holder. use instead of zip ties for cables that will fill inside the slot.
thingiverse
free

V-Slot Filament Guide by 3boysdad
... that removes dust and other junk before it makes its way to the print head.
compatible with openbuilds' v-slot al extrusions
thingiverse
free

V-Slot Cable Stay by 3boysdad
...olerances are tight - if you find yourself too tight the freecad file is also attached can you can make some changes on your own.
thingiverse
free

V-Slot Straight Cable Holder w/Circle by 3boysdad
...der w/circle by 3boysdad
thingiverse
another v-slot cable holder. this one to hold cables/wires that don't fit in the slot.
Acro
3ddd
$1
Sony xperia acro s
...sony xperia acro s
3ddd
телефон , sony xperia
телефон sony xperia acro s
turbosquid
$1

Acro Support Prop
... available on turbo squid, the world's leading provider of digital 3d models for visualization, films, television, and games.
turbosquid
$1

Acro Support Prop
... available on turbo squid, the world's leading provider of digital 3d models for visualization, films, television, and games.
3d_sky
free

Sony xperia acro s
...sony xperia acro s
3dsky
phone
phone sony xperia acro s
thingiverse
free

OpenBuilds ACRO Plates by ThothLoki
...for this thing will be donated directly to www.benboxlaser.us to continue that awesome community. https://www.paypal.me/thothloki
thingiverse
free
ACRO SYSTEMS DRAG CHAIN SYSTEM by dragonfire81m
...acro systems drag chain system by dragonfire81m
thingiverse
chain link mounting system for acro system openbuilds
thingiverse
free

Di-Acro 7.5mm Radius Finger by jeffreydreid
...di-acro 7.5mm radius finger by jeffreydreid
thingiverse
7.5mm radius finger for di-acro finger break
thingiverse
free

Laser Protector OpenBuild Acro
...openbuild acro chassis.
just add a plexiglass 60x60 of the right color regarding your laser.
you will need 2x 3mm screw and bolt.
thingiverse
free

ACRO P1 Mount For P90 by YSHTT
...acro p1 mount for p90 by yshtt
thingiverse
3dbaza
$3

ACRO Chandelier (319907)
...lt;br>xform: no<br>box trick: no<br>model parts: 4<br>render: v-ray<br>formats: 3ds max 2014, obj, fbx
Laser
3d_export
$5
laser
...laser
3dexport
a 3d laser
3d_export
free
cnc 3dp laser nozzle for 2w laser opt lasers
...logy that gave birth to cutting and engraving laser heads this laser nozzle was designed for, read the article in the link below:
3d_export
free
cnc laser mount opt lasers
...eive the engraving and cutting laser heads this cnc machine laser mount was designed for, read the article on the following page:
turbosquid
$20
Laser
... available on turbo squid, the world's leading provider of digital 3d models for visualization, films, television, and games.
turbosquid
$15
Laser
... available on turbo squid, the world's leading provider of digital 3d models for visualization, films, television, and games.
turbosquid
$3
Laser
... available on turbo squid, the world's leading provider of digital 3d models for visualization, films, television, and games.
3d_export
$5

laser sword
...laser sword
3dexport
it is a blue laser sword with a metal frame
3d_ocean
$19
Laser Turret
...be used in any sf type of game, especially in tower defense games. - laser turret: 3025 polygons - props: 270 polygons - textu...
3d_export
free
workbee cnc laser mount for opt lasers
...the specifications of engraving and cutting laser heads this mount was designed for, please take a look at the following website:
3d_export
free

shapeoko cnc laser mount for opt lasers
...ind out the opportunities that adding a cutting and engraving laser head to your cnc can bring, take a look at the website below:
Chains
archibase_planet
free
Chain
...chain
archibase planet
chain chain link chain loop
chain n020708 - 3d model (*.gsm+*.3ds) for interior 3d visualization.
3d_export
$5
chain
...chain
3dexport
3d model chain
3d_export
$5
chain
...chain
3dexport
chain. obj,fbx,blend
archibase_planet
free

Chain
...se planet
chain circuit catena
chain - archicad parametrical gdl 3d model (*.gsm). regulation of the length, curvature and angle.
archibase_planet
free
Chain
...n
archibase planet
chain circuit catena
chain - archicad parametrical gdl 3d model(*.gsm). regulation of the length and angle xyz
3d_ocean
$5
Chain
...chain
3docean
3d models chain design elements
3d models, design elements
3d_ocean
$5

Chain
...chain
3docean
3d models chain design elements
3d models, design elements
turbosquid
$10
Chain
...hain
turbosquid
royalty free 3d model chain for download as on turbosquid: 3d models for games, architecture, videos. (1329200)
turbosquid
$9
chain
...hain
turbosquid
royalty free 3d model chain for download as on turbosquid: 3d models for games, architecture, videos. (1549461)
turbosquid
$2
Chain
...hain
turbosquid
royalty free 3d model chain for download as on turbosquid: 3d models for games, architecture, videos. (1148668)
Cable
3d_export
free

Cables
...cables
3dexport
cables for your purposes
3d_export
free
cable belt for cable organization
...ze your cables in 3d printers. it will bend only to one direction. the area to put the cables per piece is aprox. 1,6cmx2,6cmx1cm
3d_ocean
$16
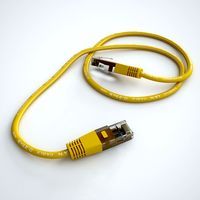
Ethernet Cable
...ethernet cable
3docean
cable computer electronics ethernet internet network connected
ethernet cable 3d model
3d_export
$65

cable
...cable
3dexport
simple rendering of the scene file
turbosquid
$14

Cable
...l cable for download as ma, max, fbx, 3ds, gltf, obj, and stl on turbosquid: 3d models for games, architecture, videos. (1631358)
3ddd
$1
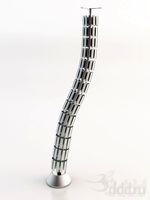
Cable Cover
...cable cover
3ddd
кабель
vertebra passacavo - cable cover
max + vray 2.20.03
3d_export
$15
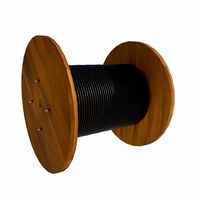
Cable reel
...without cable. textures 4k 4096x4096 targa, png, jpeg.<br>number of polygons without cable: 2896<br>with cable: 35328
3d_export
$7

short cable
...short cable
3dexport
rubber cord. very detailed. cable thickness: 2.55 mm total length: 55mm
3d_export
$5

USB CABLE
...usb cable
3dexport
turbosquid
$30
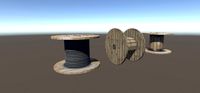
Cable Reels
...osquid
royalty free 3d model cable reels for download as fbx on turbosquid: 3d models for games, architecture, videos. (1439507)