Thingiverse
9900k 9700k Direct Die CPU protector Socket 1151 Core I9
by Thingiverse
Last crawled date: 5 years, 7 months ago
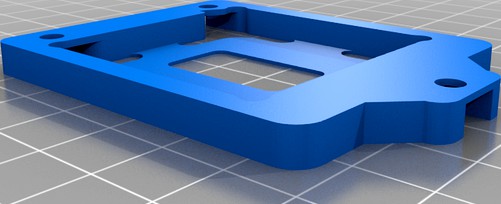
This is a CPU core protector for Socket 1151 and the Intel 9900K for those who want to remove the heathspreader and put their CPU cooler directly on the sillicon for better direct die cooling. Also included are new spacers if you want the use the Noctua D15 CPU cooler.
This protector does three things:
1) It keeps the CPU into the socket when the cooler is removed
2) It evens out the pressure. This means the cooler presses down on the core and ALSO on the surrounding PCB. This accomplishes a good cooler to cpu core connection and a good pressure on the CPU socket.
3) And most importantly: It protects the CPU die/sillicon from cracking when there is uneven pressure from the cooler.
About the Intel 9900K CPU:
The Intel 9900k 8 core CPU is a fast, but hot CPU. At default speeds core temperatures go into the high 80's and sometimes 90's degrees celcius during benchmarking. Even though Intel uses a better thermal interface (indium instead of a paste) between the CPU die and the heathspreader, it is still far from optimal.
One option is to de-lid the CPU by removing the heathspreader, cleaning up the thermal interface and applying liquid metal like Thermal Grizzly Conductonaut. Next place the heathspreader back and enjoy a degree or 6 lower temps.
The better solution is to ditch the heathspreader all together and place the cooler directly on the CPU die with liquid metal. This will lower temperatures by about 12 to 16 degrees which is quite a lot. It means:
-More stable CPU
-More silent PC since the fans need to ramp up much less
-Lower temp difference between each core (helps stability)
-Higher overclock. Makes the difference between 4.8ghz or 5ghz
Technical details and instructions:
The CPU die sticks up 0.87mm from the PCB. (Famous overclocker Der8auer measured this for the 9900k) The bracket around the CPU die should thus be 0.87mm thick in order to create an even surface. This way the CPU cooler presses on the CPU die and the PCB/socket together evenly. I designed this protector a tiny bit thinner in order to make sure the CPU die touches the cooler first and thus ensures optimal contact. The last thing you want is a gap between the cooler and the core.
Q&A
-How do I print such an precise thickness? My printer cannot do more precise then 0,1mm layers
You can do two things: 1) Adjust your first bed position ever so slightly so the 0,80mm prints a tiny bit thicker 2) Adjust your print settings so the 0.80mm prints a even a tiny bit smaller and then use a bit of blue painters tape (which is 0,1mm thickness) to get the total near 0.87mm. Also, I recommend sanding the surface to remove any inconsistencies.
-What material should I print this? Doesn't it get very hot? Like 80 degrees?
No, the underside of your cooler (assuming you either have watercooling or a high end aircooler) will not be hot. Core temperature = not heathsink temperature. I tested this and even with the 9900k pushed to the limits, the cooler itself will not run hot in a direct-die mount. I printed this in PLA and it's fine. ABS gave me warping and ePC (polycarbonate) needs a very high print temp (but has great temp resistance nonetheless)
-What are the other versions like 0,70mm and 0,60mm?
If you wanna go rambo style you can sand down the CPU core to make it a bit thinner for a few extra degrees. You can then use these thinner versions.
-My printer didn't print so precise! Help!
No worries. If the thin part around the CPU is a little to thick, just print the 0,70mm version or the 0,60mm. Alternatively if the part around the CPU is a little to thin, you can use blue painters tape as a spacer. Blue tape is 0.1mm thick per layer. Don't worry about the other dimensions around the socket as they are not super critical. You can also use some sandpaper to get the exact thickness for the middle part.
-Doesn't this need to be metal? Like Derb8auer's Core I9 direct die frame?
No, it doesn't. The frame itself doesn't apply any pressure, that's what the CPU cooler does. This part is only there to hold the CPU into the socket and acts as a spacer so the cooler presses on the CPU core and PCB evenly. None of that requires metal.
-Do I really need this part?
In fact it's not something that's required for a direct die mount. You can just place back the CPU without heatspreader and mount the cooler while only adjusting for the changed height. BUT... that only works good when the pressure is very evenly distributed and if you apply a lot of pressure maybe you crack the core! The problem also is it can be difficult to create that even pressure on such a small surface. And when the cooler is slightly tilted or the underside is not perfectly flat it's very easy to chip of a bit of the side of the CPU die.
-How do I mount this?
You remove the existing metal bracket with the little lever that pushes the CPU down into the socket. Next you mount this bracket and you re-use the screws from the original metal bracket.
-I have a Noctua D15, how do I mount this cooler?
Same as normal, but you use the smaller plastic spacers around the CPU. Also on the back of the motherboard where the metal support frame for the cooler is located, you need to add +- 2mm of little metal spacers too. There's already tiny plastic spacers used, so put that one on lastly so no metal touches the mainboard.
PROTIP: The underside of my Noctua D15 was not perfectly flat. The easy solution is to lay down a piece of sandpaper on a piece of glass or any other flat surface and sand the bottom of the CPU cooler a bit until it's even.
-How much pressure should I use when mounting my CPU cooler?
In order for the CPU to work properly there's quite some pressing down into the socket needed. I've seen posts from people who used too little force causing all kind of errors from simply not booting to missing RAM. I've tightened the 2 screws from my Noctua D15 all the way down and its fine.
-Can I use normal thermal paste instead of liquid metal between cooler and CPU die?
No, it will be terrible. Much worse then stock! Use liquid metal.
-How can I check if everything is correct and flat when the CPU is mounted in this frame?
A good way to test is as follows. Get the original heathspreader and lay it flat (with the letters down) on the CPU die. Now gently feel if it's possible to wiggle it by pressing on the sides. If you can press a side down and tilt it the slightest bit, the spacer is too thin and you can add 0.1mm blue tape or print the part again. If you think all is good do the next test: Put a tiny bit of normal thermal paste on the CPU die and also put 4 drops around it on the plastic printed part. Get the heathspreader again, clean it and place it down again on the CPU core. Press it down a bit harder and lift it up. The thermal paste should be evenly distributed on the CPU core and the 4 drops on the spacer part should also been pressed flat in a similar way. You can also mount your cooler with minimal pressure and see how the thermal paste is distributed.
And last but not least: ALWAYS SCREW DOWN THE COOLER EVENLY. TURN THE TWO MOUNTING SCREWS ONE TURN EACH AND GO BACK AND FORTH UNTIL THE COOLER IS SEATED. IF YOU SCREW DOWN ONE SIDE ALL THE WAY FIRST YOU CREATE UNEVEN PRESSURE AND YOU STILL RISK CRACKING YOUR CPU CORE!
Here's a nice video about direct die cooling:https://www.youtube.com/watch?v=s3kxo-70FmM&t=420s