Thingiverse

5th Gen 4runner Electrical Panel
by Thingiverse
Last crawled date: 4 years, 2 months ago
Overview
There are not a lot of great places to mount switches or other gauges in the 5th gen 4runner so I designed this panel to attach panel mounted objects below the AC controls, replacing the fairly useless cubbies. You can use the same switches and gauges I used, or you can modify this to fit many things like rocker switches, an spod controller, switch-pros controller, or other gauges. This removes the USB and AUX in ports, but it would be easy to add it back with something like this.
If you are concerned about cutting apart their original panel, you can buy a new one with part number 5540635070.
If you want this modified to fit whatever you want to mount on it, send me a PM or email brysonhicks56@gmail.com. I will upload a blank panel soon in multiple file formats that you can either modify or print and then drill to suit your needs.
The overhang is about 30 degrees. I printed it without support, and ran into some problems with print artifacts, but it was still structurally strong and that area is not visible unless you are looking up at it with your head where your feet should be.
Assembly
Remove plastic trays. This is fairly easy to do by pulling on the black trim on either side of the center dash. These pop off and you can then remove the AC controls by tugging on it as well. One they are removed there are two bolts to remove to free up the trays. To pull the trays out you need to pop up the center counsel trim, which can be done by hand by pulling on it. Once that is loose you can pull the trays out.
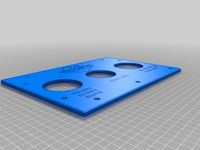
Cut the plastic tray piece as shown in my photos. You can then put the panel in place to mark where you need to drill for the bolts to hold it in place. For the top left bolts I used a hot knife tool to cut and bend a piece of plastic that I super glued in place to support the nut.
How my panel is wired
If you want to copy my setup, I used this to control and view the voltages on a Genesis Offroad Dual Battery Kit. They make a display button that shows the voltages and allows you to control the isolator, but I was not a fan of the price ($269!) and size of the display. I was able to find a source for the cable they use to connect to the kit and I probed it to find out what each pin did. I then used that cable to make most of the connections.
The National Luma dual battery display shows the voltage of each battery and includes alarms that go off if the voltage gets very low. It uses the cable going directly to the battery kit for each power and ground.
The low voltage disconnect switch controls a blue sea m-LVD that open the circuit for accessories connected to the AUX battery once the voltage gets low. This prevents the battery from being drained enough to damage it. You can override the shutoff with the switch as well as see the connection status.
The momentary switch to the right of the LVD switch manually connects the two batteries if they have been disconnected automatically due to the voltage getting low. This can be used to jumpstart the car with the push of a button if your main battery was depleted accidentally.
The amber status LED to the switch shows the current connection status. It turns on when the batteries are connected together.
The 12V socket at the top right uses the same power as the original socket, so it turns off when the car is off.
The 12V socket below the top socket is connected to the AUX battery so it is always on, unless the LVD disconnects it.
The red voltage display in the center shows the volts on the main battery when the car is on. This is useful so you can see what voltage the batteries are being charged at, which is ideally between 14.0V and 14.7V for AGM batteries.
The green amp display below the red voltage display shows the amps going through the cable from the AUX battery to the LVD. This shows the total amps being pulled out of the AUX battery so you can see how much of a load you are putting on the battery. The switch to its right turns the display on and off.
Parts list
Mounting:
Bolts, I used M3
Super glue
Wiring:
Crimp connectors
Zip Tie Anchors
10AWG wire (for socket connected to AUX battery)
Cable to connect to battery kit or google CAEN3C5M07990.
Devices:
Dual Battery Monitor
Volt Meter
Connection Switch
Sockets
Ammeter
Ammeter switch
Indicator LED
Low Voltage Disconnect
There are not a lot of great places to mount switches or other gauges in the 5th gen 4runner so I designed this panel to attach panel mounted objects below the AC controls, replacing the fairly useless cubbies. You can use the same switches and gauges I used, or you can modify this to fit many things like rocker switches, an spod controller, switch-pros controller, or other gauges. This removes the USB and AUX in ports, but it would be easy to add it back with something like this.
If you are concerned about cutting apart their original panel, you can buy a new one with part number 5540635070.
If you want this modified to fit whatever you want to mount on it, send me a PM or email brysonhicks56@gmail.com. I will upload a blank panel soon in multiple file formats that you can either modify or print and then drill to suit your needs.
The overhang is about 30 degrees. I printed it without support, and ran into some problems with print artifacts, but it was still structurally strong and that area is not visible unless you are looking up at it with your head where your feet should be.
Assembly
Remove plastic trays. This is fairly easy to do by pulling on the black trim on either side of the center dash. These pop off and you can then remove the AC controls by tugging on it as well. One they are removed there are two bolts to remove to free up the trays. To pull the trays out you need to pop up the center counsel trim, which can be done by hand by pulling on it. Once that is loose you can pull the trays out.
Cut the plastic tray piece as shown in my photos. You can then put the panel in place to mark where you need to drill for the bolts to hold it in place. For the top left bolts I used a hot knife tool to cut and bend a piece of plastic that I super glued in place to support the nut.
How my panel is wired
If you want to copy my setup, I used this to control and view the voltages on a Genesis Offroad Dual Battery Kit. They make a display button that shows the voltages and allows you to control the isolator, but I was not a fan of the price ($269!) and size of the display. I was able to find a source for the cable they use to connect to the kit and I probed it to find out what each pin did. I then used that cable to make most of the connections.
The National Luma dual battery display shows the voltage of each battery and includes alarms that go off if the voltage gets very low. It uses the cable going directly to the battery kit for each power and ground.
The low voltage disconnect switch controls a blue sea m-LVD that open the circuit for accessories connected to the AUX battery once the voltage gets low. This prevents the battery from being drained enough to damage it. You can override the shutoff with the switch as well as see the connection status.
The momentary switch to the right of the LVD switch manually connects the two batteries if they have been disconnected automatically due to the voltage getting low. This can be used to jumpstart the car with the push of a button if your main battery was depleted accidentally.
The amber status LED to the switch shows the current connection status. It turns on when the batteries are connected together.
The 12V socket at the top right uses the same power as the original socket, so it turns off when the car is off.
The 12V socket below the top socket is connected to the AUX battery so it is always on, unless the LVD disconnects it.
The red voltage display in the center shows the volts on the main battery when the car is on. This is useful so you can see what voltage the batteries are being charged at, which is ideally between 14.0V and 14.7V for AGM batteries.
The green amp display below the red voltage display shows the amps going through the cable from the AUX battery to the LVD. This shows the total amps being pulled out of the AUX battery so you can see how much of a load you are putting on the battery. The switch to its right turns the display on and off.
Parts list
Mounting:
Bolts, I used M3
Super glue
Wiring:
Crimp connectors
Zip Tie Anchors
10AWG wire (for socket connected to AUX battery)
Cable to connect to battery kit or google CAEN3C5M07990.
Devices:
Dual Battery Monitor
Volt Meter
Connection Switch
Sockets
Ammeter
Ammeter switch
Indicator LED
Low Voltage Disconnect
Similar models
thingiverse
free

Nissan X-Trail T30 Console Switch Panel by edofalcone
...
fits the 1-din tray (you gotta remove it obviously) to put your aux lights switches.
you can glue it or use m3 bolts (or both).
thingiverse
free

Voltmeter/Ammeter Case - 2 by walter
... or 5.5mm x 2.5mm jack.
some of the parts used for the meter:
voltmeter / ammeter circuit
power jack
5.5mm x 2.5mm cable
thingiverse
free

0v to 100v Voltage Regulator with digital voltmeter and ammeter by 3Dadicto
...female jack 5.5mmx2.1mm.
voltmeter power with 3.7v battery integrated in the box.
switch to disconnect the voltmeter and ammeter.
thingiverse
free

Switch Panel by cemkalyoncu
...s deadly, be warned. even 12v can easily heat up and melt plastic if the switch is not rated for the currents that you are using.
thingiverse
free

Sunhokey power supply shroud with switch by jvince
...nter run only from it's power supply. when off it disconnects from the pc and powers off completely even though still cabled.
thingiverse
free

Polaris Lock and Ride Rear Cargo Box Speaker Mounts by geofox
...ure for the lvd: https://www.thingiverse.com/thing:4876452
supports recommended for the bolt holes. no supports needed elsewhere.
thingiverse
free

Miata Tombstone Dash by josh7owens
...s are for a 2" gauge, joe-46125 switch panel and joe-46200 battery disconnect. you can order those items from summit racing.
thingiverse
free

Bench Power Supply Distribution Block by jvince
...e lead (cable) out the back for the charger usually on the bench, and two sets of banana jacks on the front for temp connections.
thingiverse
free

eBike/Universal Voltmeter and Ammeter by lensfort
...erly, but from the photos and included diagram, and if you are into ebikes, you are likely savvy enough to wire it up very easily
thingiverse
free

Limit Switch Mounts and Wiring Box for CNC3020
... on the portal.
the placement of the switches and wiring box is to see in this video: https://www.youtube.com/watch?v=bflyil3ggew
4Runner
thingiverse
free

4runner hood bumper
...4runner hood bumper
thingiverse
its a extension for the worn out hood bumpers. these fit my '96 4runner
thingiverse
free

4Runner Antenna Mount by kickinw1ng
...ner. designed to be cnc plasma or laser cut out of 11gauge steel then welded together. 3d printed prototype pictured for example.
thingiverse
free

Toyota 4Runner 2018 front threshold cover by chereushenko
...toyota 4runner 2018 front threshold cover by chereushenko
thingiverse
cover threshold for toyota 4runner 2018
thingiverse
free

Toyota 4Runner Grill Clip by reed
...ration (1987 )toyota 4runner, this clip holds the grill to the truck body. these grill clips are very similar to the stock clips.
thingiverse
free

5th gen 4runner phone holder by HornedOwl
...erse
working on designing a phone holder for random compartments on a 2020 4runner. this design is for a wireless charging puck.
thingiverse
free

4Runner sPod Mount by cw360
...his mod is for a 5th generation 4runner without crawl control. if you have a sunglasses holder, you don't have crawl control.
thingiverse
free

1990-1995 Toyota 4runner pickup switch holder by Teasleyprint
...1990-1995 toyota 4runner pickup switch holder by teasleyprint
thingiverse
switch holder for 90-95 4runner and pickup
thingiverse
free

4Runner Ebrake Center Console Switch Panel by nzbrock
...ner ebrake handle would usually go. this can be used when swapping a 3rd gen 4runner center console into a 1st gen toyota tacoma.
thingiverse
free

SourceOneV4 mount for 4runner Runcam skin by Harpalyke
...ce one v4 frame that has studs for the 4runner camera skin for the runcam5/gopro sessionhttps://www.thingiverse.com/thing:2264811
thingiverse
free

Flywoo Explorer LR4 Parts by 4runner
...flywoo explorer lr4 parts by 4runner
thingiverse
ready for tbs tracer & crossfire
5Th
thingiverse
free

Spark 5th grade cookie by yaneirag17
...spark 5th grade cookie by yaneirag17
thingiverse
spark 5th grade cookie
thingiverse
free

iPod 5th/Classic stand by kodera2t
...ipod 5th/classic stand by kodera2t
thingiverse
ipod 5th/classic stand
thingiverse
free

Canoloth DND 5th by Pirracas15
...canoloth dnd 5th by pirracas15
thingiverse
28mm canoloth miniature from dnd 5th edition, made with blender sculpting tool.
thingiverse
free

5th position by WillandMrData2
...ballet.
suggest lay print flat on build plate, the back has been made flat for easy printing.
bye for now and be well :) :]
thingiverse
free

5th gen Holder by DawgDodger
...5th gen holder by dawgdodger
thingiverse
haaaaaaaaa
thingiverse
free

makerbot 5th generation print base by rkormos
...makerbot 5th generation print base by rkormos
thingiverse
makerbot 5th generation print base
thingiverse
free

Batman iPod 5th Generation Case by eee333eee333
...batman ipod 5th generation case by eee333eee333
thingiverse
batman logo on a ipod 5th generation case
thingiverse
free

7 plug holder for 5th wheels by eagle14489
...or 5th wheels by eagle14489
thingiverse
designed to be automotive 3m tapped under the 5th wheel to hold the plug and brake cable
thingiverse
free

5th wheel camper keychain by adiastra
...heel camper keychain i made for my mother. i created the "alternate" version to have better attachment to the keychain.
thingiverse
free

Pergo 5th Anniversary Log by Pergo
...design than to incorporate it into yours.
thanks jzkmath, for the super model!
5th anniversaries are customarily "wood"
Gen
thingiverse
free

power gen by KenLin
...power gen by kenlin
thingiverse
power gen
thingiverse
free

bike power gen by KenLin
...bike power gen by kenlin
thingiverse
bike power gen
thingiverse
free

Nest Mini 2nd Gen
...nest mini 2nd gen
thingiverse
model of the nest mini 2nd gen.
thingiverse
free

Tablet Stand with Gen by yukihiro20200801
...tablet stand with gen by yukihiro20200801
thingiverse
"gen", he is my cat.
thingiverse
free

MKS GEN L by mwsid
...mks gen l by mwsid
thingiverse
mks board gen l 3d project
thingiverse
free
Vaporesso Stand for GEN X by 3DKit
...vaporesso stand for gen x by 3dkit
thingiverse
simple vape stand for vaporesso gen x and gen s
thingiverse
free

TEFAL Steam Gen by Miguelfc
...tefal steam gen by miguelfc
thingiverse
replacement part for tefal steam gen dial rotating dial holder
thingiverse
free

Apple Pencil 2nd Gen
...se
simply an apple pencil 2nd gen
enjoy!
eth: 0x40a6a19c00e0c9cd9dc43e4a3d094983653a3152
btc: 1koukp6tpbyckha8loyd1eieidw578ifbv
thingiverse
free

MKS Gen v1.4 case by Mics78
...mks gen v1.4 case by mics78
thingiverse
mks gen v1.4 case.
thingiverse
free

Mask Band with Gen (v3) by yukihiro20200801
...mask band with gen (v3) by yukihiro20200801
thingiverse
mask band with gen (v3)
Electrical
thingiverse
free

Electric toothbrush
...electric toothbrush thingiverse an electrical project where we make an electric toothbrush..... sort...
thingiverse
free

Electric box
...electric box
thingiverse
electric box
thingiverse
free

Electrical Panel - large electrical cabinet by NYC3D
...electrical panel - large electrical cabinet by nyc3d
thingiverse
large electrical cabinet
thingiverse
free

Electrical box
...electrical box
thingiverse
this is a electrical box for led light control box.
thingiverse
free

Electrical switch
...electrical switch
thingiverse
this is an electrical switch which can be printed very easily and no soldering is required.
thingiverse
free

electric longboard by MarcoMota01
...electric longboard by marcomota01
thingiverse
electric longboard
thingiverse
free

Electric Motor by TheDanMan
...electric motor by thedanman
thingiverse
an electric motor
thingiverse
free

BOX ELECTRIC by leonk
...box electric by leonk
thingiverse
box electric
thingiverse
free

Electric pallet by leonk
...electric pallet by leonk
thingiverse
electric pallet
thingiverse
free

electrical box by leonk
...electrical box by leonk
thingiverse
electrical box
Panel
thingiverse
free

Shower panel panels hook by Mikifly
...shower panel panels hook by mikifly
thingiverse
shower panel panels hook
thingiverse
free

Arcade panel
...arcade panel
thingiverse
a simple arcade panel.
thingiverse
free
Control panel
...control panel
thingiverse
control panel for scuba regulator/bank system
thingiverse
free

Solar panel
...solar panel
thingiverse
it is a full-size solar panel.
you have to print at 5%.
thingiverse
free

Nuclear panel
...nuclear panel
thingiverse
this is a nuclear panel created for the fun !
don't forget to enable the support.
thingiverse
free

clips panel
...lips panel
thingiverse
this is a clip that i made for folding mini asian panel / screenhttps://www.thingiverse.com/thing:2573850
thingiverse
free

Panel Mounts by valentinp72
...panel mounts by valentinp72
thingiverse
some xt60 and usb b panel mounts.
designed to be glued on the panel.
thingiverse
free

M3D Panels by steve3d
...m3d panels by steve3d
thingiverse
m3d enclosure
lateral panels are fixed;
front and rear panels are removable.
thingiverse
free

v3 Panel by SpencerR87
...v3 panel by spencerr87
thingiverse
v3 panel
thingiverse
free

Decorative Panel by ashimizu
...decorative panel by ashimizu
thingiverse
decorative panel.