Thingiverse
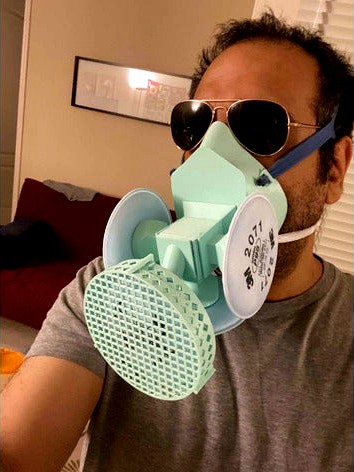
4 Filter Mask by jedsmith
by Thingiverse
Last crawled date: 3 years ago
Summary / Notes
Disclaimer:
• There are no guarantees about the efficacy of any home made masks. Use at your own risk. Get creative, stay safe. These are okay to use per CDC ONLY if you run out of other approved masks. Though the goal is to reach and exceed n95 level of filtration, this has not yet been confirmed. These are a last resort mask, considered equivalent to a scarf. You have to be the one to choose what you wear and I am not responsible for any negative outcomes if you choose to use this. The info here is for educational use only.
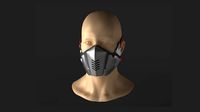
This is a large a cloogey mask. I designed it taking account of the following considerations:
• You can get reusable 3M respirators that work with the filters I mention under the “required” list below, but they only allow 2 filters. I wanted to have 4 to allow easier inhalation.
• In California, you are not allowed to have an exhalation valve in places like stores, etc. (an understandable attempt to slow the spread) so again, because the 3M respirators have exhalation valves, another reason to design my own.
• Even with 4 of these filters I find I can only wear this mask comfortably for about 30 minutes. Your mileage may vary.
• The from filter covering (parts F and G) are to allow you to rest the mask without damaging the filter medium. You could always replace parts E, F and G with another print of part D if you like.
• Yes- it looks ridiculous- you’ll get funny looks. But it works for me. Perhaps it will for you.
Usage Considerations
• Again, it looks pretty funny
• Do your own research but my take on the filters is that they might lose effectiveness if:
o Washed
o Sprayed with alcohol
• So you make want to create 3 or masks and quarantine each one after use for an appropriate period of time
• Again, it looks silly/ funny
• It’s difficult to talk with one of these on.
Parts List
A. (1 ea.) Mask (large and medium included)
B. (1 ea.) Air exchange compartment
C. (2 ea.) Side filter holders
D. (1 ea.) Bottom filter holder
E. (1 ea.) Filter box connector
F. (1 ea.) Filter box – bottom
G. (1 ea.) Filter box – cover
Required
• 3M filters
o Most important! You can get them with the N95 or N100 standard – here is a link on Amazon in the US (try searching for “2071” or N100) - https://www.amazon.com/gp/product/B00JE6V22Q/ref=ppx_yo_dt_b_search_asin_image?ie=UTF8&psc=1
• Hot glue gun/ glue sticks (on Amazon here - https://www.amazon.com/gp/product/B0768MGL5L/ref=ppx_yo_dt_b_search_asin_title?ie=UTF8&psc=1#HLCXComparisonWidget_feature_div)
• Rubber door sealant
o This is for sealing the mask against your face this one from Amazon feel great against the face (link on US Amazon here: https://www.amazon.com/gp/product/B07BBTFXQV/ref=ppx_yo_dt_b_search_asin_title?ie=UTF8&psc=1)
• Rubber gloves or thin rubber
o This is to create a seal/gasket between the 3M filter discs and the holders you print
• Elastic
o To fasten the mask to your face. For upper elastic I suggest using this material as it covers the top of your head and supports the weight of the mask better (a bit pricey so you can try the regular elastic). https://www.amazon.com/gp/product/B08B42H599/ref=ppx_yo_dt_b_search_asin_title?ie=UTF8&psc=1
o For the bottom of the mask I suggest something like this, also available on Amazon- https://www.amazon.com/gp/product/B0876T4LBS/ref=ppx_yo_dt_b_search_asin_title?ie=UTF8&psc=1
Instructions
Order/ obtain the items listed under “required”
Print the parts – including both the “large” and “medium” versions of part “A”. I used PLA but I’m sure PTEG or some other material will do. Note that the only part that needs more than one is part “C” (you’ll need 2 of them).
Use the rubber door insulating strip to line the both the large version and medium version of part “A”.
See which version of part “A” fits you best with the rubber sealant installed in them. Go with that.
Glue all the parts together using the lettered diagram as a guide. DO NOT GLUE PART G TO PART F. Part G is a “snap on” cover and is place on part F after the filter has been placed.
Use the printed item “Gasket Stencil” to draw on rubber gloves etc. and carefully cut out 4 rubber gaskets from a rubber glove, etc.
Place the cut out gaskets on parts C, D and F.
Place your filters on parts C (you will have printed 2 parts for C), D and F.
Carefully place filter cover "G" over filter part "F".
Use your elastic to thread through the loops in part “A”
Your mask is now ready to wear!
Disclaimer:
• There are no guarantees about the efficacy of any home made masks. Use at your own risk. Get creative, stay safe. These are okay to use per CDC ONLY if you run out of other approved masks. Though the goal is to reach and exceed n95 level of filtration, this has not yet been confirmed. These are a last resort mask, considered equivalent to a scarf. You have to be the one to choose what you wear and I am not responsible for any negative outcomes if you choose to use this. The info here is for educational use only.
This is a large a cloogey mask. I designed it taking account of the following considerations:
• You can get reusable 3M respirators that work with the filters I mention under the “required” list below, but they only allow 2 filters. I wanted to have 4 to allow easier inhalation.
• In California, you are not allowed to have an exhalation valve in places like stores, etc. (an understandable attempt to slow the spread) so again, because the 3M respirators have exhalation valves, another reason to design my own.
• Even with 4 of these filters I find I can only wear this mask comfortably for about 30 minutes. Your mileage may vary.
• The from filter covering (parts F and G) are to allow you to rest the mask without damaging the filter medium. You could always replace parts E, F and G with another print of part D if you like.
• Yes- it looks ridiculous- you’ll get funny looks. But it works for me. Perhaps it will for you.
Usage Considerations
• Again, it looks pretty funny
• Do your own research but my take on the filters is that they might lose effectiveness if:
o Washed
o Sprayed with alcohol
• So you make want to create 3 or masks and quarantine each one after use for an appropriate period of time
• Again, it looks silly/ funny
• It’s difficult to talk with one of these on.
Parts List
A. (1 ea.) Mask (large and medium included)
B. (1 ea.) Air exchange compartment
C. (2 ea.) Side filter holders
D. (1 ea.) Bottom filter holder
E. (1 ea.) Filter box connector
F. (1 ea.) Filter box – bottom
G. (1 ea.) Filter box – cover
Required
• 3M filters
o Most important! You can get them with the N95 or N100 standard – here is a link on Amazon in the US (try searching for “2071” or N100) - https://www.amazon.com/gp/product/B00JE6V22Q/ref=ppx_yo_dt_b_search_asin_image?ie=UTF8&psc=1
• Hot glue gun/ glue sticks (on Amazon here - https://www.amazon.com/gp/product/B0768MGL5L/ref=ppx_yo_dt_b_search_asin_title?ie=UTF8&psc=1#HLCXComparisonWidget_feature_div)
• Rubber door sealant
o This is for sealing the mask against your face this one from Amazon feel great against the face (link on US Amazon here: https://www.amazon.com/gp/product/B07BBTFXQV/ref=ppx_yo_dt_b_search_asin_title?ie=UTF8&psc=1)
• Rubber gloves or thin rubber
o This is to create a seal/gasket between the 3M filter discs and the holders you print
• Elastic
o To fasten the mask to your face. For upper elastic I suggest using this material as it covers the top of your head and supports the weight of the mask better (a bit pricey so you can try the regular elastic). https://www.amazon.com/gp/product/B08B42H599/ref=ppx_yo_dt_b_search_asin_title?ie=UTF8&psc=1
o For the bottom of the mask I suggest something like this, also available on Amazon- https://www.amazon.com/gp/product/B0876T4LBS/ref=ppx_yo_dt_b_search_asin_title?ie=UTF8&psc=1
Instructions
Order/ obtain the items listed under “required”
Print the parts – including both the “large” and “medium” versions of part “A”. I used PLA but I’m sure PTEG or some other material will do. Note that the only part that needs more than one is part “C” (you’ll need 2 of them).
Use the rubber door insulating strip to line the both the large version and medium version of part “A”.
See which version of part “A” fits you best with the rubber sealant installed in them. Go with that.
Glue all the parts together using the lettered diagram as a guide. DO NOT GLUE PART G TO PART F. Part G is a “snap on” cover and is place on part F after the filter has been placed.
Use the printed item “Gasket Stencil” to draw on rubber gloves etc. and carefully cut out 4 rubber gaskets from a rubber glove, etc.
Place the cut out gaskets on parts C, D and F.
Place your filters on parts C (you will have printed 2 parts for C), D and F.
Carefully place filter cover "G" over filter part "F".
Use your elastic to thread through the loops in part “A”
Your mask is now ready to wear!
Similar models
thingiverse
free

Light-Duty Vice by tmt0727
...gc96/ref=ppx_yo_dt_b_search_asin_title?ie=utf8&psc=1
you need a grease, 1x nut 1x washer, 2x washers and small 2x wood screws
thingiverse
free
12 Function Deep Dish Button Box by coyoteyz13
..._title_o03_s00?ie=utf8&psc=1
https://www.amazon.com/gp/product/b07vhcb1q4/ref=ppx_yo_dt_b_search_asin_title?ie=utf8&psc=1
thingiverse
free
Hand Mixer by OM3
...e?ie=utf8&psc=1
power supplyhttps://www.amazon.com/gp/product/b01461mogq/ref=ppx_yo_dt_b_search_asin_title?ie=utf8&psc=1
thingiverse
free
DEEJ Audio Controller - 5 linear sliders by Scnd_edition
...8&psc=1
optional: rubber feethttps://www.amazon.com/gp/product/b075f1hw3s/ref=ppx_yo_dt_b_search_asin_title?ie=utf8&psc=1
thingiverse
free

Lavalier Mount and XLR Clamp by StefanKovatchev
...on.com/gp/product/b07f36r49k/ref=ppx_yo_dt_b_search_asin_title?ie=utf8&psc=1
instructional video:https://youtu.be/7r1u72yyfys
thingiverse
free

X-Carriage Anet Hotend by davidtanis
...?ie=utf8&psc=1
and the wheelshttps://www.amazon.com/gp/product/b07gf9vghd/ref=ppx_yo_dt_b_search_asin_title?ie=utf8&psc=1
thingiverse
free

Ryobi Battery Brick
...?ie=utf8&psc=1
quick-connect:https://www.amazon.com/gp/product/b0057zqj12/ref=ppx_yo_dt_b_search_asin_title?ie=utf8&psc=1
thingiverse
free
Noctua Laptop Cooling Pad for 3:2 Aspect Ratio Laptops by 3Dnate
...e?ie=utf8&psc=1
rubber feet:https://www.amazon.com/gp/product/b087h5b87m/ref=ppx_yo_dt_b_asin_title_o09_s00?ie=utf8&psc=1
thingiverse
free
XB-31 Kamerakopf MK1
...=utf8&psc=1
kugellager:https://www.amazon.de/gp/product/b07cxn1143/ref=ppx_yo_dt_b_search_asin_title?ie=utf8&psc=1
welle:
grabcad
free

40x40mm Heatsink
...k with thermal pad from amazon.
https://www.amazon.com/gp/product/b01iqoajbq/ref=ppx_yo_dt_b_search_asin_title?ie=utf8&psc=1
Filter
3d_export
$10
cartridge filter
...cartridge filter
3dexport
cartridge filter
3d_export
$6
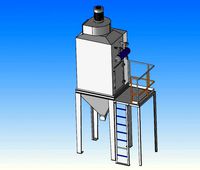
Bag filter
...bag filter
3dexport
bag filter
3d_export
$10

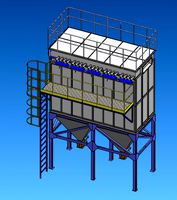
of dust filter
...of dust filter
3dexport
3d model of dust filter
3d_export
$10

of bag filter
...of bag filter
3dexport
3d model of bag filter
3d_export
$7

of bag filter
...of bag filter
3dexport
3d model of bag filter
turbosquid
$20

Filter
...ty free 3d model filter for download as ma, max, obj, and fbx on turbosquid: 3d models for games, architecture, videos. (1512887)
3d_export
$10
bag filter
...he ash hopper. when the gas containing fine dust passes through the filter material, the dust is retained and the gas is purified
3ddd
$1

UFI Filter
...ufi filter
3ddd
фильтр , ufi
ufi oil filter
turbosquid
$30

Filter
... available on turbo squid, the world's leading provider of digital 3d models for visualization, films, television, and games.
turbosquid
$5

filters
... available on turbo squid, the world's leading provider of digital 3d models for visualization, films, television, and games.
Mask
turbosquid
$1
Dust Mask Medical Mask Face Mask Surgical Mask
...k face mask surgical mask for download as blend, fbx, and obj on turbosquid: 3d models for games, architecture, videos. (1533329)
3d_export
$5

Mask
...mask
3dexport
african mask
turbosquid
$2
Riggged Surgical mask face mask dust mask medical mask
...sk dust mask medical mask for download as blend, fbx, and obj on turbosquid: 3d models for games, architecture, videos. (1536257)
archibase_planet
free

Mask
...mask
archibase planet
mask sculpture decor
mask - 3d model for interior 3d visualization.
3d_export
$19
masks tech metal masks wearable futuristic masks
... tech metal masks wearable futuristic masks
3dexport
masks, tech metal masks, wearable, futuristic masks zip contain fbx obj max
archibase_planet
free
Mask
...mask
archibase planet
mask sculpture decor
mask-decor - 3d model for interior 3d visualization.
archibase_planet
free
Mask
...mask
archibase planet
mask
swimming mask - 3d model (*.gsm+*.3ds) for interior 3d visualization.
archibase_planet
free
Mask
...mask
archibase planet
picturesque element mask
mask n050608 - 3d model (*.gsm+*.3ds) for interior 3d visualization.
archibase_planet
free

Mask
...mask
archibase planet
mask picturesque element
mask n230708 - 3d model (*.gsm+*.3ds) for interior 3d visualization.
archibase_planet
free
Mask
...mask
archibase planet
mask ornament decoration
mask decor n240211 - 3d model (*.gsm+*.3ds) for interior 3d visualization.
4
turbosquid
$9

Office Chair 4-4
... available on turbo squid, the world's leading provider of digital 3d models for visualization, films, television, and games.
3d_export
$5

doors- 4
...doors- 4
3dexport
doors 4
3d_export
$5

hinge 4
...hinge 4
3dexport
hinge 4
3ddd
$1

Штора №4
...штора №4
3ddd
штора №4
3d_export
free

playstation 4
...playstation 4
3dexport
playstation 4
turbosquid
$1

re 4-4 electric locomotive
... free 3d model re 4 4 electric locomotive for download as obj on turbosquid: 3d models for games, architecture, videos. (1707845)
3ddd
$1

nexus 4
...nexus 4
3ddd
lg , телефон
nexus 4
3ddd
$1

4 Poufs
...4 poufs
3ddd
пуф
4 soft poufs
turbosquid
$12

Calligraphic Digit 4 Number 4
...hic digit 4 number 4 for download as max, obj, fbx, and blend on turbosquid: 3d models for games, architecture, videos. (1389332)
3ddd
$1

Dauphin 4+
...dauphin 4+
3ddd
кресло
dauphin 4+ конференц кресло