Thingiverse

3D Printer Workbench Leveling Legs by rasputera
by Thingiverse
Last crawled date: 2 years, 10 months ago
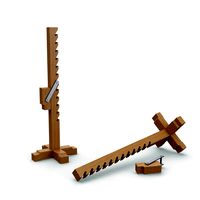
Ensure that your 3D printer is on a perfectly level surface with these 3D printed workbench leveling legs. The central knob is cross-threaded so turning it to the left will move the plate above it up, and the foot below it down at the same time (raising the workbench), and turning the knob the other way will lower the workbench down.
It makes leveling a workbench for a 3D printer a breeze!
Printing
There are 3 pieces to print. The top plate, the central knob, and the bottom foot. For smooth threading, keep the layer height of all three to 0.12 mm.
The Top Plate
The plate will need to have screw holes in the location needed to secure it to the bottom of your workbench. The provided STL file is for the Hart 36-In W x 24-In D 5-Drawer Mobile Tool Chest Workbench W/ Wood Top (https://tinyurl.com/ea6vkcp7). Feel free to remix the top plate for your own workbench.
I recommend printing the plate with 8 mm walls or 100% infill (or both) to make it very strong.
The Central Knob
The knob is cross-threaded in the center so turning it causes the top to move in the opposite direction as the bottom. I recommend printing the knob with 2.5 mm walls with 50% infill (or you could just 100% this piece as well). Printing in a different color than the plate and foot is a nice visual indication that there is some sort of action associated with the piece.
The Bottom Foot
Pick one of the 2 STL files for the foot. I did not like the way my slicer was doing the support for the right-angle overhang, so I created a cylindrical support directly into the model. If your slicer does a better job of support, use the "Foot No Support" file and let your slicer do the support work. If you don't like the job your slicer is doing, feel free to use the "Foot With Support" file (and make sure to turn off the support in your slicer).
The foot is designed to be used with these anti-vibration pads: https://tinyurl.com/52uu7nkf
After clean-up, thread the pieces together and spin several times until everything is turning smoothly before installation. A quick video is attached.
https://youtu.be/XOb78JSayuY
Similar models
thingiverse
free

Ikea Hedra Knob (M4) by Jonaaaa
...series.
designed to print on a dlp printer.
to print on a fdm printer without supports use top and bottom file and glue together.
thingiverse
free

Leveling Bench Cookie
...e glued to the bottom if you use this with a clamping table with 3/4" holes. i attached a piece of no-slip foam to the top.
thingiverse
free

round knob with threaded hole by termin8ed
...ith threaded hole by termin8ed
thingiverse
round knob with threaded hole. print with hole on the top and support on the bottom.
thingiverse
free

Jar Lid by Lote_VR
...nable support: yes.
support placement: everywhere.
support pattern: zigzag.
build plate adhesion
build plate adhesion type: none.
thingiverse
free

Socket Organizers
...issing.
infill: 10% or more
support "top" - yes
support "bottom" - no
pla
layer res: 0.2 mm
nozzle: 0.4 mm
thingiverse
free

Christmas Tree Bauble - Vase Mode by 3DBISH
...inter does not support multi profiles:
print 7 mm as solid bottom layers (@0.1 mm = 70 bottom layers)
print the rest in vase mode
thingiverse
free

Enclosure for LCD 12864 Smart Display Controller
... with flexible tpu material. it will fit a wider variation of shaft size... and will have a nice "grippy" feel as well.
thingiverse
free

Friendship 7 Bottom and Top Cap by Darkcheops
...uld print the top without altering it but could not complete the flat part on top so i created a separate file for the top piece.
thingiverse
free

ShopVac Caster Foot A and B
...and on it with no deformation
infil pattern: cubic
connect infil lines: yes
tree support: yes : for recessed screw hole on bottom
thingiverse
free

Cloudspire Tower by HelloImMax
... hugolours and the "spiral tower" model submitted by kijai.
all .stl files have been repaired through autodesk netfabb.
Workbench
3d_export
$10

workbench
...workbench
3dexport
workbench. in folder textures base color, height, metallic, normal, roughness. and model fbx.
3d_export
$5

mechanical workbench
...es, the mechanical hand has bones for animation, there are no textures since the standard colors are used, it does not load much.
turbosquid
$49

Moravian Workbench
... model moravian workbench for download as blend, fbx, and obj on turbosquid: 3d models for games, architecture, videos. (1284497)
turbosquid
$25

Old Workbench
...ee 3d model old workbench for download as blend, fbx, and obj on turbosquid: 3d models for games, architecture, videos. (1609131)
3d_export
$5

workbench
...workbench
3dexport
a simple old (or maybe not old, depending on the texture) vestak. in the archive fbx, obj, textures
turbosquid
$79

Workbench Roubo
... available on turbo squid, the world's leading provider of digital 3d models for visualization, films, television, and games.
turbosquid
$10
Workbench Helper
... workbench helper for download as 3ds, obj, fbx, 3dm, and skp on turbosquid: 3d models for games, architecture, videos. (1411448)
turbosquid
$1

Workbench Large
... available on turbo squid, the world's leading provider of digital 3d models for visualization, films, television, and games.
3d_export
$30

Folding workbench 3D Model
...g workbench 3d model
3dexport
workbench bench vice garage workshop shed tool
folding workbench 3d model pixelblock 43940 3dexport
turbosquid
$20

Old Workbench With Gears
...3d model old workbench with gears for download as max and fbx on turbosquid: 3d models for games, architecture, videos. (1633193)
Legs
3d_ocean
$10

Furniture Legs
...furniture legs
3docean
furniture furniture legs leg legs metal leg
furniture legs,legs,
archibase_planet
free

Leggings
...eggings
archibase planet
leggings gaiters gaiter clothes
leggings n140713 - 3d model (*.gsm+*.3ds) for interior 3d visualization.
3d_ocean
$4

Chicken legs
...chicken legs
3docean
3ds arman3dg chicken chicken legs games legs low max poly
chicken legs…
turbosquid
$1

legging
...ng
turbosquid
royalty free 3d model legging for download as on turbosquid: 3d models for games, architecture, videos. (1569799)
3d_export
$25

table leg
...table leg
3dexport
table leg with ram
turbosquid
$19

Leg
... available on turbo squid, the world's leading provider of digital 3d models for visualization, films, television, and games.
3d_export
$5

lion leg
...lion leg
3dexport
3d lion leg for cabinet
3d_export
$5

table leg
...table leg
3dexport
table leg for wood milling machine
3ddd
$1

Leg Exercise
...leg exercise
3ddd
тренажер
leg exercise equipment fitness
3d_export
$5

two-legged hook
...two-legged hook
3dexport
two-legged hook
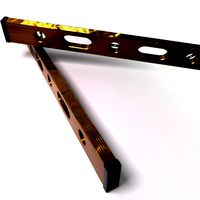
Leveling
design_connected
$11

Levels
...levels
designconnected
one nordic levels computer generated 3d model. designed by form us with love.
design_connected
$7
Level
...level
designconnected
zanotta level shelves and storage computer generated 3d model. designed by arik levy.
turbosquid
$29
level
...ty free 3d model level for download as 3ds, obj, c4d, and fbx on turbosquid: 3d models for games, architecture, videos. (1272856)
turbosquid
$1
level
... available on turbo squid, the world's leading provider of digital 3d models for visualization, films, television, and games.
3d_export
$5
Mario level
...mario level
3dexport
mario level low quality for fun videos
3ddd
$1
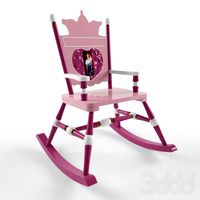
LEVELS OF DISCOVERY
...етская мебель "levels of discovery". rab10003 princess mini rocker
кресло-качалка (мини) "принцесса навсегда"
3d_export
$19

level design
...level design
3dexport
you can use this design (level design) in your own game.
turbosquid
$60
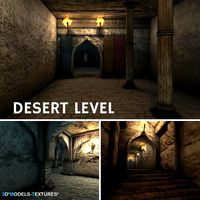
Desert level
...squid
royalty free 3d model desert level for download as fbx on turbosquid: 3d models for games, architecture, videos. (1208131)
turbosquid
$15
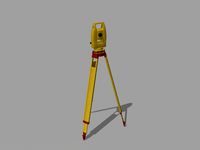
Transit Level
...quid
royalty free 3d model transit level for download as max on turbosquid: 3d models for games, architecture, videos. (1158112)
turbosquid
$14

Districts Level
...id
royalty free 3d model districts level for download as max on turbosquid: 3d models for games, architecture, videos. (1408410)
Printer
archibase_planet
free

Printer
...inter
archibase planet
printer laser printer pc equipment
printer n120614 - 3d model (*.gsm+*.3ds) for interior 3d visualization.
archibase_planet
free

Printer
...rchibase planet
laser printer office equipment computer equipment
printer - 3d model (*.gsm+*.3ds) for interior 3d visualization.
turbosquid
$100

Printer
...er
turbosquid
royalty free 3d model printer for download as on turbosquid: 3d models for games, architecture, videos. (1487819)
turbosquid
$3

Printer
...turbosquid
royalty free 3d model printer for download as max on turbosquid: 3d models for games, architecture, videos. (1670230)
turbosquid
$1

printer
...turbosquid
royalty free 3d model printer for download as max on turbosquid: 3d models for games, architecture, videos. (1595546)
turbosquid
$1

printer
...turbosquid
royalty free 3d model printer for download as max on turbosquid: 3d models for games, architecture, videos. (1595105)
turbosquid
$10

Printer
...id
royalty free 3d model printer for download as max and 3dm on turbosquid: 3d models for games, architecture, videos. (1607146)
turbosquid
$7

Printer
...royalty free 3d model printer for download as ma, ma, and obj on turbosquid: 3d models for games, architecture, videos. (1644580)
turbosquid
$30

Printer
... available on turbo squid, the world's leading provider of digital 3d models for visualization, films, television, and games.
turbosquid
$20

Printer
... available on turbo squid, the world's leading provider of digital 3d models for visualization, films, television, and games.