Thingiverse
3D PRINTED DIY ELECTRIC CAR, The Jellybean3D by GonzaloChomon
by Thingiverse
Last crawled date: 3 years, 4 months ago
INTRODUCTION
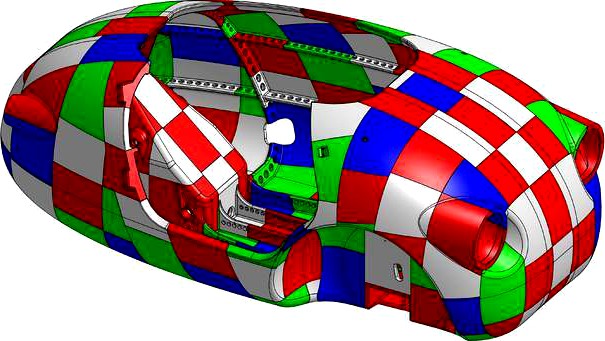
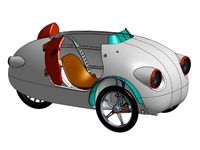
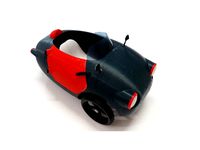
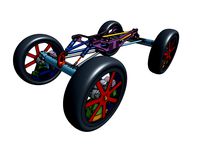
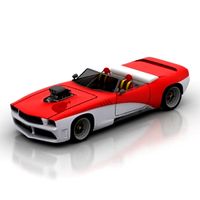
The Jellybean3D is a fully DIY Open Source 3D printed electric vehicle.
Designed to be made with standard FDM hobby printers and easy to find/work PLA, and/or maybe PETG plastic, some small parts printed with PA (Nylon), and some off the shelf components.
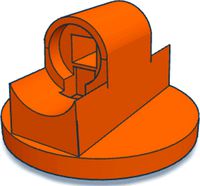
In order to create the big parts like the body and door, they have been strategically cut on small easy printable pieces that will be glued/welded afterwards.
More info here: https://youtu.be/umWhtFFmUe0
More information coming soon, please be patient it is a “solo project” for now.
I HAVE UPLOADED A 1/10 SCALE VERSION, if you want to print a small one for yourself. The printing files can be downloaded from here: https://www.prusaprinters.org/prints/47678 or here: https://www.thingiverse.com/thing:4669754
I started this project here because I will be releasing the Open Source in a few days (maybe weeks…) and needed the link for the documentation.
And because in some forums people wanted to see more and see how the parts are, and if they can print them.
So I just upload here a couple samples pieces of the body, anyone can print them with the printing suggestions and profiles and check if they like the idea.Please post your prints and please give some feedback.
This is an experimental project that aims to explore the limits of hobby 3D printing.
This project does not aim to reproduce a standard vehicle construction. Many things can go wrong, but we will enjoy and learn through the process. :)
Any suggestion and help is welcome. Feel free to comment.
This is a non commercial project borne with my own time and money and with the help of some collaborators, people and companies that decided to help me in this endeavour that alone may be impossible to do. THANK YOU to all of them.
Please, consider contributing to these projects: https://paypal.me/GonzaloChomon Thank you.
Contributors so far:
-Ricardo Paramo Pelaez (ricardoparamo.com) for his tireless unconditional help on design and advice.
-Attribution to Peter Vullings for inspiration on the shape of the Jellybean3D by his vehicle design shape, the Velopetta from the company velectric.co.nz
-Paramatters.com for letting me use their topology optimisation software “Cognicad” to design some parts.
-Laurent AUBRY-DUBOURG
-José Gros Aymerich
Link to further information, construction videos and more, can be found at this YouTube playlist: https://www.youtube.com/playlist?list=PLJfG3HktqdD5y3SG_rDiSx5rBmsbD77oQ
Link to PrusaPrinters project page: https://www.prusaprinters.org/prints/46729
All documentation of this project on any format is licensed under the Creative Commons-Attribution-ShareAlike (CC-by-sa 4.0) license. https://creativecommons.org/licenses/by-sa/4.0/
PRINTING SUGGESTIONS
The parts for this project have to be strong, so most of the suggestions are in order to achieve maximum strength and they differ from what is normally used for aesthetic parts. As well there are some suggestions in order to improve parts printing speed.
-Printer: Minimum build volume 220x220x220mm, with heated bed.
-Nozzle diameter: 0.6mm to 1mm. (I use a 0.8mm)
-Layer height: 45% to 55% of nozzle diameter.
-Line width: 110% to 150% of nozzle diameter. (I use 150% for external perimeters, and 112% for the other lines)
-Infill pattern: Gyroid.
-Printing temperature: As high as the material allows without material degradation.
-Printing speed: Low to medium. (I use 30mm/s for external perimeters, 45mm/s for other perimeters and 65mm/s for infill)
-Use a volcano heating cartridge or similar so maximum volumetric speed can be increased, test before increase. ( I was able to set it up to 20mm^3/s+)
-Use minimum cooling or no cooling at all in order to enhance layer adhesion. (I use auto cooling, it only starts cooling if the layer time is under 20 seconds or at bridges lines)
-Use an enclosure if possible to avoid fast cooling and prevent high internal tensions and warping deformations.
-Set bed temperature to maximum recommended for the material.
-Use some kind of adhesion enhancer in the bed like PVA stick or similar.
-Most parts are printed with no supports, some with supports only on the build plate, and 9 parts with full supports.
-Printing profiles and other notes are detailed in the BOM for every part.
Both sample parts do not need supports when printing.
PRINTING PROFILES
There are 4 different printing profiles used for the vehicle parts detailed at the BOM, here is 2 different ones you can test:LIGHT: (For parts that don’t need to be specially strong)
-Perimeters: 1
-Top layers: 3
-Bottom layers: 3
-Infill: 9% NORMAL: (For parts that has some stress)
-Perimeters: 2
-Top layers: 4
-Bottom layers: 3
-Infill: 9%
The Jellybean3D is a fully DIY Open Source 3D printed electric vehicle.
Designed to be made with standard FDM hobby printers and easy to find/work PLA, and/or maybe PETG plastic, some small parts printed with PA (Nylon), and some off the shelf components.
In order to create the big parts like the body and door, they have been strategically cut on small easy printable pieces that will be glued/welded afterwards.
More info here: https://youtu.be/umWhtFFmUe0
More information coming soon, please be patient it is a “solo project” for now.
I HAVE UPLOADED A 1/10 SCALE VERSION, if you want to print a small one for yourself. The printing files can be downloaded from here: https://www.prusaprinters.org/prints/47678 or here: https://www.thingiverse.com/thing:4669754
I started this project here because I will be releasing the Open Source in a few days (maybe weeks…) and needed the link for the documentation.
And because in some forums people wanted to see more and see how the parts are, and if they can print them.
So I just upload here a couple samples pieces of the body, anyone can print them with the printing suggestions and profiles and check if they like the idea.Please post your prints and please give some feedback.
This is an experimental project that aims to explore the limits of hobby 3D printing.
This project does not aim to reproduce a standard vehicle construction. Many things can go wrong, but we will enjoy and learn through the process. :)
Any suggestion and help is welcome. Feel free to comment.
This is a non commercial project borne with my own time and money and with the help of some collaborators, people and companies that decided to help me in this endeavour that alone may be impossible to do. THANK YOU to all of them.
Please, consider contributing to these projects: https://paypal.me/GonzaloChomon Thank you.
Contributors so far:
-Ricardo Paramo Pelaez (ricardoparamo.com) for his tireless unconditional help on design and advice.
-Attribution to Peter Vullings for inspiration on the shape of the Jellybean3D by his vehicle design shape, the Velopetta from the company velectric.co.nz
-Paramatters.com for letting me use their topology optimisation software “Cognicad” to design some parts.
-Laurent AUBRY-DUBOURG
-José Gros Aymerich
Link to further information, construction videos and more, can be found at this YouTube playlist: https://www.youtube.com/playlist?list=PLJfG3HktqdD5y3SG_rDiSx5rBmsbD77oQ
Link to PrusaPrinters project page: https://www.prusaprinters.org/prints/46729
All documentation of this project on any format is licensed under the Creative Commons-Attribution-ShareAlike (CC-by-sa 4.0) license. https://creativecommons.org/licenses/by-sa/4.0/
PRINTING SUGGESTIONS
The parts for this project have to be strong, so most of the suggestions are in order to achieve maximum strength and they differ from what is normally used for aesthetic parts. As well there are some suggestions in order to improve parts printing speed.
-Printer: Minimum build volume 220x220x220mm, with heated bed.
-Nozzle diameter: 0.6mm to 1mm. (I use a 0.8mm)
-Layer height: 45% to 55% of nozzle diameter.
-Line width: 110% to 150% of nozzle diameter. (I use 150% for external perimeters, and 112% for the other lines)
-Infill pattern: Gyroid.
-Printing temperature: As high as the material allows without material degradation.
-Printing speed: Low to medium. (I use 30mm/s for external perimeters, 45mm/s for other perimeters and 65mm/s for infill)
-Use a volcano heating cartridge or similar so maximum volumetric speed can be increased, test before increase. ( I was able to set it up to 20mm^3/s+)
-Use minimum cooling or no cooling at all in order to enhance layer adhesion. (I use auto cooling, it only starts cooling if the layer time is under 20 seconds or at bridges lines)
-Use an enclosure if possible to avoid fast cooling and prevent high internal tensions and warping deformations.
-Set bed temperature to maximum recommended for the material.
-Use some kind of adhesion enhancer in the bed like PVA stick or similar.
-Most parts are printed with no supports, some with supports only on the build plate, and 9 parts with full supports.
-Printing profiles and other notes are detailed in the BOM for every part.
Both sample parts do not need supports when printing.
PRINTING PROFILES
There are 4 different printing profiles used for the vehicle parts detailed at the BOM, here is 2 different ones you can test:LIGHT: (For parts that don’t need to be specially strong)
-Perimeters: 1
-Top layers: 3
-Bottom layers: 3
-Infill: 9% NORMAL: (For parts that has some stress)
-Perimeters: 2
-Top layers: 4
-Bottom layers: 3
-Infill: 9%
Similar models
thingiverse
free
3D PRINTED DIY ELECTRIC CAR, The Jellybean3D by GonzaloChomon
...adhesion enhancer in the bed like pva stick or similar -most parts are printed with no supports, some with...
thingiverse
free
3D PRINTED DIY ELECTRIC CAR, The Jellybean3D 1/10 scale model by GonzaloChomon
.../9_9_ydc-no4
nozzle: 0.3 - 0.4mm
layer heigh: 0.15 - 0.2mm
print door part with brim
happy to see your prints, please post them.
thingiverse
free
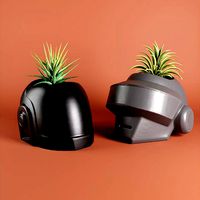
Daft Punk plant pot by angel_greenwood
... to print both helmets, but u can use 0.4 mm nozzle
layer height : 0.3 mm
perimeters: 2 (1.2 mm)
infill : 5% giroid
supports: yes
thingiverse
free
MINI ITX COMPUTER CASE by themakerunit
...fill for the outer shell with a layer height of 0.4mm.
if using a 0.4mm nozzle you should probably go for 3 external perimeters.
thingiverse
free
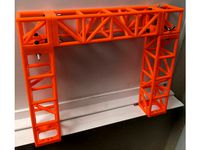
Truss Sticks and 2 Way Vertical Corner by D3Dprinting
...with custom supports is included.
made for m4x20mm screws
0.5mm extrusion width, no infill, 2 perimeters, side plates 100% infill
thingiverse
free
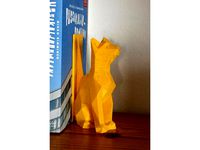
Polygon Mesh Cat Bookend by jammi
...re print cooling or possibly slightly lower temperature, and finer k-value calibration (or retraction settings, if you use that).
thingiverse
free
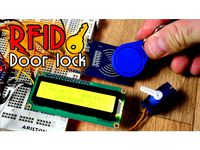
Door lock case RFID by ELECTRONOOBS
...eo here: https://www.youtube.com/watch?v=x7husqs86dm
i've used 20% infill, 2 perimeters, 0.4mm nozzle and 0.2mm layer height.
thingiverse
free

Foot for 20x20 profile by pablo_s
...or the 20x20 profile but it fit on the 20x40 as well.
print it in flexible material, i used 3 perimeters, 50% infill, no support.
thingiverse
free
I've moved, nothing to see here.
...s?
i've moved everything to prusaprinters.org. you can find my profile at:
https://www.prusaprinters.org/social/32808/prints
thingiverse
free
ActiveJet lamp replacement part by PedroElek
...itned with:
pla,
0.4mm nozzle,
0.24mm layer height,
3 perimeters,
25% infill density,
no raft,
no supports.
print as it is. :)
Jellybean3D
thingiverse
free
3D PRINTED DIY ELECTRIC CAR, The Jellybean3D 1/10 scale model by GonzaloChomon
.../9_9_ydc-no4
nozzle: 0.3 - 0.4mm
layer heigh: 0.15 - 0.2mm
print door part with brim
happy to see your prints, please post them.
thingiverse
free
3D PRINTED DIY ELECTRIC CAR, The Jellybean3D by GonzaloChomon
...bottom layers: 3
-infill: 9%
normal: (for parts that has some stress)
-perimeters: 2
-top layers: 4
-bottom layers: 3
-infill: 9%
Gonzalochomon
thingiverse
free
3D PRINTED DIY ELECTRIC CAR, The Jellybean3D 1/10 scale model by GonzaloChomon
.../9_9_ydc-no4
nozzle: 0.3 - 0.4mm
layer heigh: 0.15 - 0.2mm
print door part with brim
happy to see your prints, please post them.
thingiverse
free
3D PRINTED DIY ELECTRIC CAR, The Jellybean3D by GonzaloChomon
...bottom layers: 3
-infill: 9%
normal: (for parts that has some stress)
-perimeters: 2
-top layers: 4
-bottom layers: 3
-infill: 9%
thingiverse
free
Gosainthan, Competition RC Rock Crawler (Super Class) OpenRC by GonzaloChomon
...ill be added shortly
transmitter programing and mixes will be added shortly
more pictures and action videos will be added shortly
Diy
3d_export
free
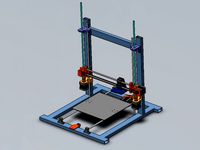
DIY 3D Printer
...diy 3d printer
3dexport
diy 3d printer model
turbosquid
$10
Diy tiered
...l diy tiered for download as max, max, max, max, fbx, and obj on turbosquid: 3d models for games, architecture, videos. (1603709)
turbosquid
$3
Diy Desk to Bench
...odel diy desk to bench for download as 3ds, max, obj, and fbx on turbosquid: 3d models for games, architecture, videos. (1506589)
turbosquid
$2

DIY Moon Light
...model diy moon light for download as obj, fbx, blend, and dae on turbosquid: 3d models for games, architecture, videos. (1501170)
3d_export
$8
DIY CNC Router 3D Model
...diy cnc router 3d model
3dexport
cnc; router; diy; homemade
diy cnc router 3d model maikeru86 58463 3dexport
turbosquid
$5
Diy Kitchen Cabinets
...itchen cabinets for download as 3ds, obj, fbx, blend, and dae on turbosquid: 3d models for games, architecture, videos. (1197373)
3d_export
free

Download free Diying Plant 3D Model
...download free diying plant 3d model
3dexport
diying plant blender
diying plant 3d model visitorsama 98607 3dexport
3ddd
$1
DIY coffee table + decor
... рамка для фото
кофейный столик diy 400х350х600(h) мм. моделился по фото. внимание: материалы - corona.
turbosquid
$3
Diy Wire Lamp Shade
...free 3d model diy wire lamp shade for download as 3ds and fbx on turbosquid: 3d models for games, architecture, videos. (1347605)
cg_studio
$12
DIY MONGOLIAN LAMB STOOLS3d model
... hair soft pile white
.max - diy mongolian lamb stools 3d model, royalty free license available, instant download after purchase.
Electric
3d_export
$5
Electric pole
...electric pole
3dexport
electric pole for street, electricity line
3ddd
$1

electric mixer
...electric mixer
3ddd
electric mixer , миксер
electric mixer
3ddd
$1
electrical installation
...electrical installation
3ddd
electrical installation , розетка
electrical installation
turbosquid
$19
The electric water heater electric
... available on turbo squid, the world's leading provider of digital 3d models for visualization, films, television, and games.
turbosquid
free
Electrical Outlet electric splitter
... available on turbo squid, the world's leading provider of digital 3d models for visualization, films, television, and games.
3d_ocean
$20
Electric Guitar
...electric guitar
3docean
electric electric guitar guitar music music instrument
model of a electric guitar created in maya.
3d_ocean
$12
Electric Shaver
...electric shaver
3docean
electric electric shaver hair removal personal care shaver shaving
electric shaver created in 3ds max.
3ddd
$1

electrical switch
...h
3ddd
electrical , розетка
electrical switch from bticino company
series livinglight
3d_export
$7
Electric Conveyor
...electric conveyor
3dexport
electric conveyor
3d_export
$5
electric drums
...electric drums
3dexport
electric drums
Car
3d_export
$5
car
...car
3dexport
luxury car high quality car
3d_export
$5

car
...car
3dexport
luxury car high quality car
3d_export
$5
car
...car
3dexport
luxury car high quality car
3d_export
$5
car
...car
3dexport
luxury car high quality car
3d_export
$5
car
...car
3dexport
luxury car high quality car
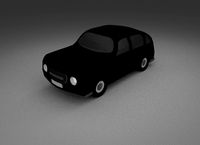
archibase_planet
free
Car
...
archibase planet
car sports car motor-car sportster
car nascar#1 n300114 - 3d model (*.gsm+*.3ds) for exterior 3d visualization.
archibase_planet
free
Car
...ibase planet
car motor-car sportster sports car
car gablota xform n190214 - 3d model (*.gsm+*.3ds) for exterior 3d visualization.
archibase_planet
free
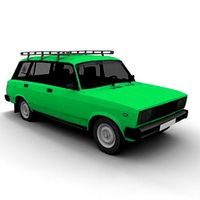
Car
...car
archibase planet
car motor car transport
car vaz 2104- 3d model for interior 3d visualization.
3d_export
$15
car
...car
3dexport
car
3d_export
free
car
...car
3dexport
car
Printed
design_connected
$27

...print
designconnected
moroso print computer generated 3d model. designed by wanders, marcel.
3ddd
free

Eichholtz Prints
...- eichholtz print central station i
13 - eichholtz print central station ii
14 - eichholtz print marisa
15 - eichholtz print tish
3ddd
$1

Eichholtz Prints
...print abstract - set of 2
10 - eichholtz print orange abstract
11 - eichholtz print buddha right
12 - eichholtz print buddha left
turbosquid
$1

... available on turbo squid, the world's leading provider of digital 3d models for visualization, films, television, and games.
3ddd
free

Eichholtz Prints
...of 4
2 - print dunbar 2 set of 4
3 - print guadeloupe 1 set of 4
4 - print guadeloupe 2 set of 4
5 - print giles
6 - print trett
3ddd
$1

Eichholtz Prints
...nt tutti frutti
3 - eichholtz prints watson - set of 2
4 - eichholtz prints antique nautilus - set of 2
5 - eichholtz print tiara
3d_export
$5

Monster for printing
...monster for printing
3dexport
monster 3d model printing
3ddd
free

printed rug
...printed rug
3ddd
ковер
very creative printed rug
3ddd
free

Eichholtz Prints
...иал: бумага
габариты (вхш): 72 x 62 см
описание: print sweetmeat - постер в деревянной раме.
3 - prints varsity set of 2
арти
3ddd
free

Art Print Posters
...art print posters
3ddd
прованс
art print posters by patrician prints