Thingiverse

3 Wheel X carriage attachment and X belt adjuster for the Tarrantula by jimwooly
by Thingiverse
Last crawled date: 3 years, 1 month ago
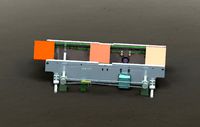
Tevo Tarrantula Left hand 3 Wheel X Carriage attachment with an X belt tensioner.
I have used ideas from various other 'Things' to create this 3 wheel belt tensioner after struggling to remove play in my X carriage using the original off centre adjustments.
The 'Things' I borrowed ideas from and gained inspiration from are -
https://www.thingiverse.com/thing:2034743 (Modular X Carriage)https://www.thingiverse.com/thing:1704100 (Belt Tensioner)
Hardware Required -
4 M4x10mm Countersunk bolts.
5 M4x35 either Button Head or Cap Head bolts.
1 M5x25 Cap Head bolt.
2 M5x35 Cap Head bolts.
1 M4X20 either Button Head or Cap Head bolts.
1 M4x40 Cap Head bolt.
10 M4x10 either Button Head or Cap Head bolts.
6 M4 Nuts.
2 M5 Nuts
10 M6 Washers
2 M5 Washers
8 M4 T-Nuts.
4 Wheels.
(Don't let this list put you off as some of the hardware can be recovered from the original X carriage mounting assembly)
Assembly -
1) loosely connect the centre plate to the X carriage with countersunk 4mm bolts and T-
Nuts.
2) Assemble 2 wheels to the RH plate using the long 5mm bolts (Place washers under the screw heads).
3) Attach the RH plate and wheels to the centre plate using the 5mm bolts and 5mm nuts.
4) Insert the spacers between the RH and centre plates, loosely attaching them with 4 4mm bolts and nuts. (Don't forget to place a 4mm nut into the recess on the bottom)
5) Insert the 3rd wheel into the 'Saddle' and secure with the short 5mm bolt and a nut.
6) Insert the Saddle assembly between the RH and centre plates, secure it with a 4mm bolt and nut.
7) Use the 20mm long 4mm bolt to tighten the saddle against the 20mm V channel which should pull the other 2 wheels into contact with the opposite side of the 20mm V channel.
8) When all 3 wheels are in contact with the V channel tighten the inner 2 4mm Counsunk bolts using a Hex key though the holes in the RH plate. When they are tight and the centre plate is secure to the X carriage, remove the 20mm long bolt from the saddle and ease the saddle away from the V channel. This will giive you access to the outer 2 4mm Countersunk bolts through the holes in the RH plate. Once all are tightened replace the 20mm bolt and ensure all 3 wheels are making contact with the V channel.
9) The remaining assemble is straght foreward.
Similar models
thingiverse
free

Belt Tensioning Carriage for Delta Printer by somewhat_brave
...ing nuts, and 6 washers (two per bolt)
6 x 6mm diameter x (16mm to 20mm) long bolts, matching nuts, and 6 washers (one per bolt)
thingiverse
free

K8200 Y Axis Tensioner by k8200User
...m bearing
1 x 5mm bolt (at least 20mm long)
2 x 5mm washers
1 x 5mm nut
2 x 3mm bolts (at least 15mm long)
2 x 3mm nuts
thingiverse
free

Tevo tarantula PRO X axis belt tensioner
...y hands.
if you want to use 5mm bolts, you can print carriage from original design (they are swappable) and drill out the holles.
thingiverse
free

Magball Carriages for Kossel printer with 2020 extrusions by JohnOCFII
...ension bolt 35mm
35mm m3 bolt
nyloc nut
the openscad file is included along with the stl files in case you wish to make changes.
thingiverse
free

Delta Carriage for 2020 Aluminum V-Slot® 20x20 Linear Rail by quadcells
...near the top of the carriage for the end stop adjusting bolt and one to lock down the end stop adjusting bolt (see the pictures).
3dwarehouse
free

Bolts and Hardware
...age bolt and hex head bolt, 1/2' x 3' length, with washers, lock washer and nut #bolt #hardware #lock_washer #nut #washer
thingiverse
free

CR-10 X Axis Belt Tensioner by bglover
... cap screws
2 x m4 lock nuts
2 x m4 flat washers
1 x m4 nut
check back often. i will be uploading my y axis belt tensioner soon.
grabcad
free

ShapeOko2 Belt Tensioners
...ension is 4mm hex m5 30mm long
the bolt for the clamp is a 2.5mm hex m3 14mm long
reverse side of clamp 2 locking hex 5mm m3 nuts
thingiverse
free

X Carriage for Wanhao Di3 Toranado PGE by Beevus
...install x carriage onto printer. attach belt in a similar fashion to the original and tighten with the tensioner....
3dwarehouse
free

5/16' X 3/4' Carriage Bolt Assembly
...5/16' x 3/4' carriage bolt assembly
3dwarehouse
5/16' x 3/4' carriage bolt, nut and washer
Tarrantula
thingiverse
free

YetAnotherZ Bracket for Tevo Tarrantula by parkprimus20
...agged with the weight of the screw and hot end. made this bracket to improved the rigidity and hopefully improve print accuracy.
thingiverse
free

20x20 corner glass holder for tevo tarrantula by denzelcris
...20 corner glass holder for tevo tarrantula by denzelcris
thingiverse
corner made in tinkercad
clamps imported and scaled to 101%
thingiverse
free

Diamond hotend cooler, blower and prox sensor for tevo tarantula by sheepilja
...remix of the diamond hotend part for the tevo tarrantula just print it upside down and use tiewraps to...
Jimwooly
thingiverse
free

Peg for greetings cards by jimwooly
...peg for greetings cards by jimwooly
thingiverse
clip for suspending christmas cards from led lighting or from string etc
thingiverse
free

Simple 'Peg' for greetings cards by jimwooly
...39;peg' for greetings cards by jimwooly
thingiverse
clip for suspending christmas cards from led lighting or from string etc
thingiverse
free

Bearing pin Retainer by jimwooly
... the wheels had a habit of easing out over a period of time so i produced this 'collar' to prevent them coming out again.
thingiverse
free

Peugeot 3008 Bag Hook by jimwooly
...in the side of the peugeot 3008 (2017 model) boot. used to hold the handles of a carrier bag to prevent the contents falling out.
thingiverse
free

Makita Jigsaw Anti-Splinter Guard by jimwooly
...w anti-splinter guard
it would be better printed in some clear pla or petg but as an emergency unit i suppose any colour will ok.
thingiverse
free

V Slot Cover by jimwooly
...in tpu and they just snap in and out of the v slot and being tpu can be easily cut to the length required.
printed at 20% infill.
thingiverse
free

TT Pro Reset Button by jimwooly
...is is the last time i changed the marlin config.h file. i have various marlin files and this helps me to locate the current one.
thingiverse
free

Yubico Neo Contact Covers by jimwooly
...he 2 designs here. one is just a cover for the usb contacts and the other covers both the contacts and the 'gold button'.
thingiverse
free

Amended the original cover to suit my PSU. by jimwooly
... that the mains supply was on the correct side for my psu. added a 'support' for the rear of the psu to stop it wobbling.
thingiverse
free

Open Chain Link by jimwooly
...r additional end fittings but as the connector ends are common to most other chain links most end fittings are available already.
Carriage
archibase_planet
free

Carriage
...arriage
archibase planet
perambulator baby carriage pram
carriage n250908 - 3d model (*.gsm+*.3ds) for interior 3d visualization.
3d_export
free

carriage
...carriage
3dexport
old fashion carriage model, more files here:
turbosquid
$140

Carriage
...urbosquid
royalty free 3d model carriage for download as max on turbosquid: 3d models for games, architecture, videos. (1482052)
turbosquid
$25

Carriage
...urbosquid
royalty free 3d model carriage for download as max on turbosquid: 3d models for games, architecture, videos. (1285944)
3d_export
free

carriage
...carriage
3dexport
game cart
3d_ocean
$15

Barrel Carriage
...ieval oak old transport wheels wine wood
this model contains a barrel and a carriage. it is a medieval type of wood oak carriage.
turbosquid
$40

Carriage
...ty free 3d model carriage for download as obj, fbx, and blend on turbosquid: 3d models for games, architecture, videos. (1290094)
turbosquid
free

Carriage
...yalty free 3d model carriage for download as ma, obj, and fbx on turbosquid: 3d models for games, architecture, videos. (1239157)
3d_export
$5

Medieval carriage
...medieval carriage
3dexport
medieval carriage in fairy style
turbosquid
$58

Carriage
...d model carriage with scene for download as max, obj, and fbx on turbosquid: 3d models for games, architecture, videos. (1276262)
Belt
turbosquid
$9
Belt conveyor belt
...t conveyor belt for download as 3ds, ige, obj, stl, and sldas on turbosquid: 3d models for games, architecture, videos. (1226546)
3d_export
$6
belt
...d then comes off and fastens at the front of the seat. version: 2015 units: millimetres x-form: yes polys: 120 950 verts: 163 944
3d_export
$7
belt grinder
...belt grinder
3dexport
belt grinder
3d_export
$5
Belt conveyor
...belt conveyor
3dexport
belt conveyor
3ddd
$1
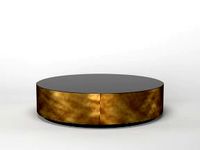
column belt
...column belt
3ddd
колонна
column belt
turbosquid
$5
Belt
... available on turbo squid, the world's leading provider of digital 3d models for visualization, films, television, and games.
3d_ocean
$5
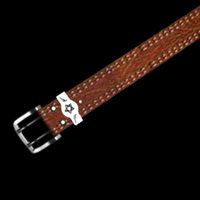
Leather Belt
...ather belt is created in 3dsmax 2011 and rendered with vray 1.5 and it has all the texture included with the multiple obj format.
3d_ocean
$5

Belt Ring
...belt ring
3docean
belt jewelry ring
belt ring 3d model. total weight 3.5 gram & 1.1 stone size. 3dm and obj file format.
design_connected
$11
Belt Square
...belt square
designconnected
meridiani belt square computer generated 3d model. designed by parisio, andrea.
design_connected
$11
Belt Round
...belt round
designconnected
meridiani belt round computer generated 3d model. designed by parisio, andrea.
Adjuster
3d_ocean
$7
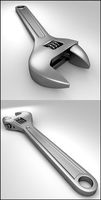
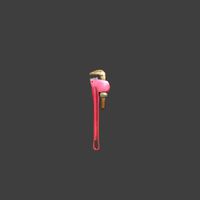
Adjustable Wrench
...adjustable wrench
3docean
adjustable wrench highly detailed wrench
highly detailed adjustable wrench.
3ddd
$1
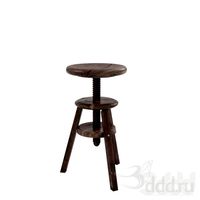
Adjustable Stool
...adjustable stool
3ddd
табурет
wooden adjustable stool.
3d_ocean
$20

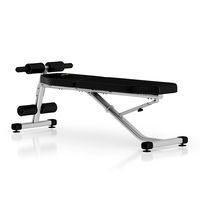
Adjustable Gym Bench
...st adjustable bench black equipement gym gymnastic indoor silver sport workout
3d model of black and silver adjustable gym bench.
3d_ocean
$20
Adjustable Gym Bench
...st adjustable bench black equipement gym gymnastic indoor silver sport workout
3d model of black and silver adjustable gym bench.
3d_ocean
$16

Adjustable Weight Bench
...arbell bench black equipement gym gymnastic indoor sport weight workout
3d model of black adjustable weight bench with a barbell.
turbosquid
$5

Adjustable wrench
...
royalty free 3d model adjustable wrench for download as fbx on turbosquid: 3d models for games, architecture, videos. (1313414)
3d_export
$5

adjustable tension lock
...adjustable tension lock
3dexport
adjustable tension lock
turbosquid
$1
Adjustable Wrench
...free 3d model adjustable wrench for download as obj and blend on turbosquid: 3d models for games, architecture, videos. (1446736)
turbosquid
$1

Adjustable Wrench
...y free 3d model adjustable wrench for download as c4d and fbx on turbosquid: 3d models for games, architecture, videos. (1379022)
3d_export
$5

Adjustable key
...adjustable key
3dexport
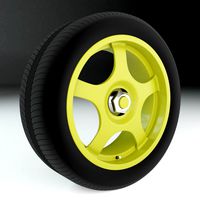
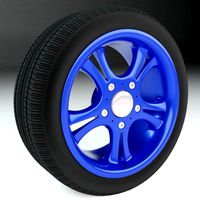
Wheel
archibase_planet
free
Wheel
...l steering control steering wheel
wheel ship steering wheel n060215 - 3d model (*.gsm+*.3ds+*.max) for exterior 3d visualization.
3d_ocean
$14
Wheel
...wheel
3docean
car rim car wheel rim wheel
high poly car wheel design. 16,840 polys
3d_export
free
wheel
...wheel
3dexport
wheel
3d_export
free
wheel
...wheel
3dexport
wheel
3d_export
free
Wheel
...wheel
3dexport
wheel
3d_export
$5

wheel
...wheel
3dexport
wheel for car.
3d_export
$5
wheel
...wheel
3dexport
car wheel
3d_export
$5
wheel
...wheel
3dexport
car wheel
3d_export
$5
wheel
...wheel
3dexport
car wheel
3d_export
$5
wheel
...wheel
3dexport
car wheel
Attachment
turbosquid
$20
M4A1 + Attachements
... available on turbo squid, the world's leading provider of digital 3d models for visualization, films, television, and games.
turbosquid
$19

Attached House
... available on turbo squid, the world's leading provider of digital 3d models for visualization, films, television, and games.
turbosquid
$15
Attache case
... available on turbo squid, the world's leading provider of digital 3d models for visualization, films, television, and games.
cg_studio
$75

Attached House3d model
...d model
cgstudio
.3ds .fbx .max .obj - attached house 3d model, royalty free license available, instant download after purchase.
turbosquid
$2
M416 AR with attachments
... model m416 ar with attachments for download as blend and fbx on turbosquid: 3d models for games, architecture, videos. (1614294)
turbosquid
$10

M16A2 with M203 Attachment
... available on turbo squid, the world's leading provider of digital 3d models for visualization, films, television, and games.
turbosquid
$3

Modern 1911 with Attachments
... available on turbo squid, the world's leading provider of digital 3d models for visualization, films, television, and games.
turbosquid
$3

bench attached to greenery
... available on turbo squid, the world's leading provider of digital 3d models for visualization, films, television, and games.
3d_export
$8
Mercedes Sprinter sun visor attachment
...mercedes sprinter sun visor attachment
3dexport
mercedes sprinter sun visor attachment
turbosquid
$14
Residential building with attached shop
...l residential building with attached shop for download as max on turbosquid: 3d models for games, architecture, videos. (1482935)
3
turbosquid
$10

Mountain Bike 3 -3 of 3
...model mountain bike 3 (#3 of 3) for download as fbx and blend on turbosquid: 3d models for games, architecture, videos. (1438752)
turbosquid
$6

Rock 3-3
...urbosquid
royalty free 3d model rock 3-3 for download as obj on turbosquid: 3d models for games, architecture, videos. (1628065)
turbosquid
$29

Books 150 pieces 3-3-3
...books 150 pieces 3-3-3 for download as max, obj, fbx, and stl on turbosquid: 3d models for games, architecture, videos. (1384033)
turbosquid
$3

Genesis 3 Clothing 3
... available on turbo squid, the world's leading provider of digital 3d models for visualization, films, television, and games.
3d_export
$5

hinge 3
...hinge 3
3dexport
hinge 3
3ddd
$1

Розетка 3
...розетка 3
3ddd
розетка
розетка 3
turbosquid
$50

is-3
... available on turbo squid, the world's leading provider of digital 3d models for visualization, films, television, and games.
turbosquid
$10

Mountain Bike 3 -2 of 3
...model mountain bike 3 (#2 of 3) for download as fbx and blend on turbosquid: 3d models for games, architecture, videos. (1438750)
turbosquid
$10

Mountain Bike 1 -3 of 3
...model mountain bike 1 (#3 of 3) for download as fbx and blend on turbosquid: 3d models for games, architecture, videos. (1438743)
3d_export
$5

3 CATS
...3 cats
3dexport
3 cats pen holder